A view refers to how the properties and records of each object are displayed.
We frequently receive inquiries about not being able to see specific property information. This is often related to the view settings. By default, the view is set to show only a limited number of properties. If you wish to display additional properties in the view, you need to adjust the view settings accordingly.
It is also possible to create multiple views, allowing you to separate settings as necessary.
A form refers to an input form for entering information when creating a new record. Initially, this is also set to the default configuration, so only limited properties are displayed. Therefore, if you want to display specific properties in the record creation form, configuration is required.

With Sanka, you can customize views and forms to match the required business workflow!
First, we will introduce where to manage views and forms.
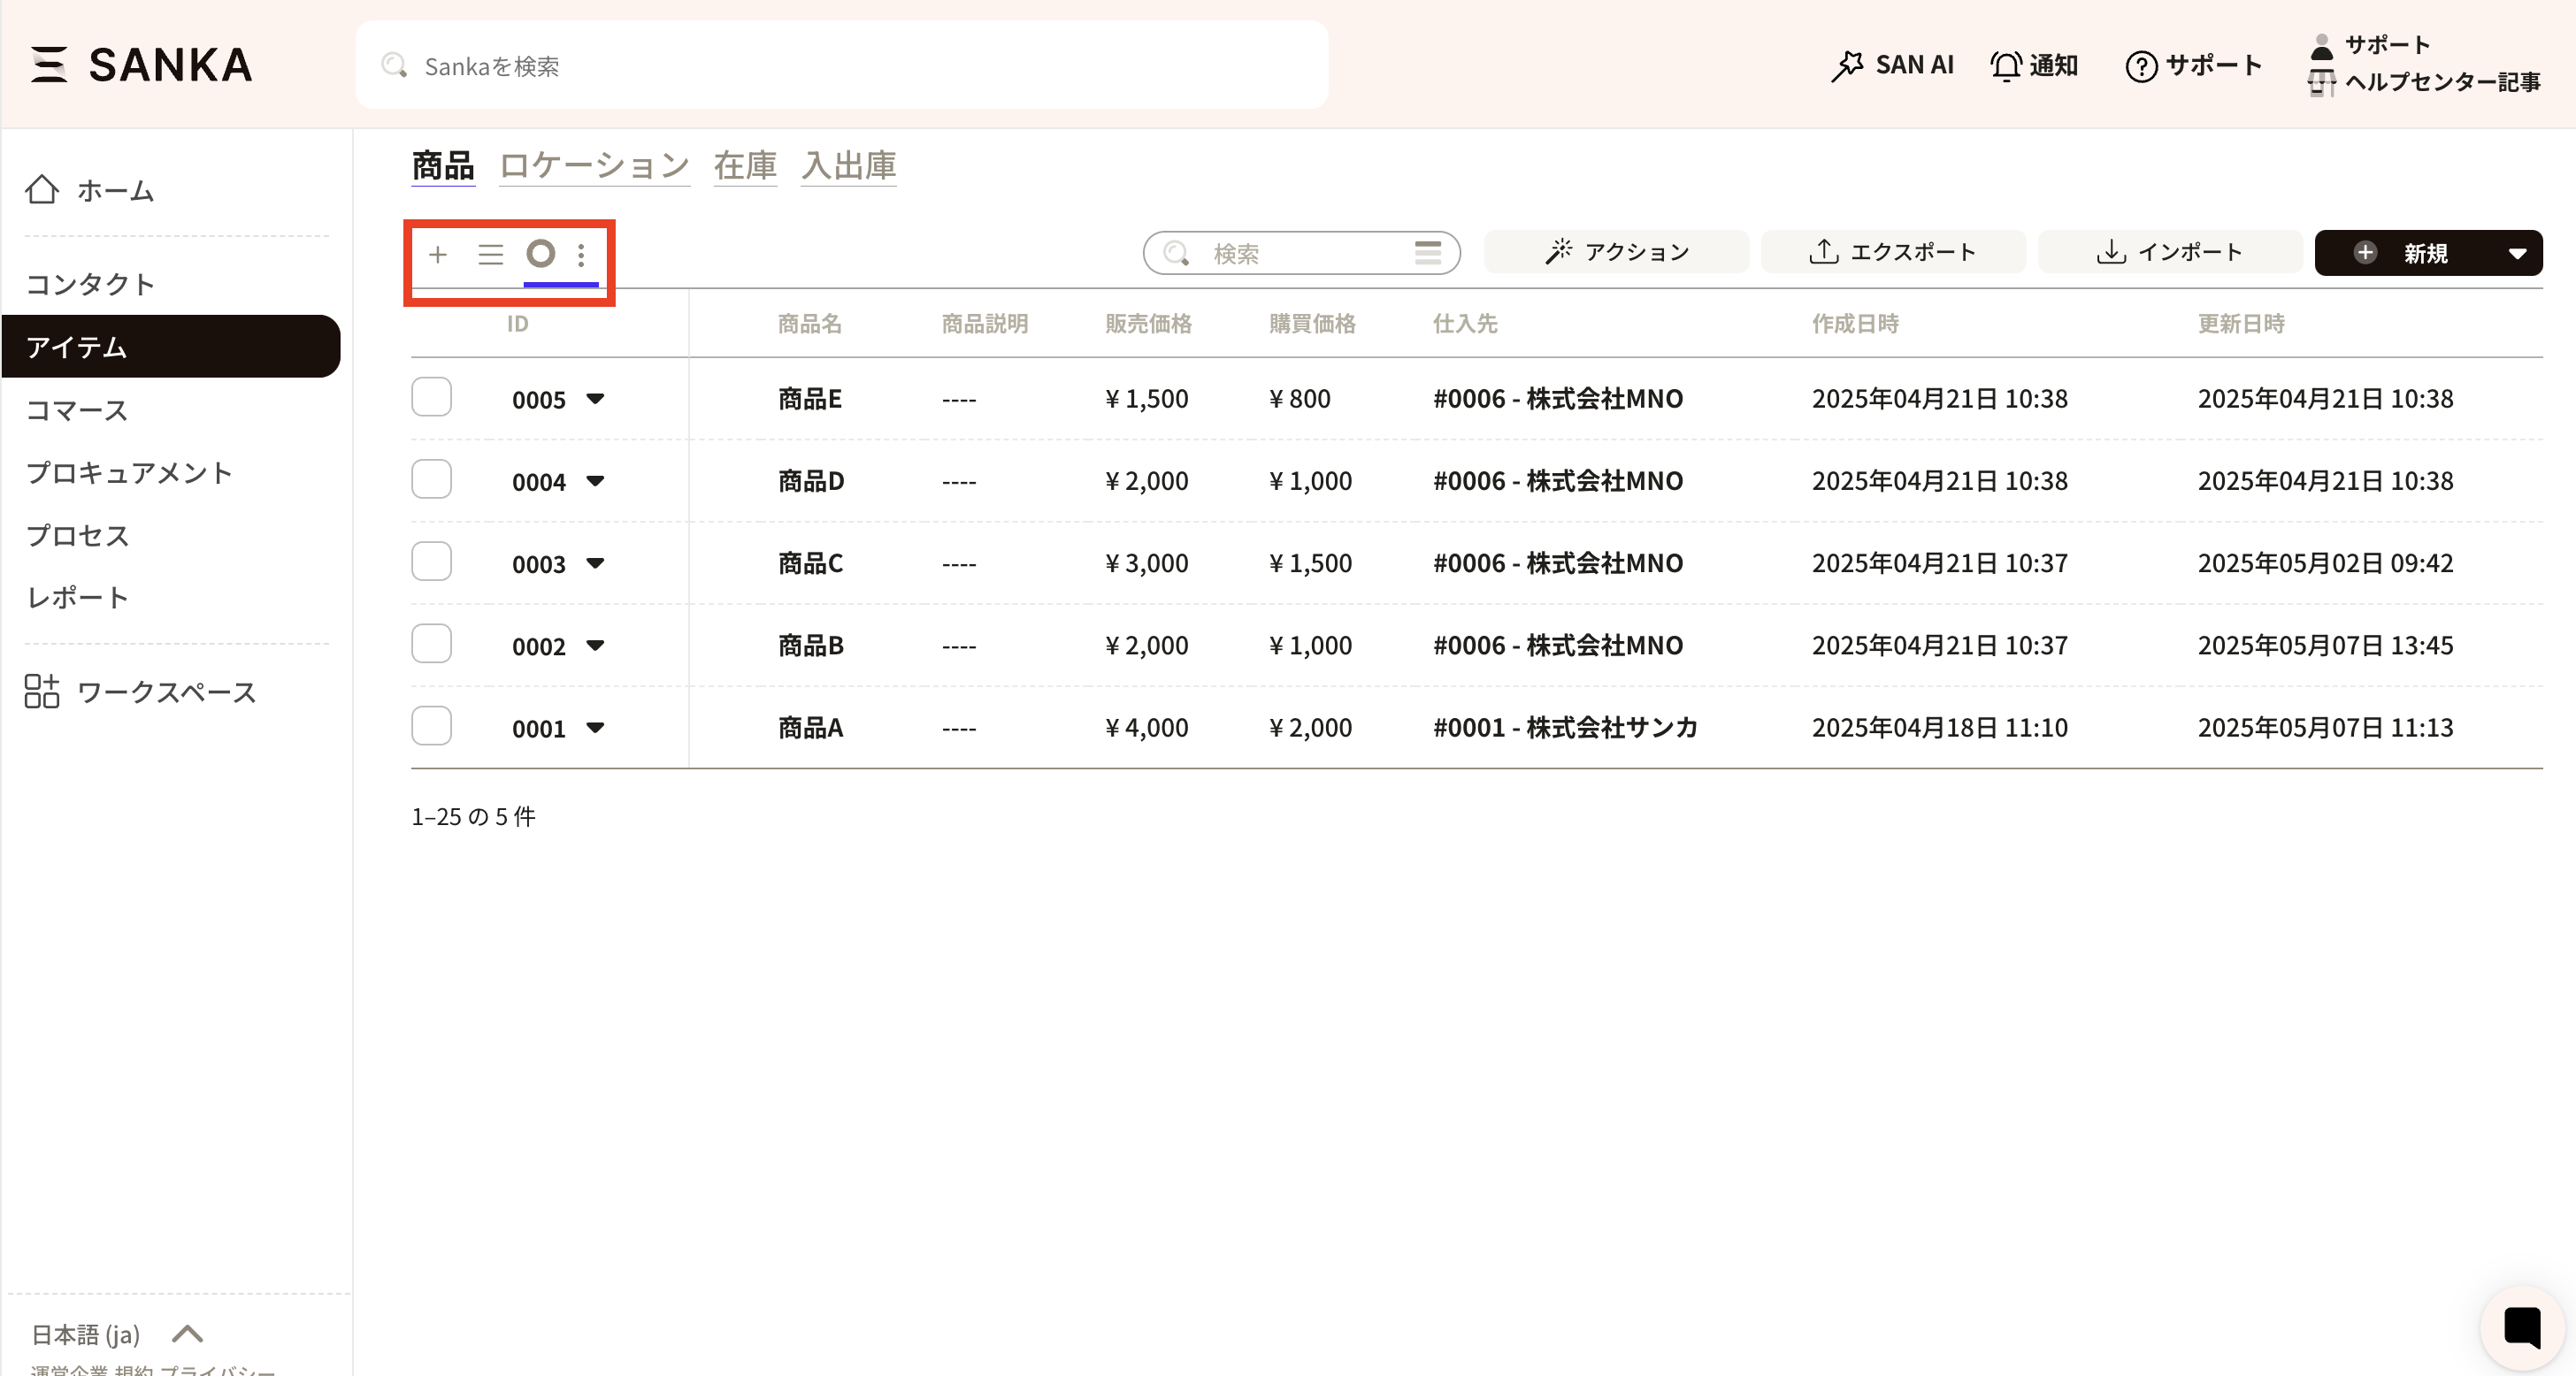
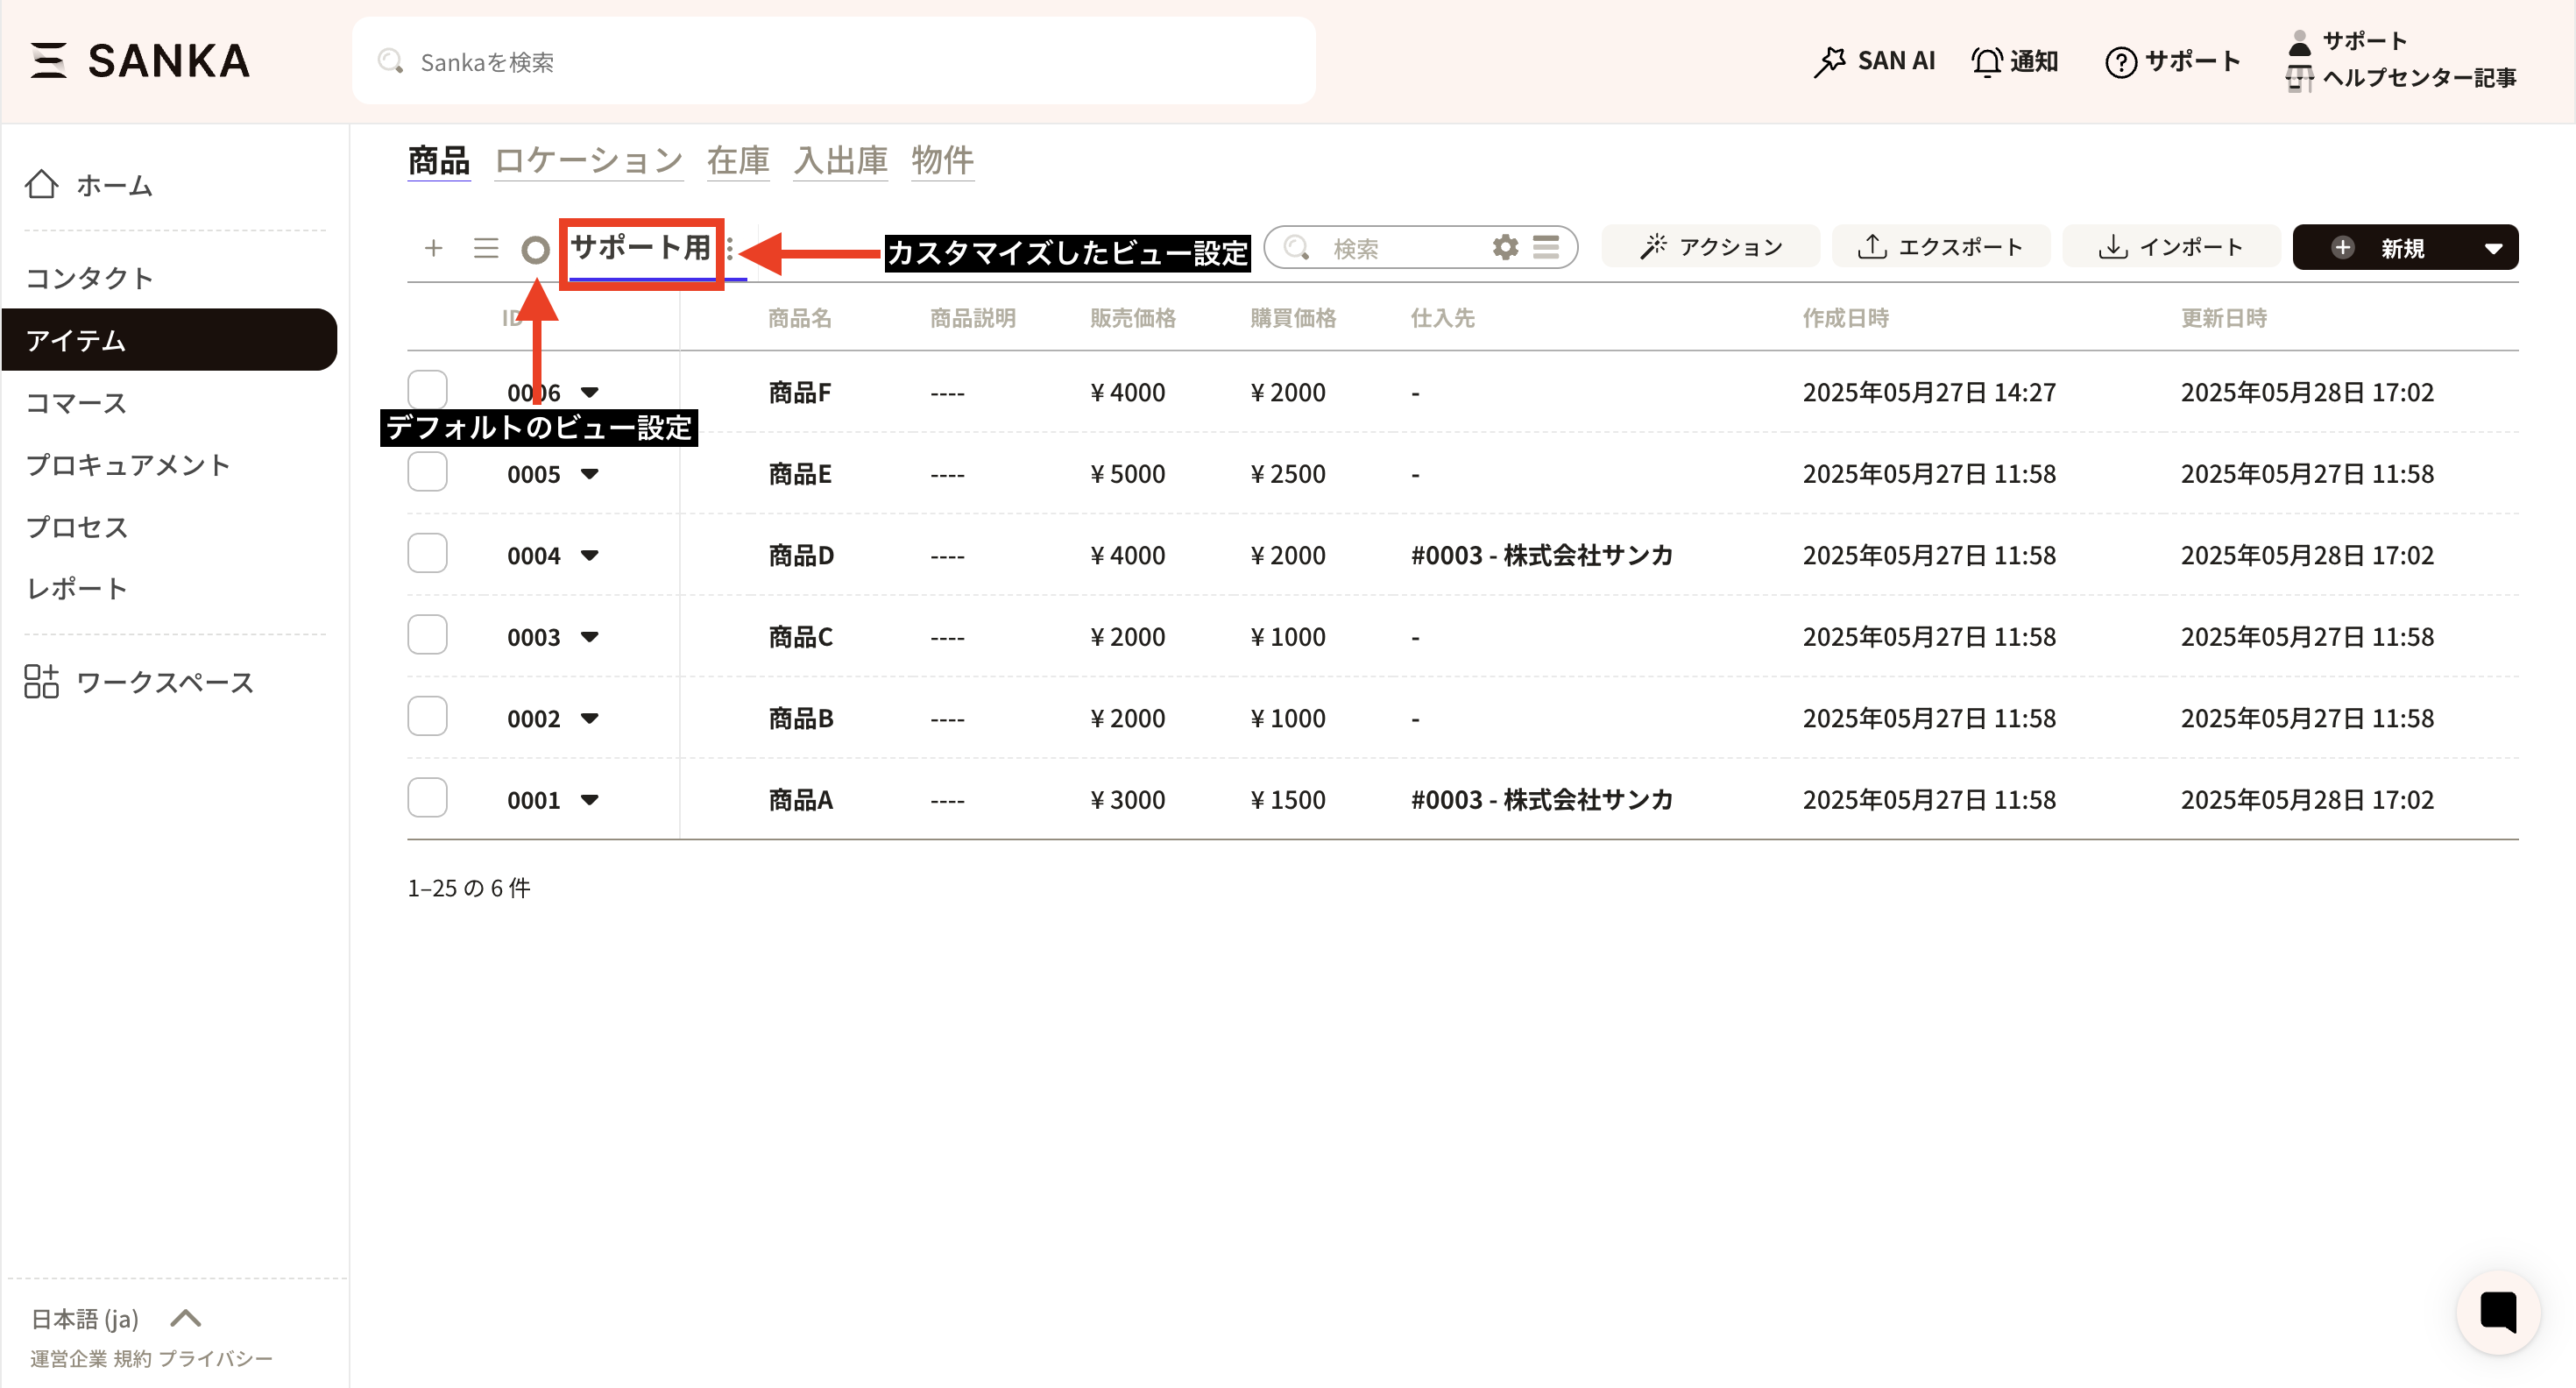
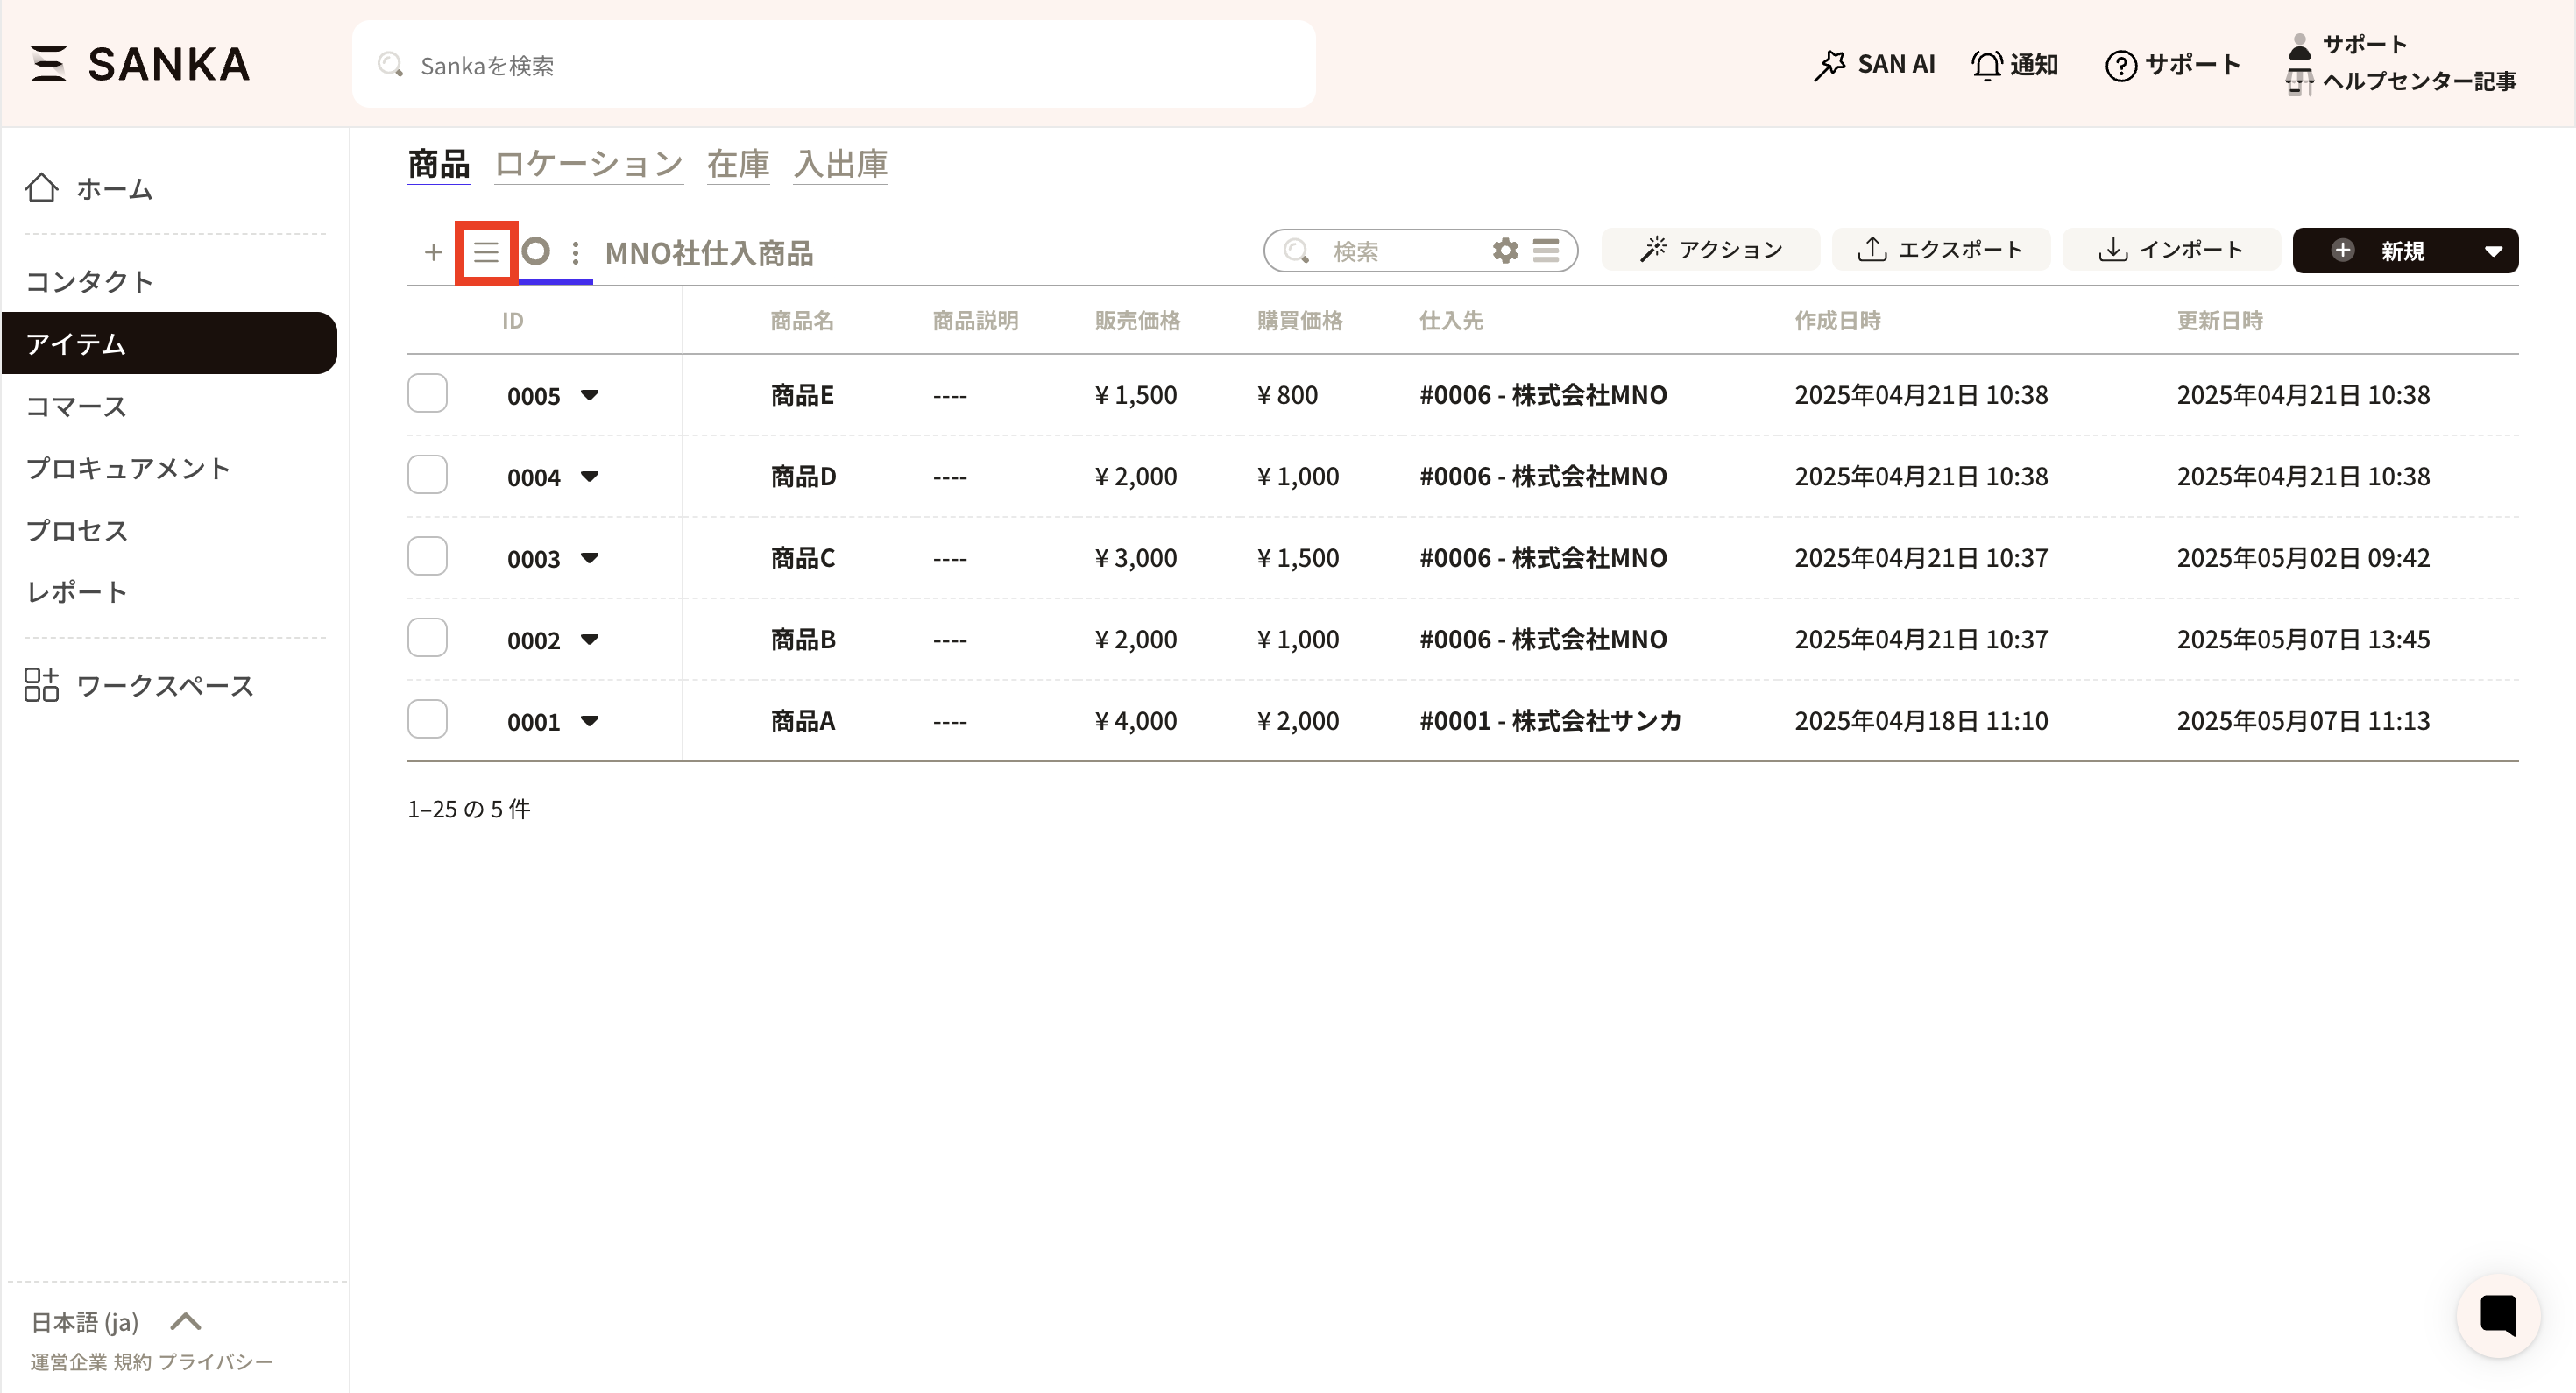
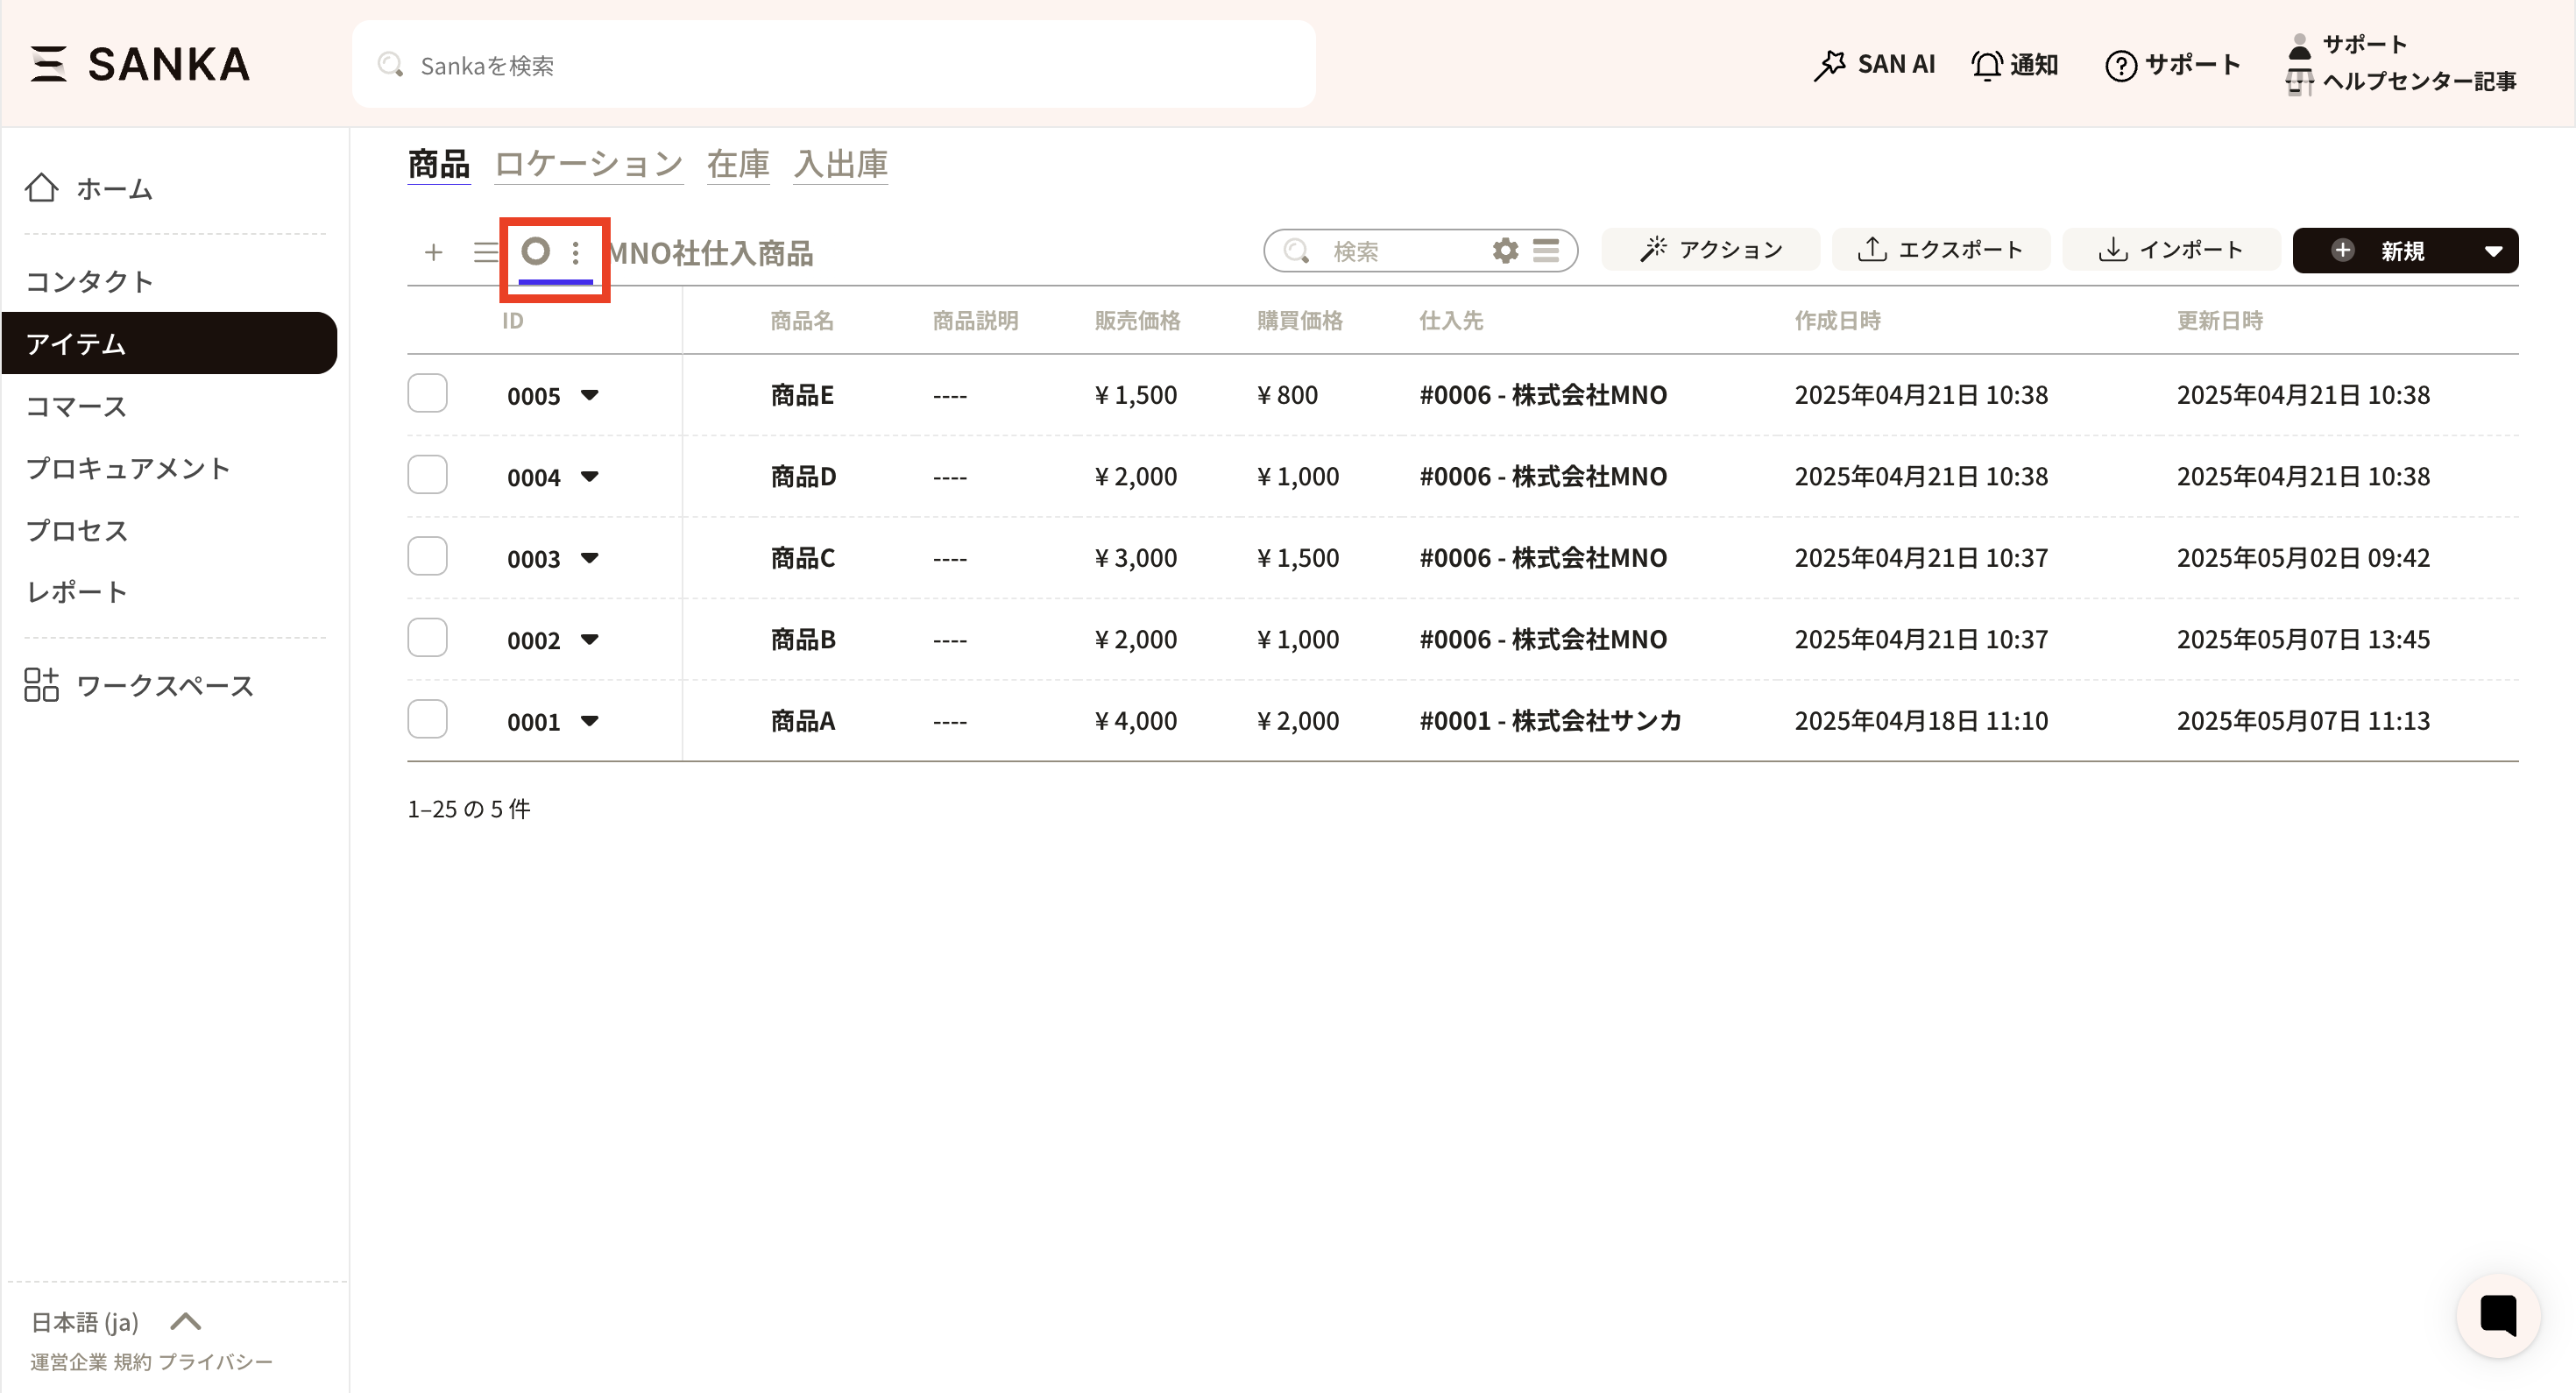
View management can be performed using the two options in the upper left corner of the record table list: " " to create a view, and "≡" to switch between views.
Mark: This is where you can create a new view. Forms can also be created here.
≡ Mark: The location where created views are registered, and where you can switch among various views.
〇 Mark: Indicates the default view setting. This setting is registered initially.
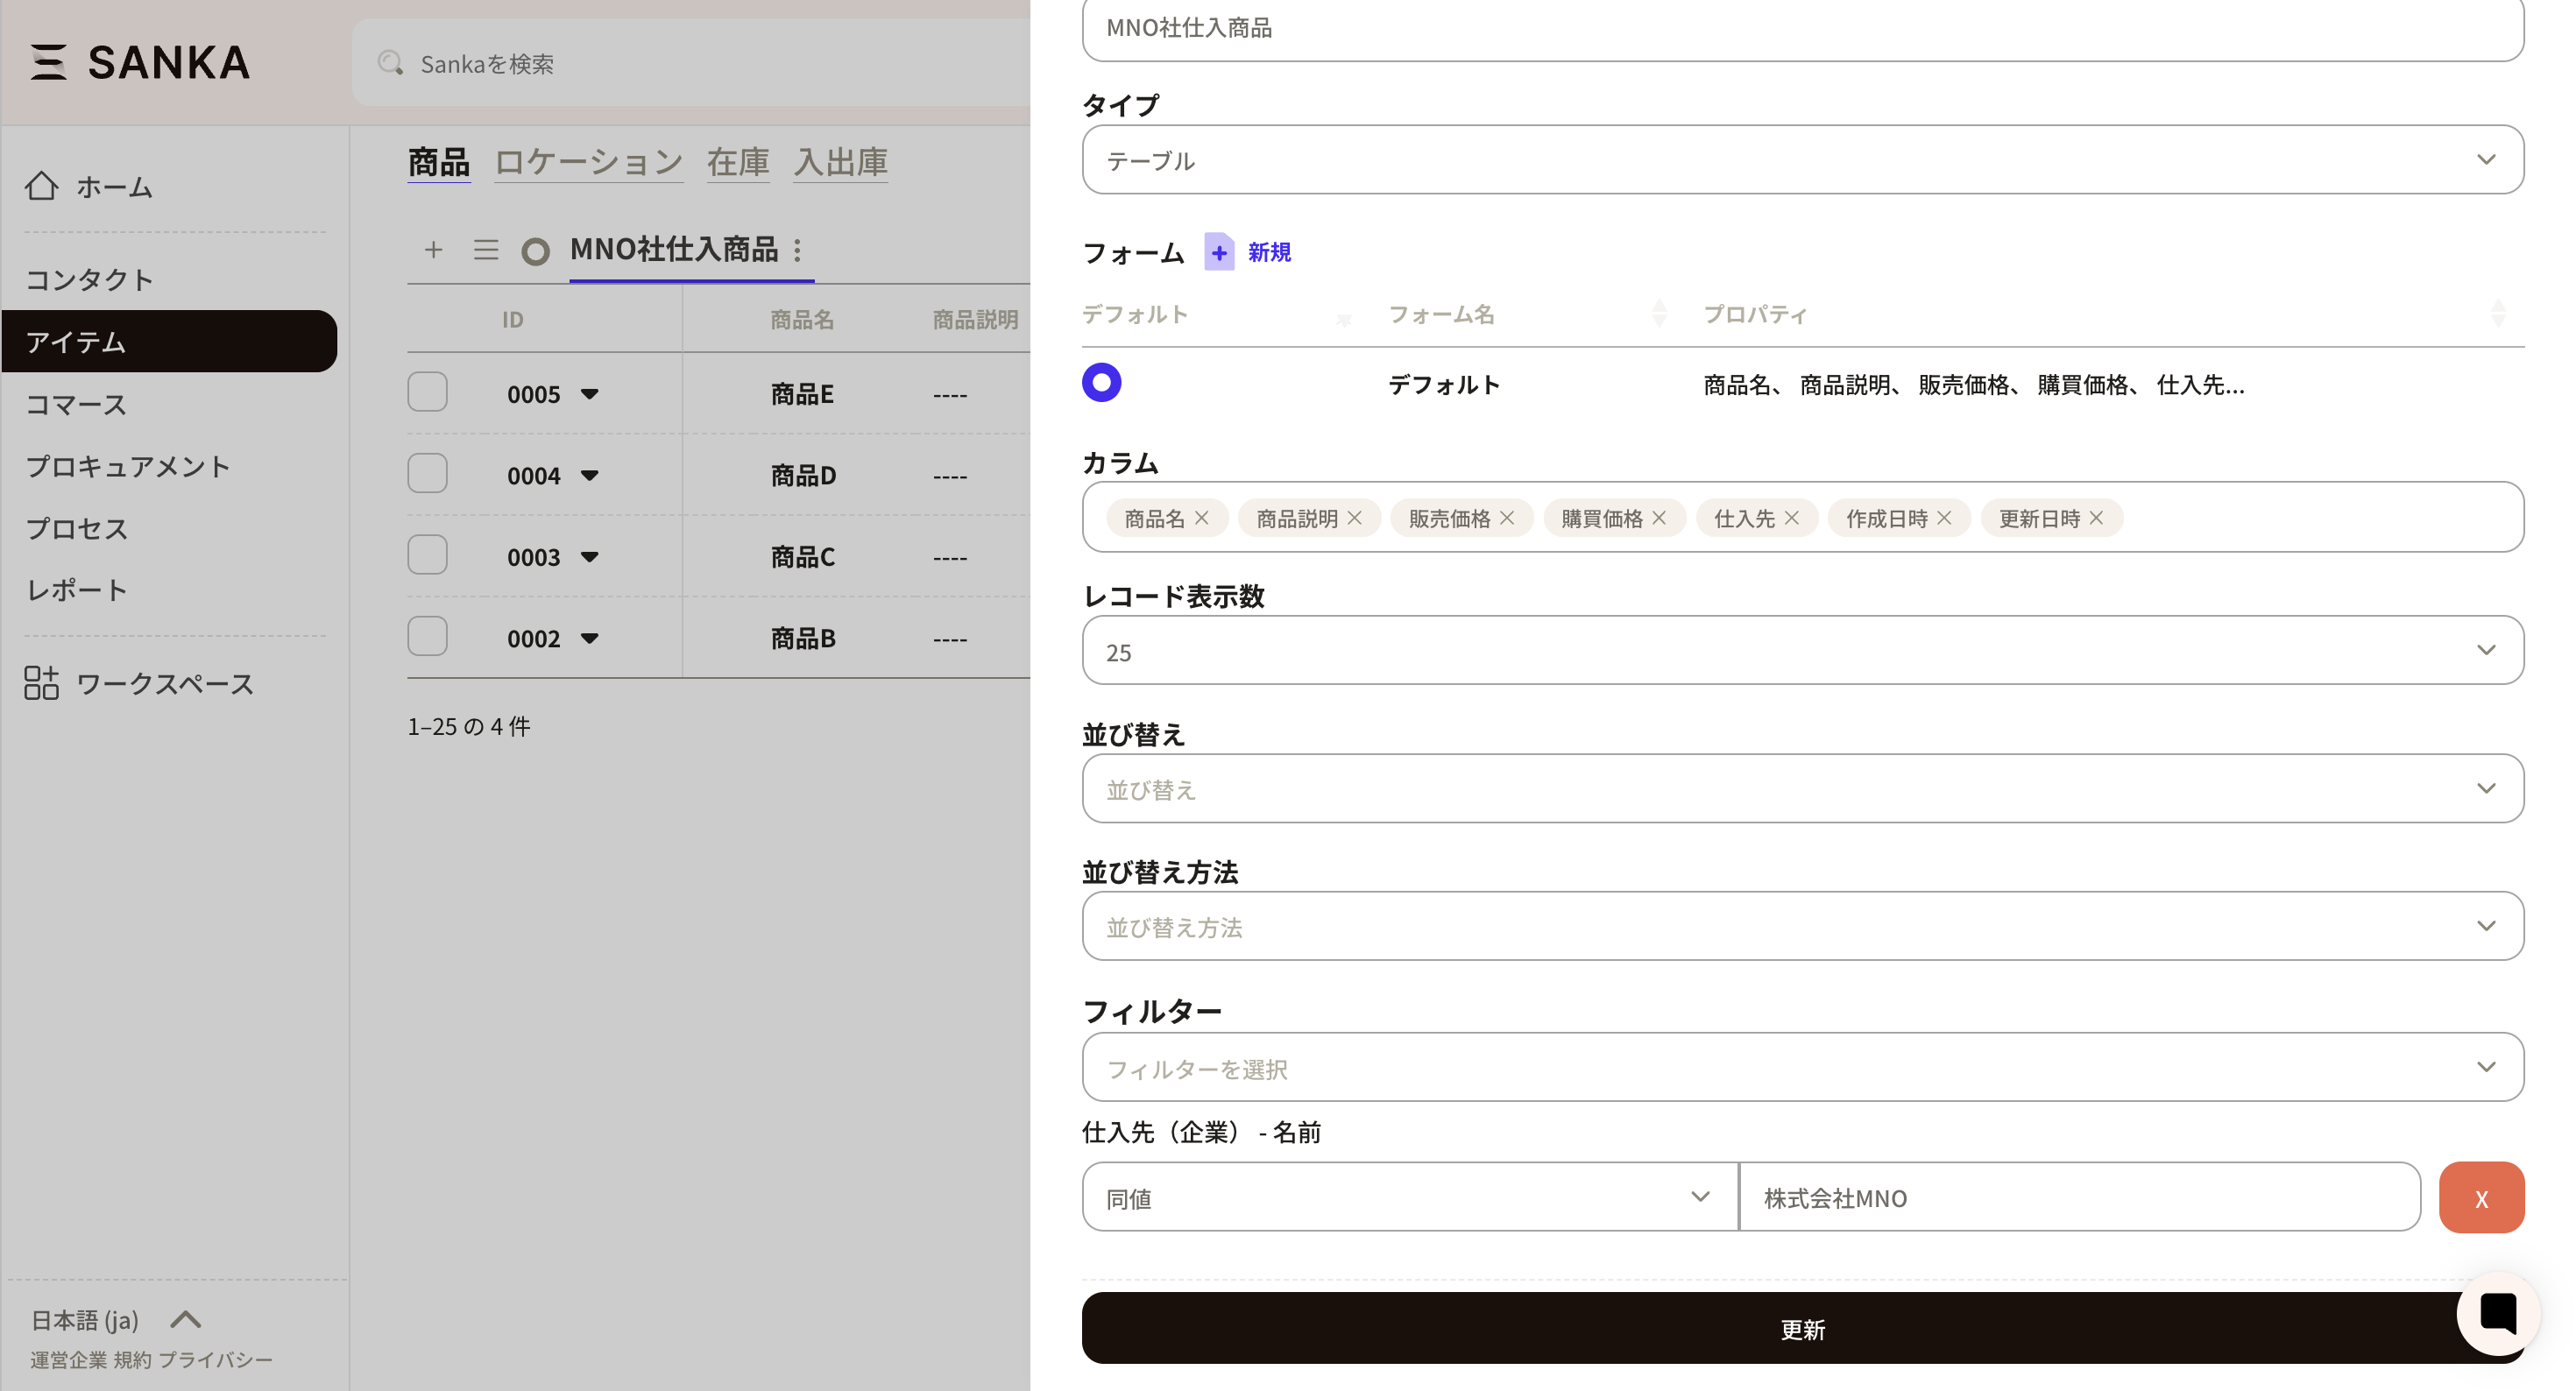
This section introduces how to customize views according to your business workflow. First, click on the “” Create View button located at the upper left of the record table list to display the Create View screen. Here, we will explain the input fields for view management.
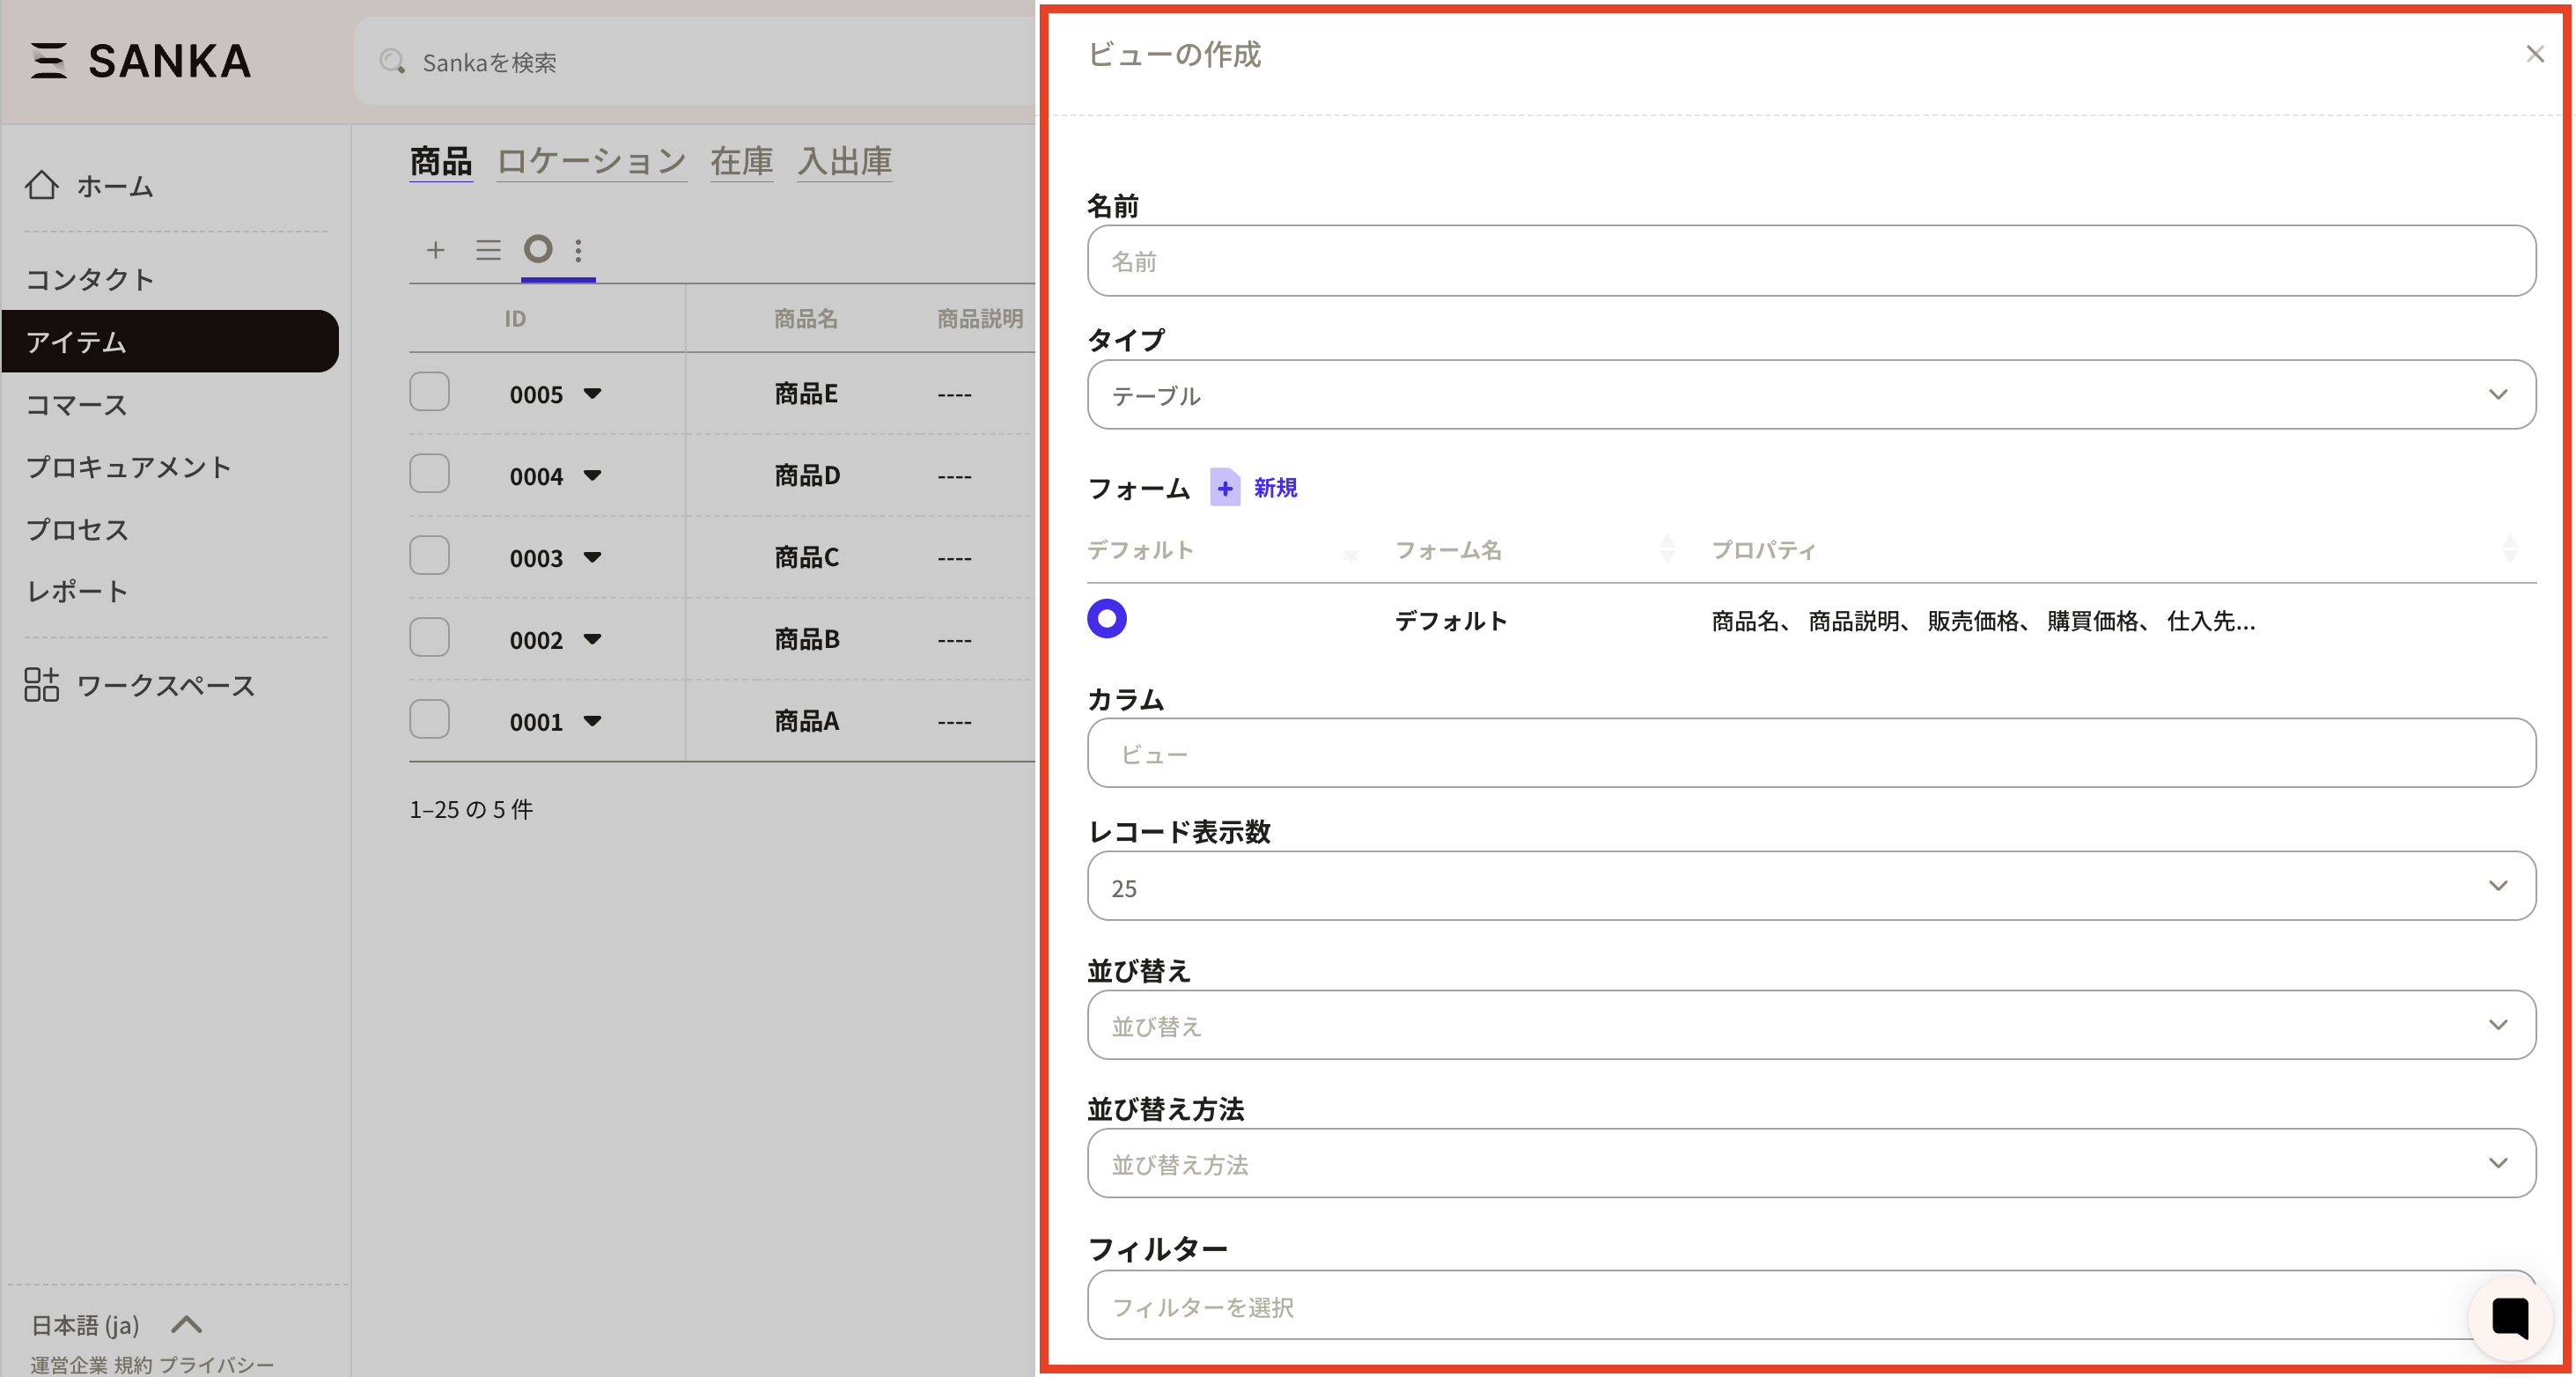
Name: Set the name of the view. It is recommended to use an easily recognizable name.

It will be displayed as shown below.
Type: You may configure the type as Table or Group Table. By default, the records are displayed in a table format. Generally, selecting Table is sufficient.

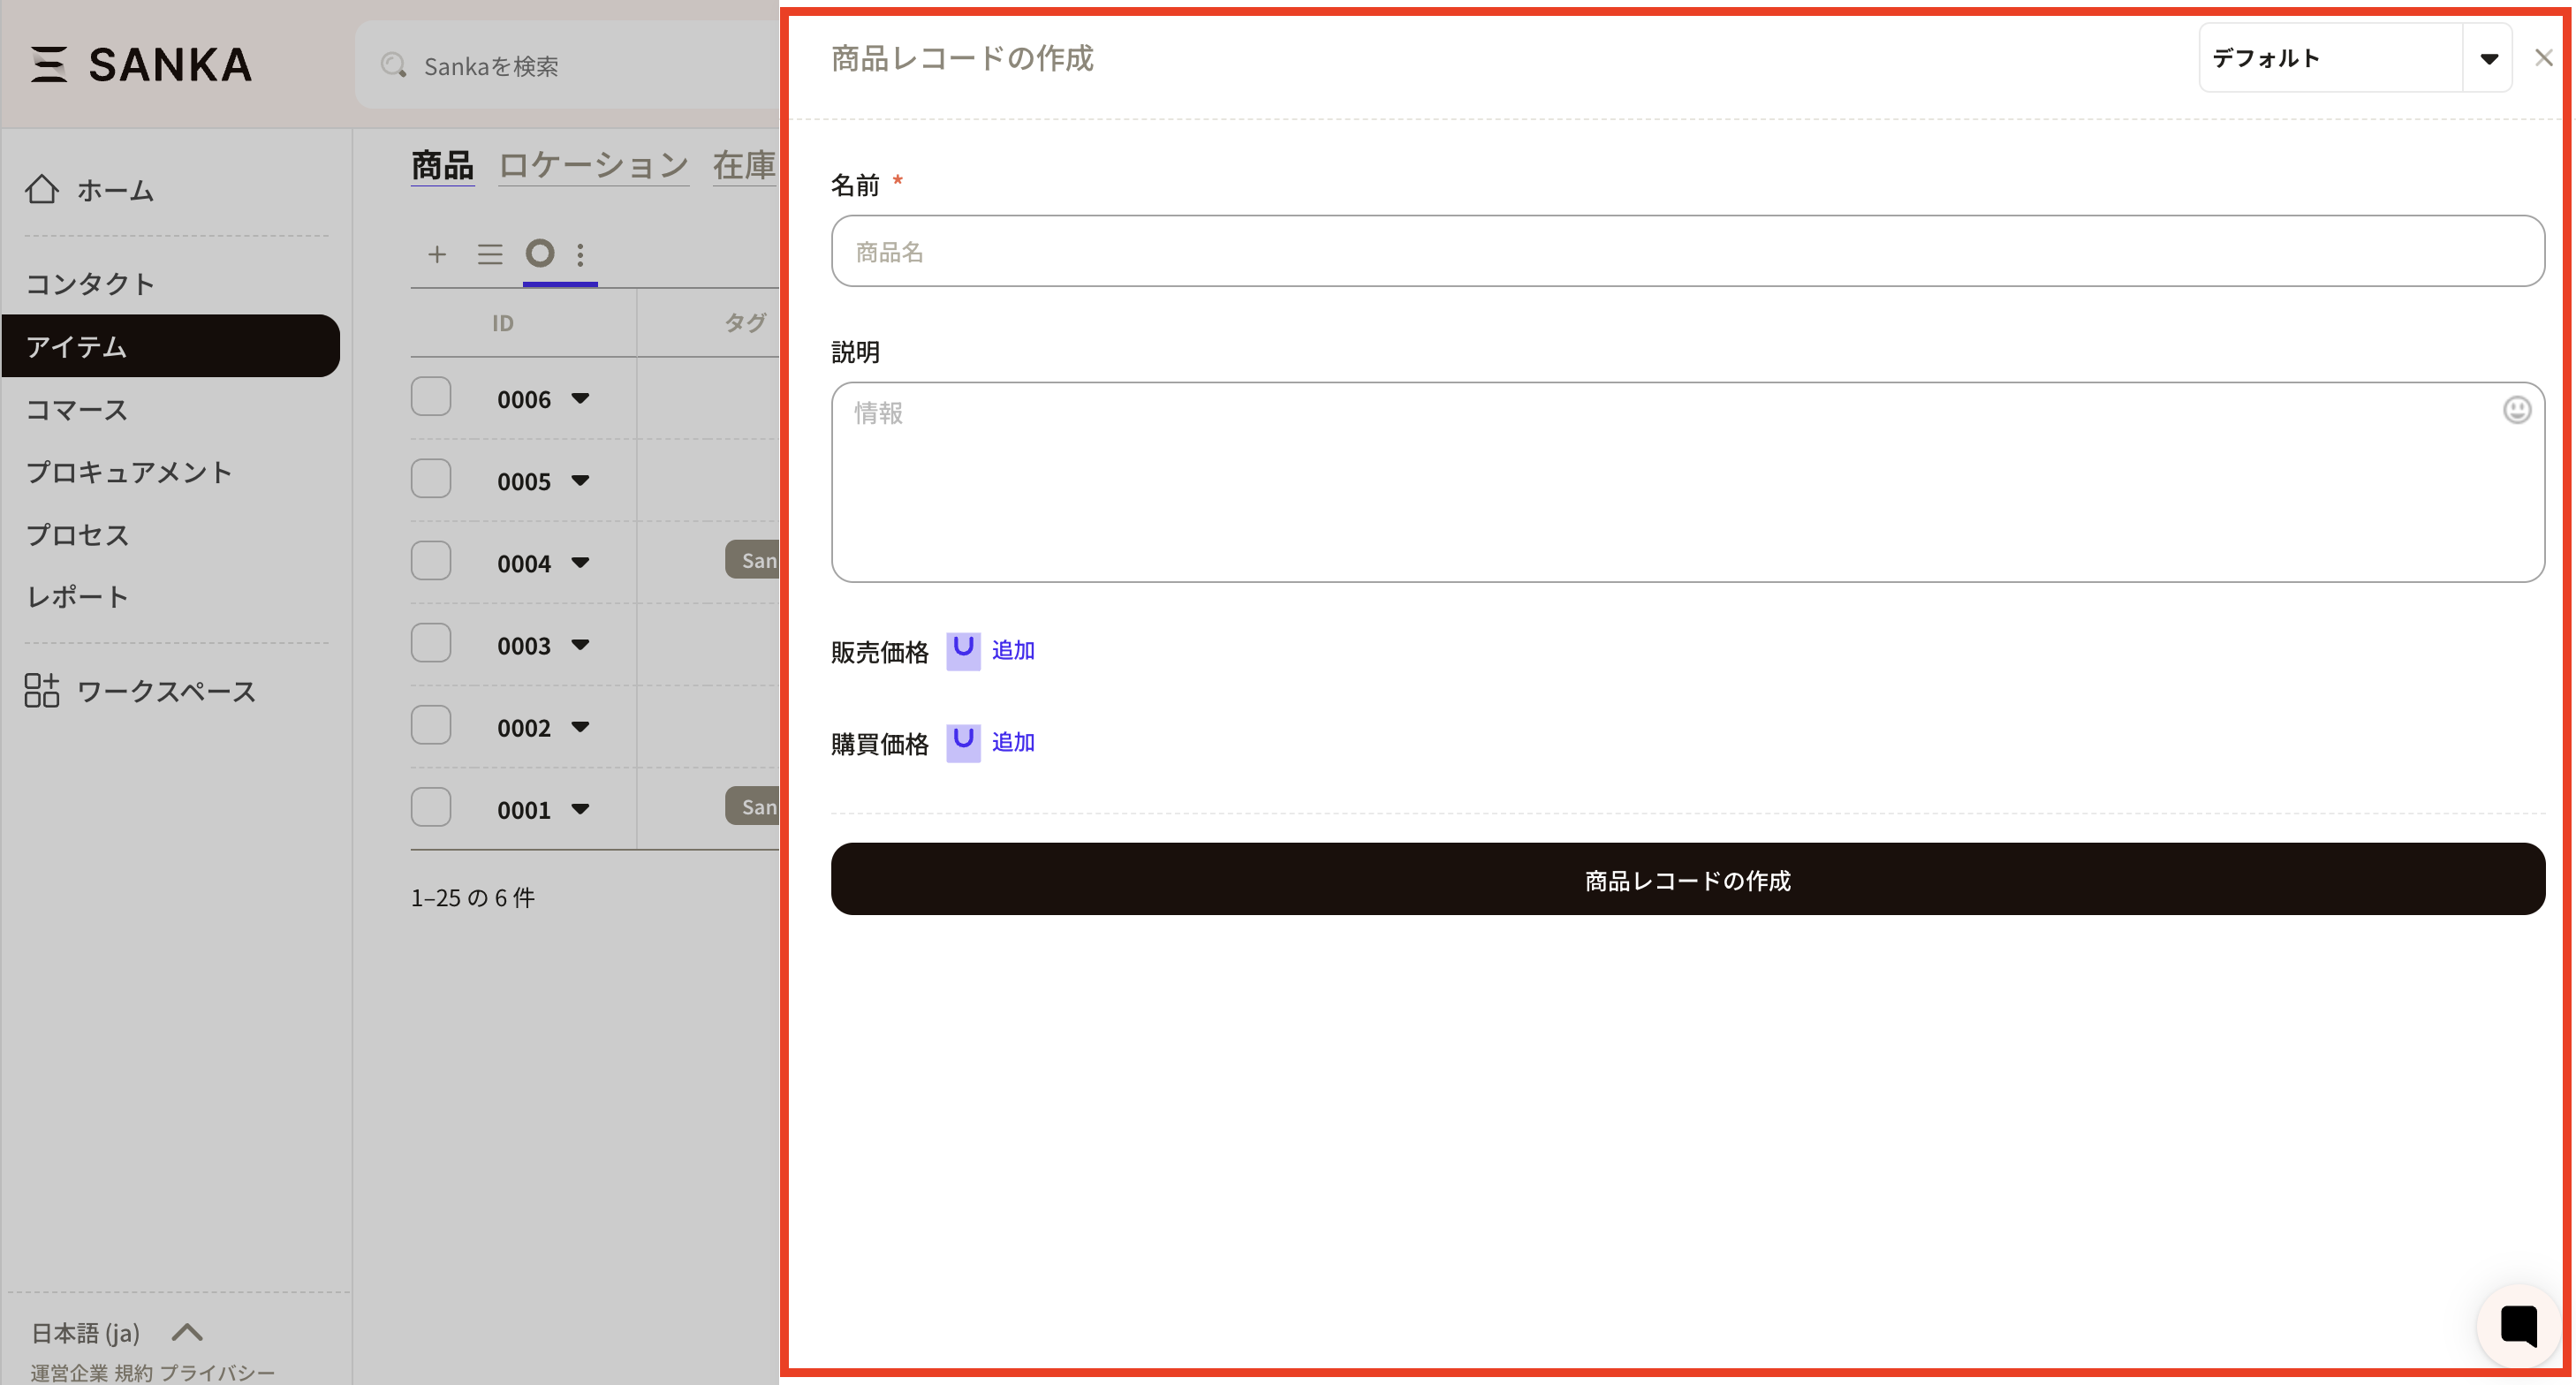
Form: You can customize the property settings of the "Create Record" form screen, which is displayed when registering record information. The initial setup uses the default settings. You may create a new form using the "New" button.

※Items configured in the form will be reflected in the new record creation form.
Column: You can configure the properties to be displayed in the record list view. When you click on the column area, the properties are displayed and can be set as needed.
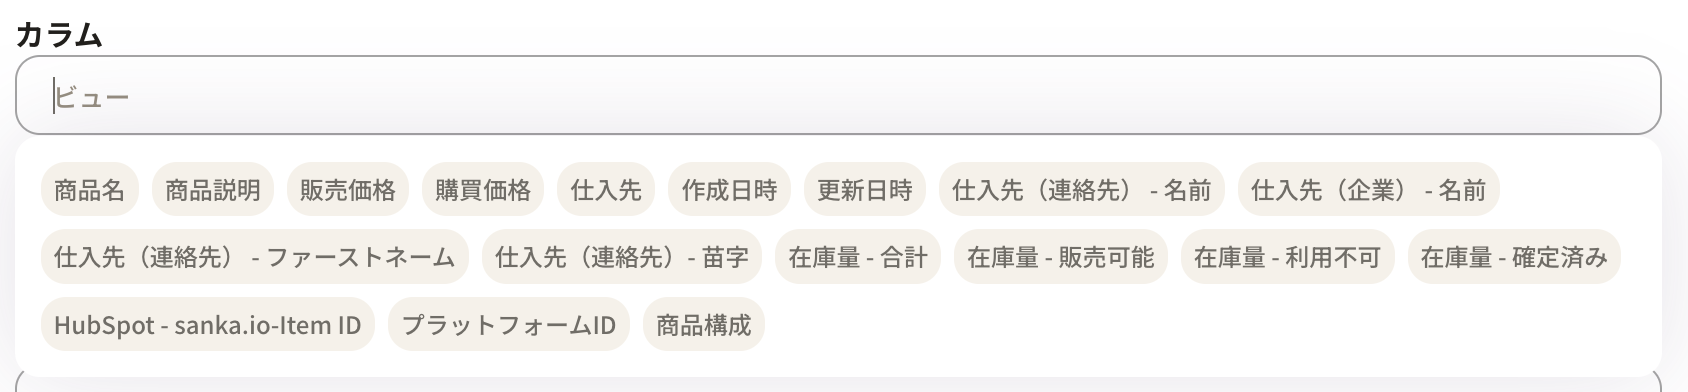
Select and add property names. It is also possible to drag property names to change their order.

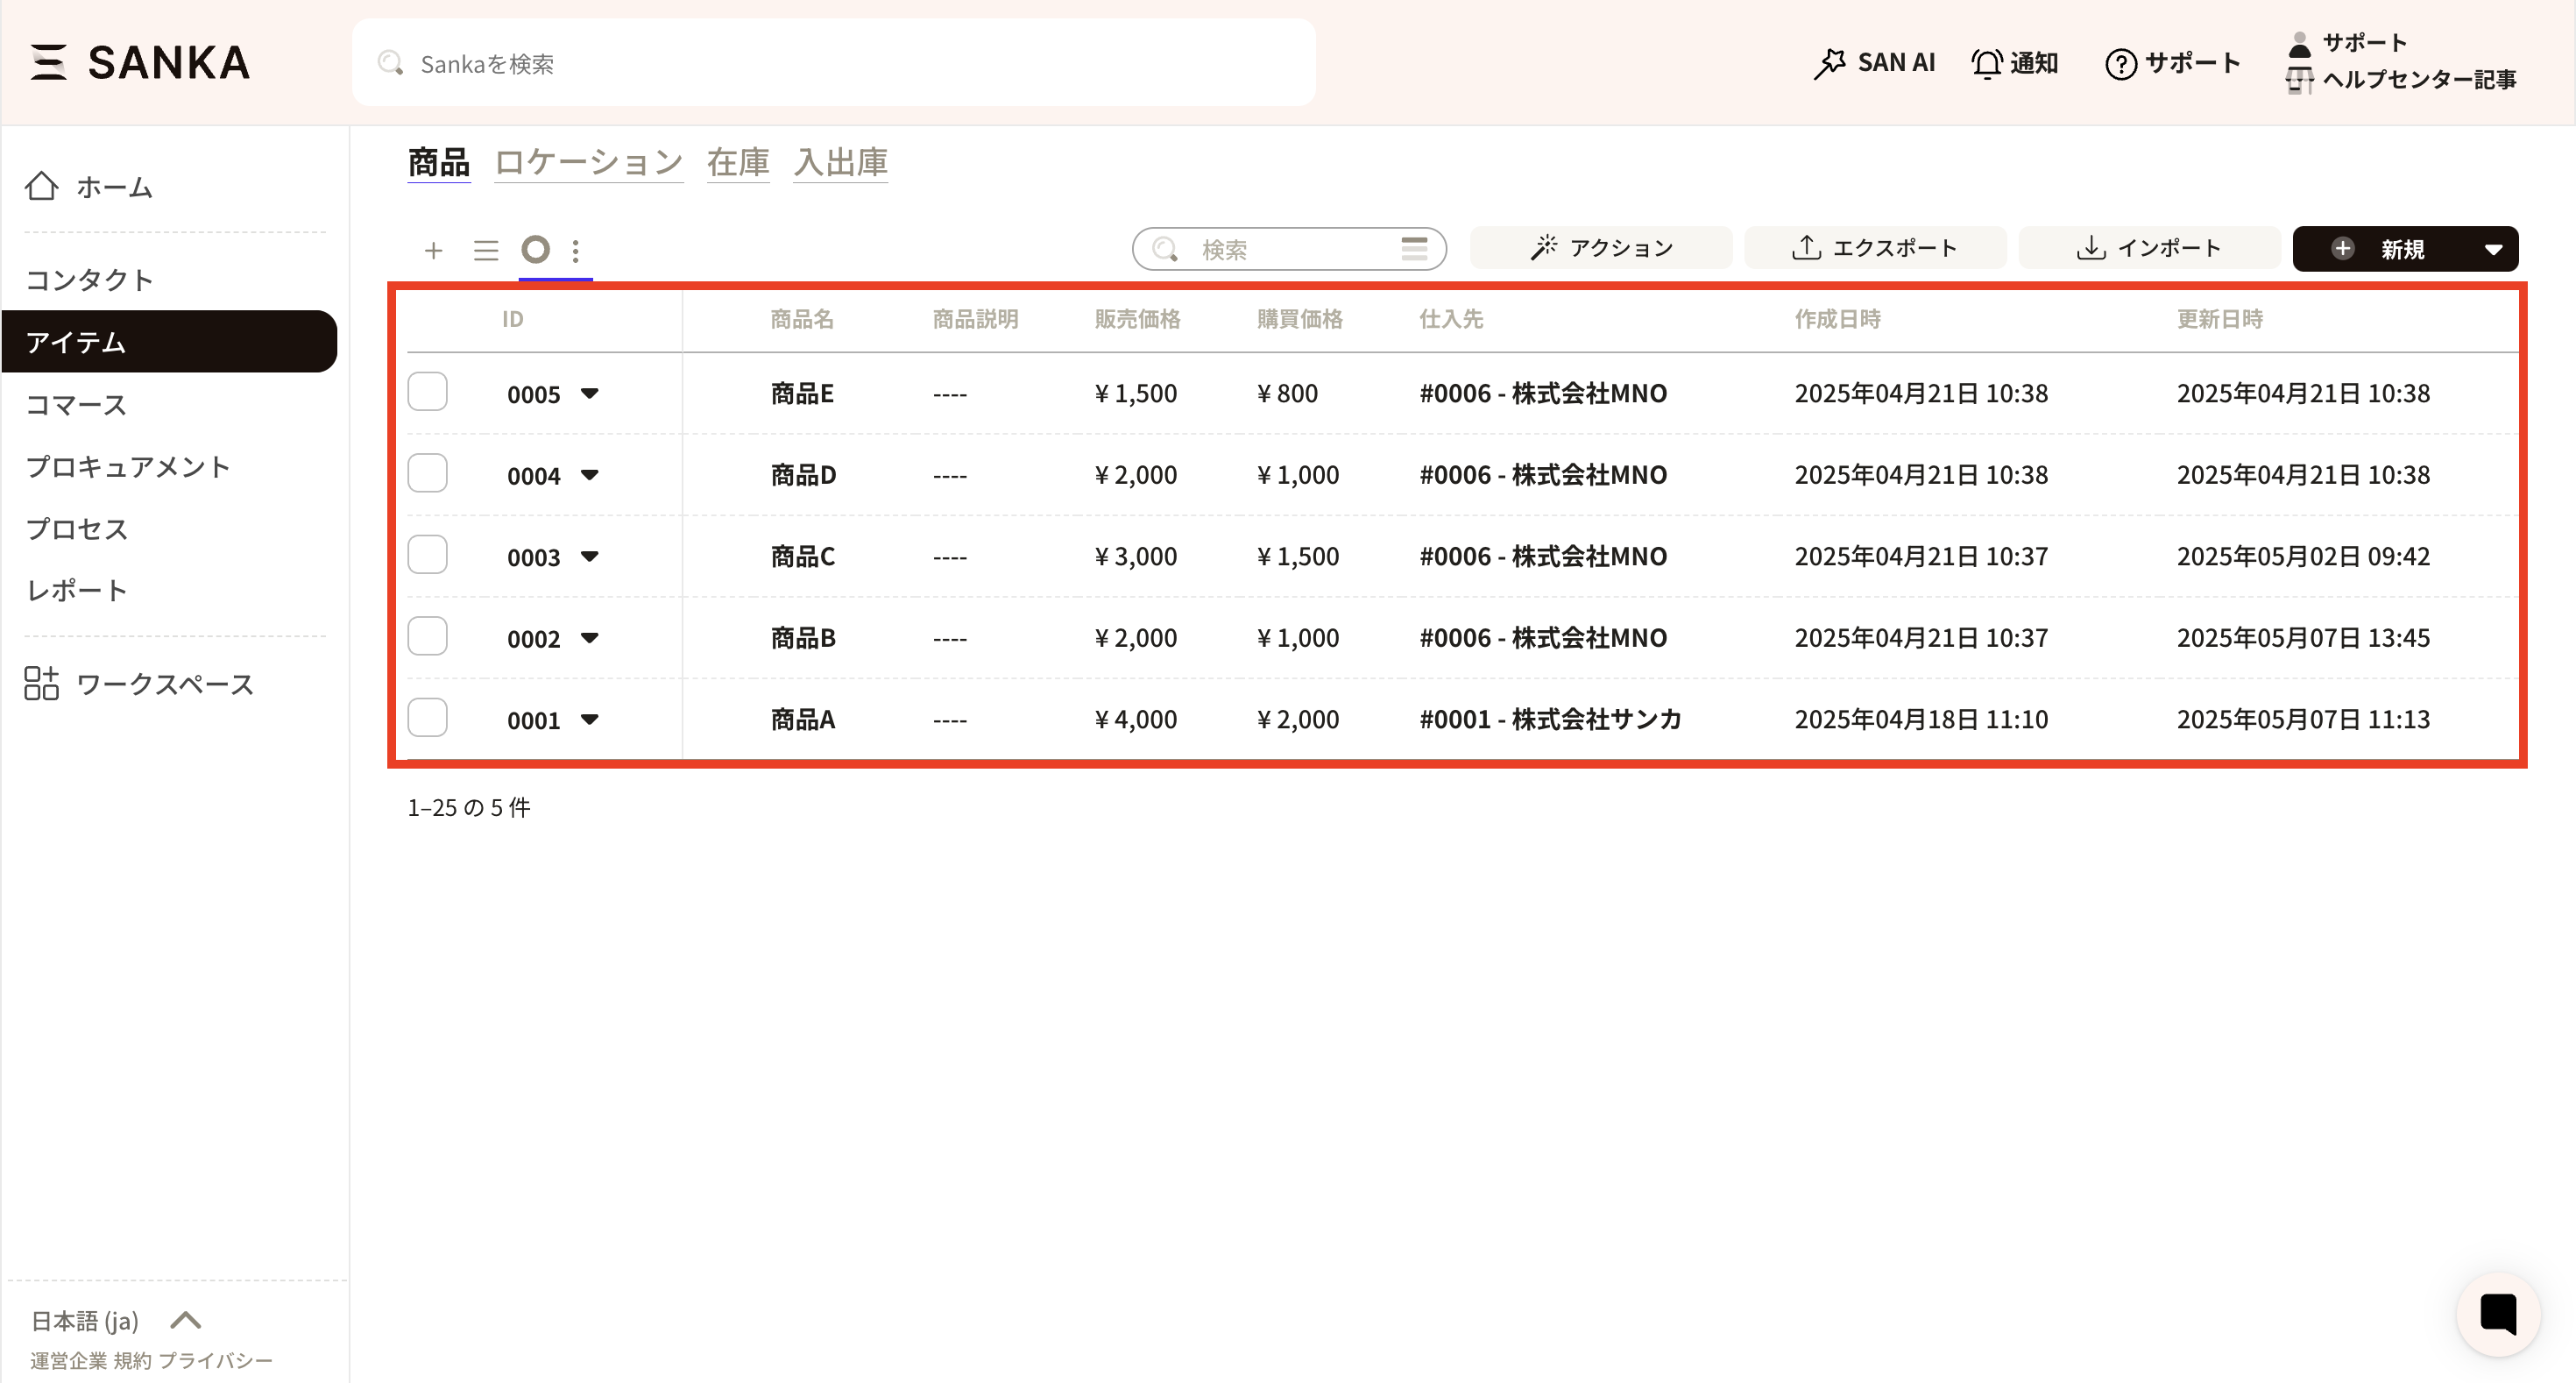
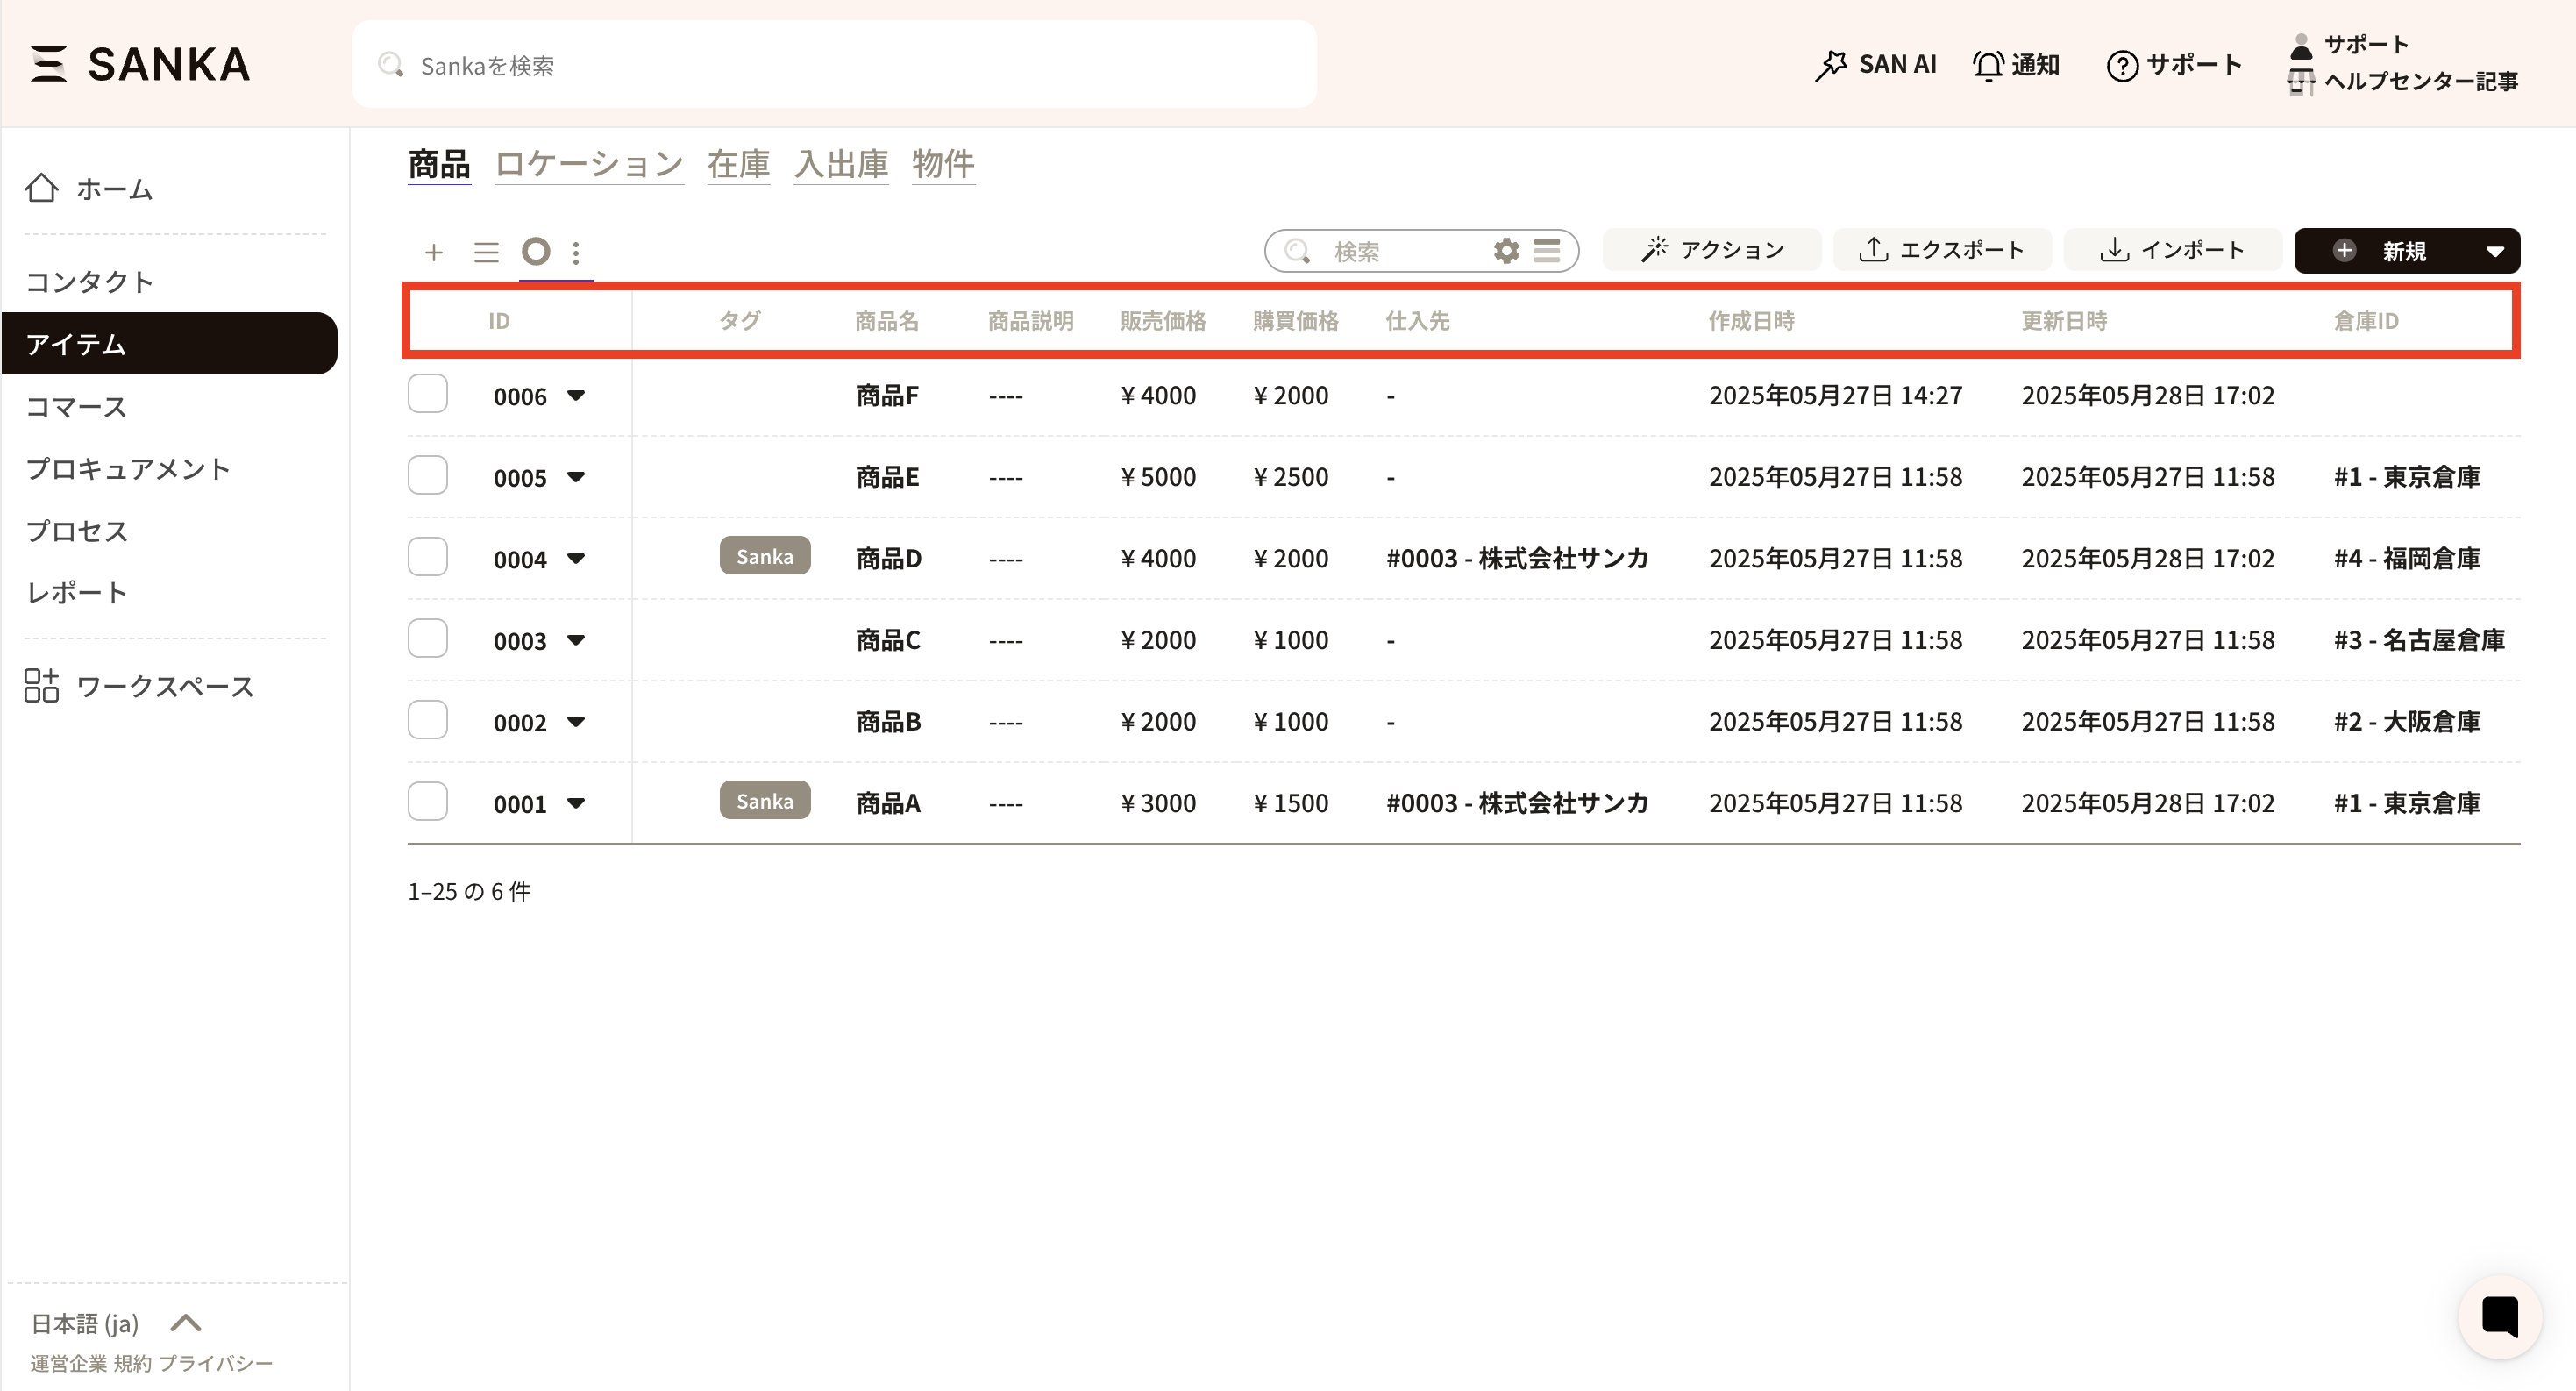
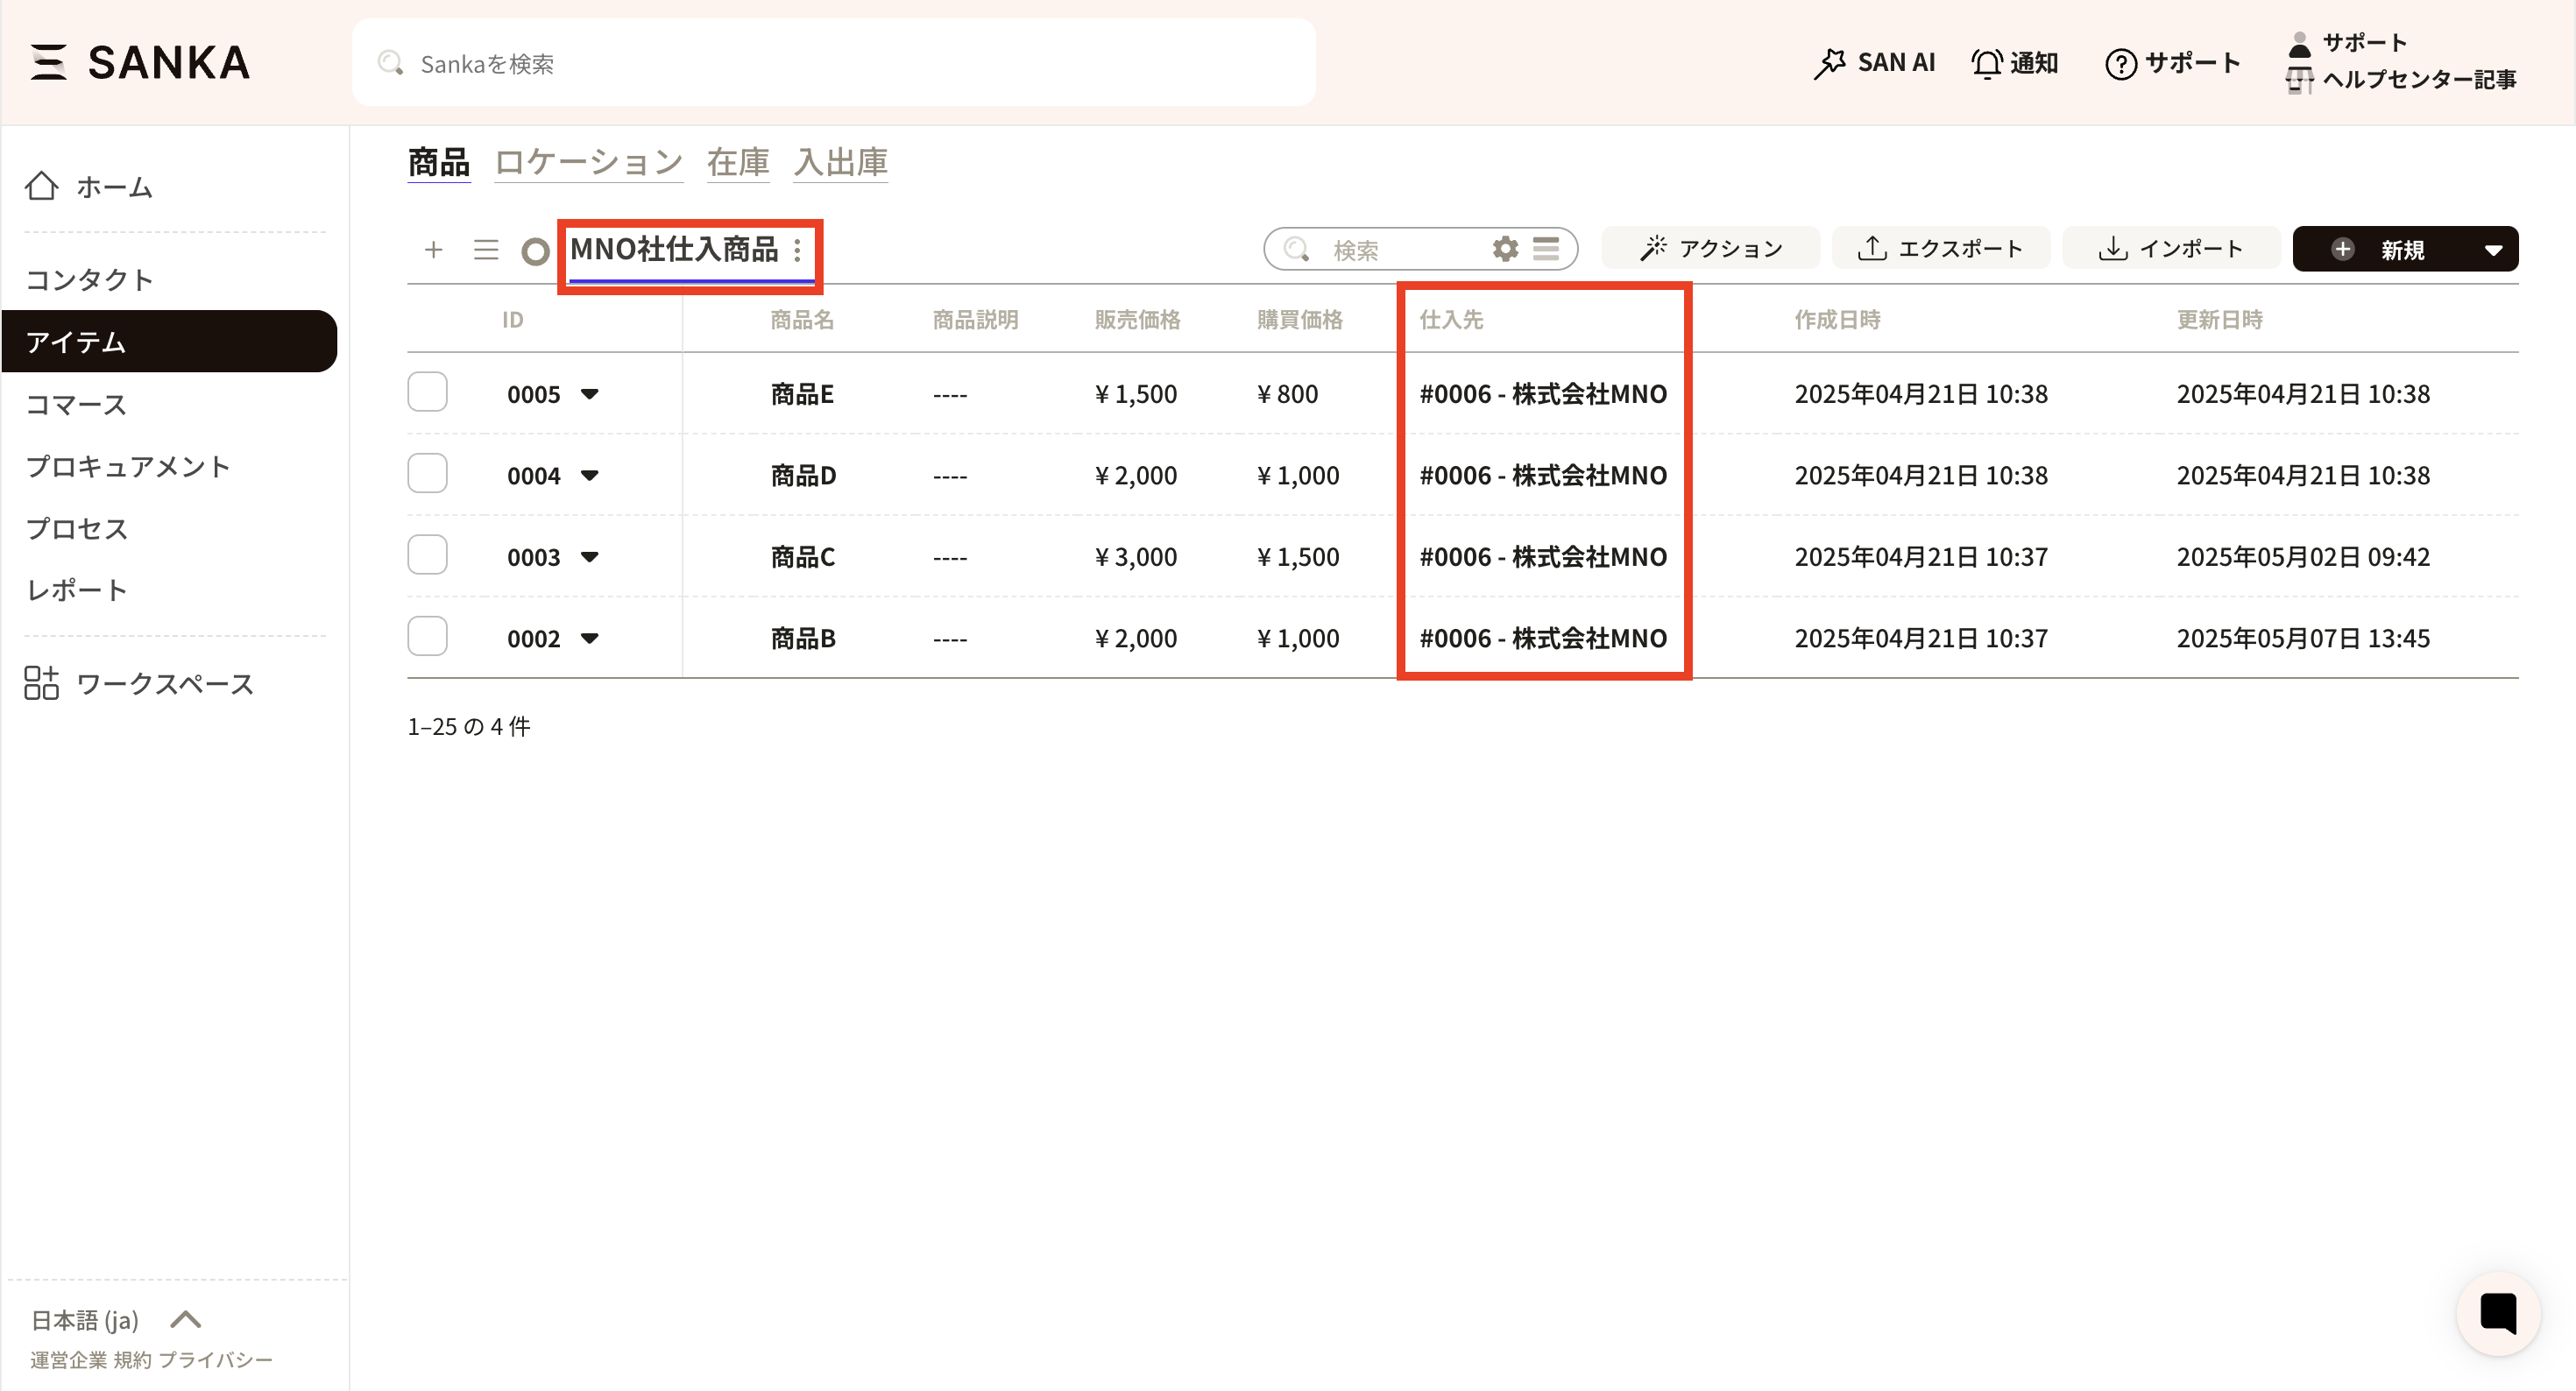
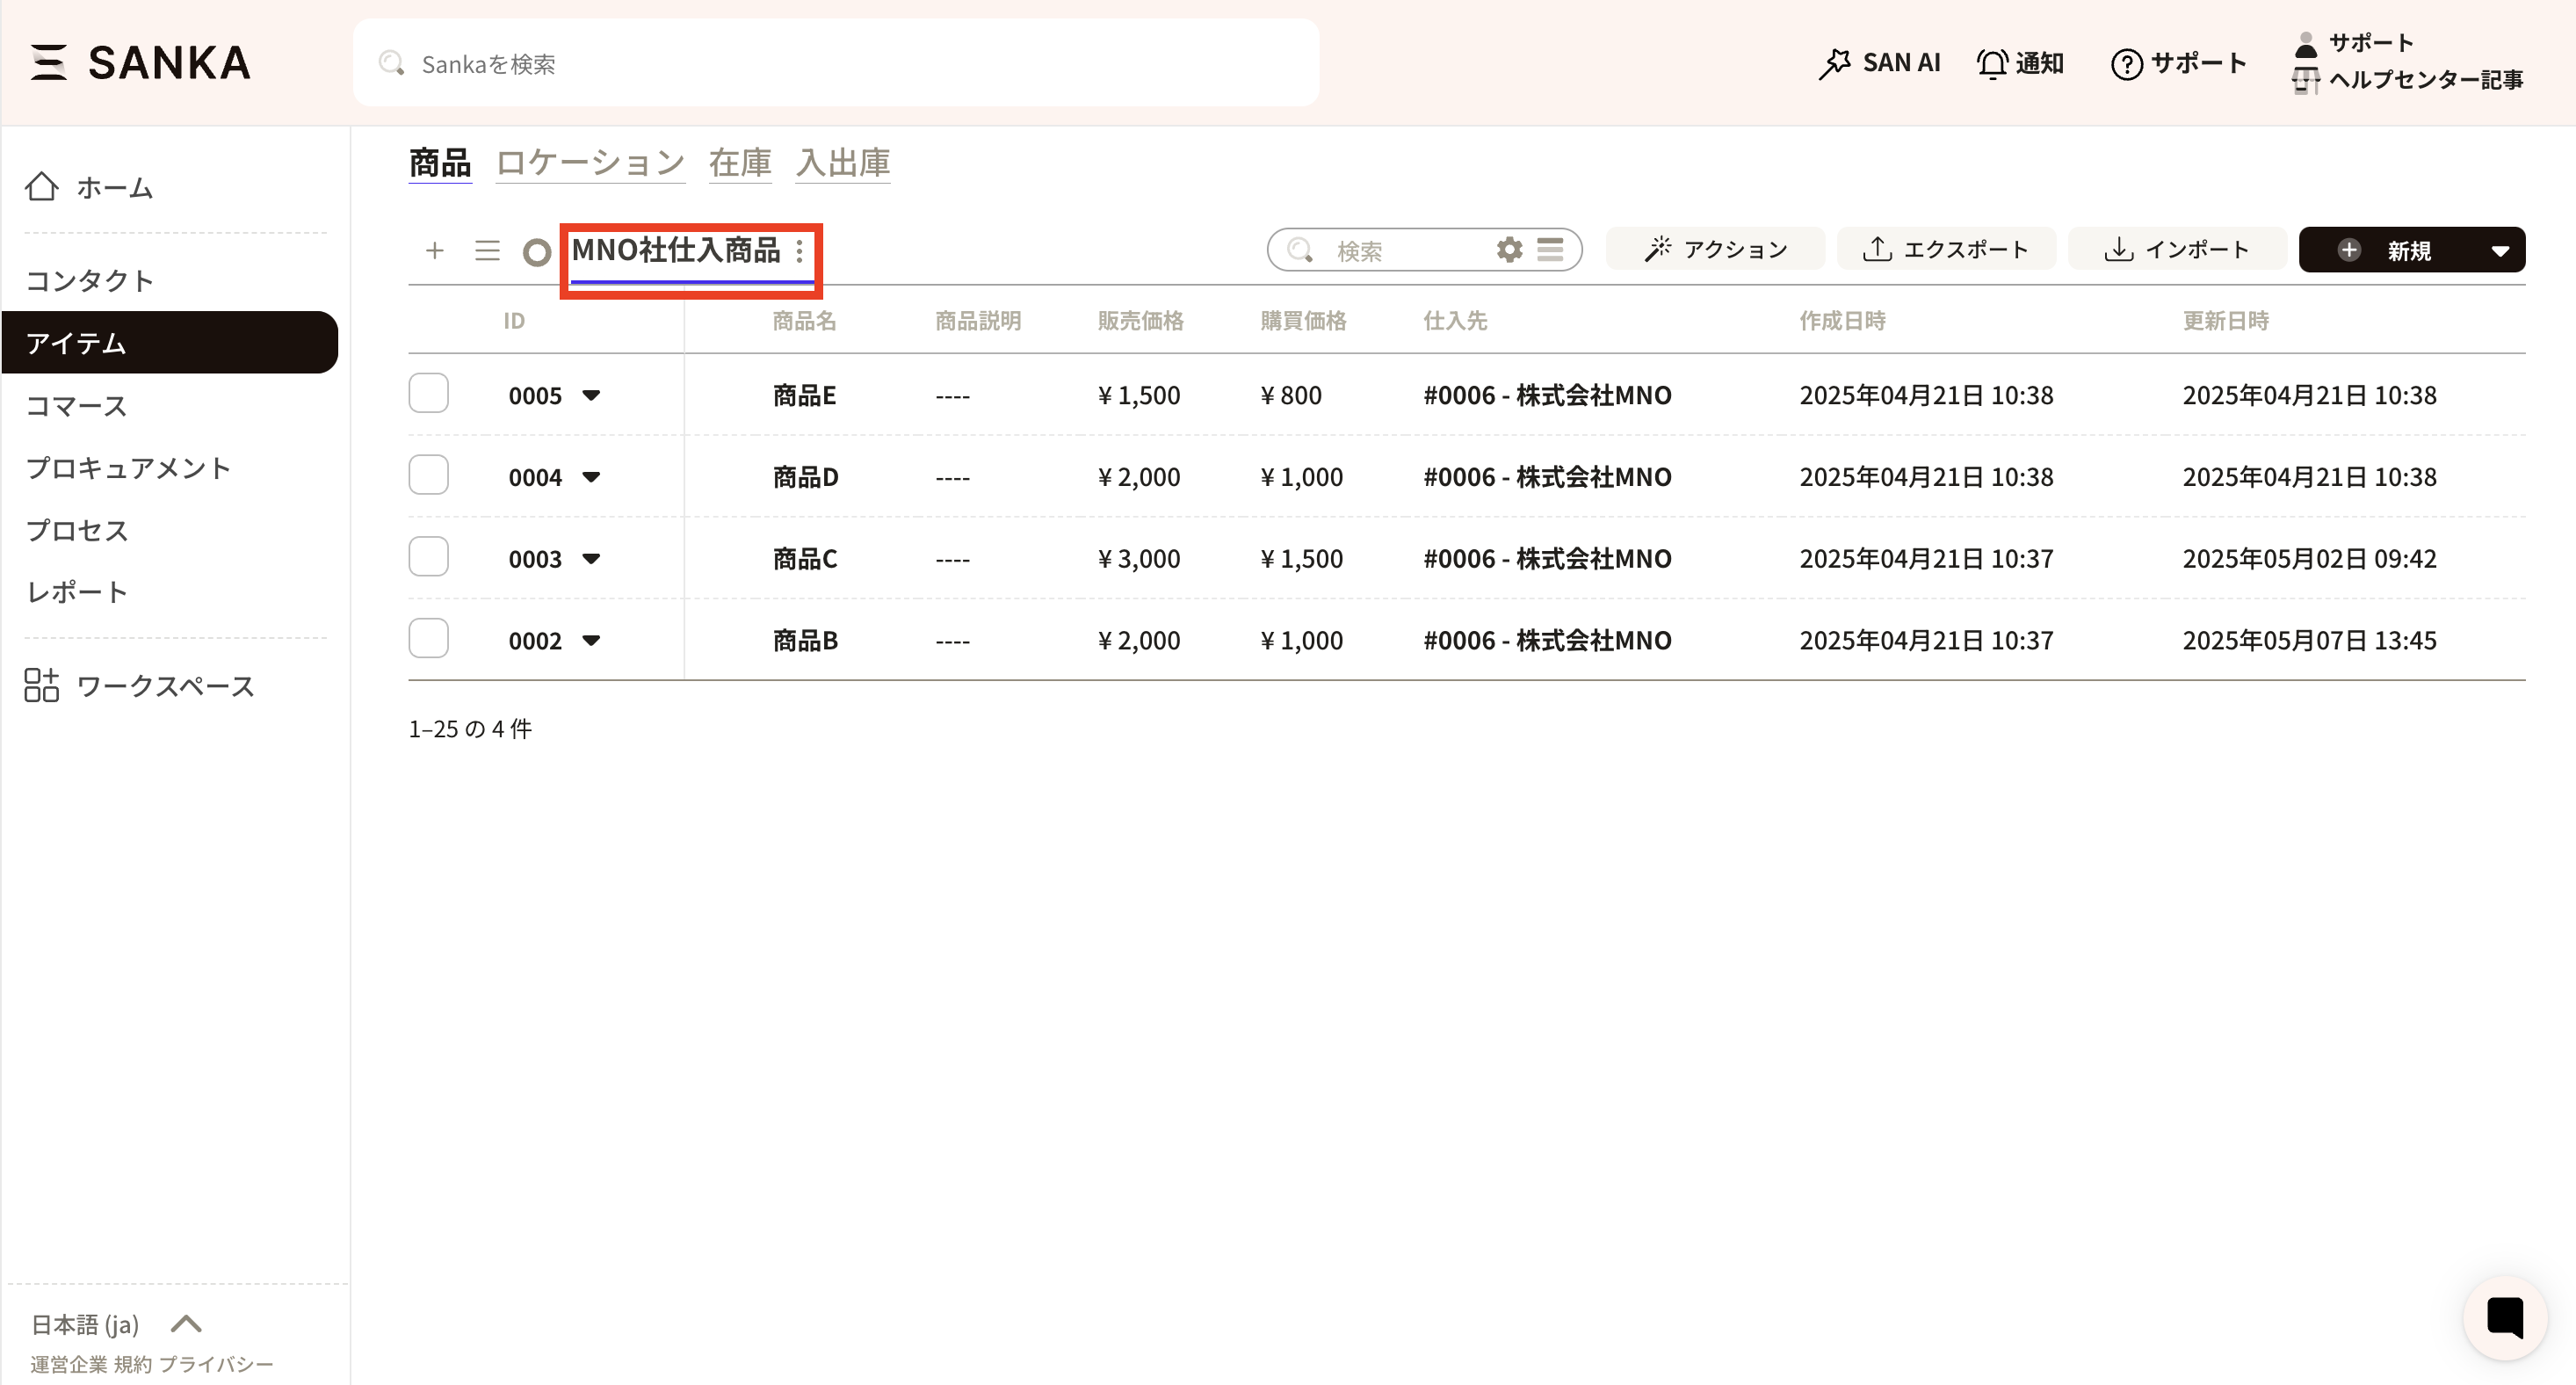
※This column setting will be reflected in the item section displayed as the header of the record table list (the section marked with the red line below)!
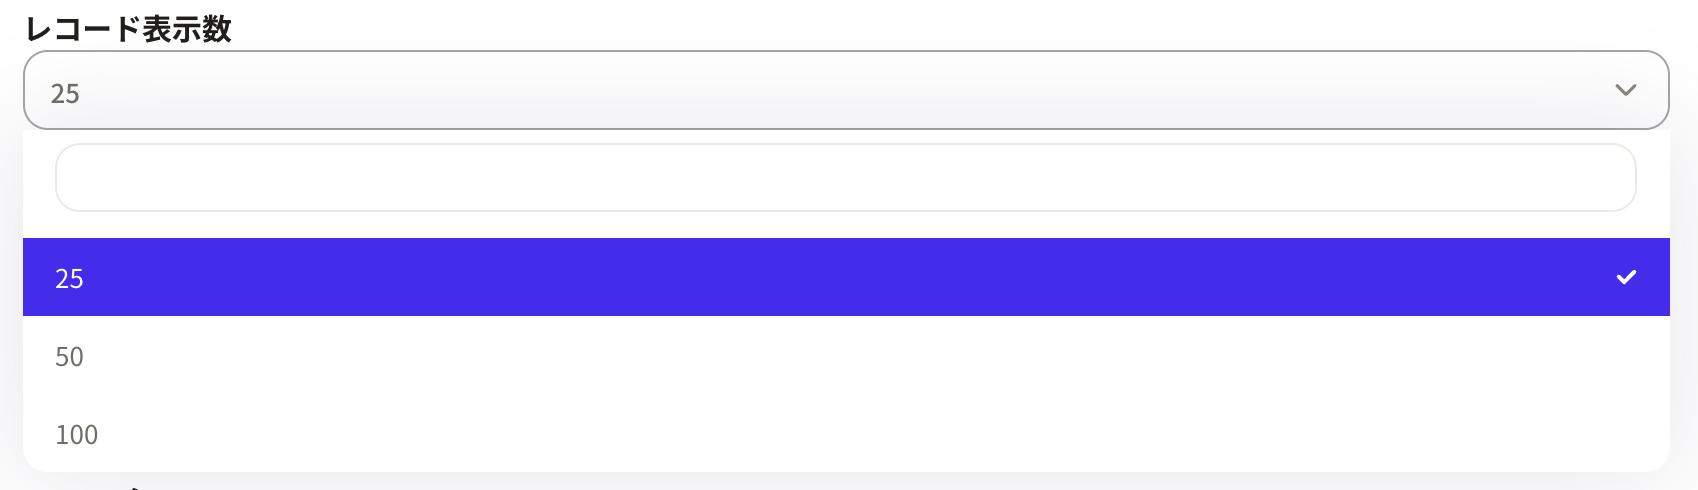
Number of records: You can set the number of records to display per screen.
Sorting: You can change the display of records to either "Descending" or "Ascending" order. First, select the reference property here. Only numerical values are applicable in this context.
Sorting Method: This is linked to the property selected under "Sorting". You may choose either "Descending" or "Ascending" order.


Filter: You can configure what to filter and what to display.

Here, as an example, we will configure a view to display only items purchased from MNO Corporation.
In the filter, select Supplier (Company) - Name and set it to MNO Corporation as the equivalent value. You may select items configured within your own properties.
Update button: Please make sure to press the update button after configuring the information.
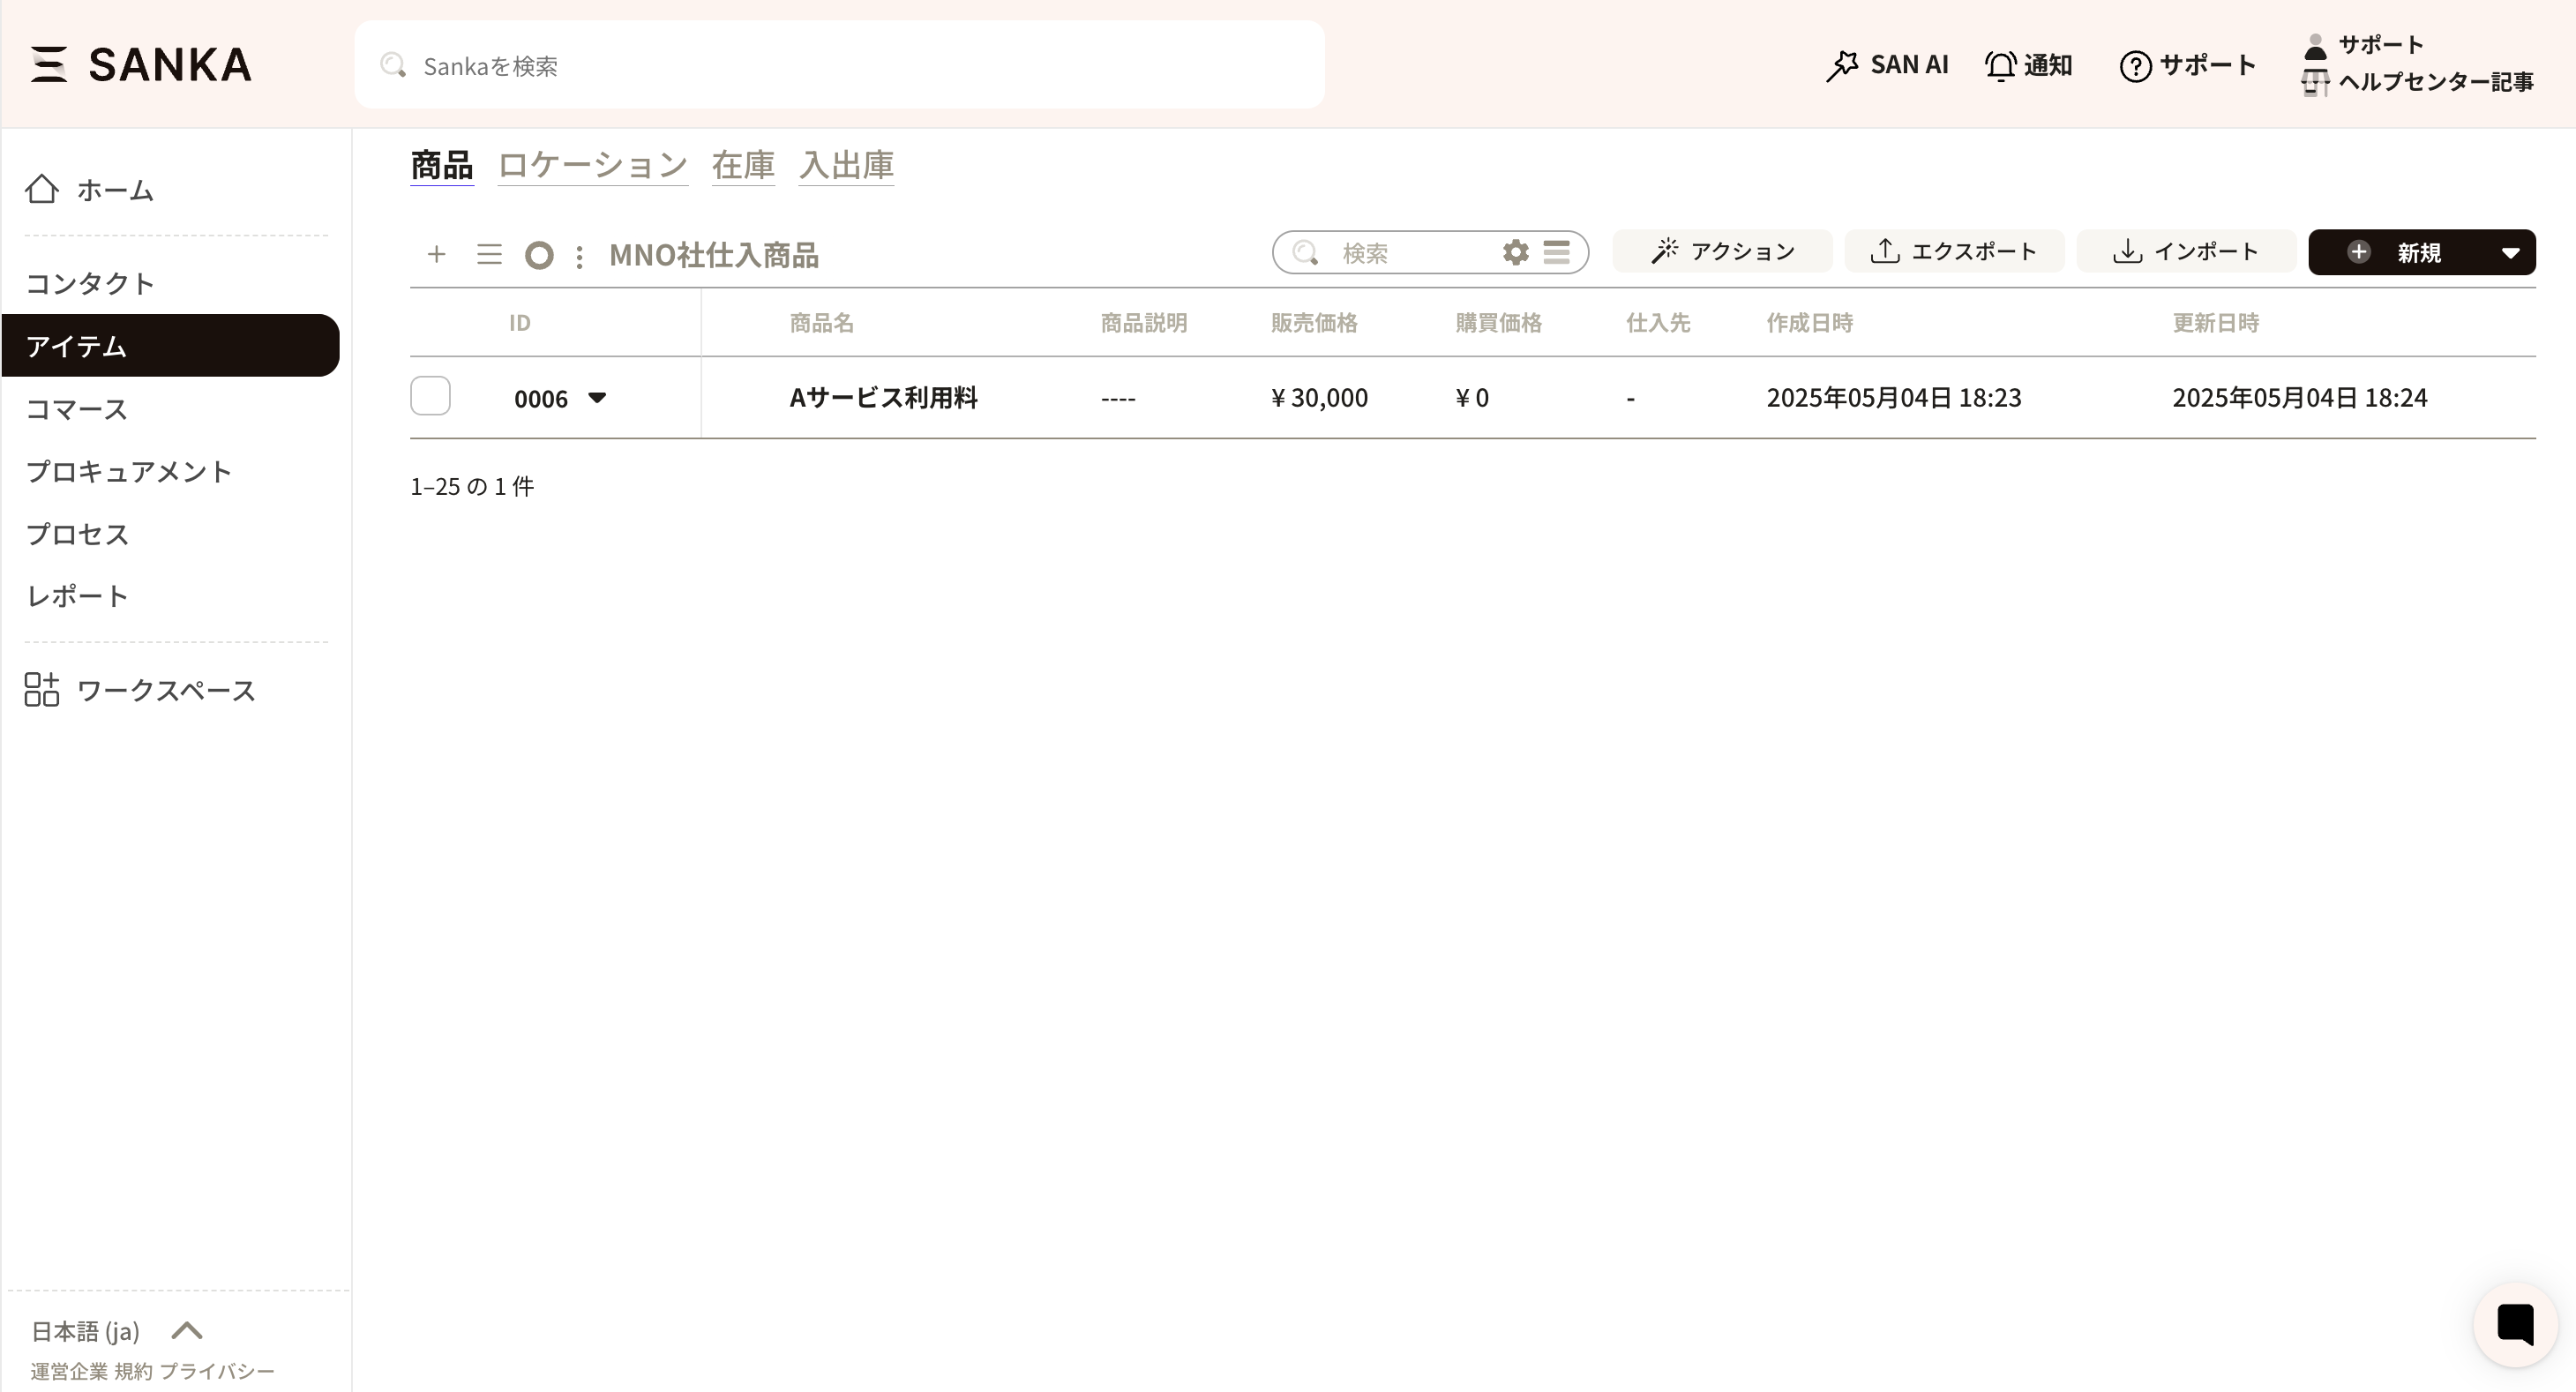
The settings for the new view have been applied. Additionally, only products recently purchased from MNO Corporation are displayed. It is possible to add more views, so please configure them in accordance with your operational workflow.
Here, we will present editing methods for view management picked from common support inquiries. Please refer to this information.
Switch the view to the archive list using the three-line icon (hamburger icon) located at the top left of the record list. When you select the archive view, a list of previously archived records will be displayed.
① Click the three-line icon (hamburger icon) at the top left of the record list.
② A list of registered views will appear. Select 'Archive' from the list.

③ The list of archived records will be displayed.
Yes, it is possible to set a private view that is applied only to your account.
As the number of shared views increases, you may have concerns such as, “Although I am the only one using this view, it is visible to others...” or “Managing the views has become complicated...”
You can customize your workspace to suit your working style without affecting the team.
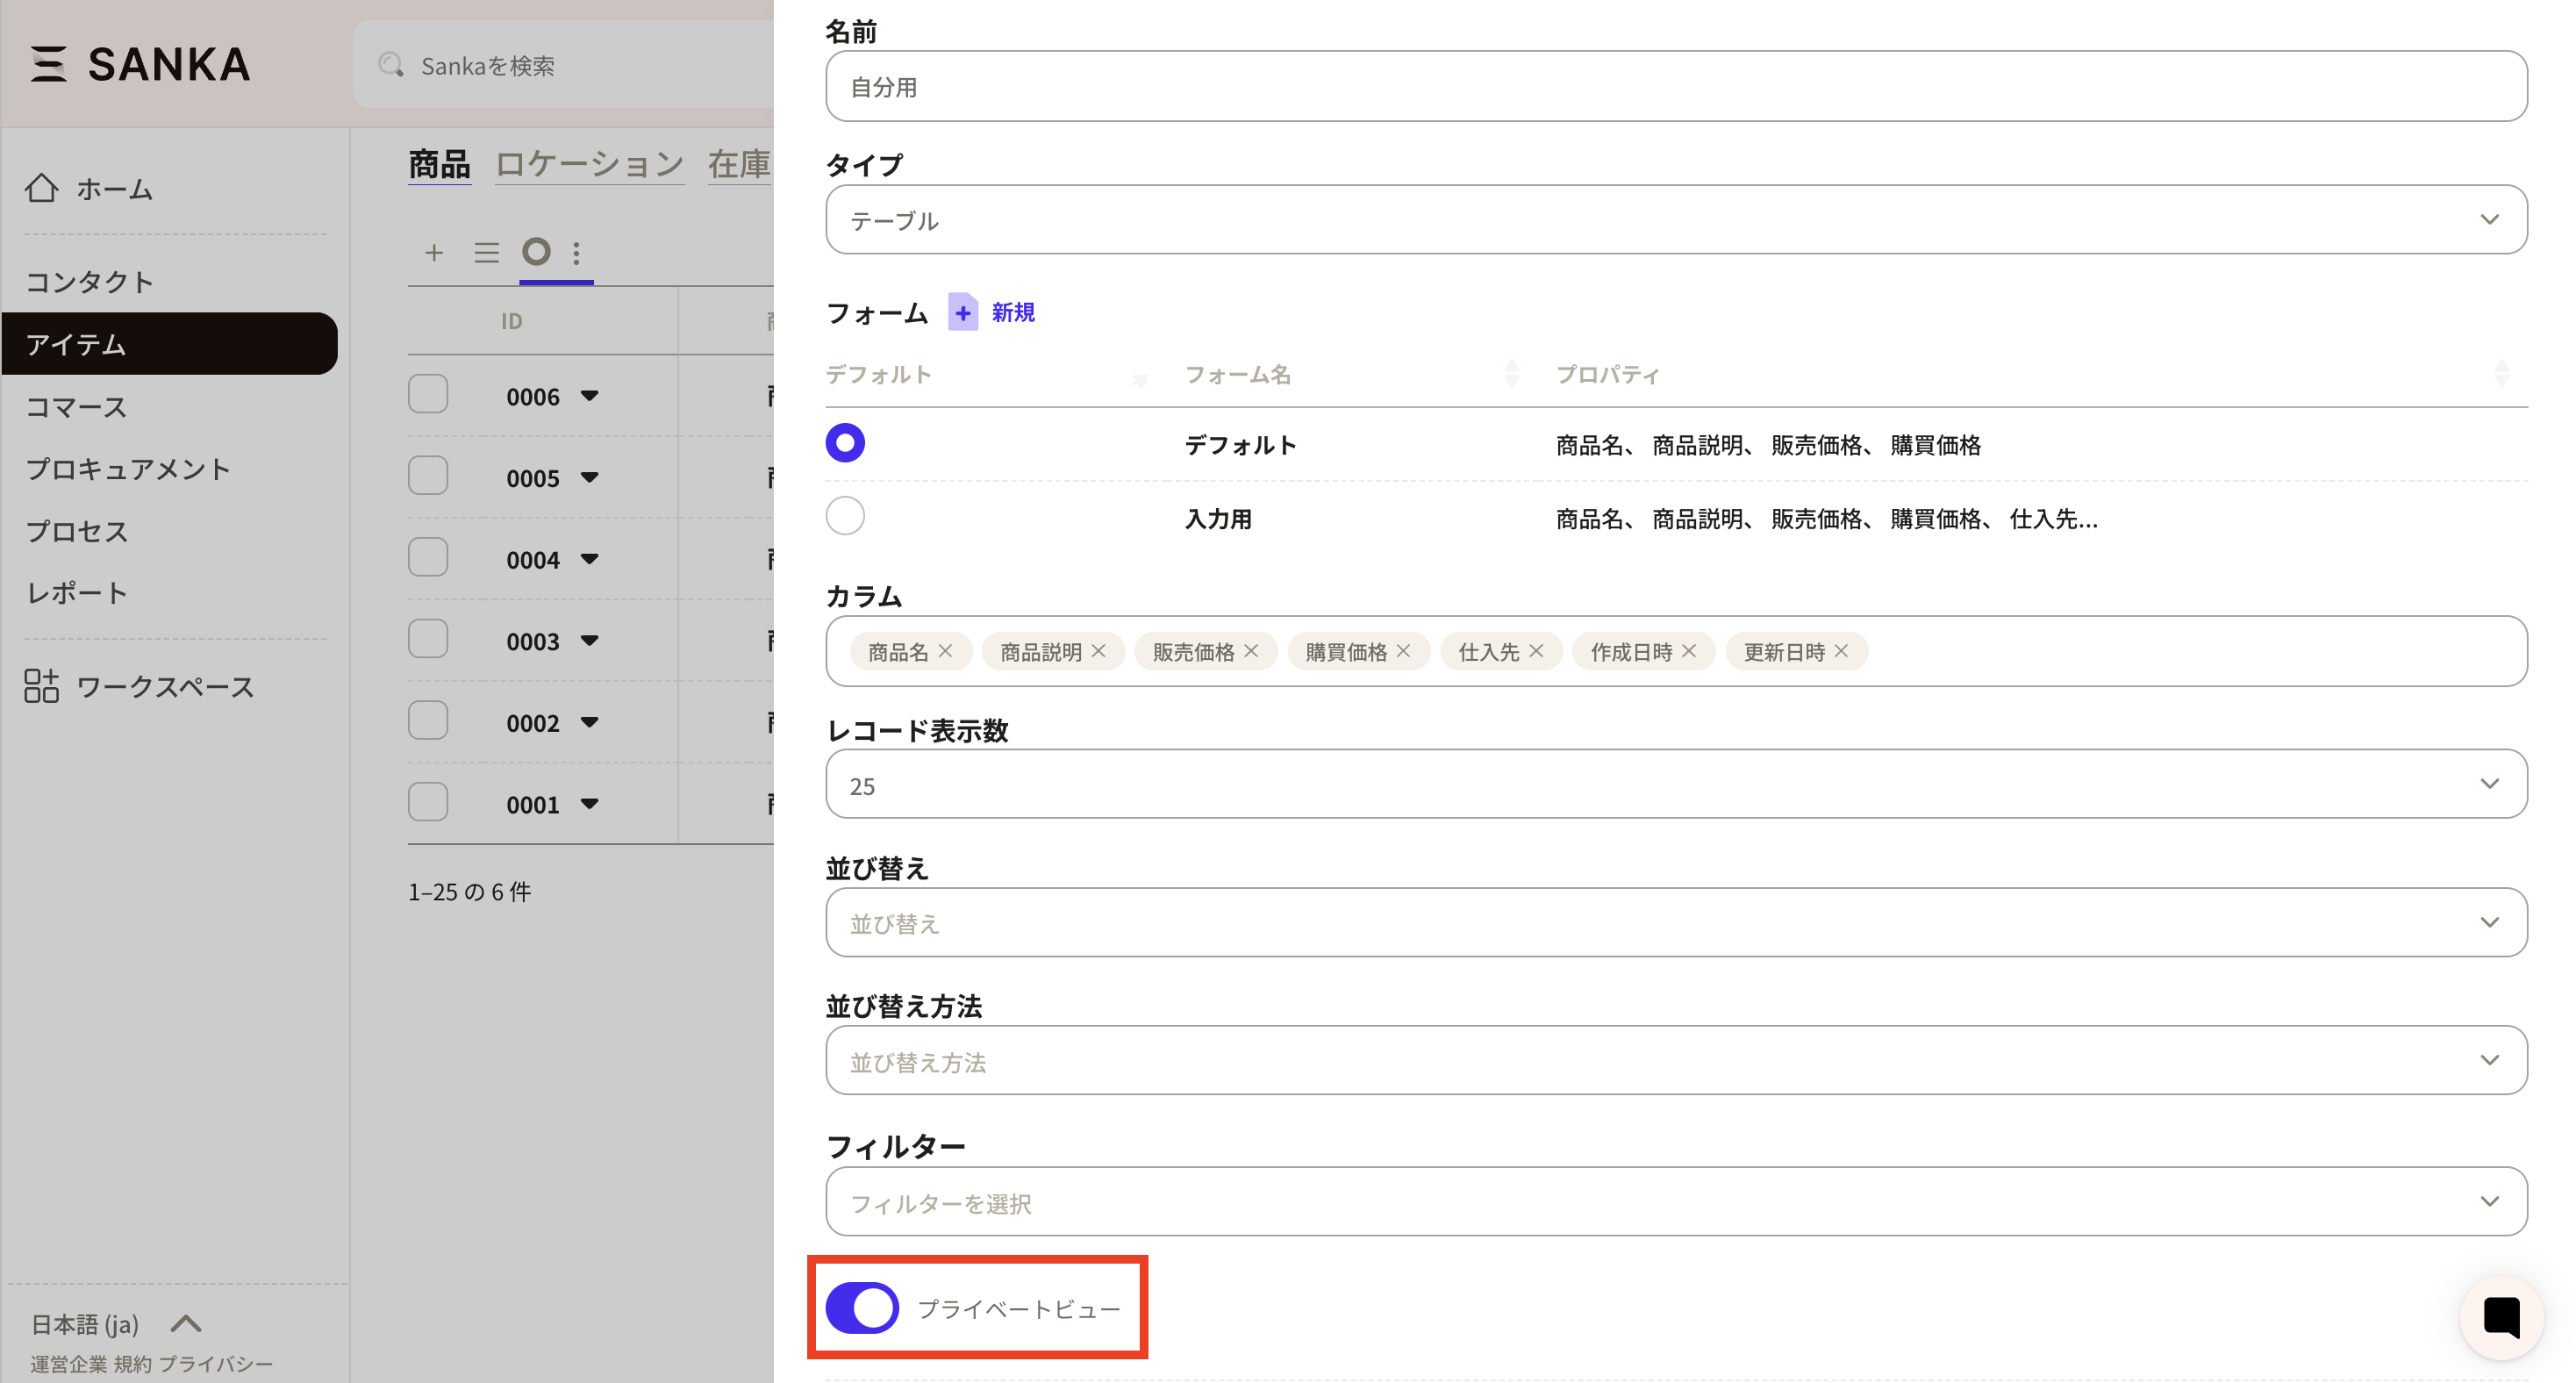
A private view can only be set at the time the view is created. *An existing public view cannot be changed to a private view.
When creating a view, please enable the Private View tab and register.
We have received many inquiries regarding forms. This section introduces how to add, edit, and delete forms. First, we will introduce how to add a form.
There are two methods for adding a form. One is to create it from View Management, and the other is to create it directly from the form screen.
① Open View Management. Here, we are opening the default view settings.
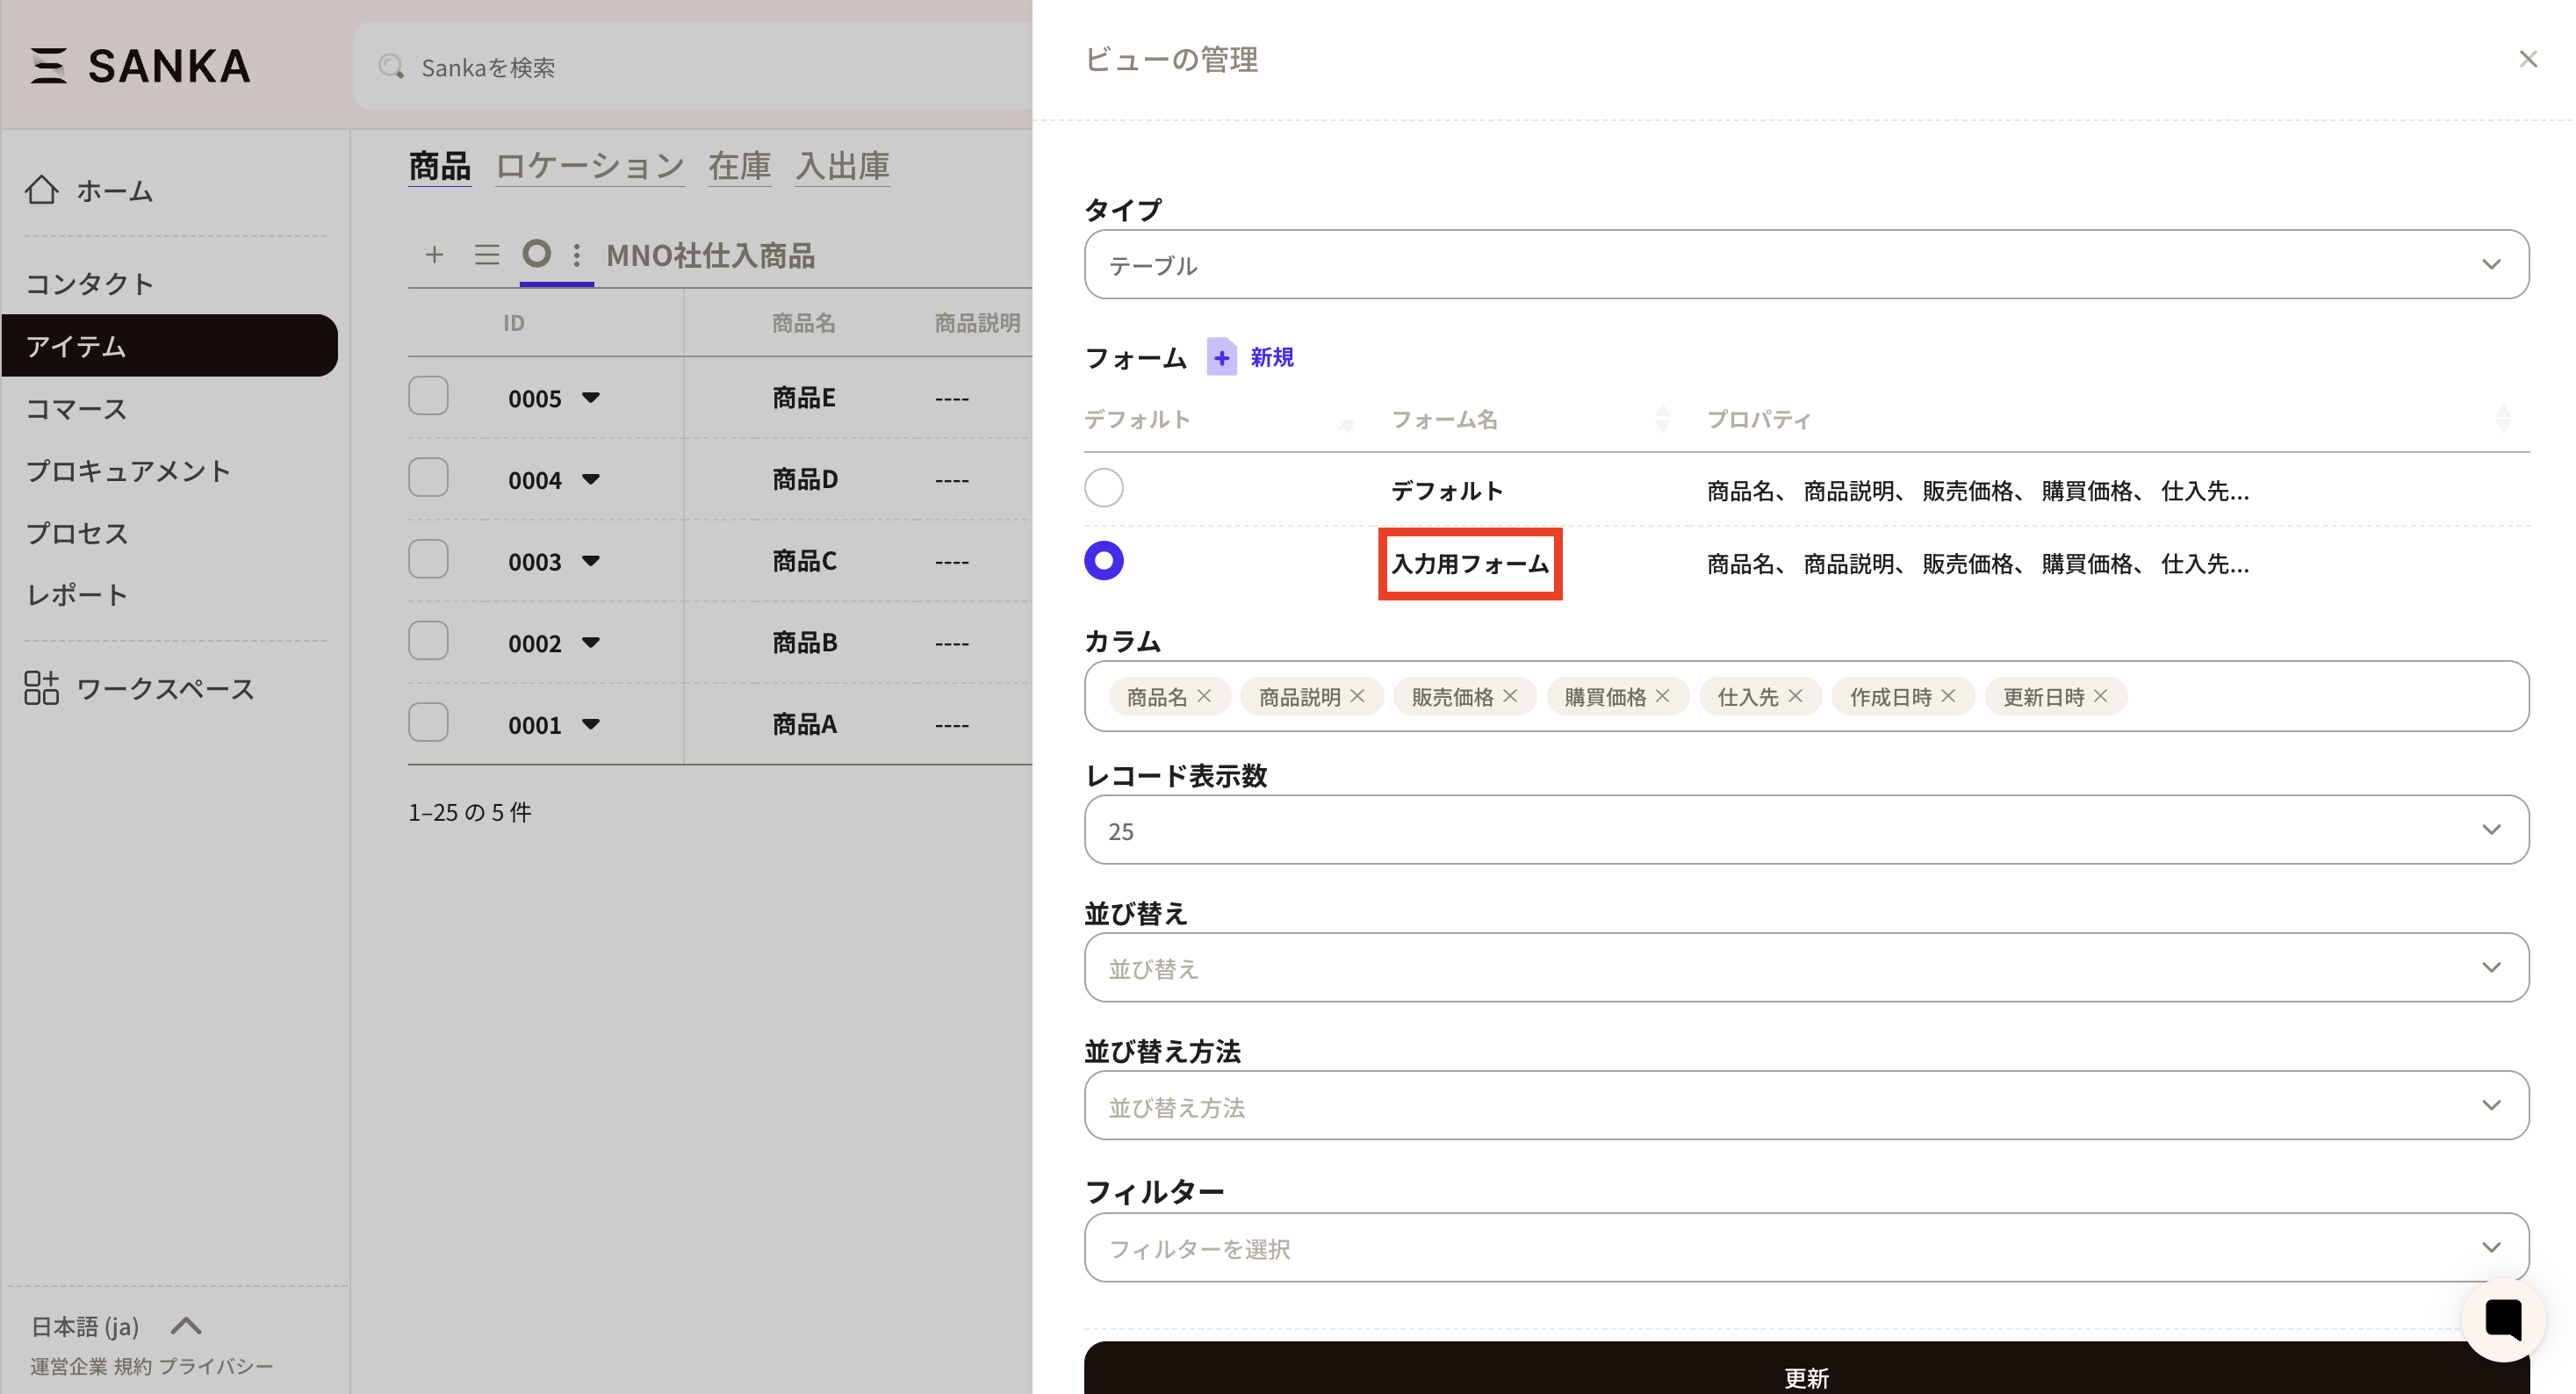
② The View Management screen will be displayed. Click the "New" button on the right of the form to create a new form.
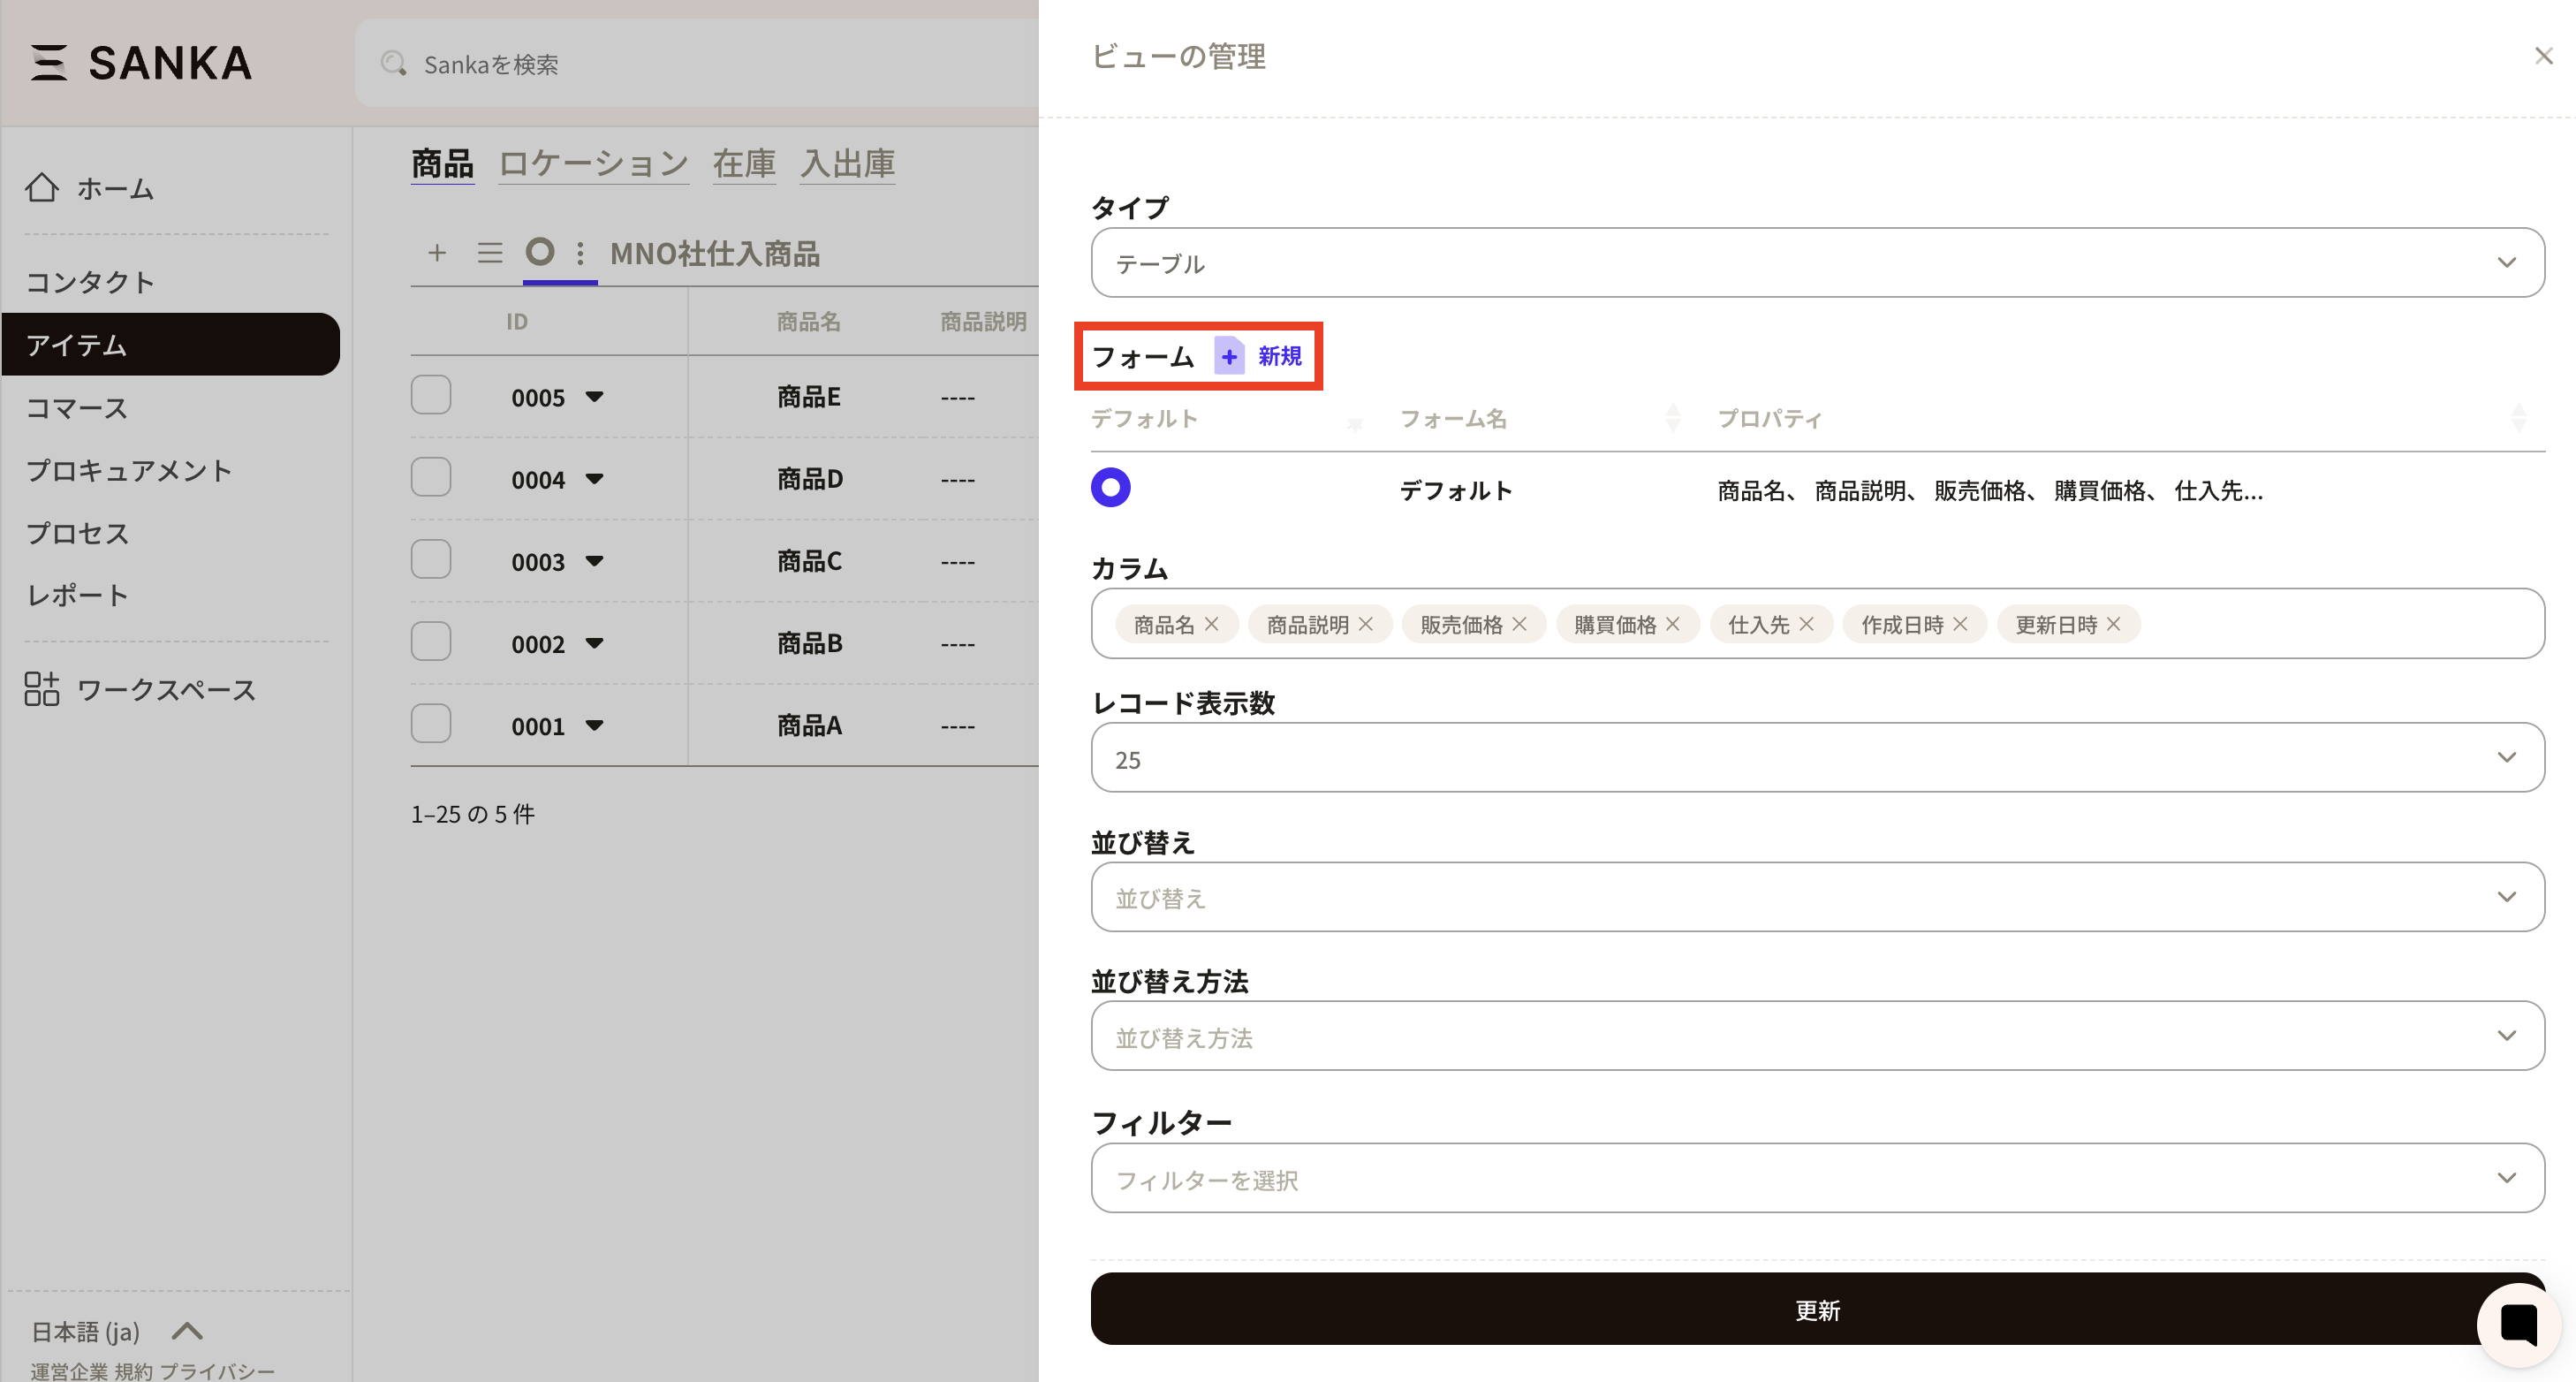
③ The "Create Form" screen will be displayed.
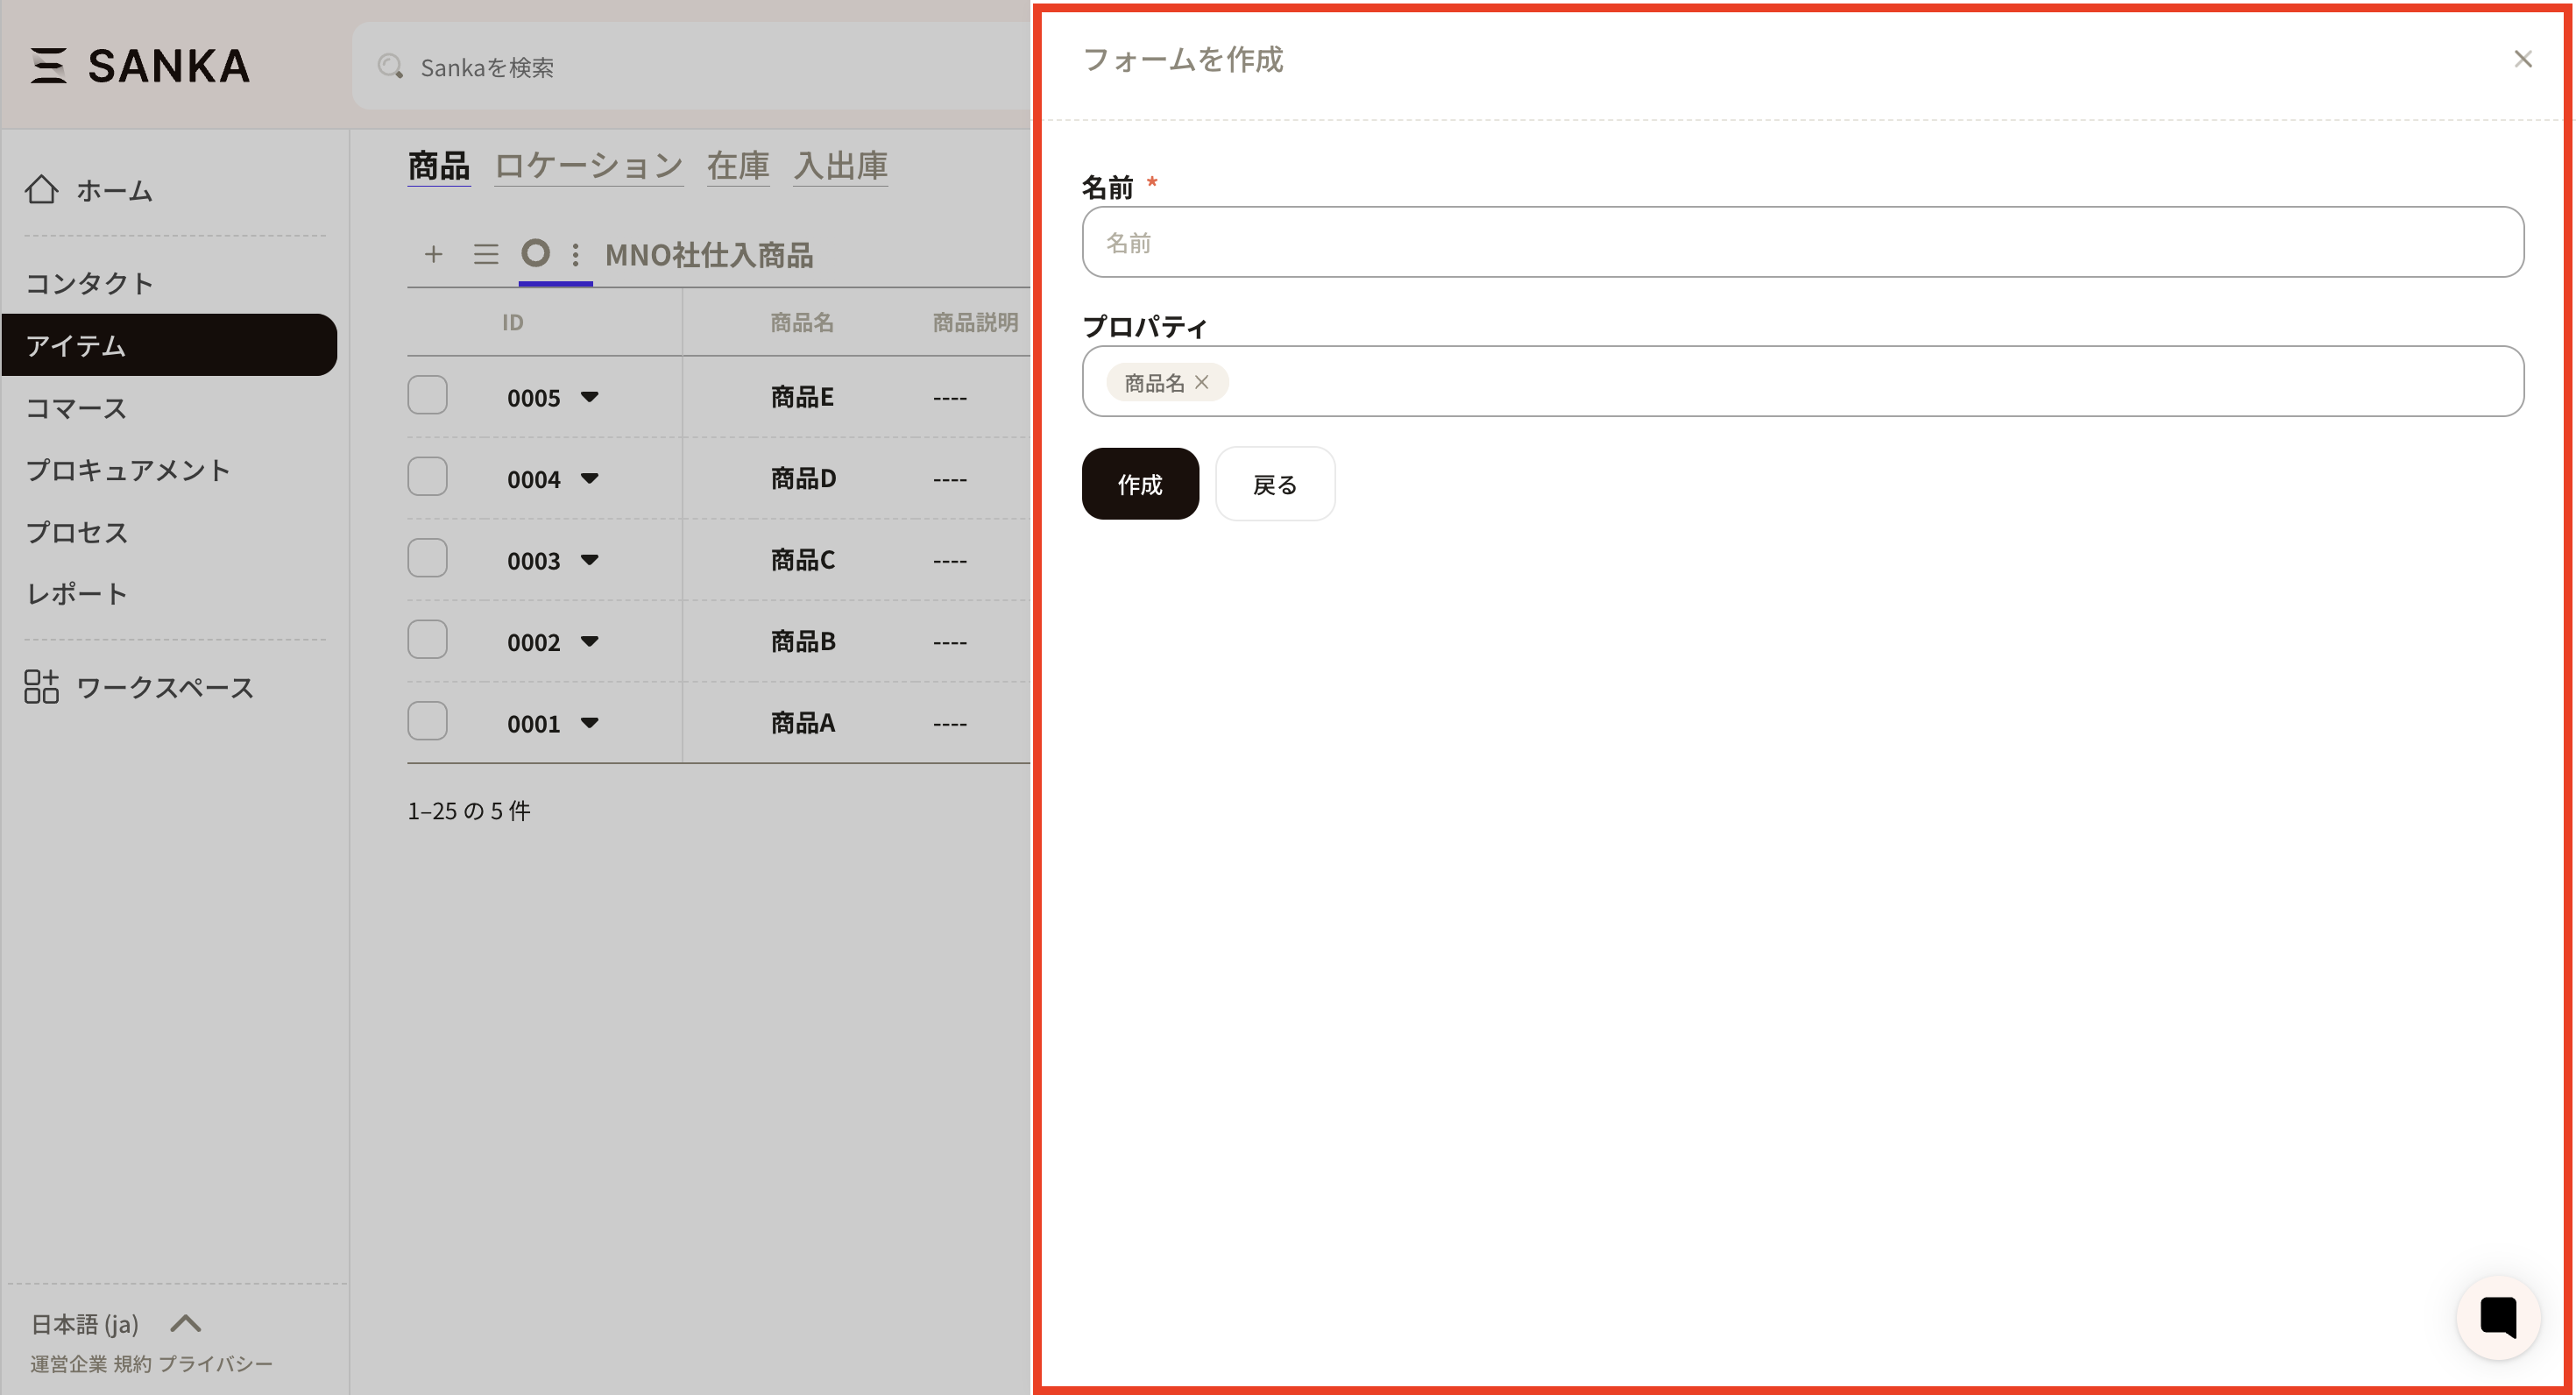
④ Set the required items.
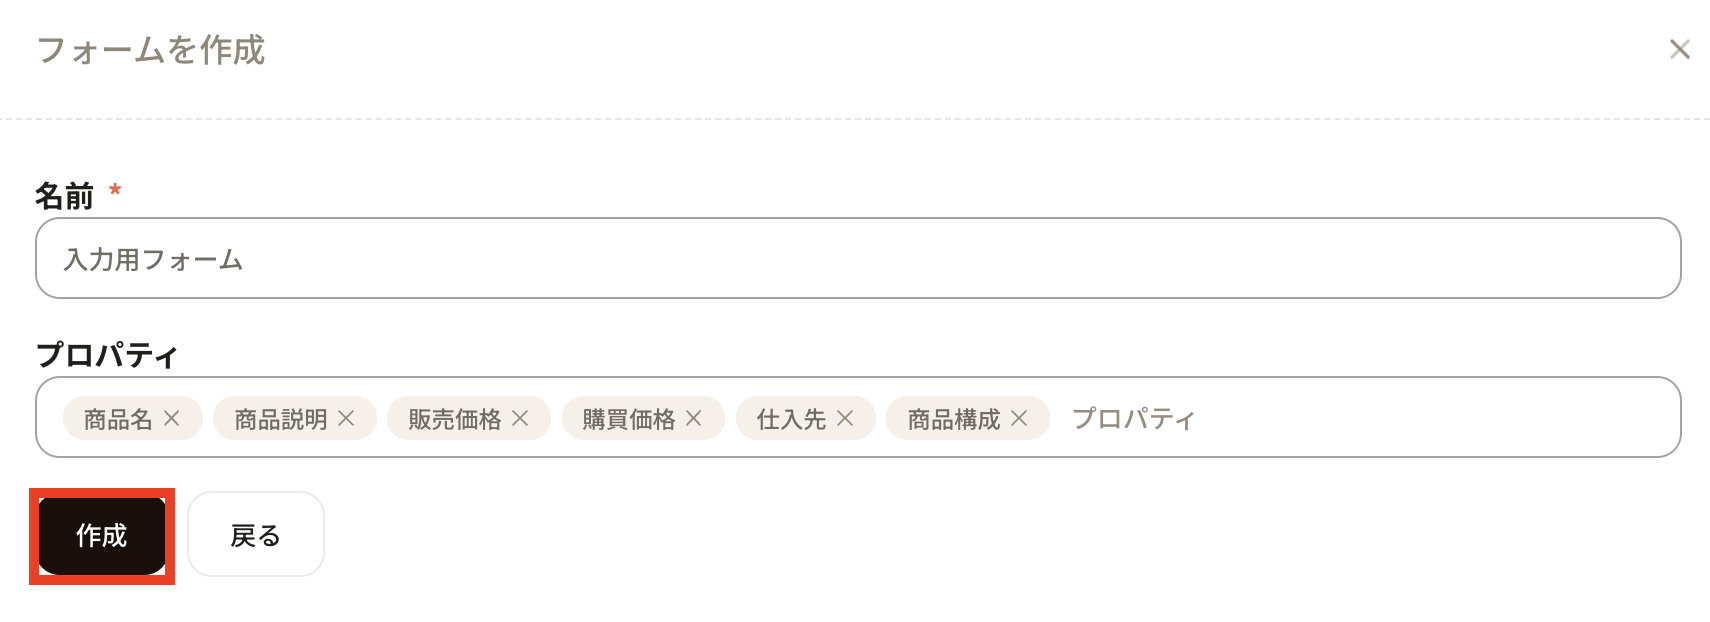
Please set a name that is easy to understand.
Select all properties that you would like to be entered during information registration. You can also change the order by dragging the property name.

⑤ Once you press the Create button, it will be registered.
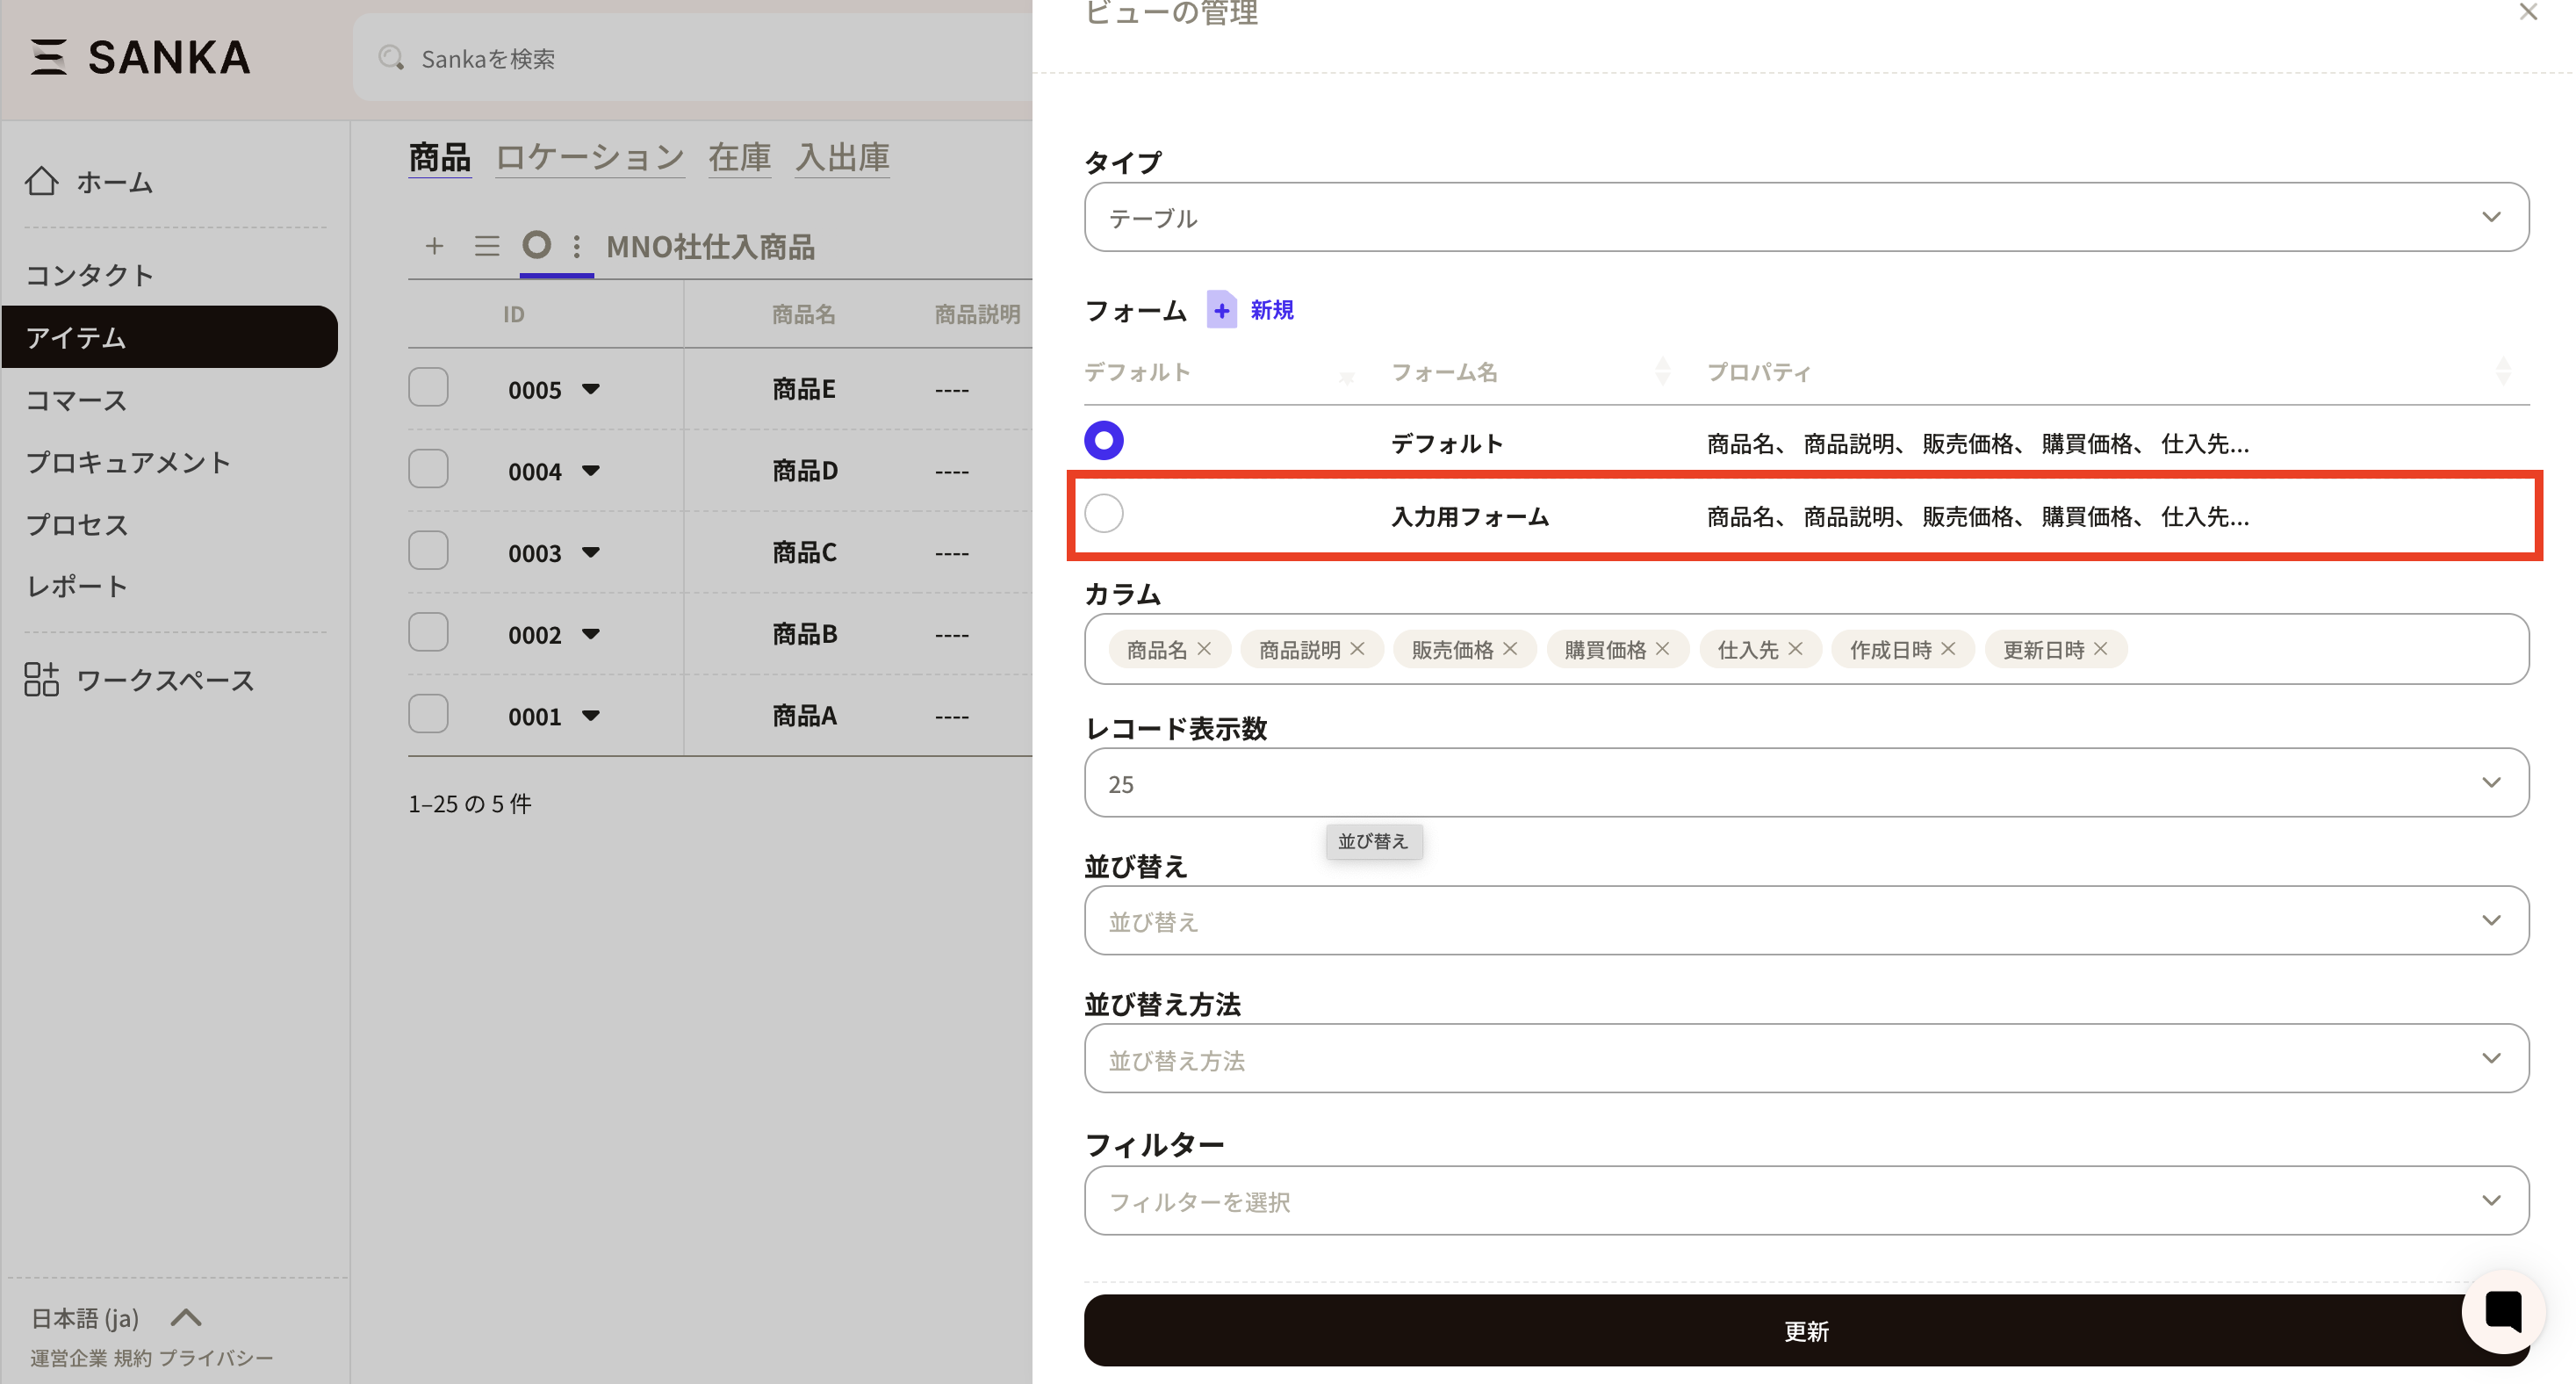
⑥ Once registration is complete, you will return to the view management screen. The form you have added will be reflected. The information of the added form will be reflected in the management of all views of the same object. Therefore, please be careful not to accidentally edit or delete forms registered in different views, as they will also be reflected.
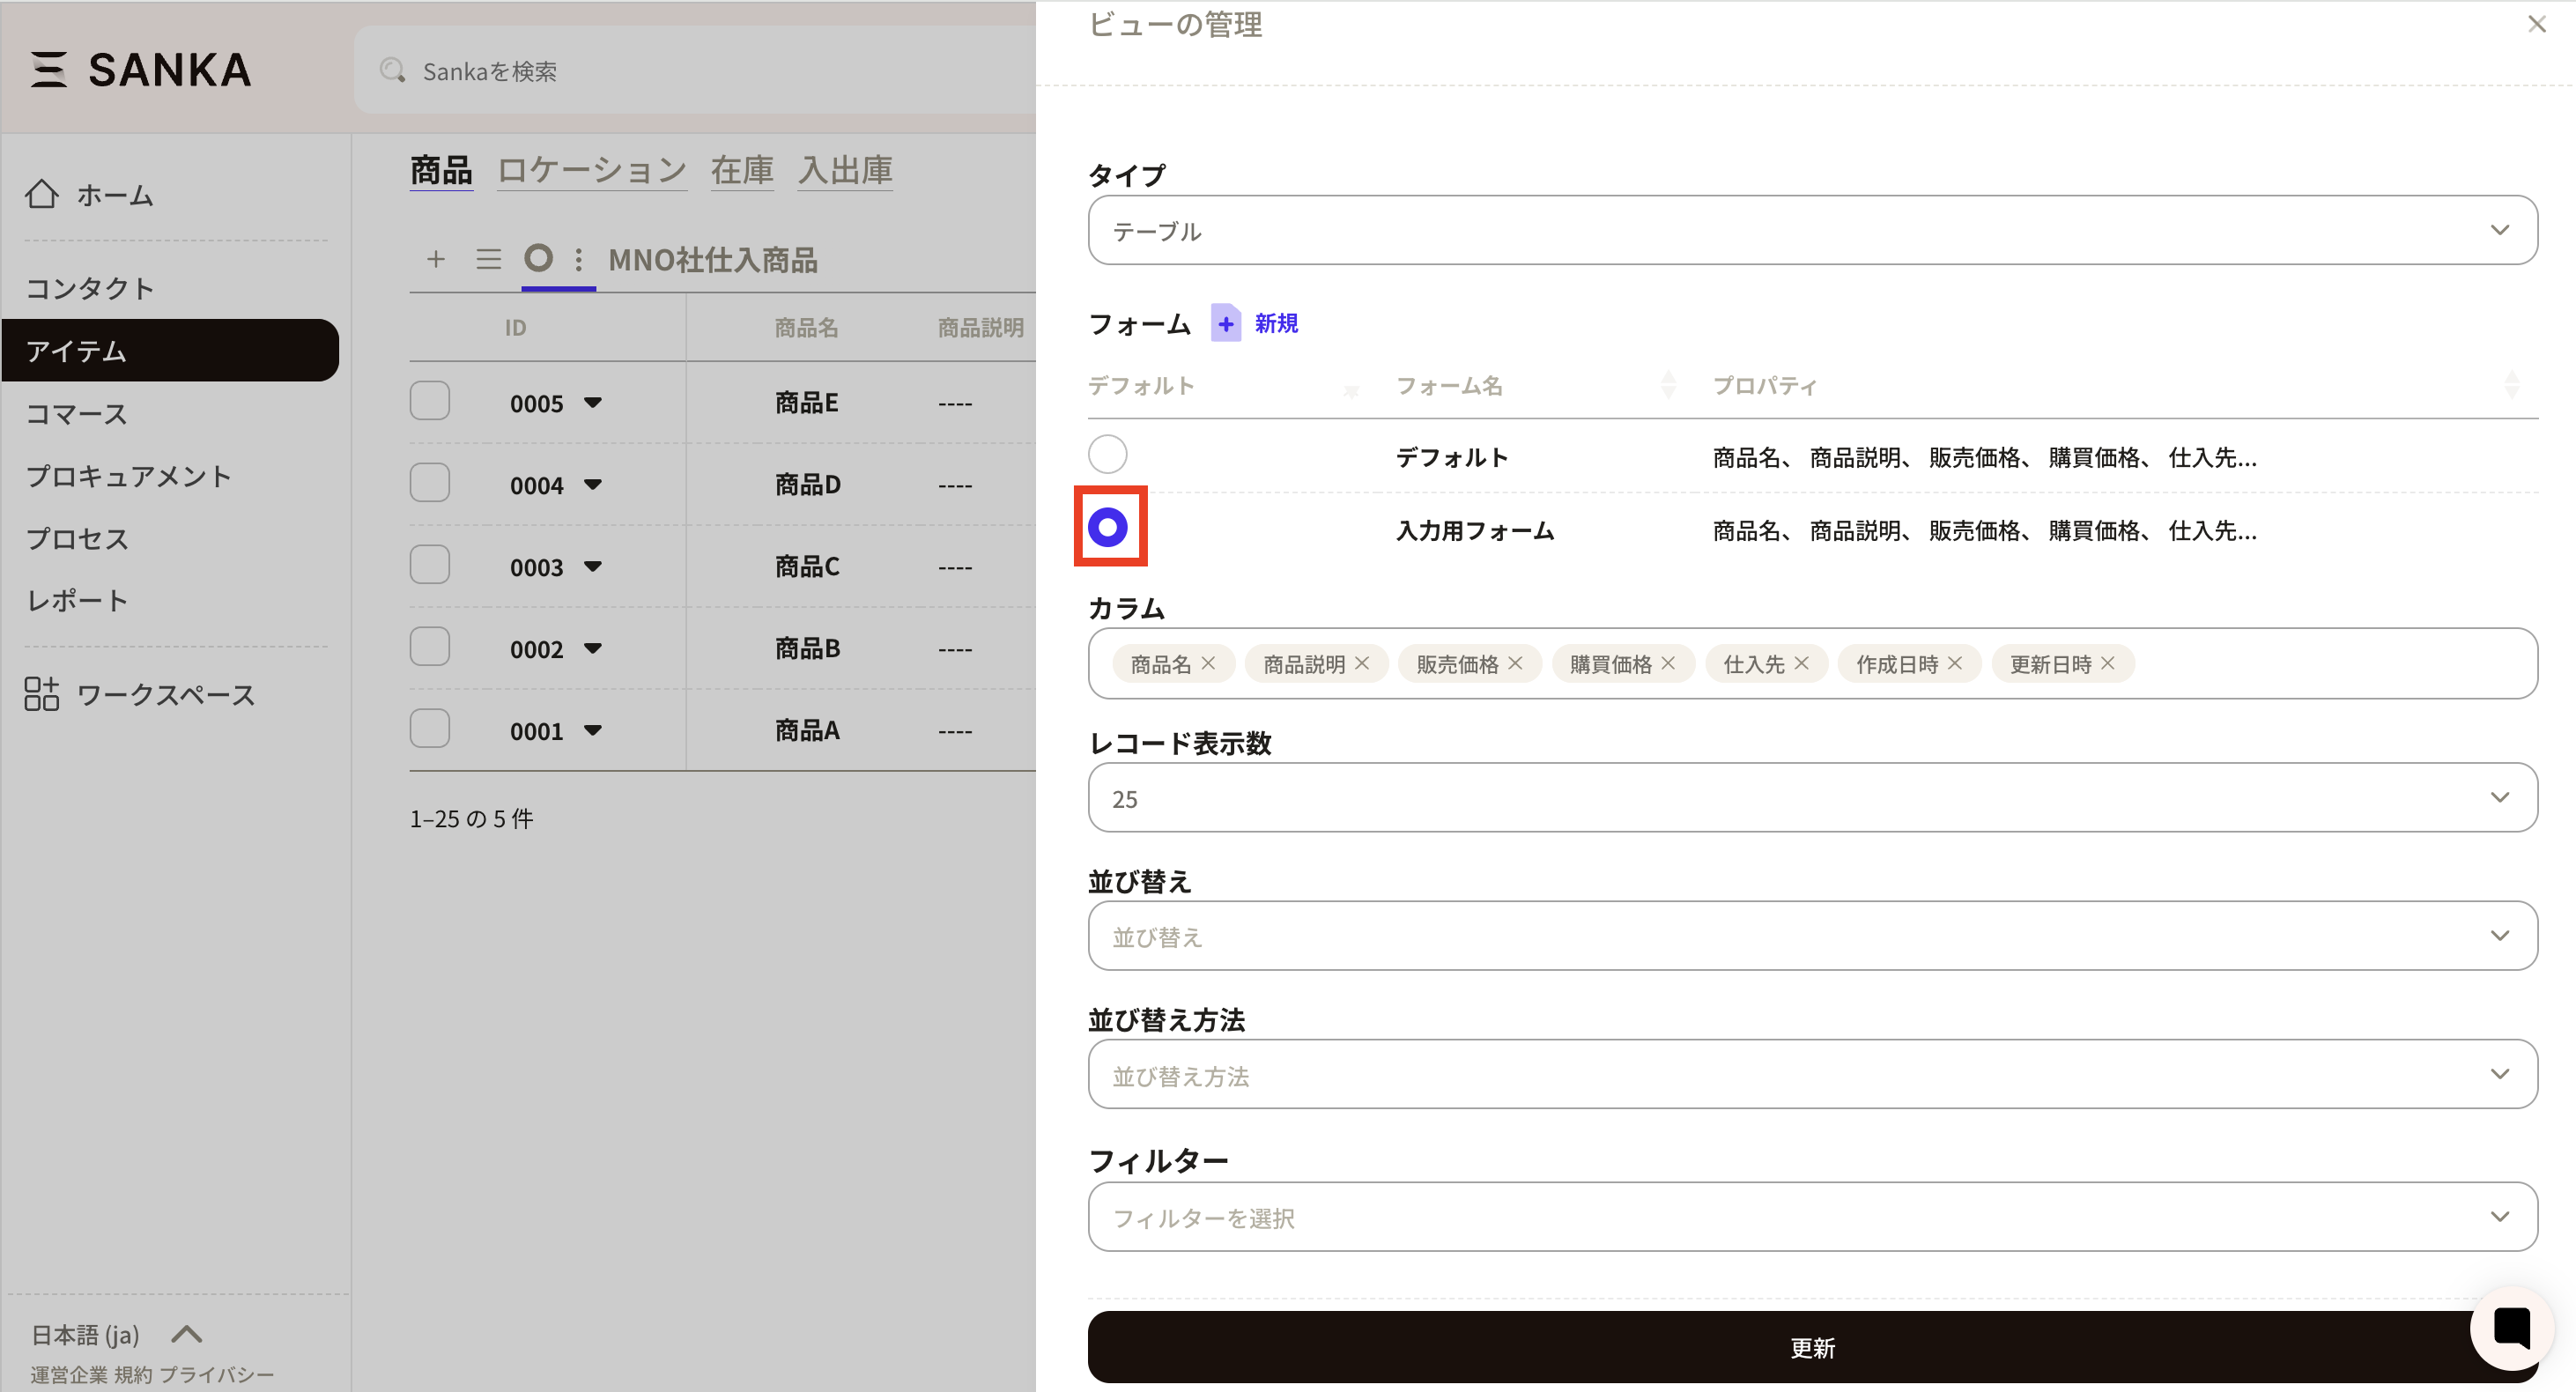
⑦ To apply the added form to an actual record input form, click the round check on the left side. Since this is the default view management screen, it will be set for the default view's form. Next, click the update button to apply the changes.
⑧ Open “New” in the management screen of the default view. You will see that the form you previously configured has been set as the record creation form.
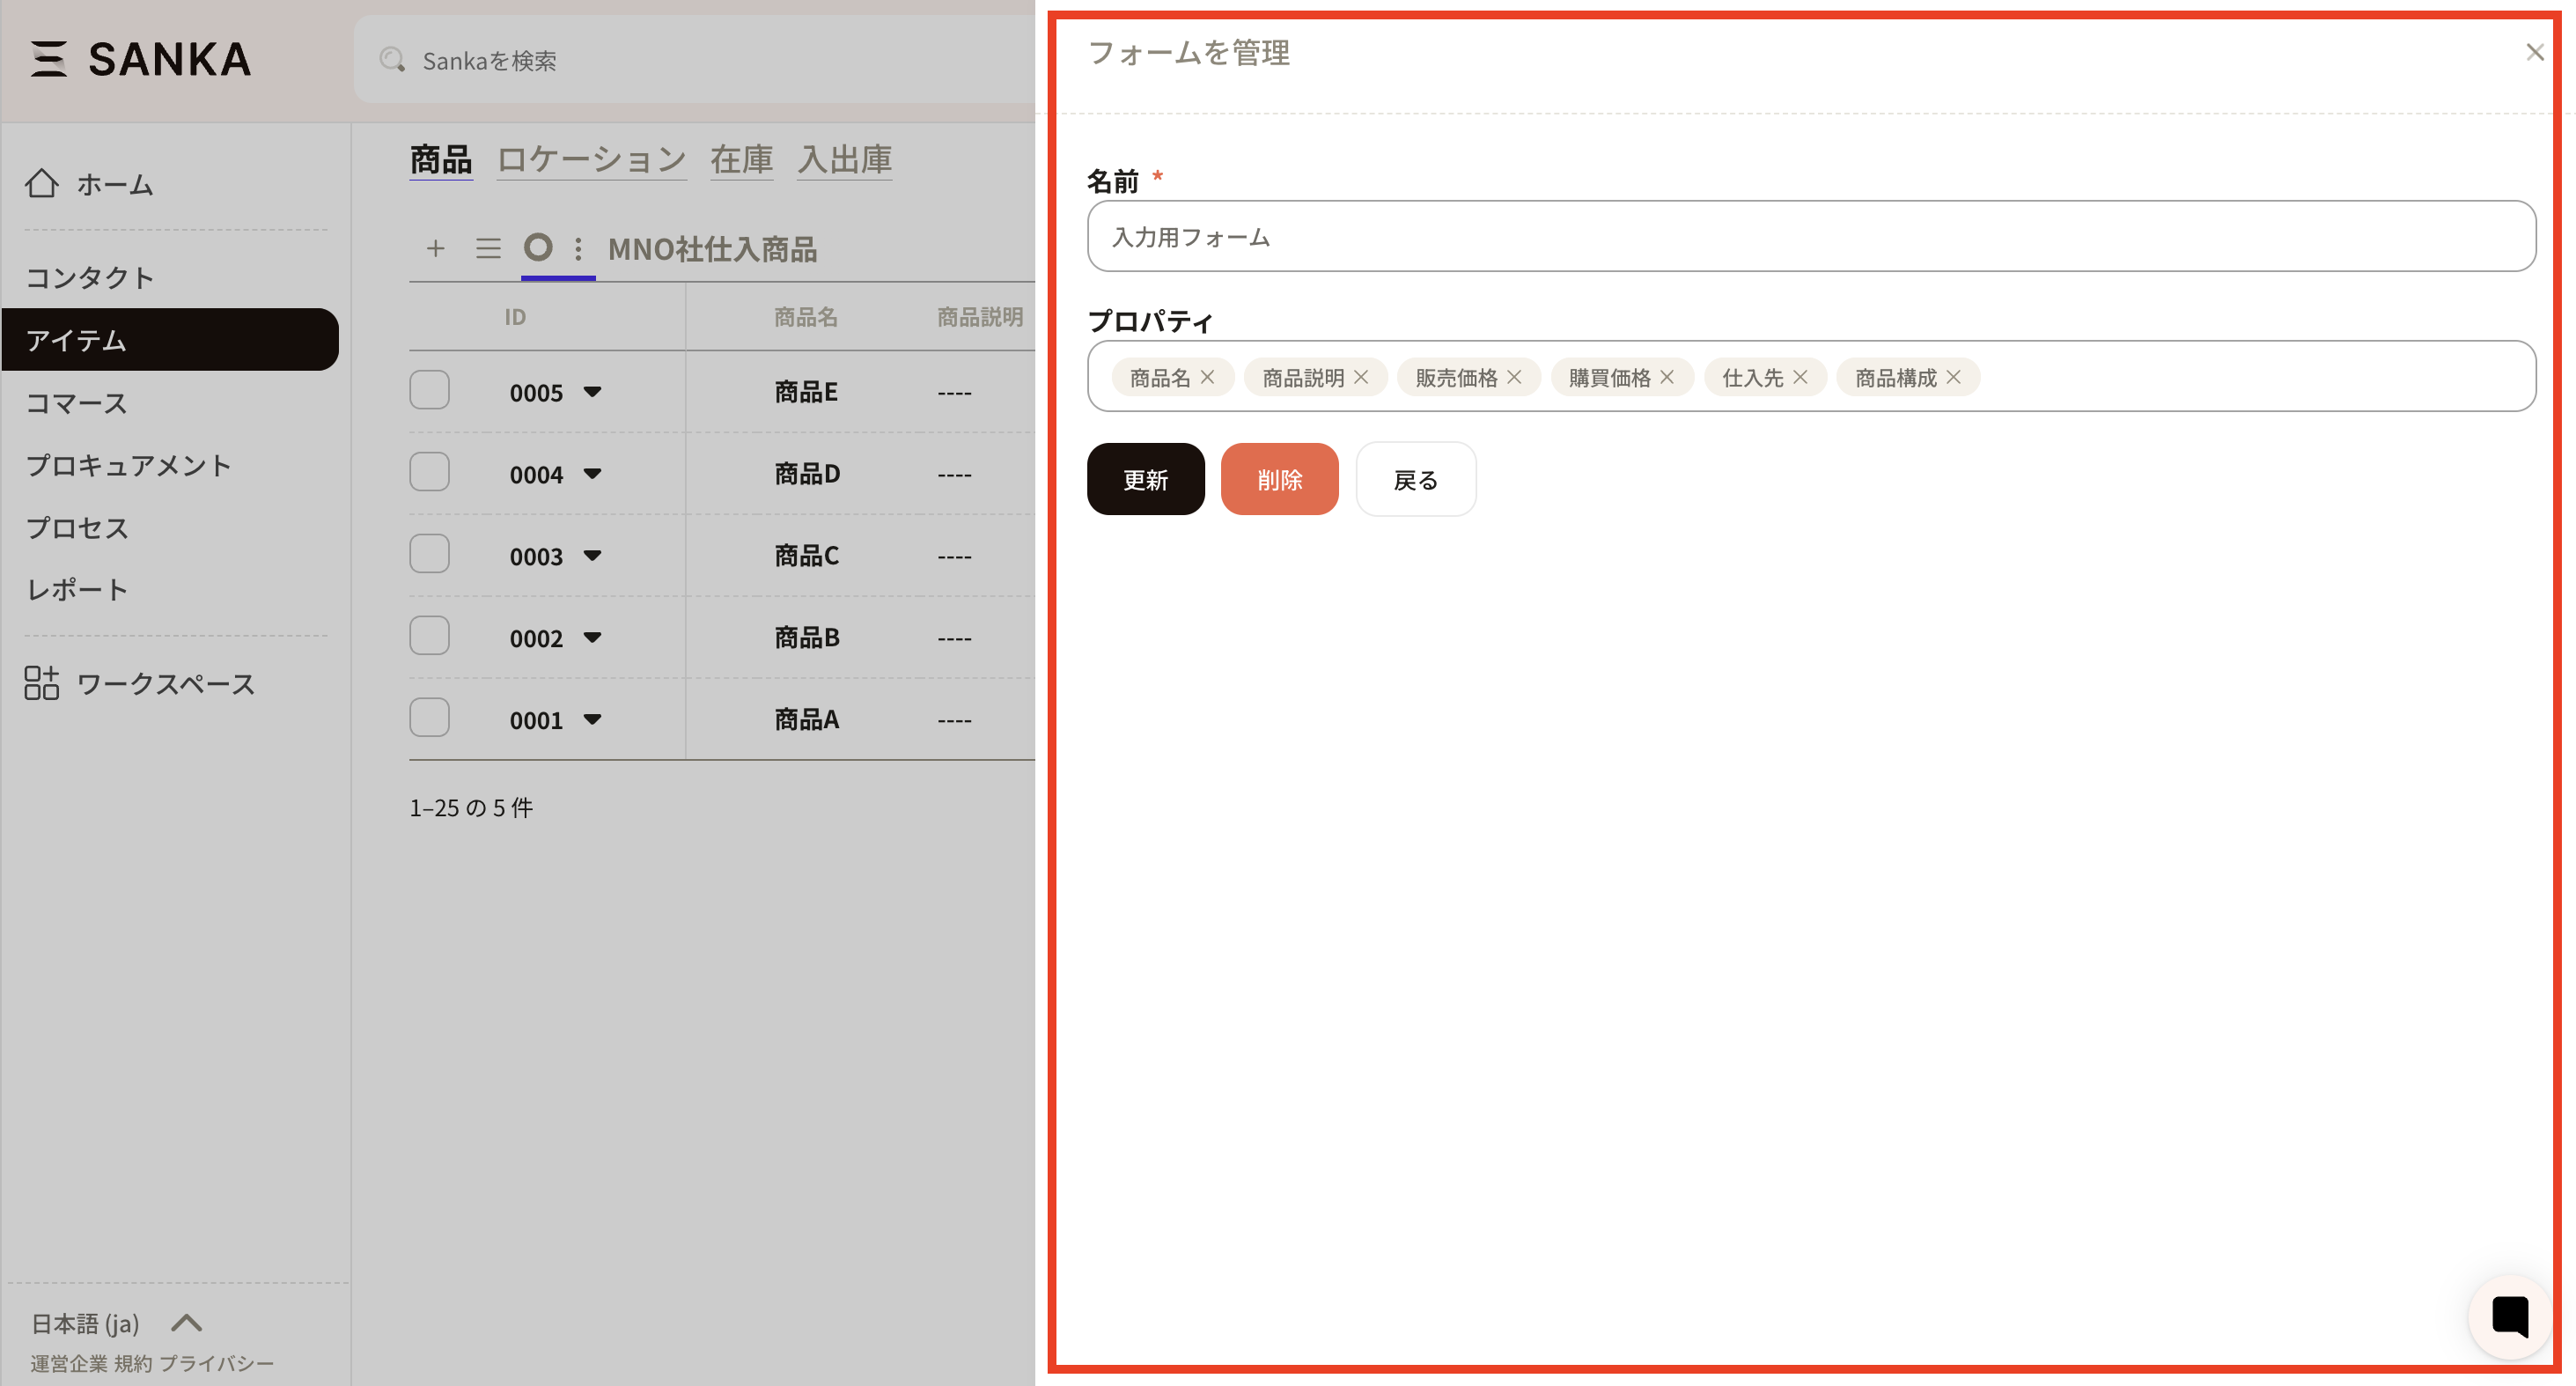
⑨ To edit or delete a form you have created, click the name of the registered form. *Please note that the default cannot be changed or deleted.
⑩ The 'Manage Form' screen will be displayed, so please make corrections as necessary. After making corrections, click the 'Update' button to save the changes. Additionally, if you wish to delete the form you created, you can do so by clicking the 'Delete' button.
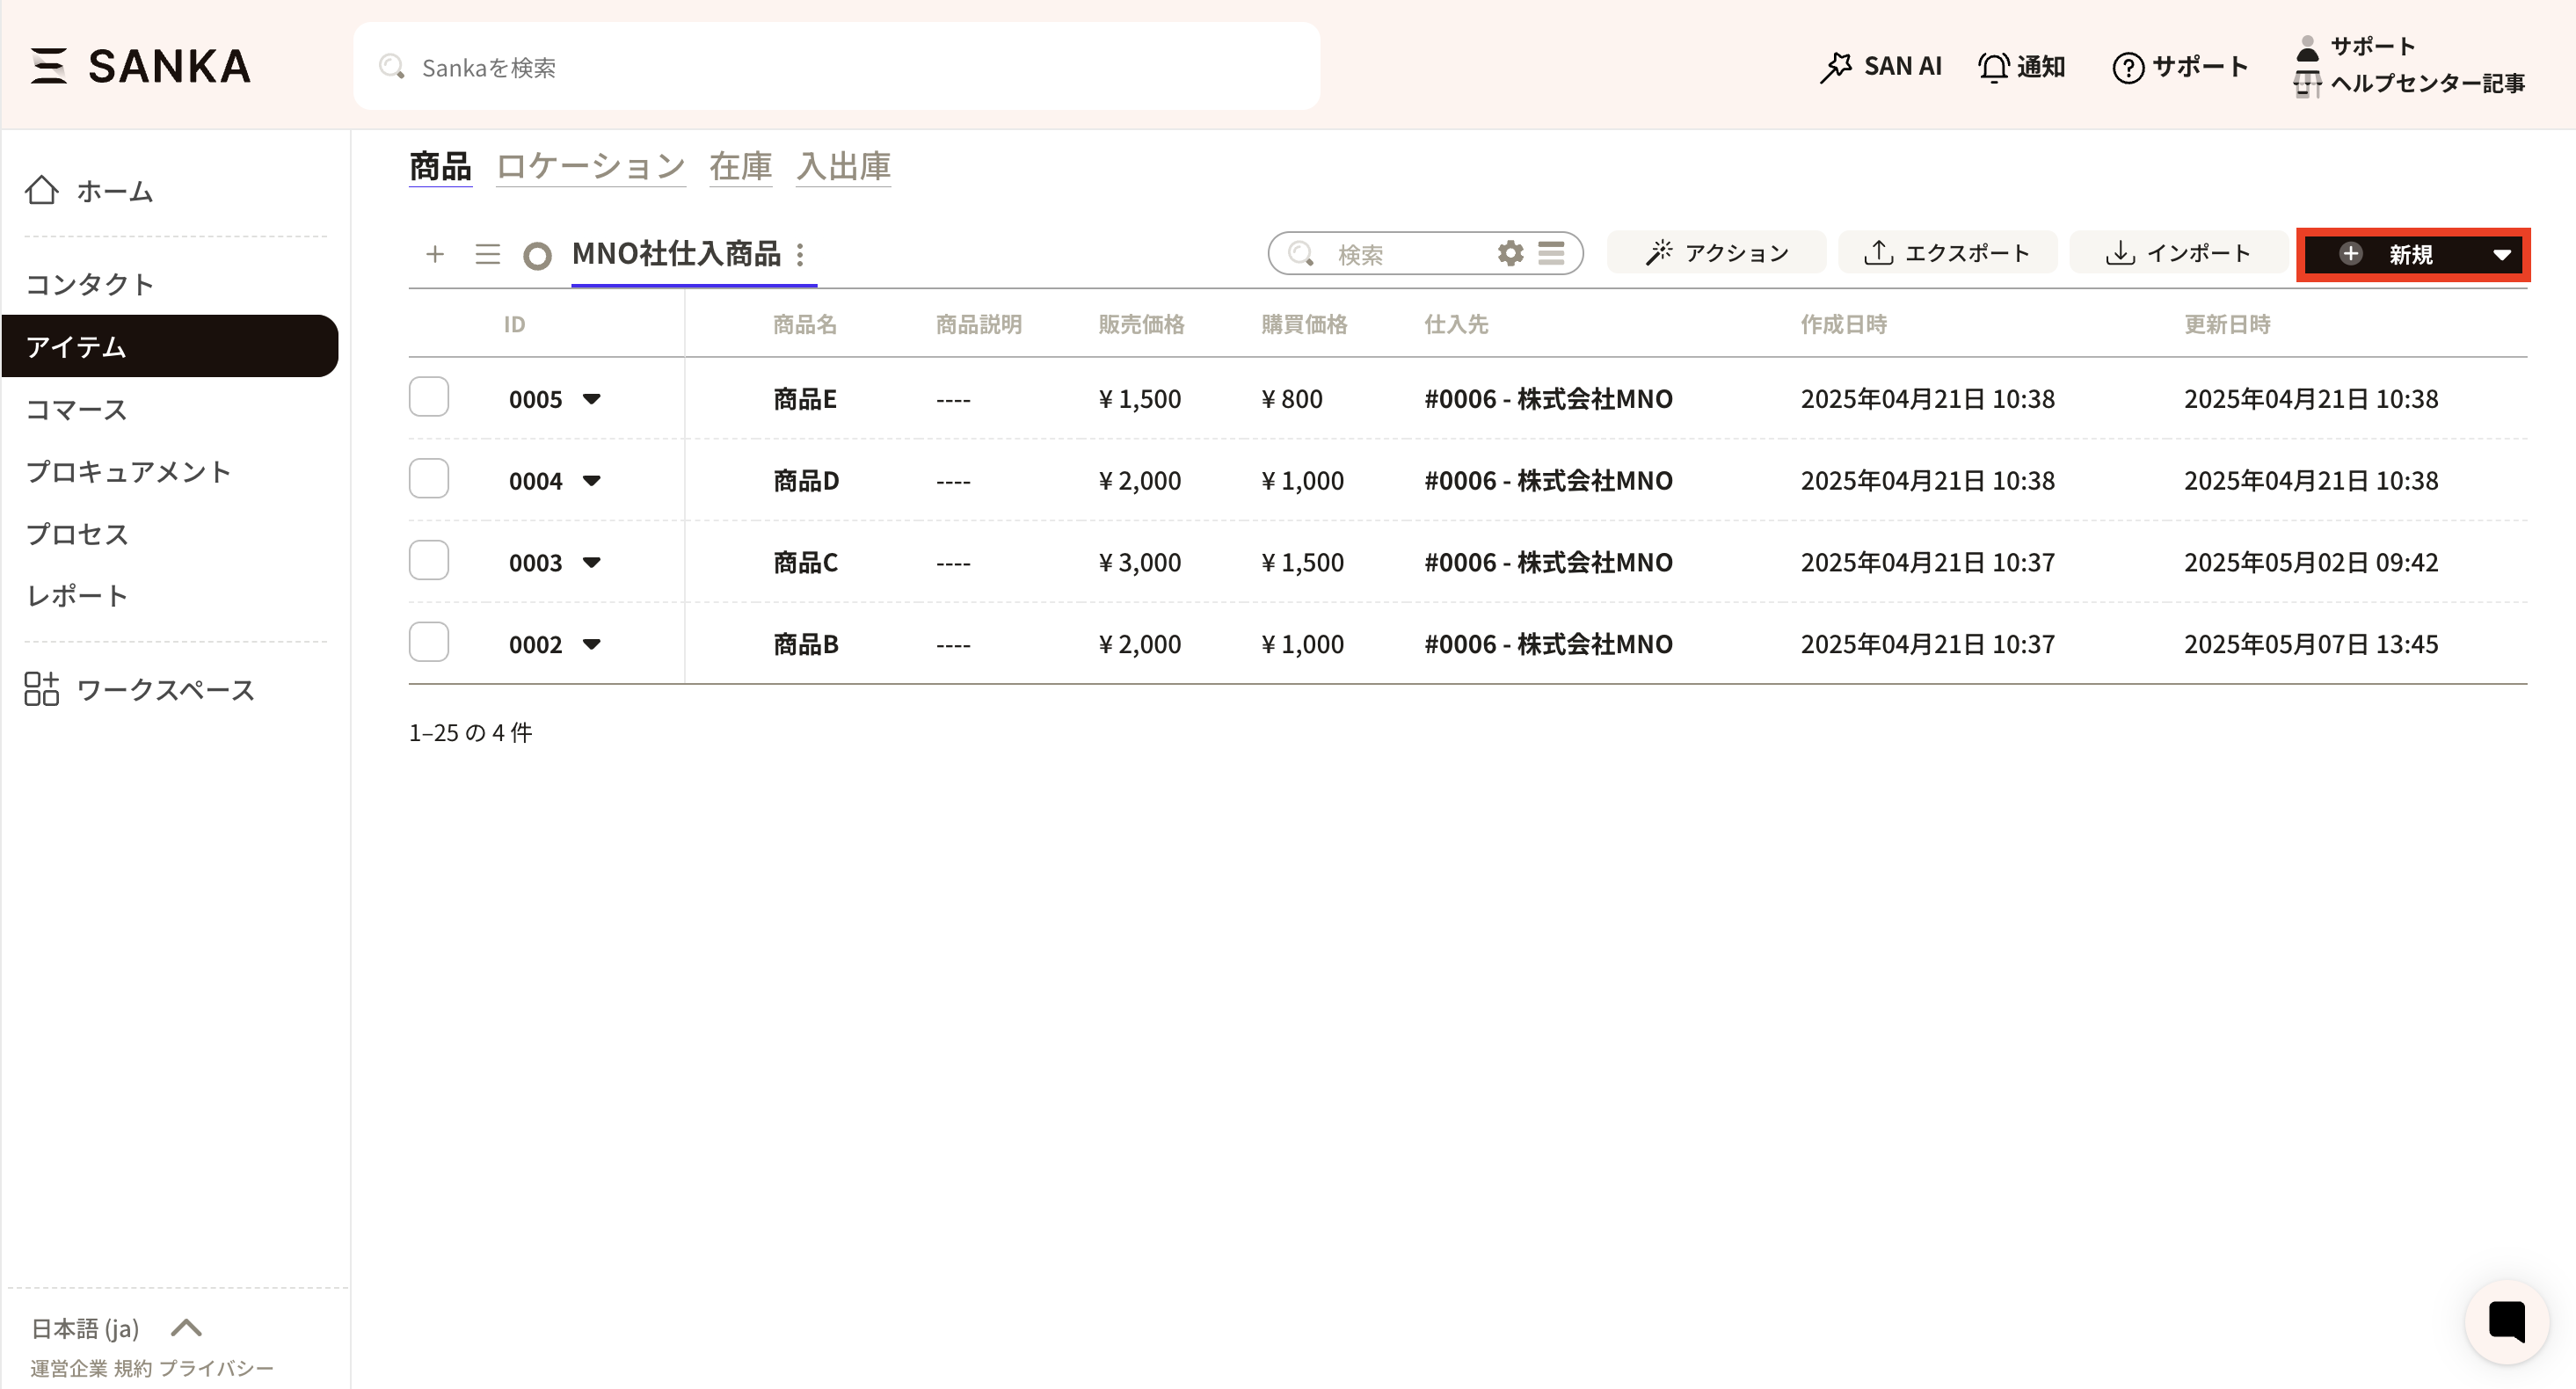
From here, we will explain how to create a form from the record creation form.
① First, select the view you wish to add.
② Next, click the New button at the top right to access the record creation form.
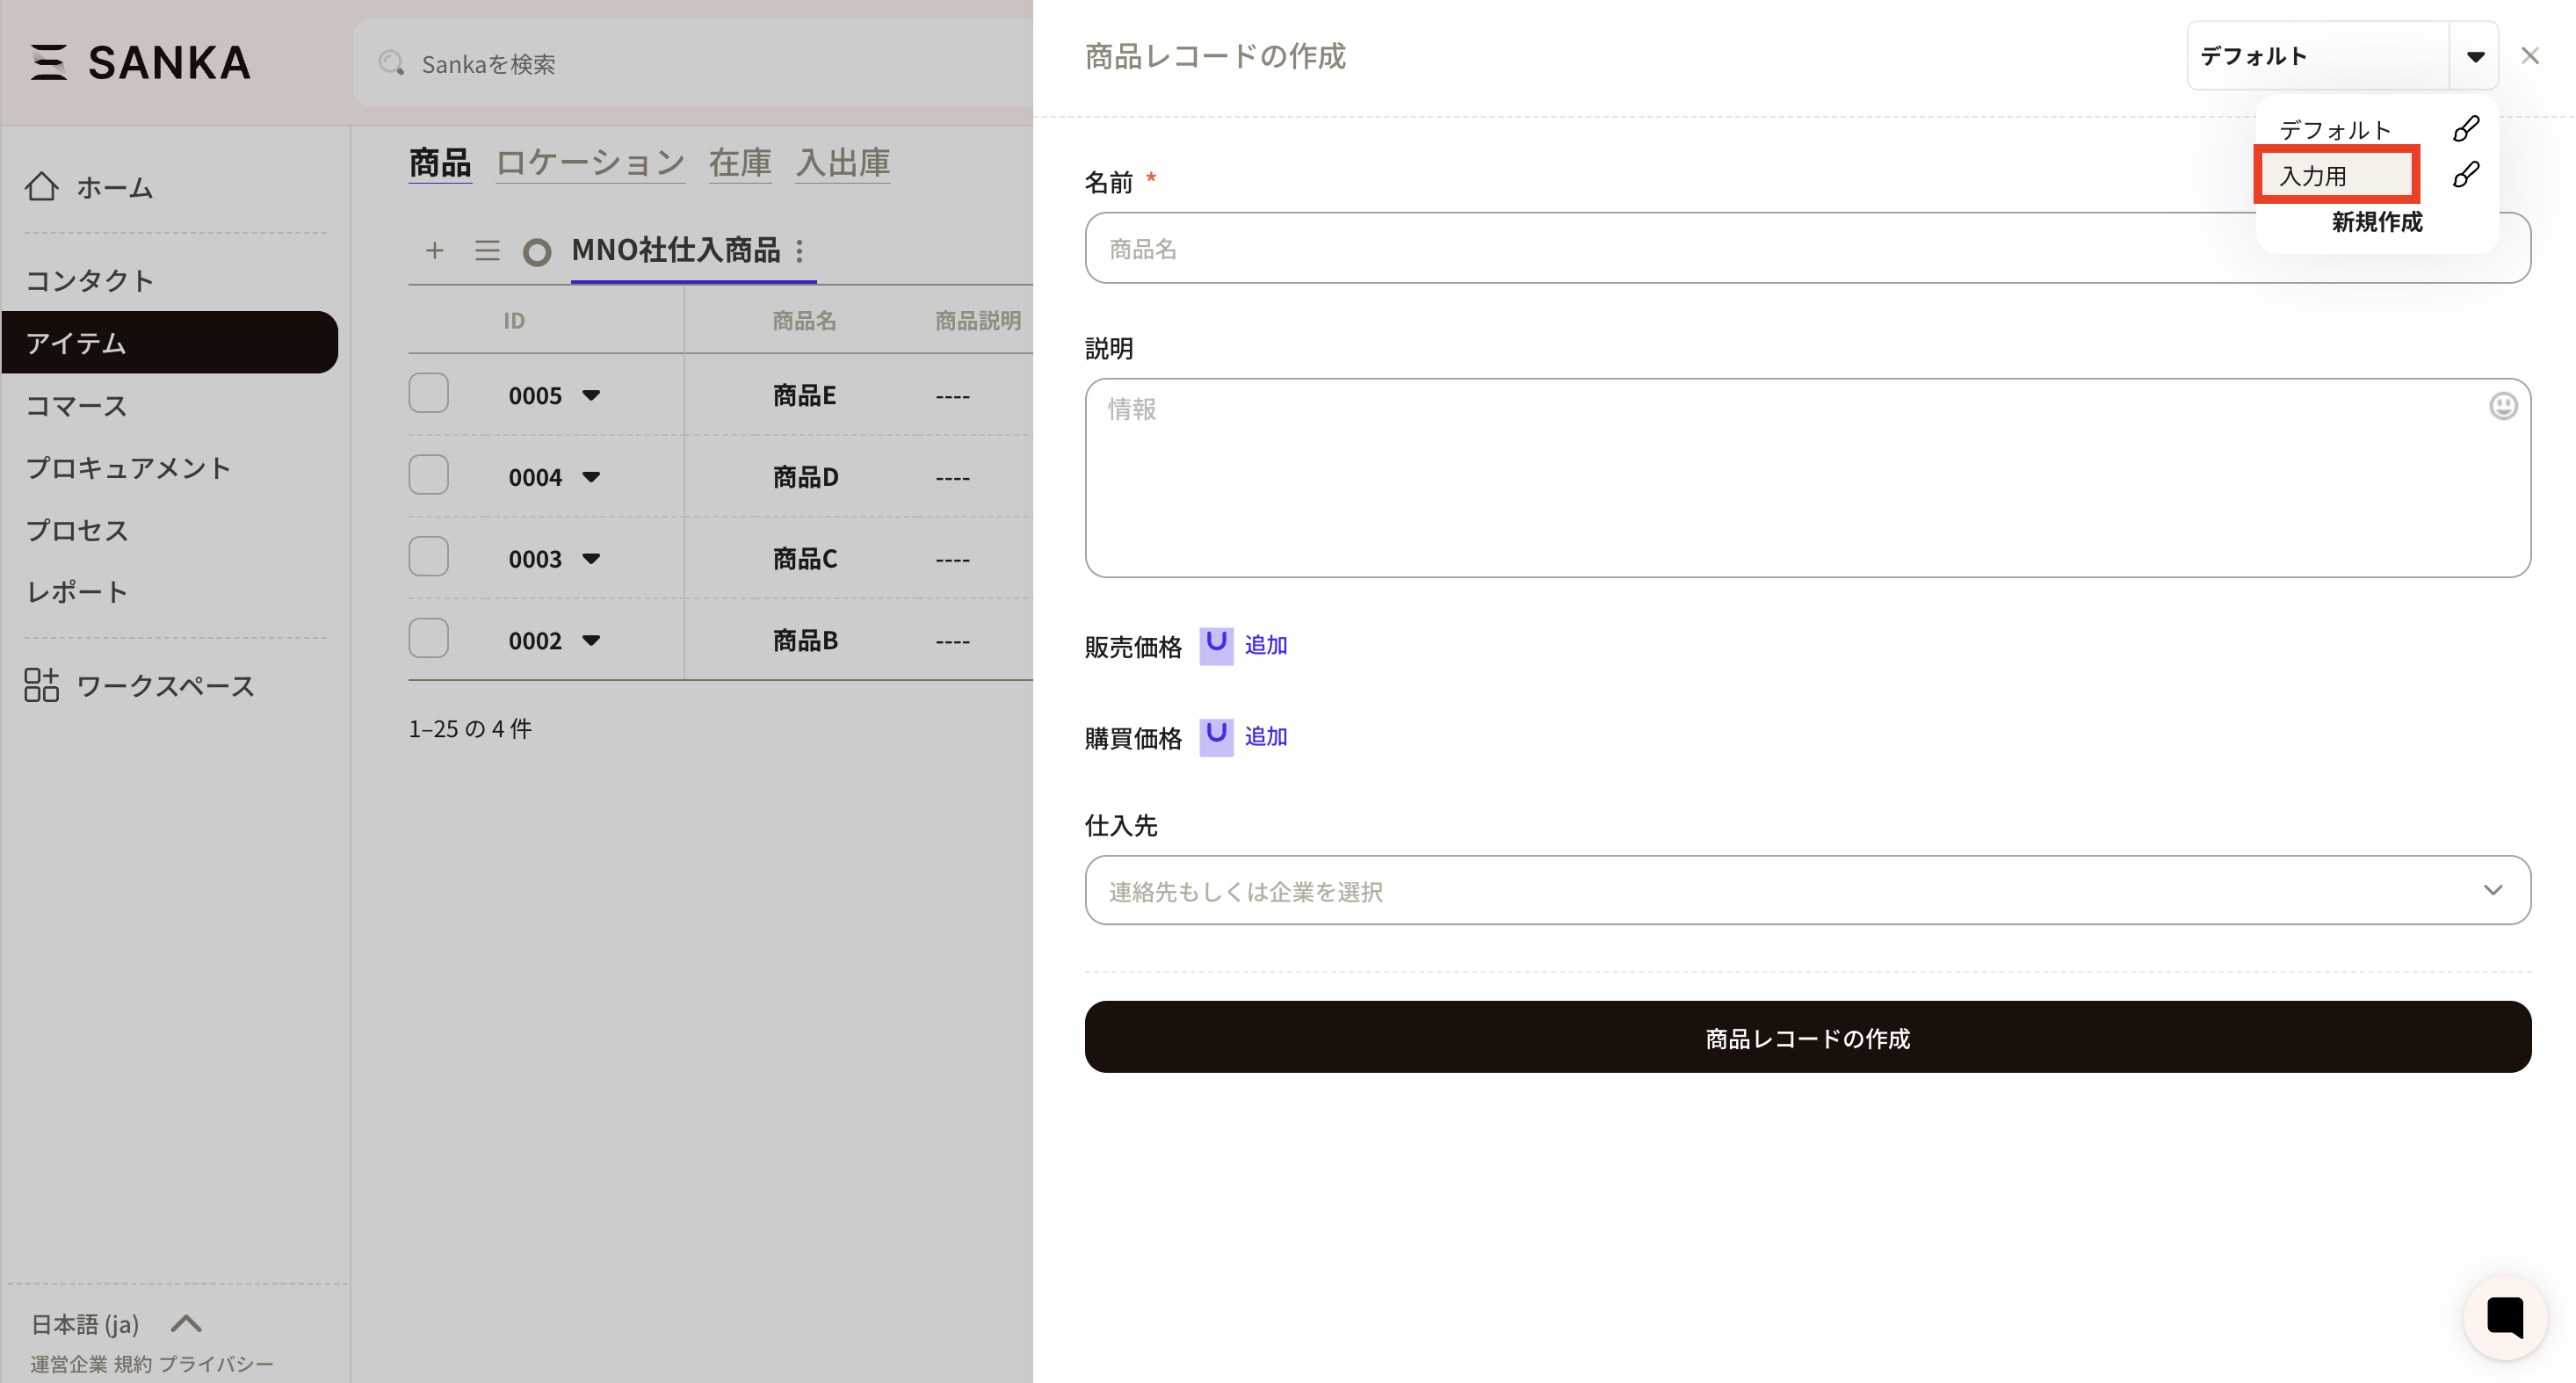
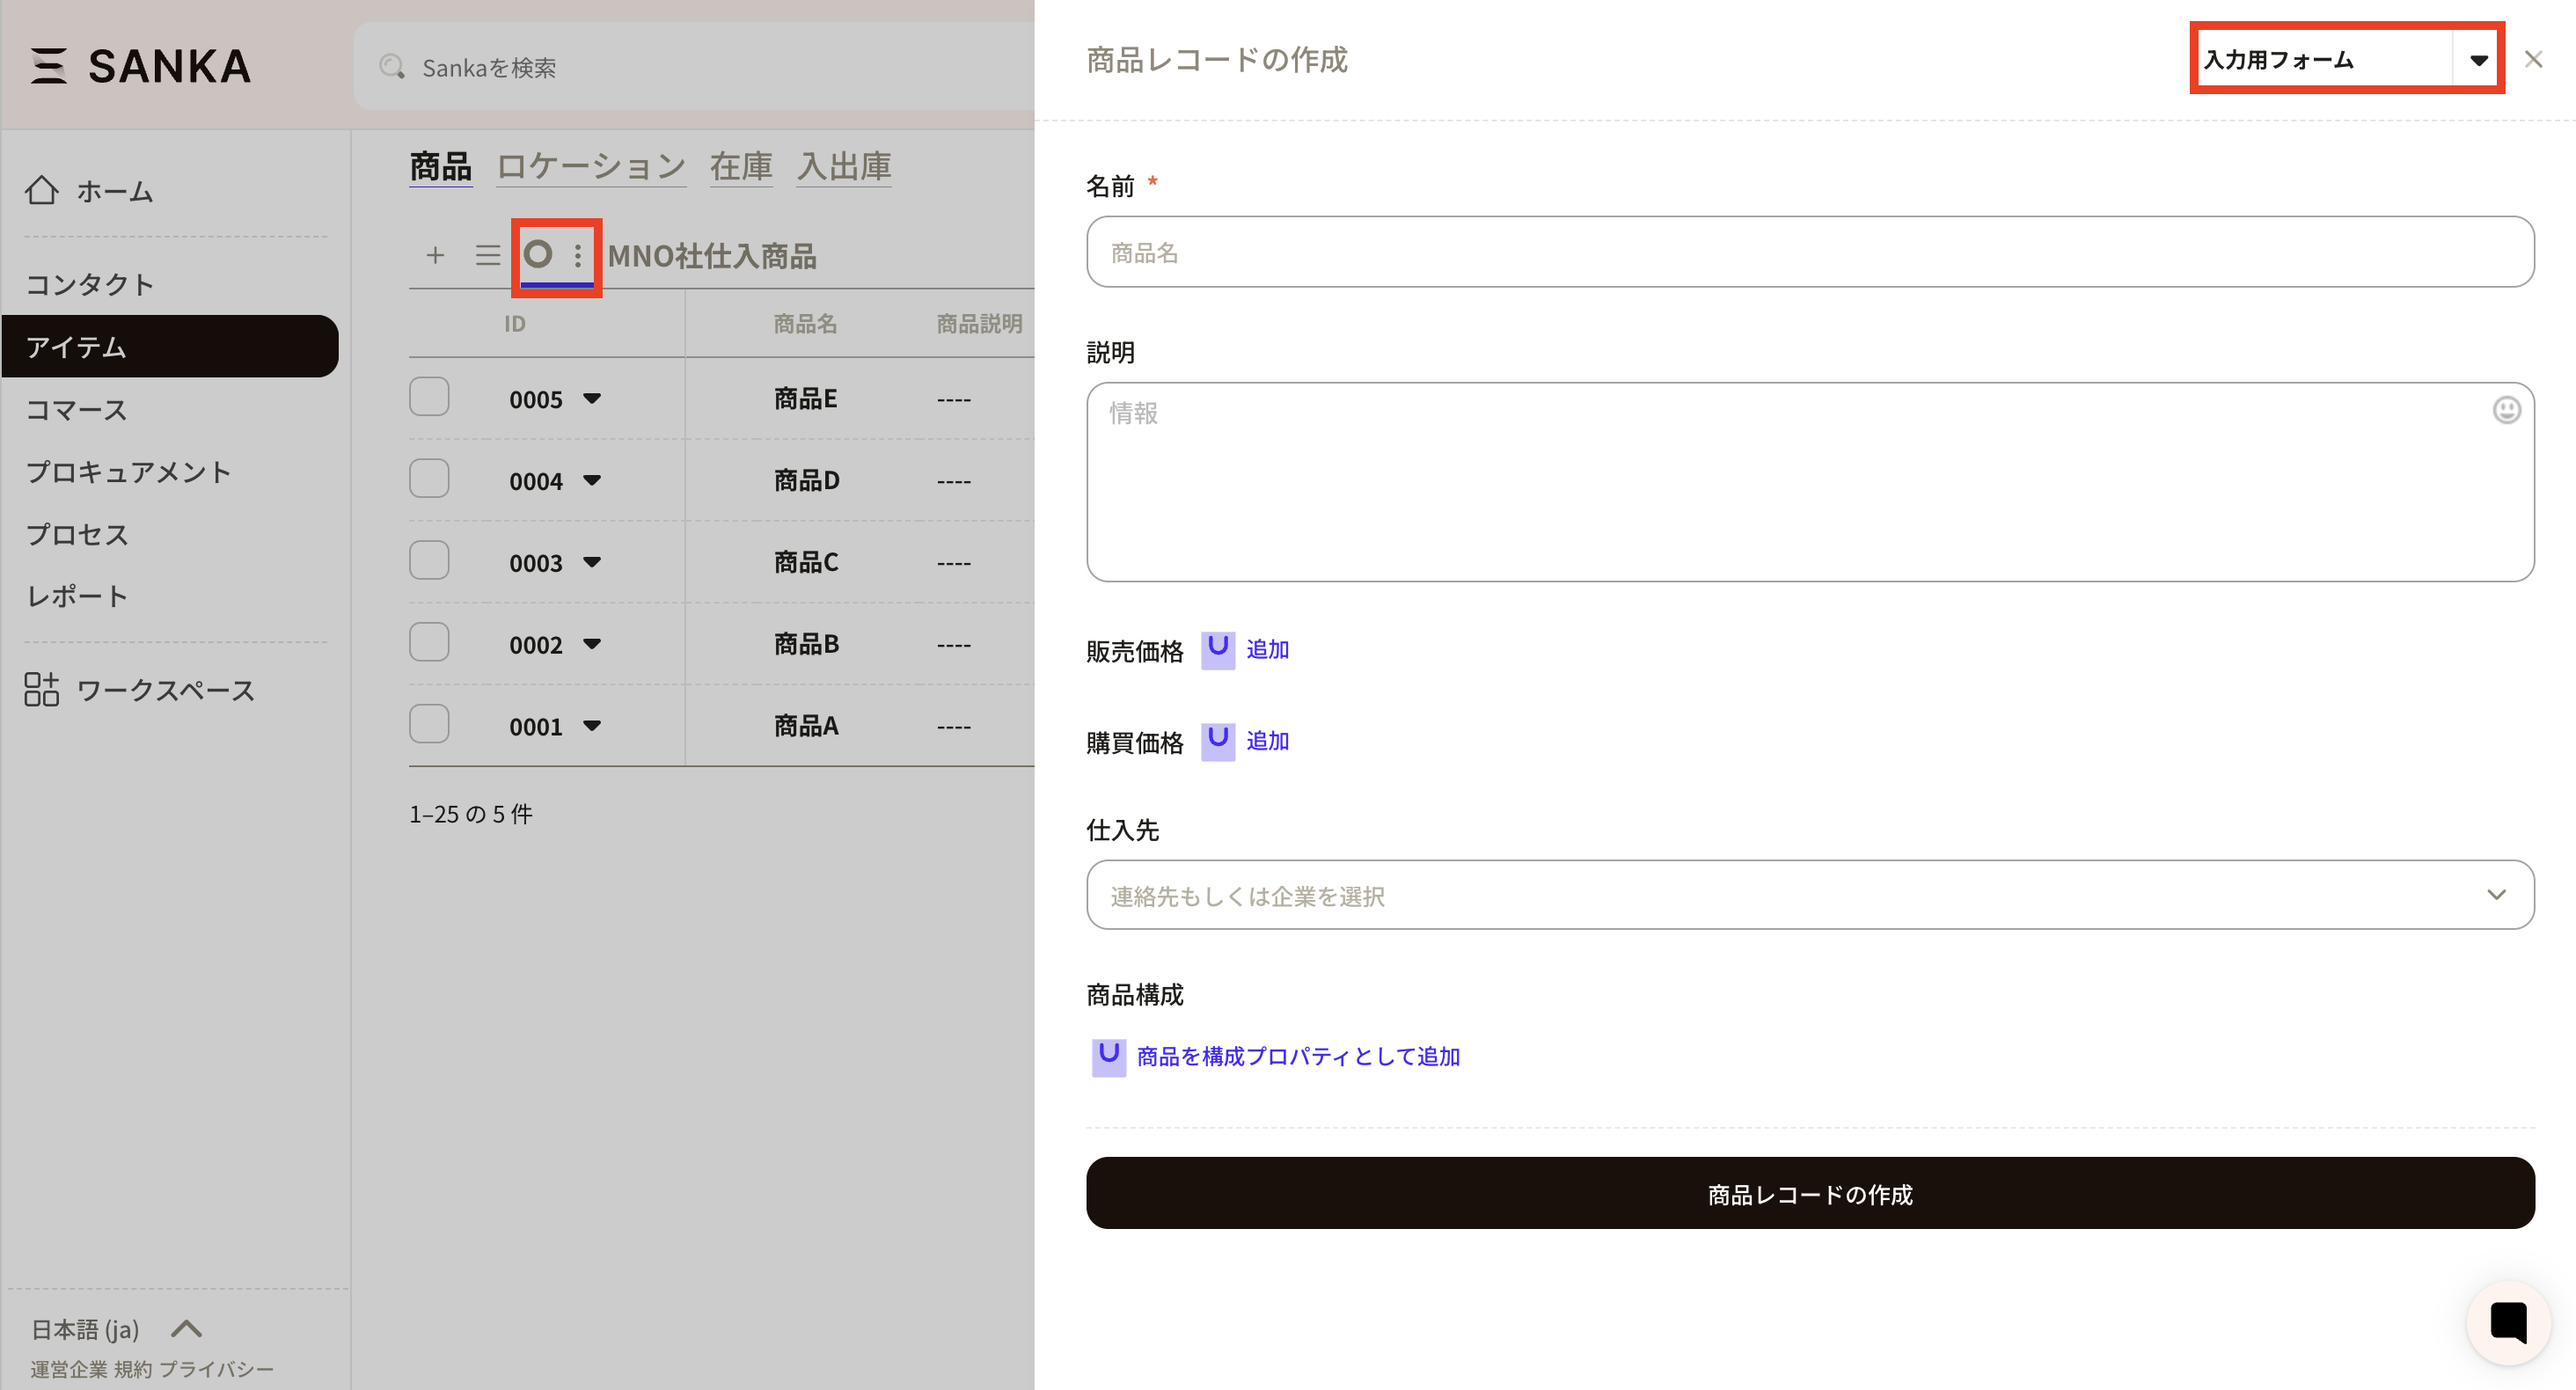
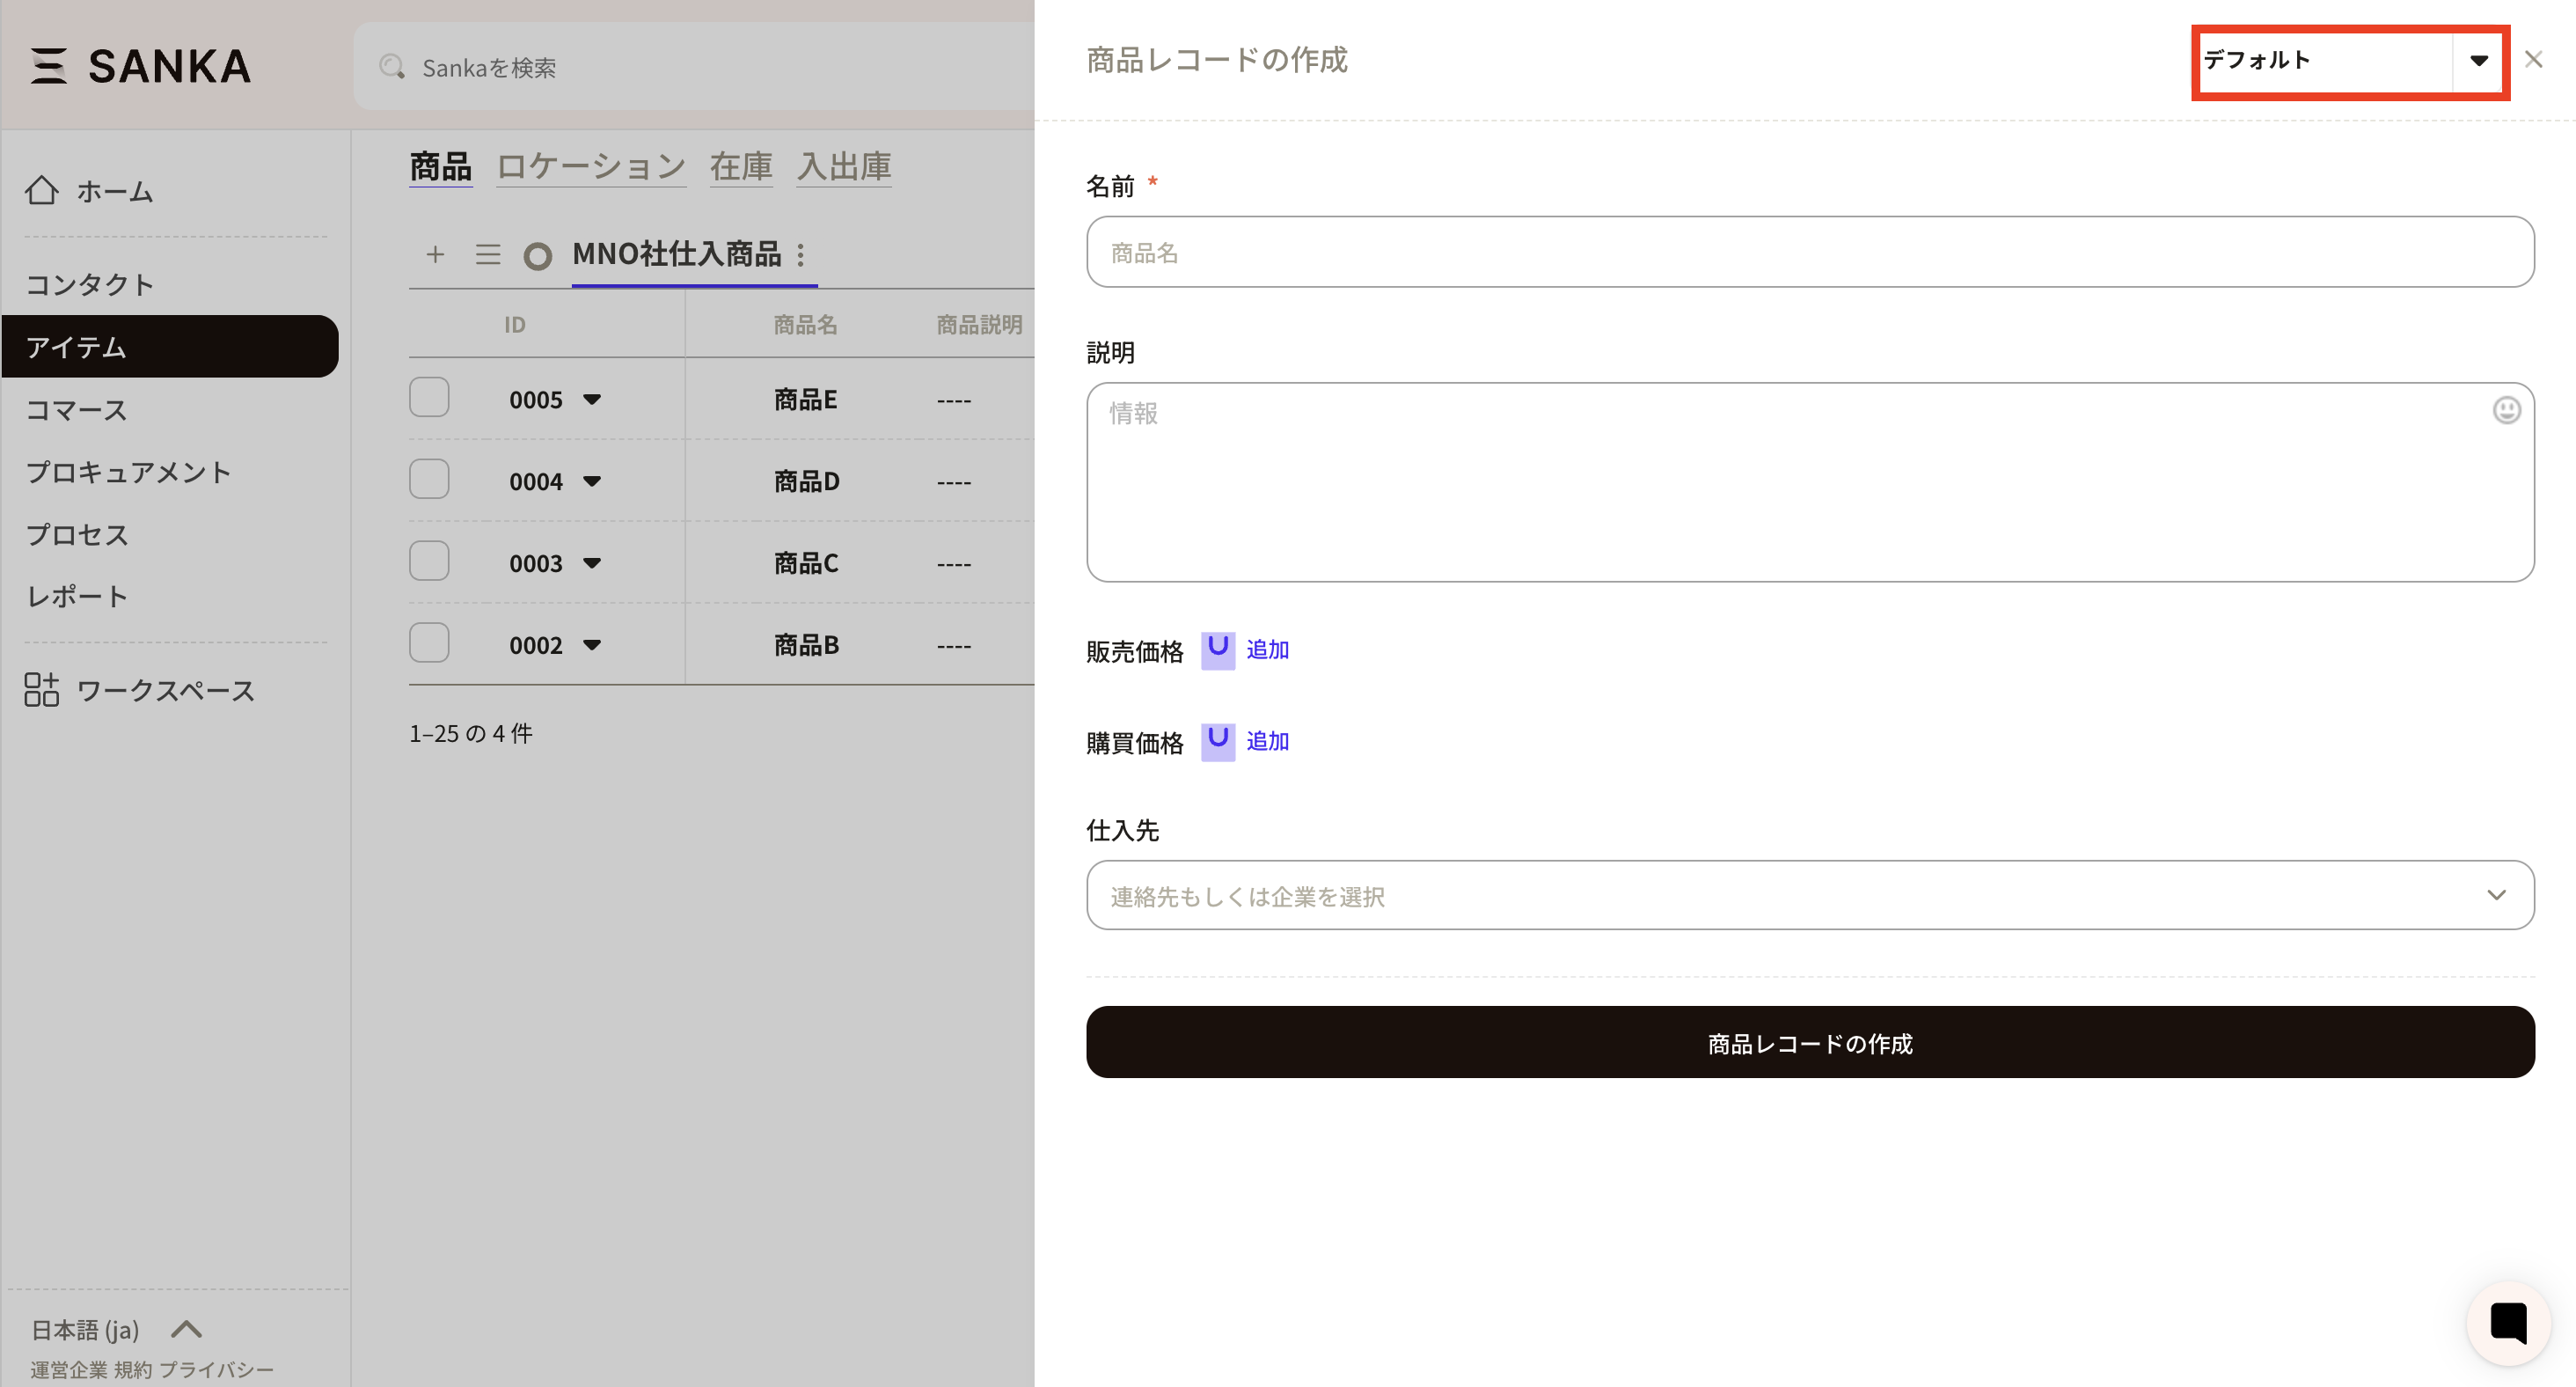
③ There is a tab labeled “Default” at the upper right of the record creation form. This indicates that the currently selected form is set as the default.
Click the triangle button on the right to create a new form.
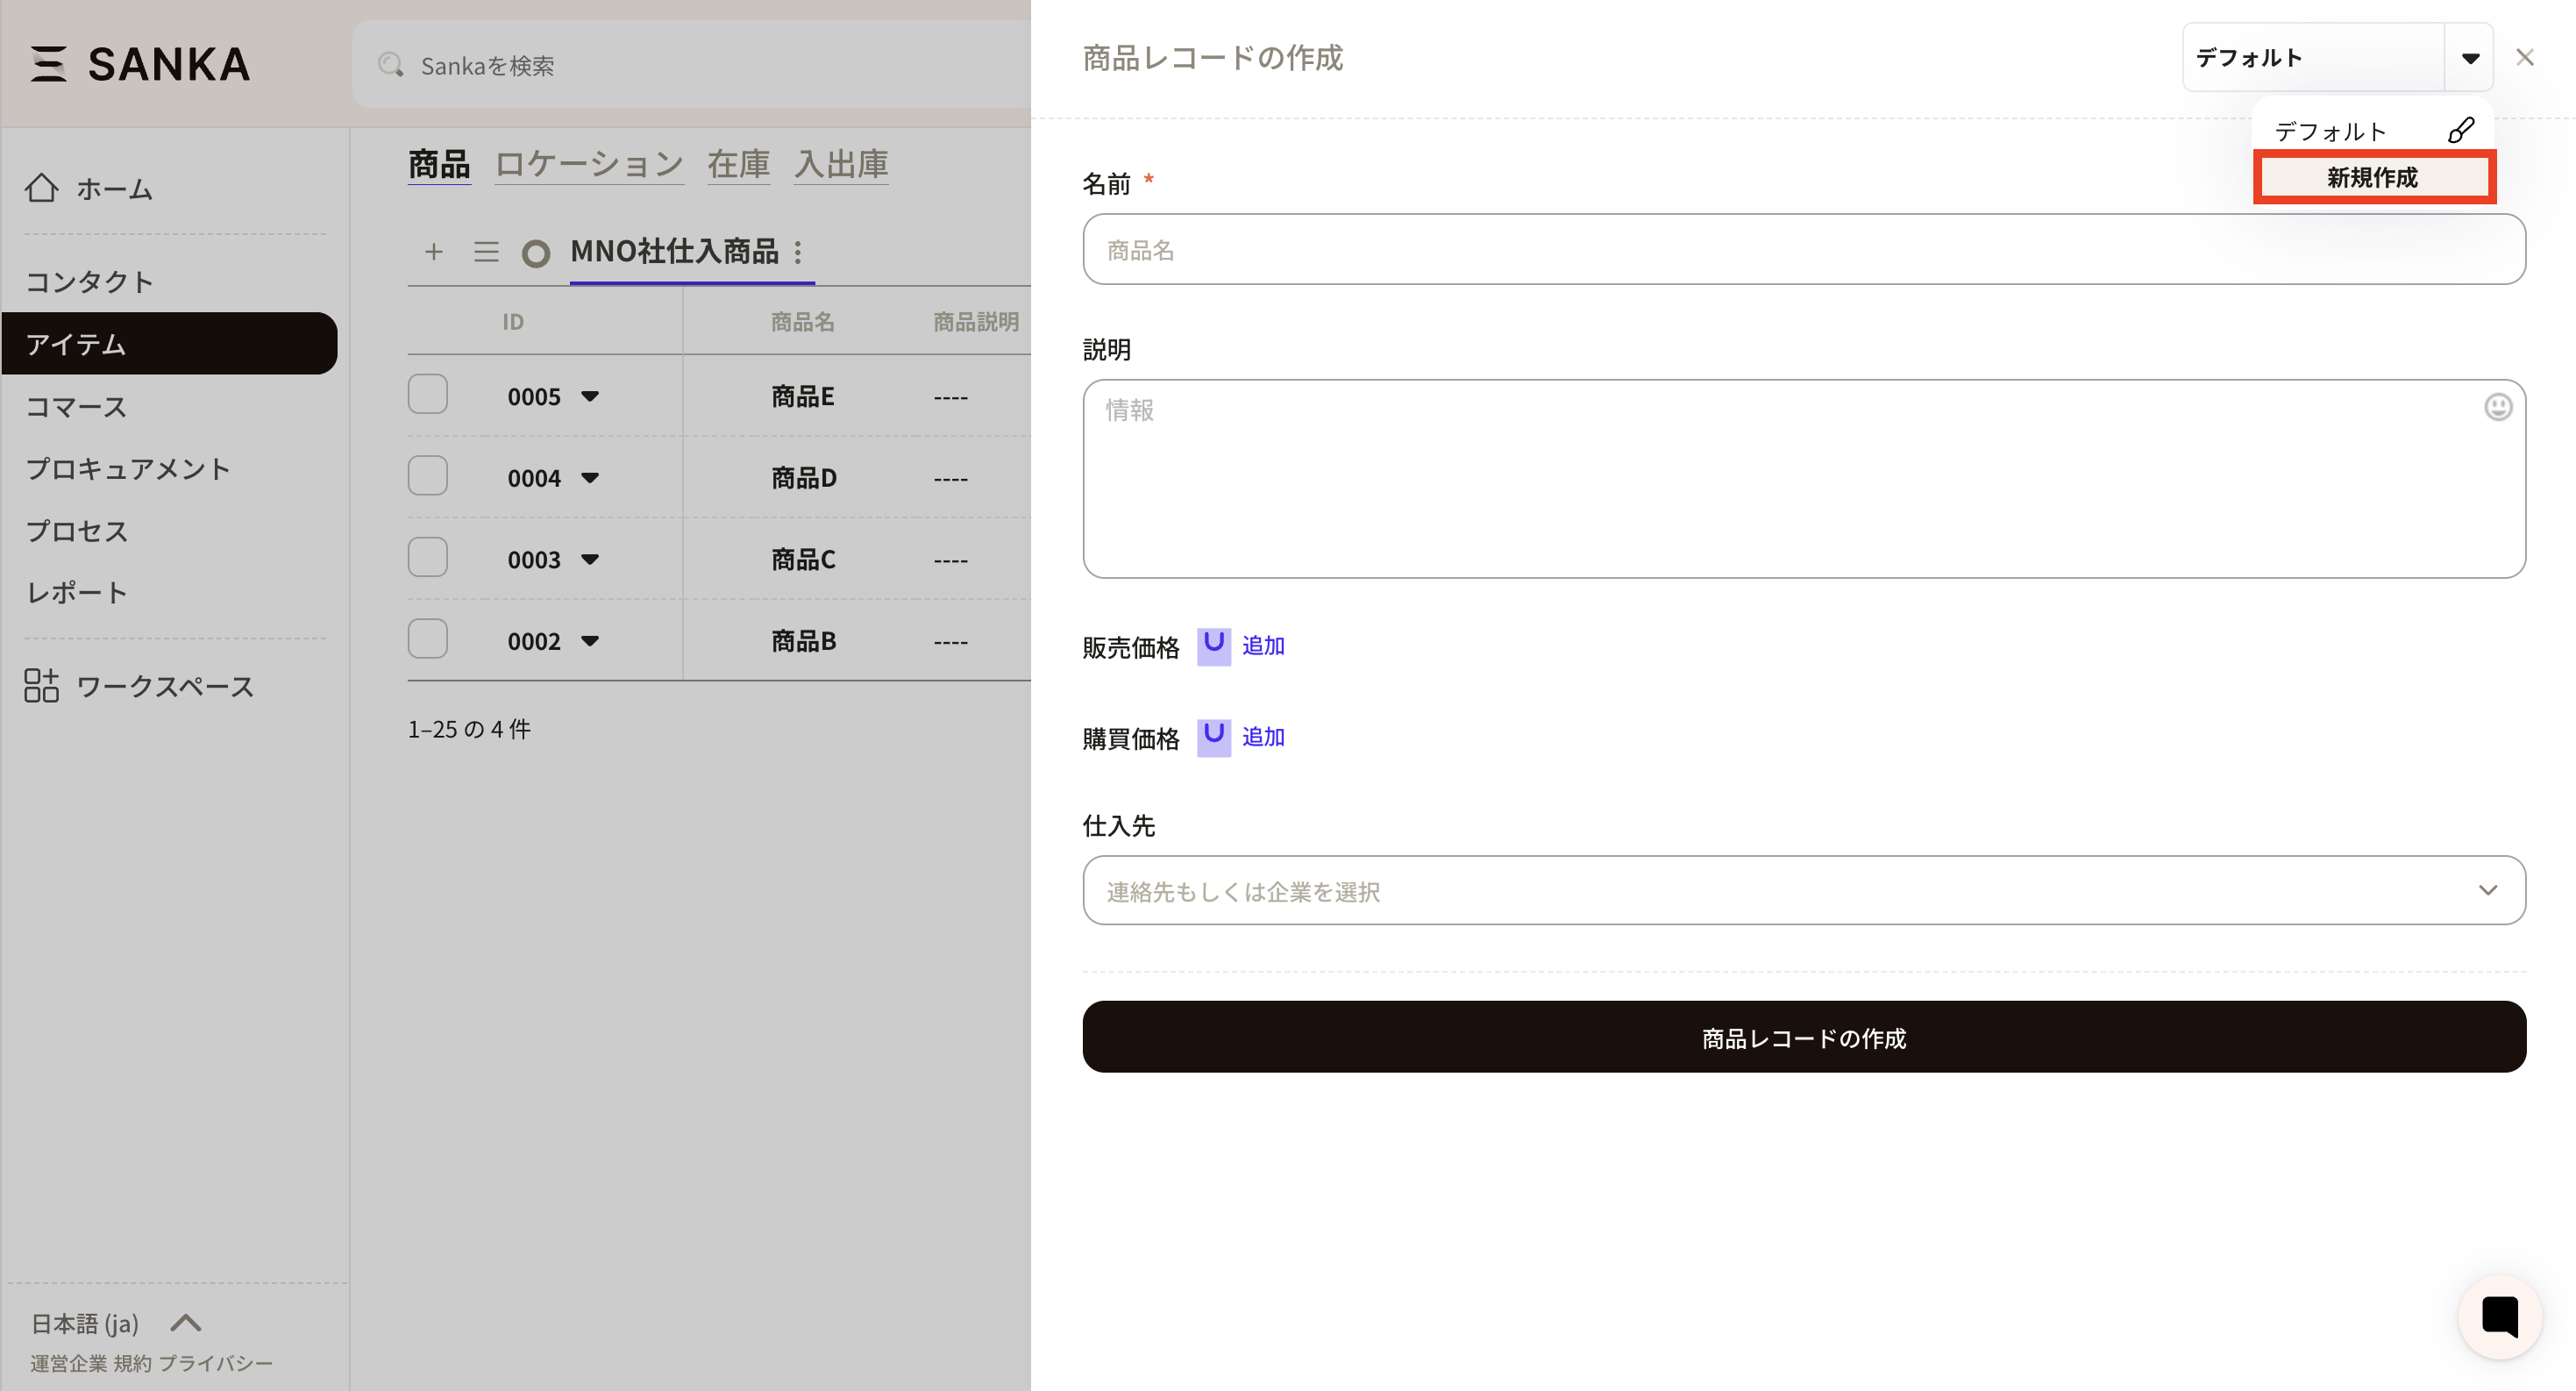
④ Click the Create New button.
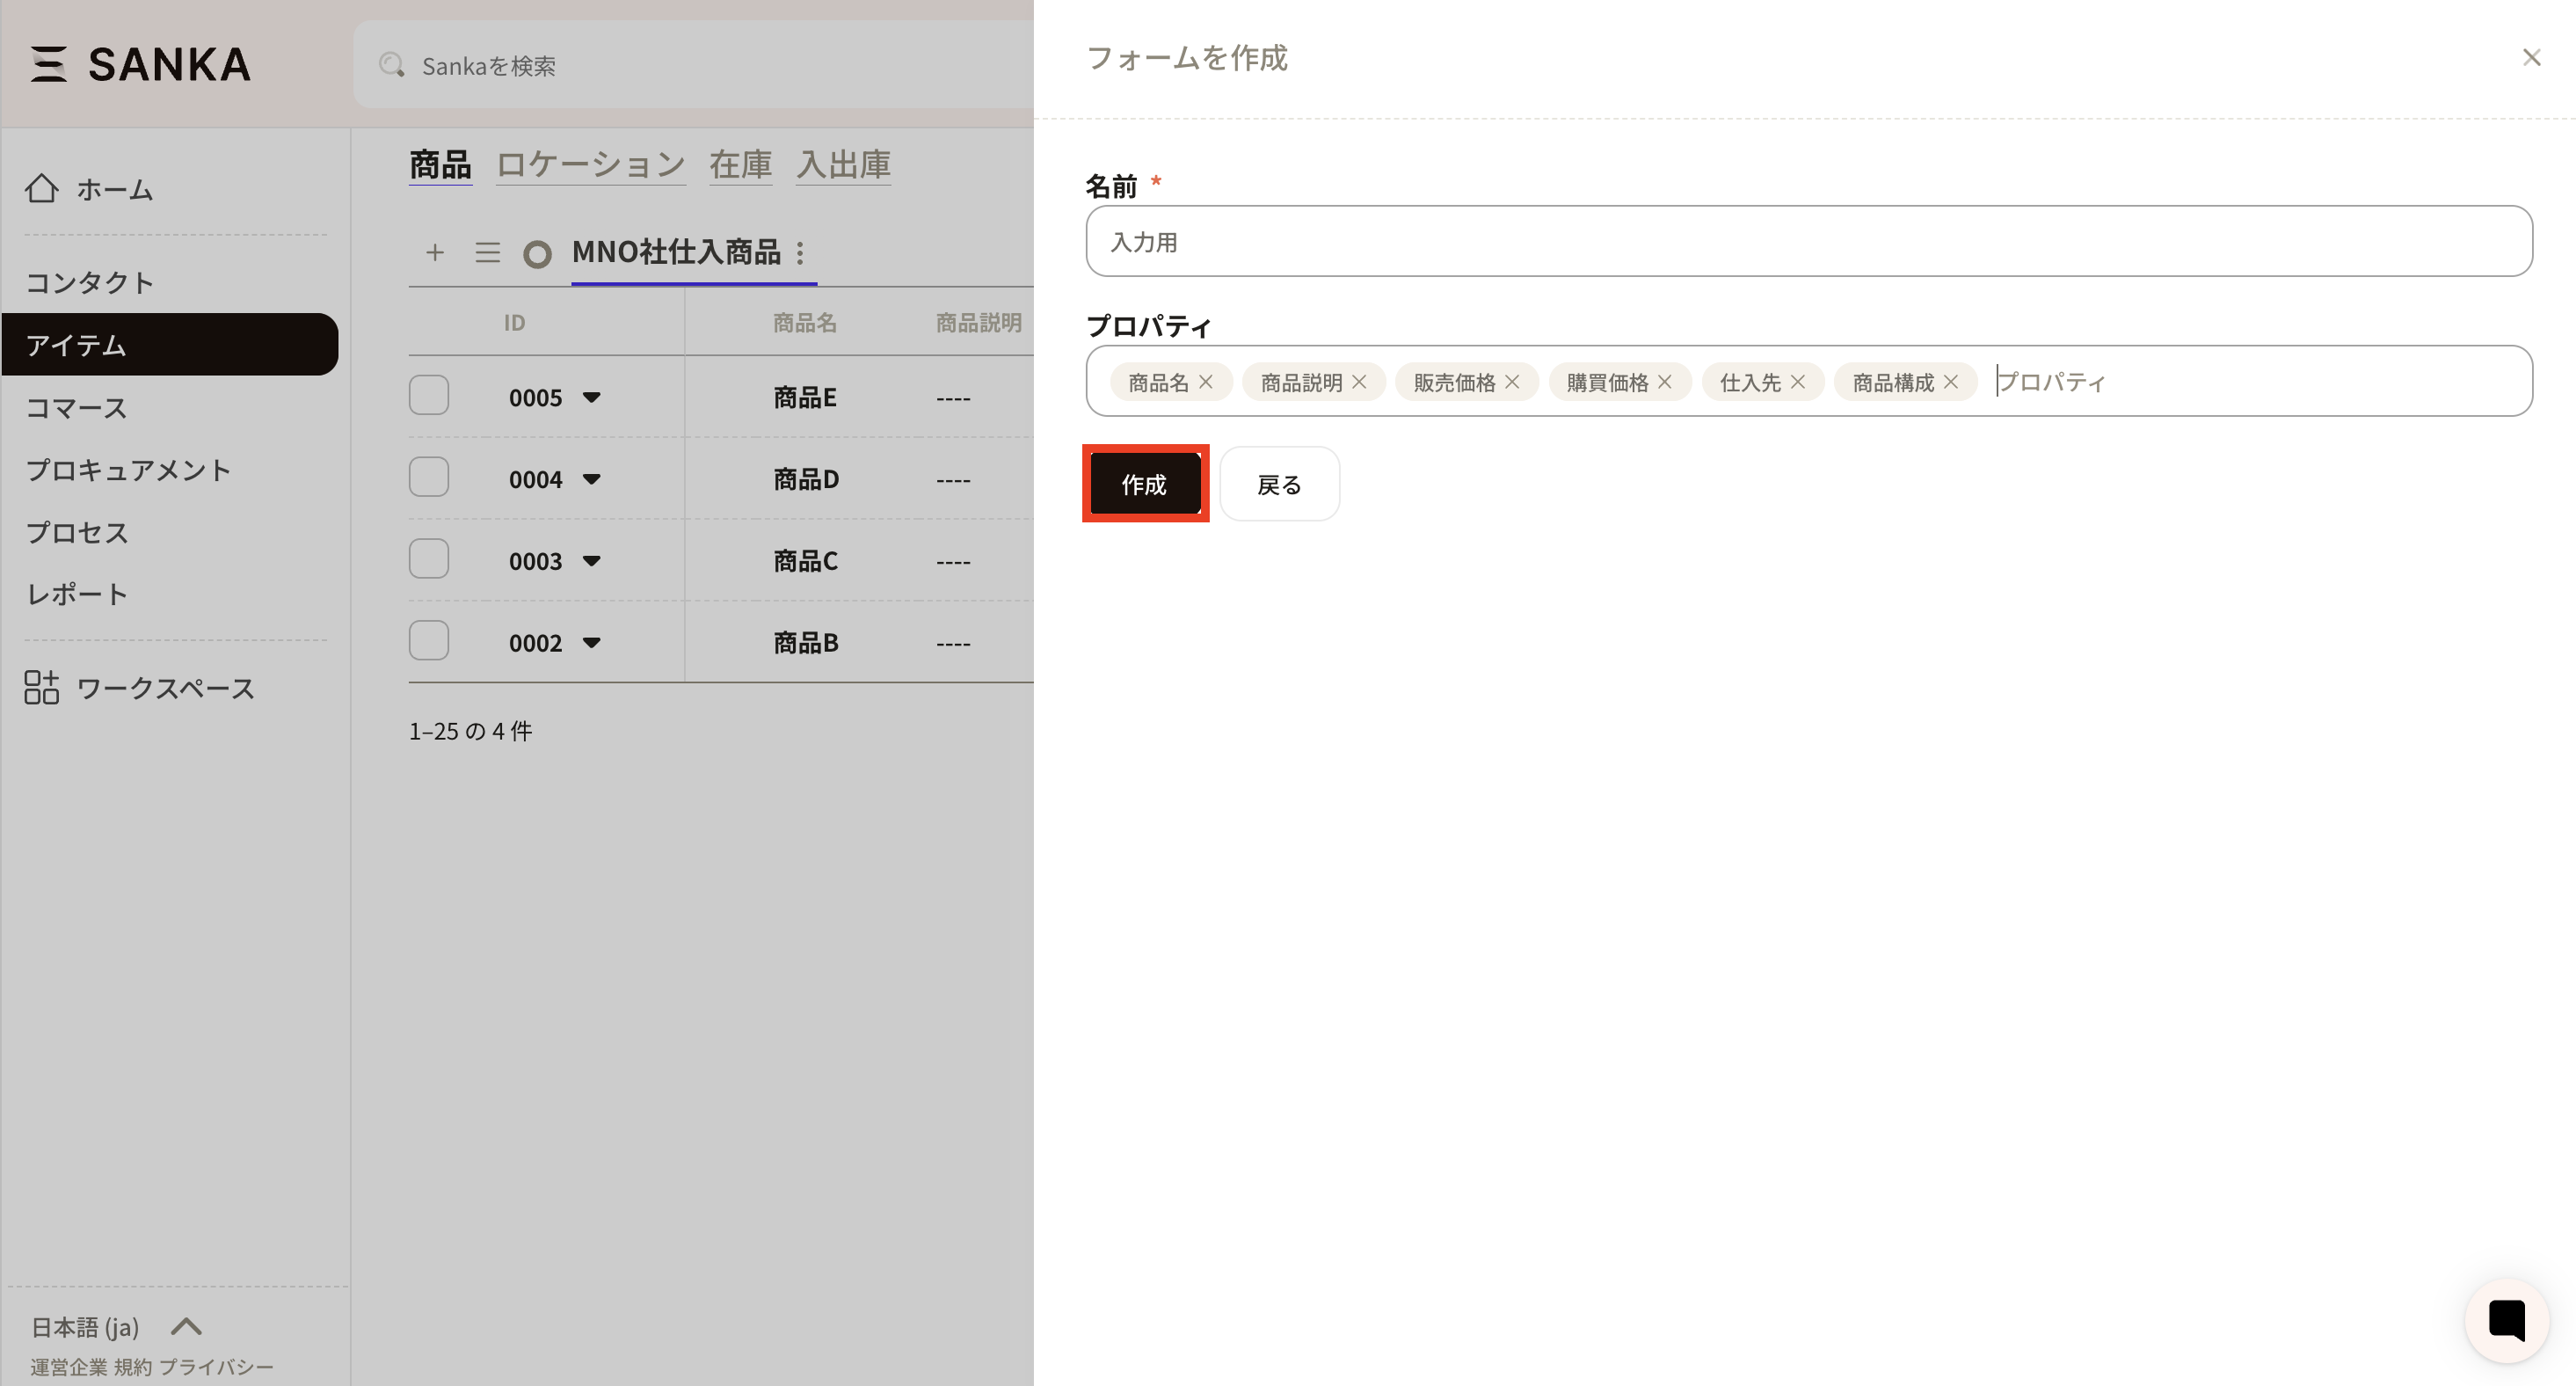
⑤ The form creation screen will appear. Please configure the required information.
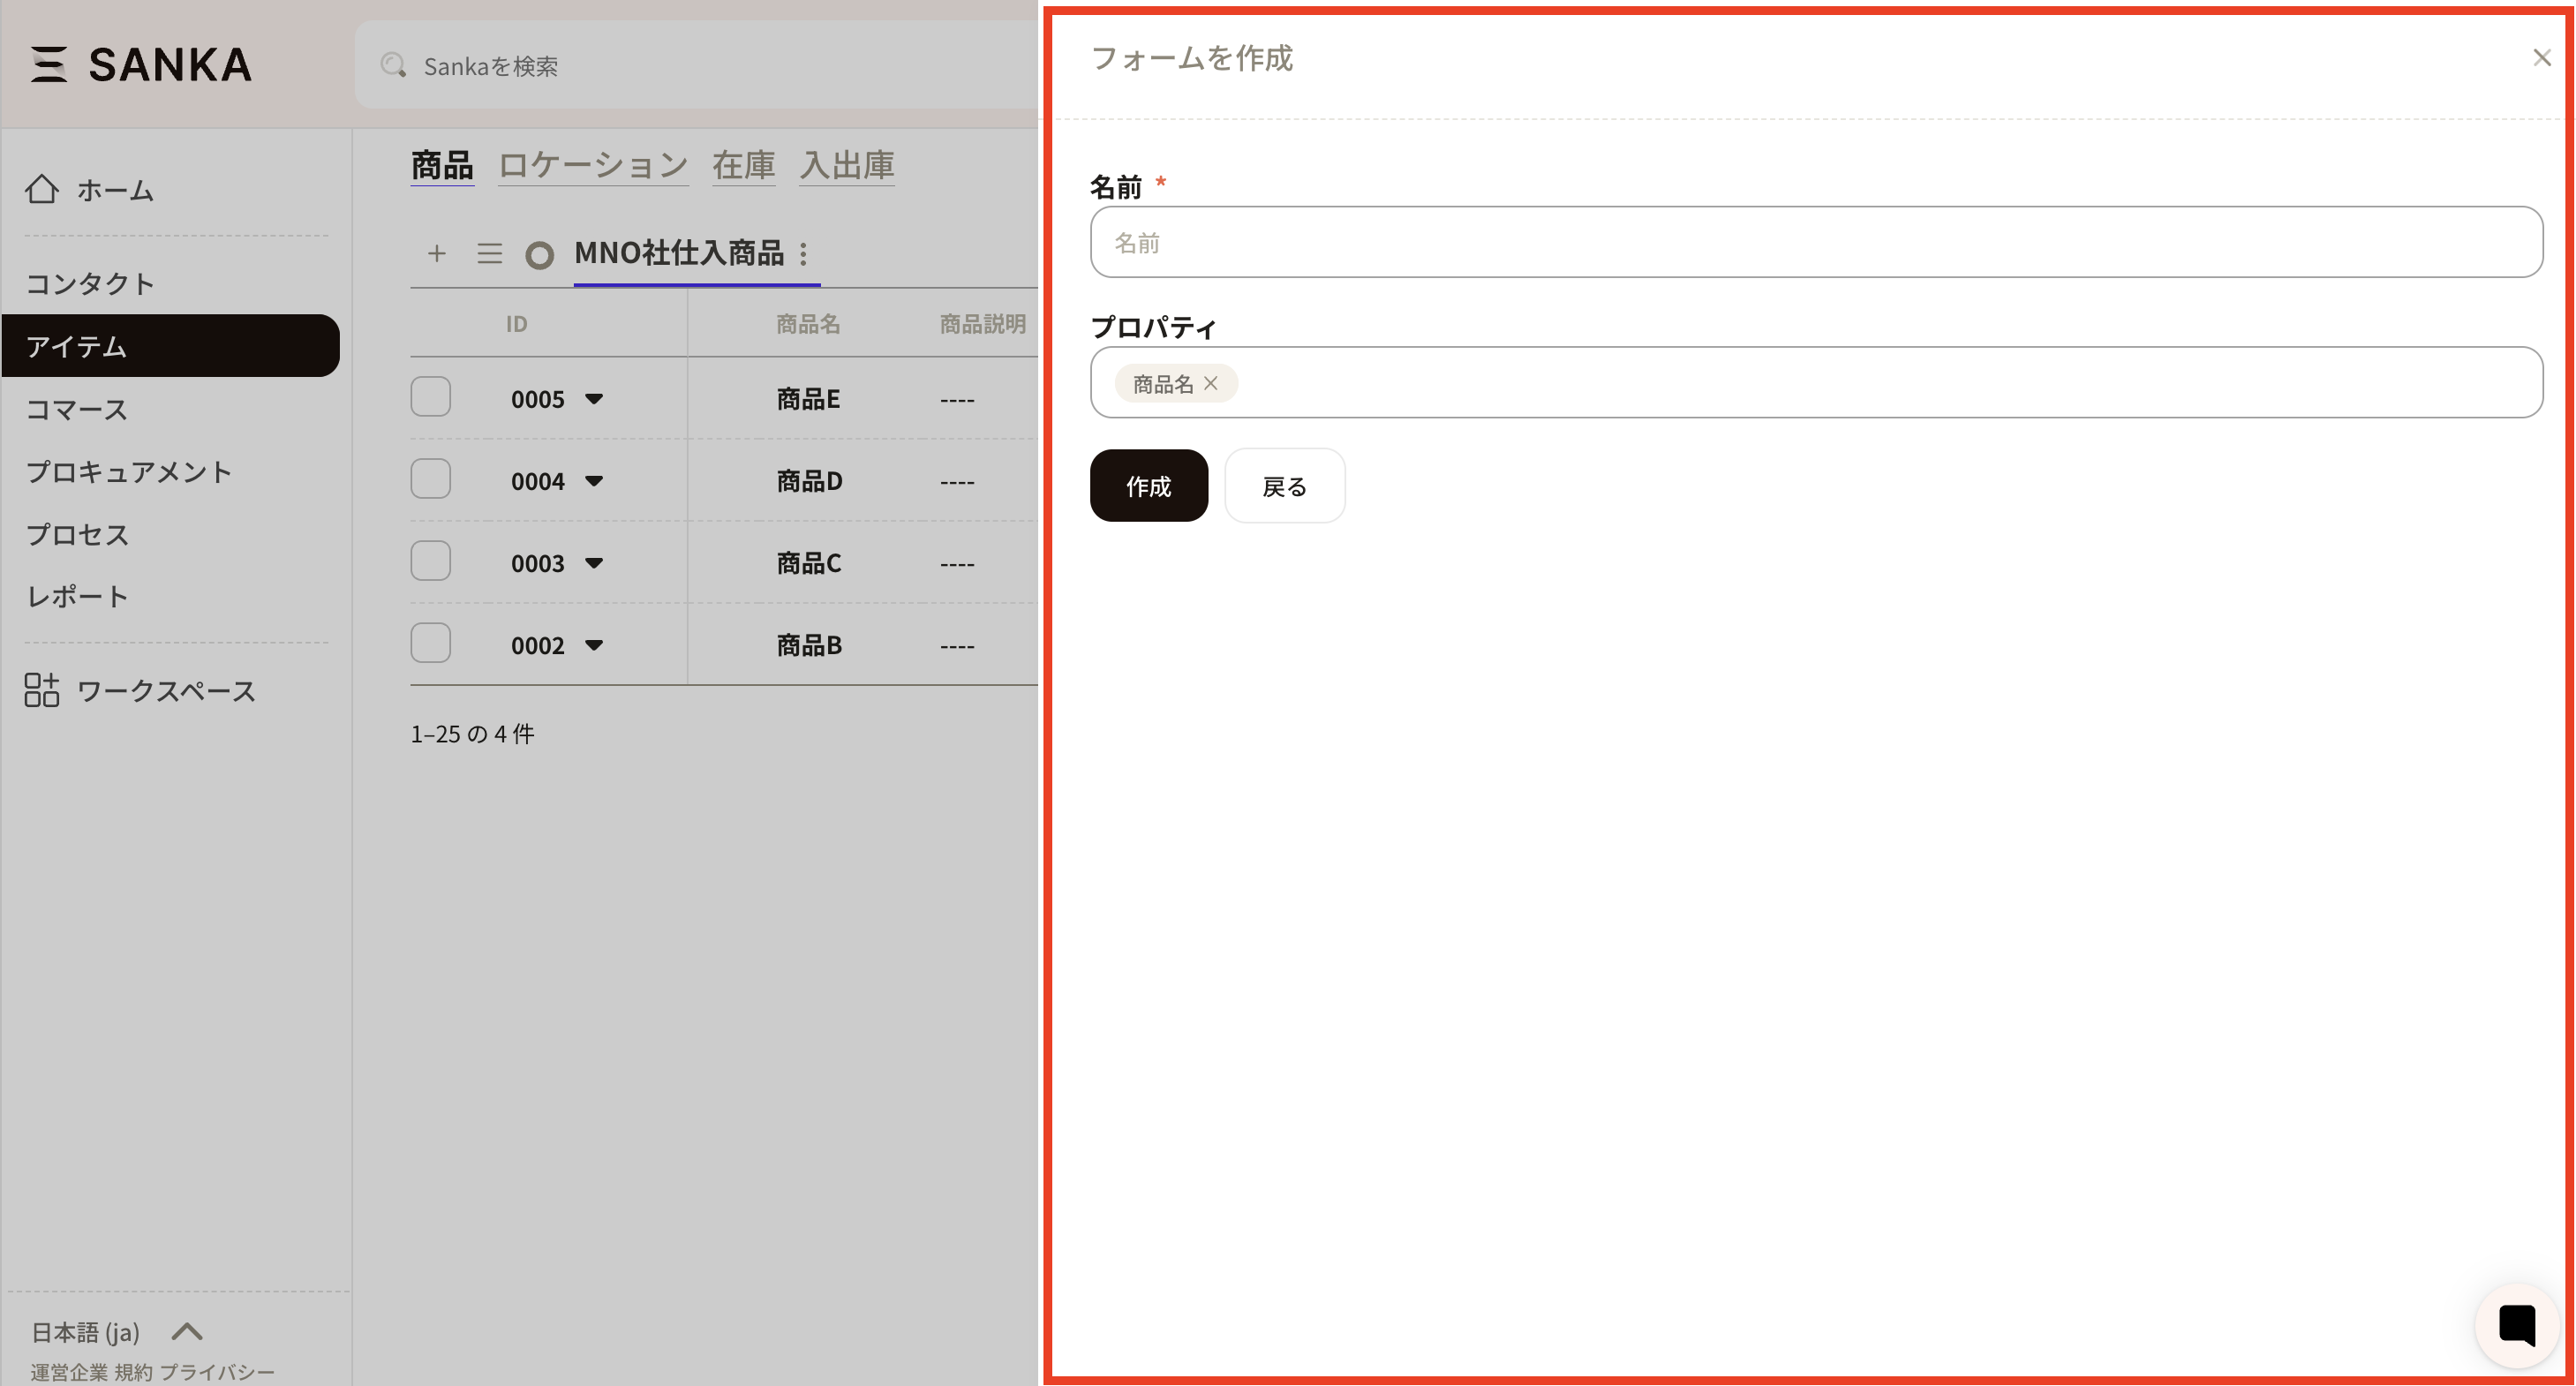
⑥ Please set a name that is easily recognizable. You can change the order of properties by dragging the items.
Once you have set the required information, click the Create button.
⑦When you return to record creation, the form you configured earlier is now applied.