This section explains the essential methods for creating and managing properties for each object.
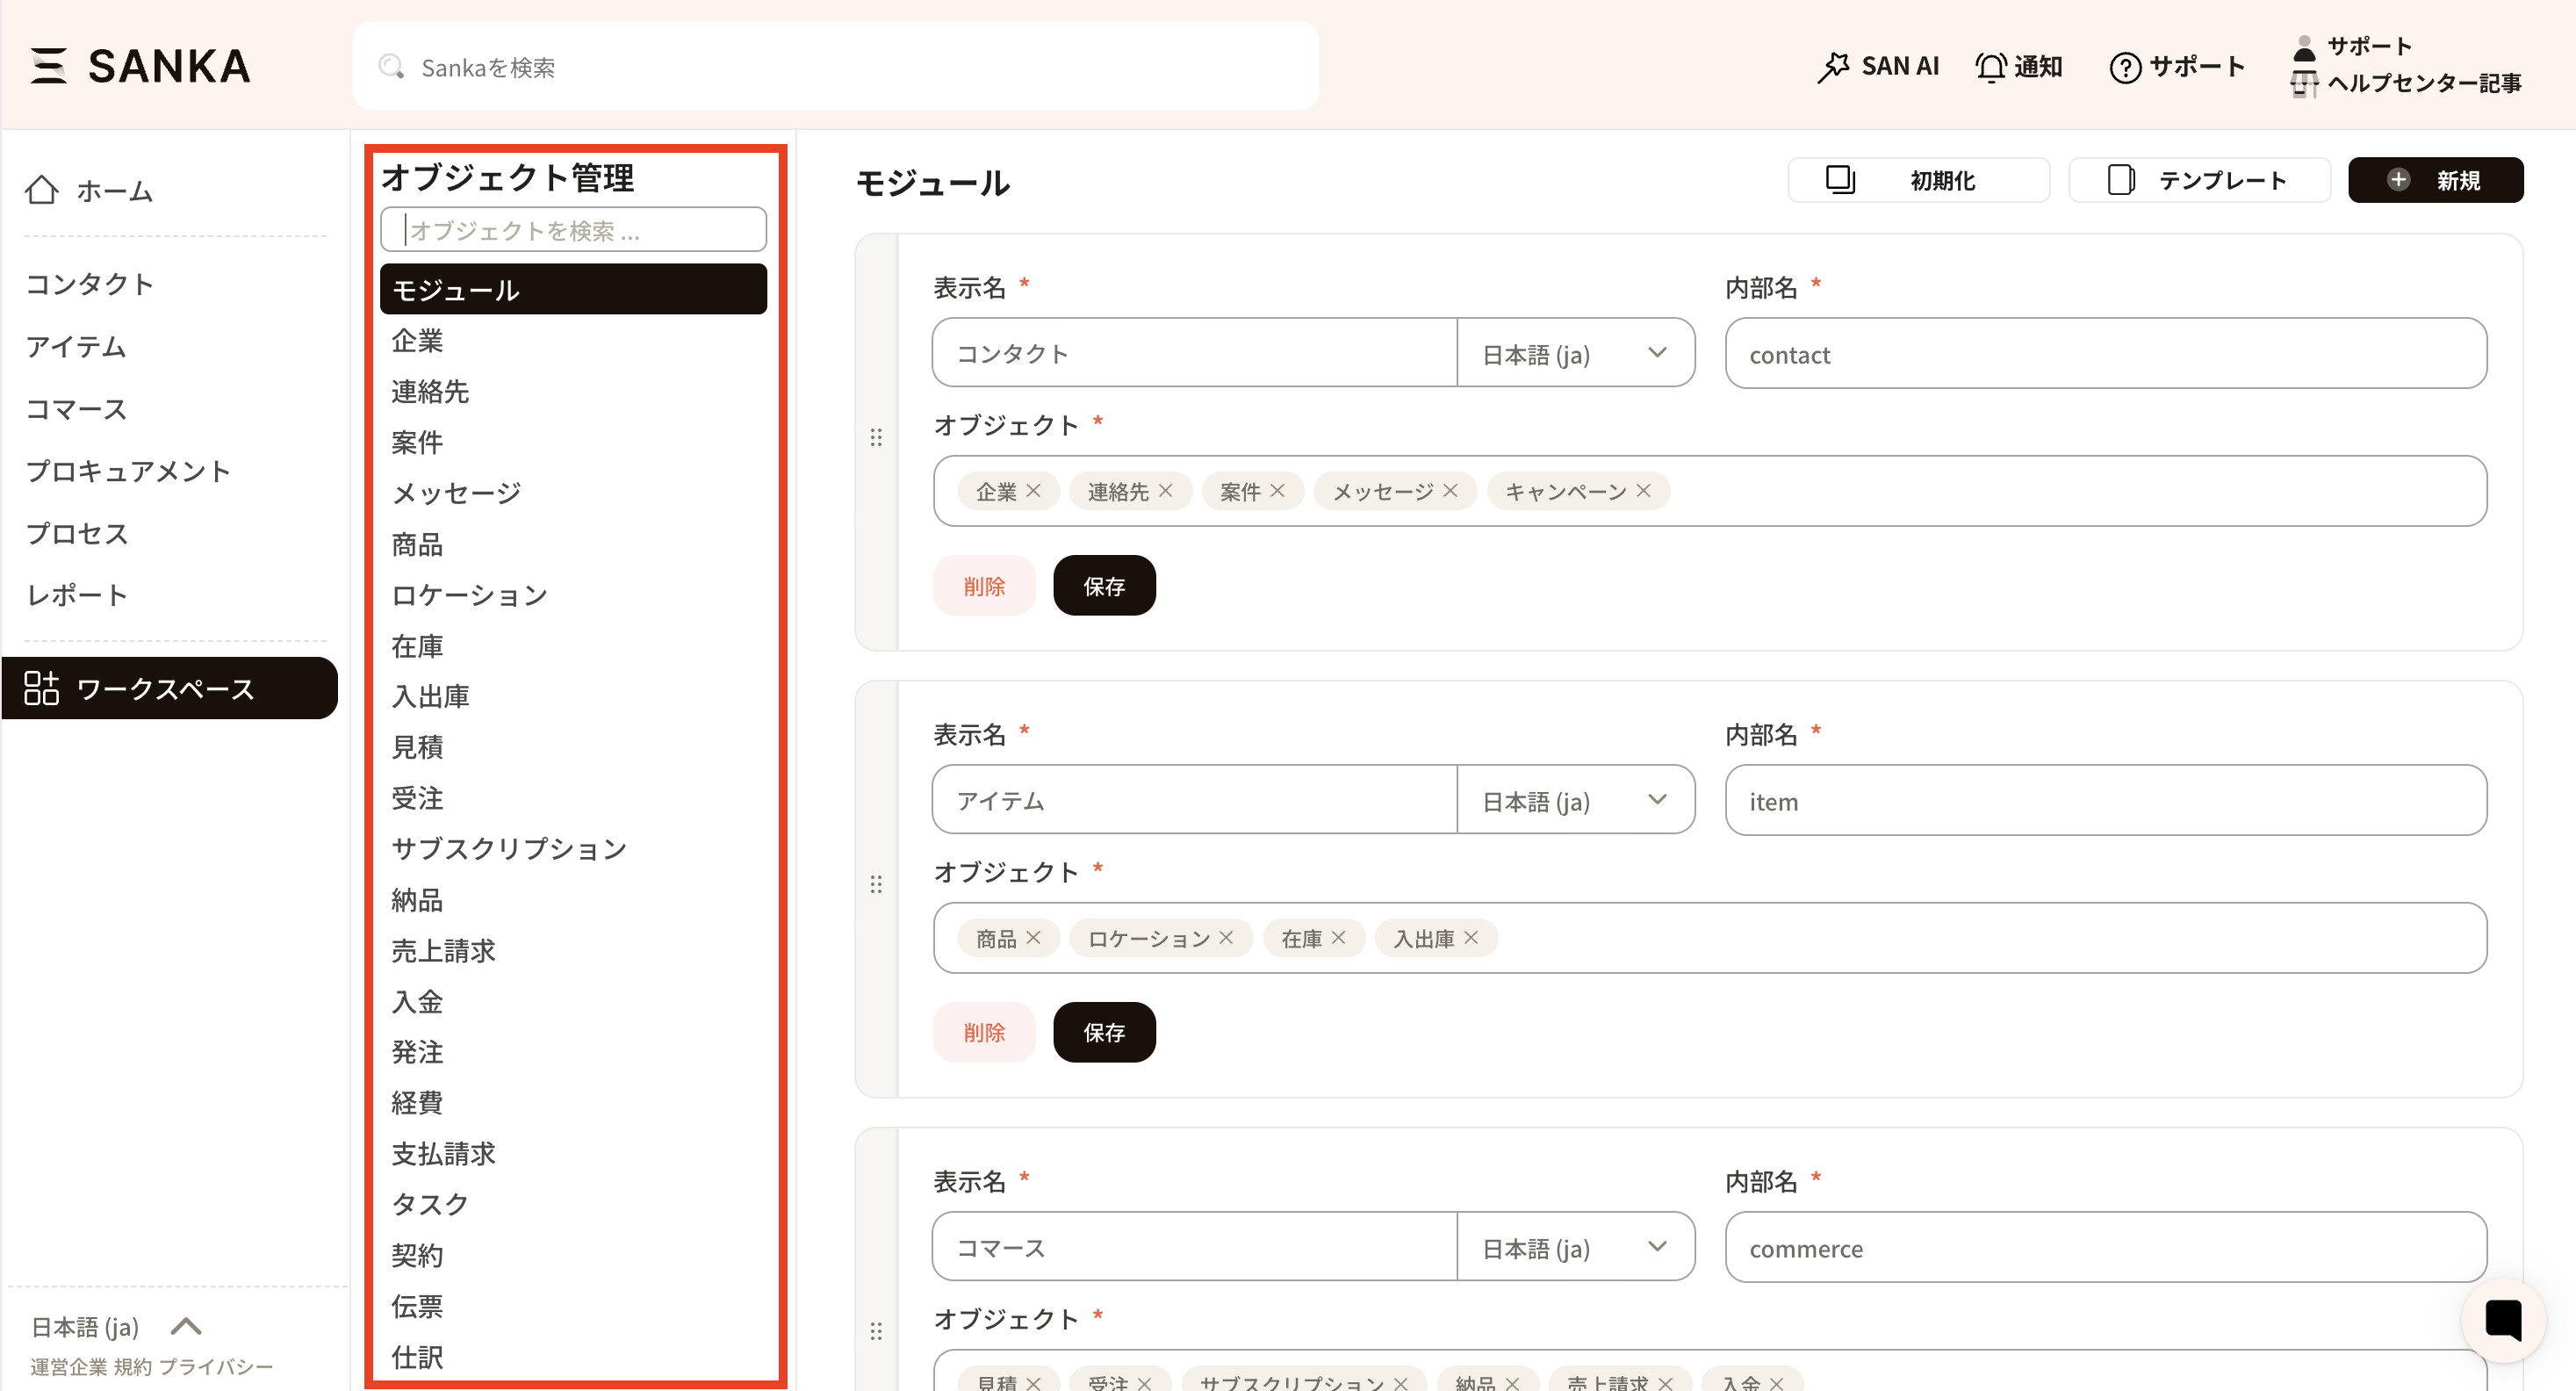
1. Select Object Management in the workspace located on the left side of the SANKA screen.

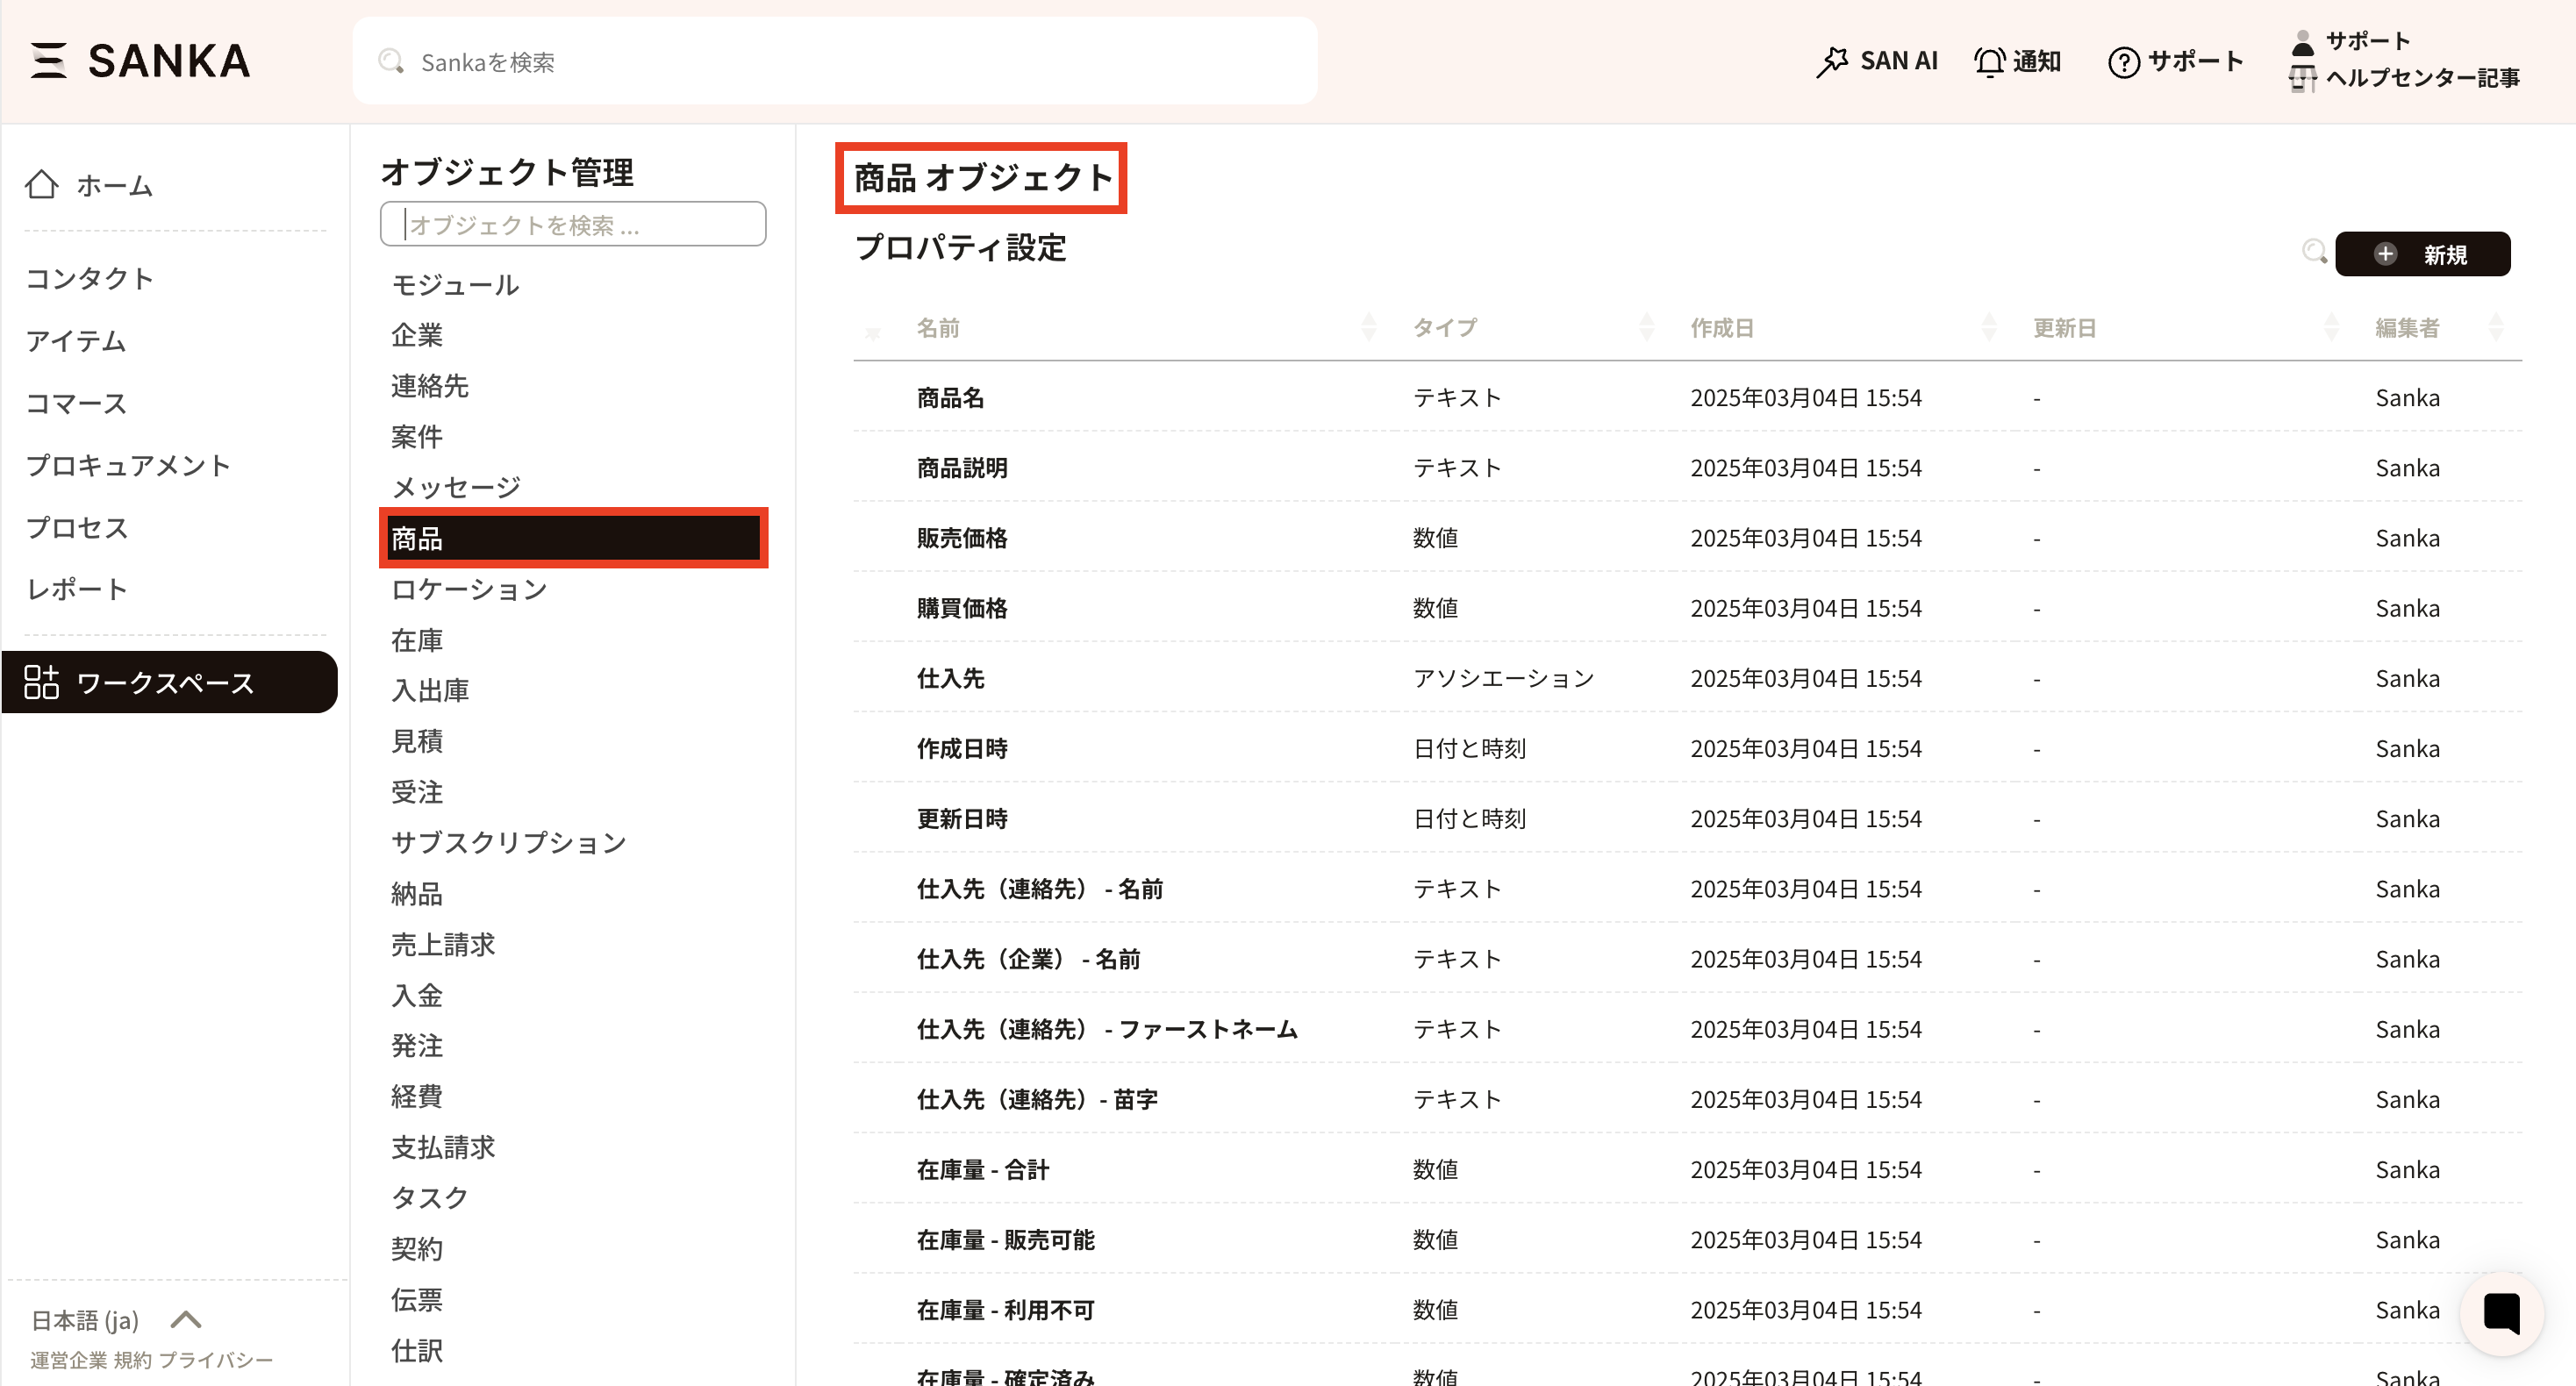
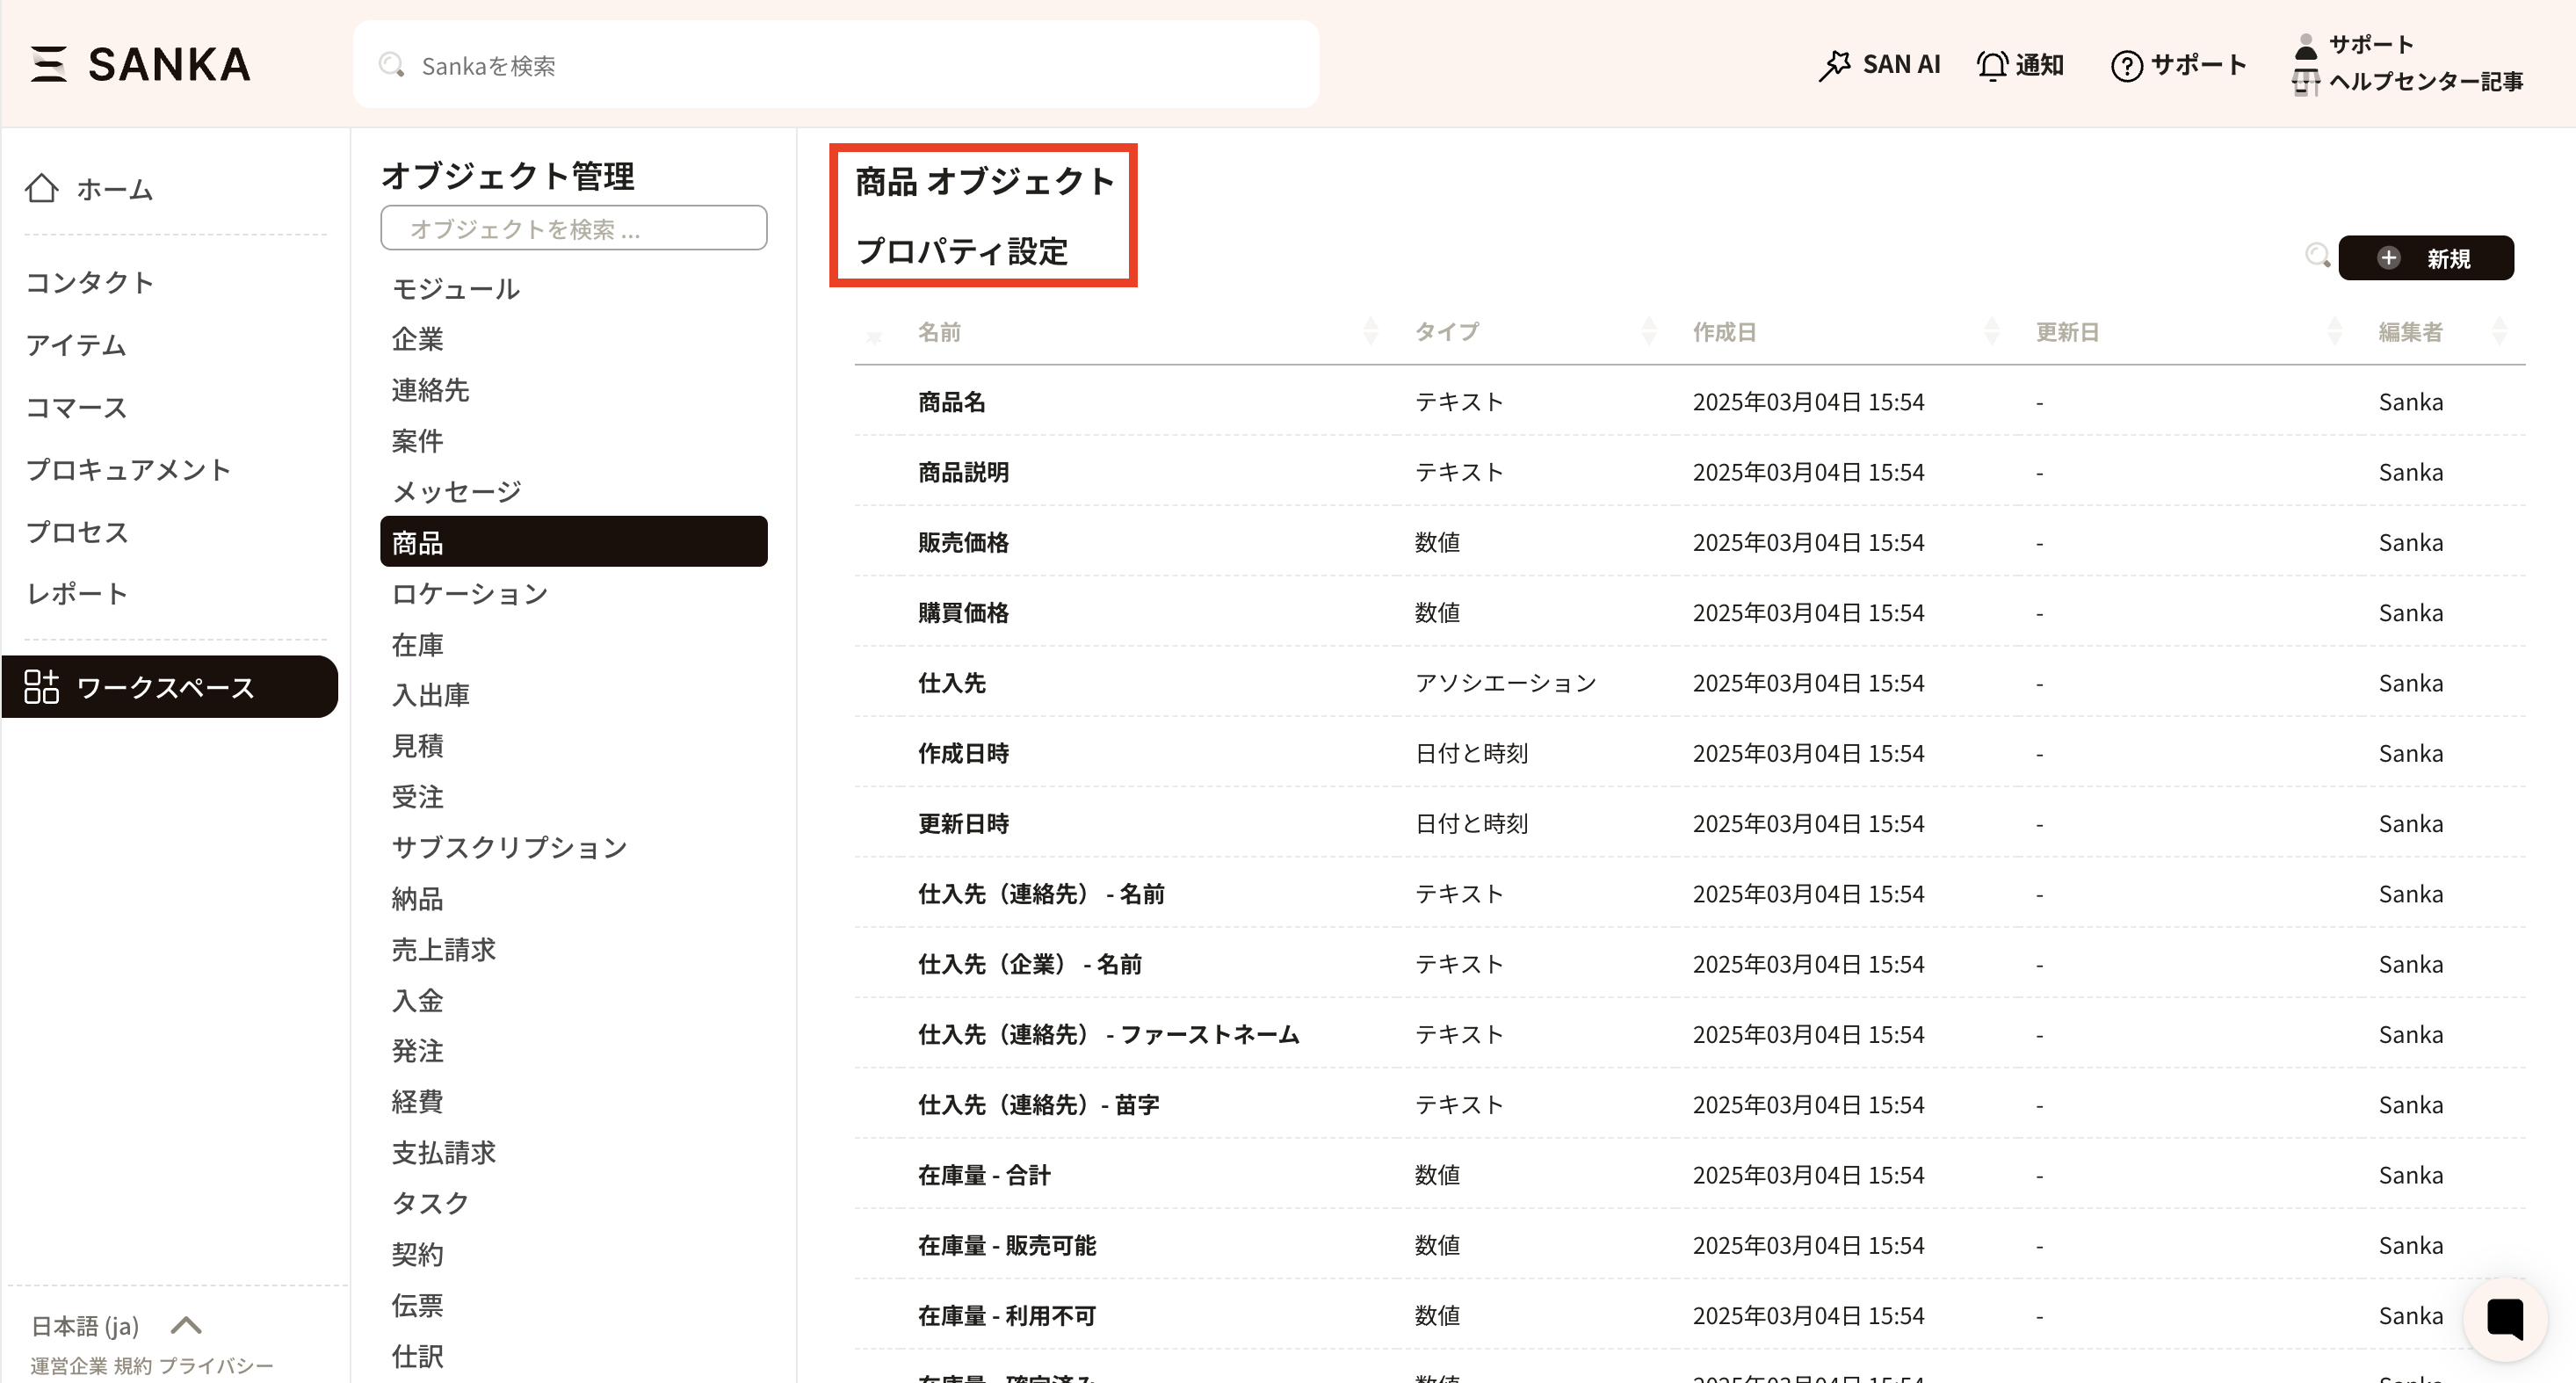
② When you open Object Management, a list of all objects available in the workspace will be displayed. By clicking the object to which you wish to add properties, you can edit it.
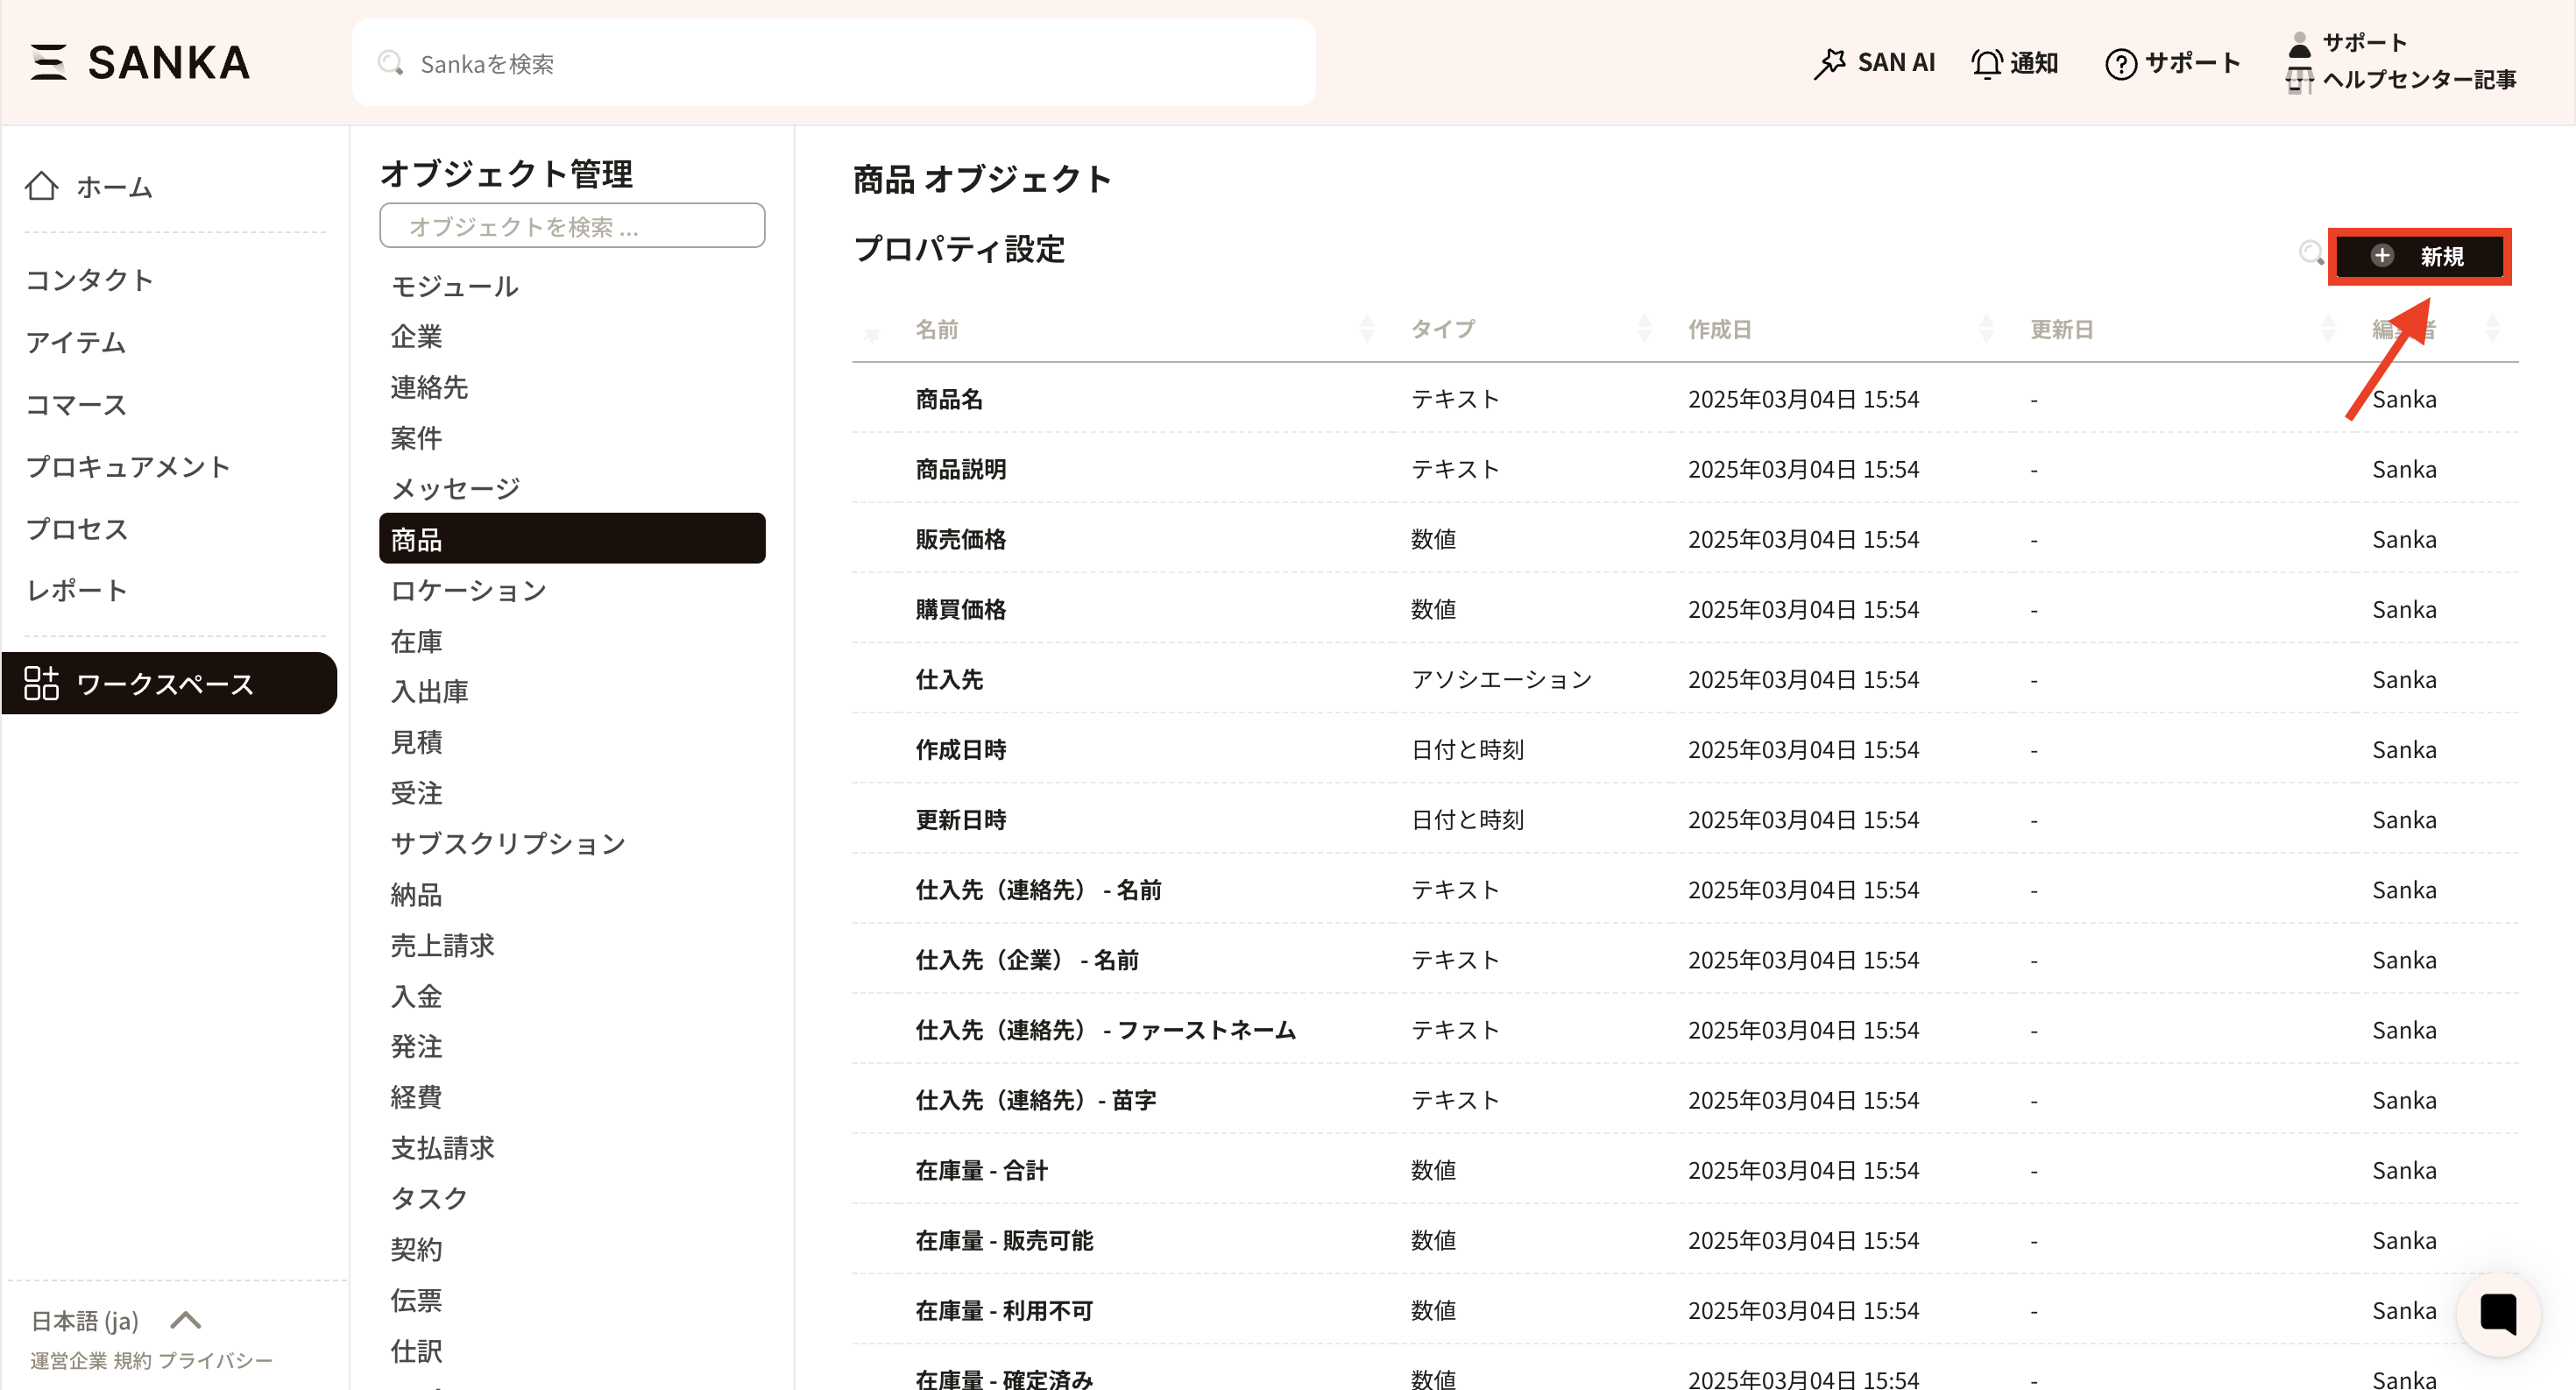
③ As an example, we will add a new property to the Product object. When you click Product from the object management list, the property settings page for the Product object will open. A list of the default properties is displayed.
④ Add properties. Click the Add New button on the right side of the property settings.
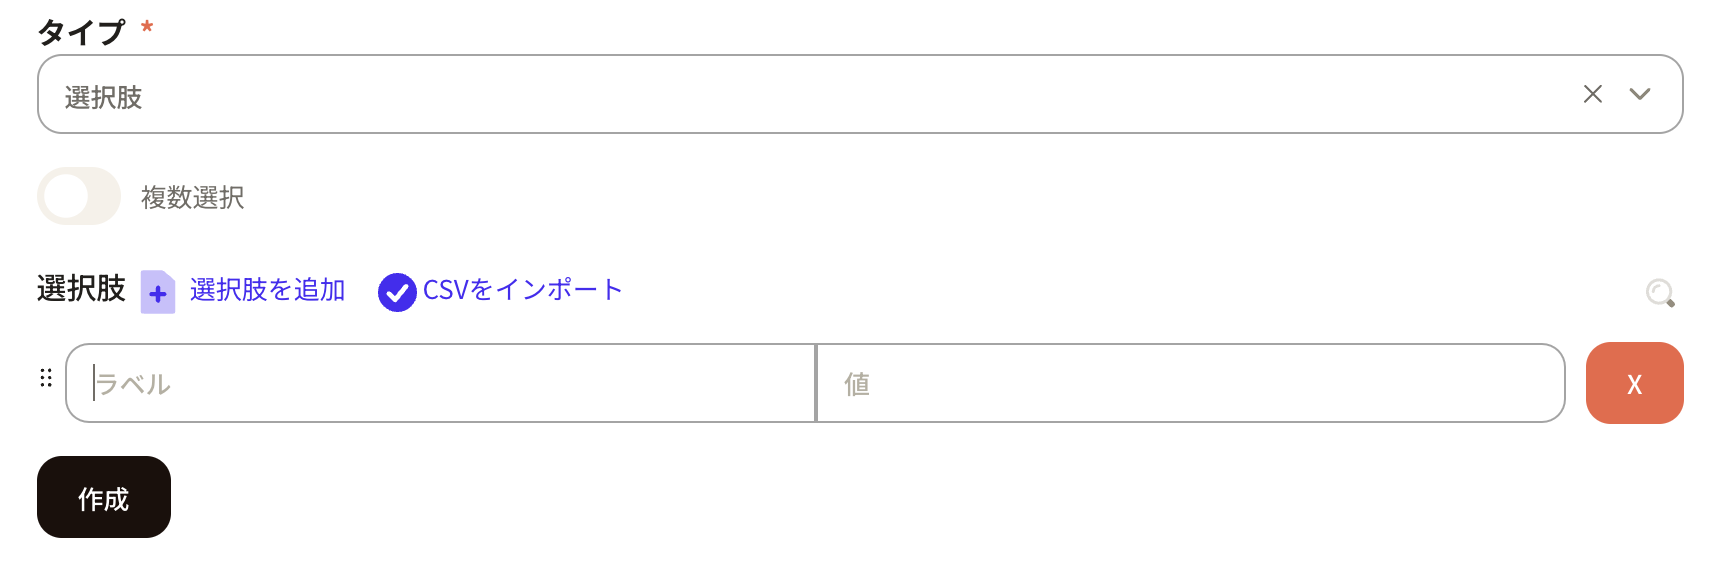
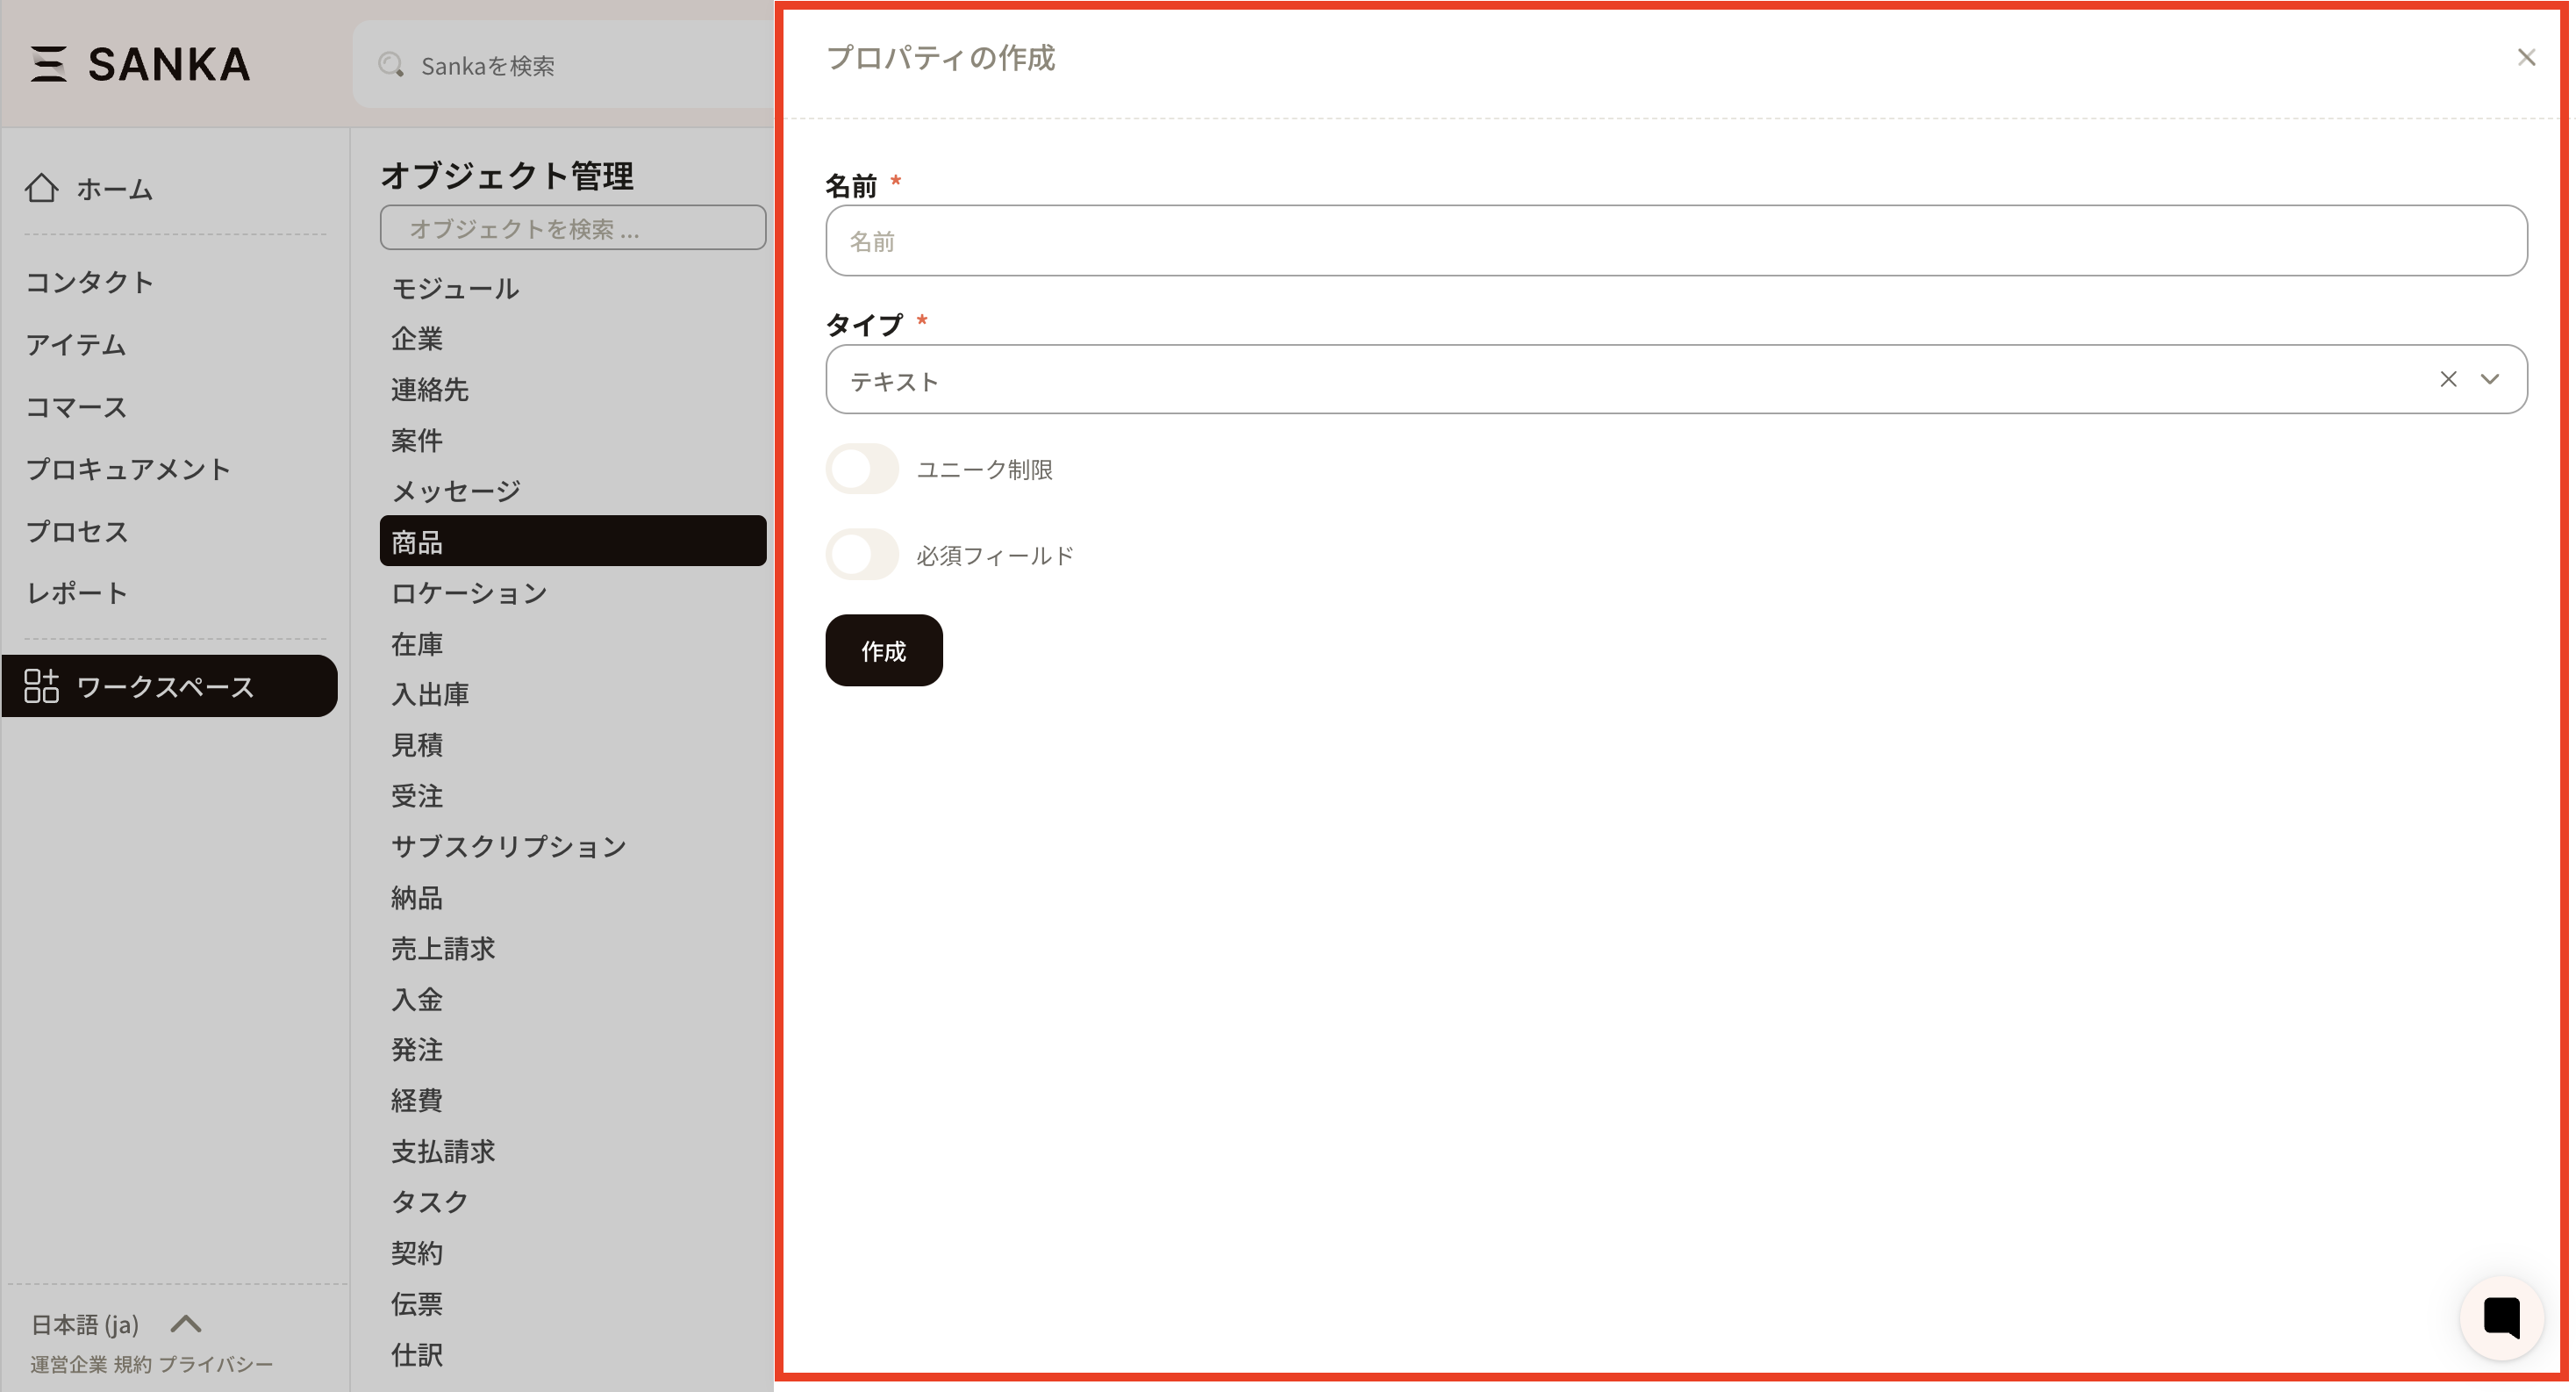
⑤ The property creation screen will be displayed.
By enabling the Required Field option, you can set the item as mandatory.

⑥ Enter the required information for the new property.
• Property name: Enter an easily understandable name. (Example: SKU, Category)

• Property type: Select a type. The purpose of this setting is to determine the most suitable input form according to the information to be registered for the property and to enhance operational efficiency. (Text, Number, Date, Options, etc.)

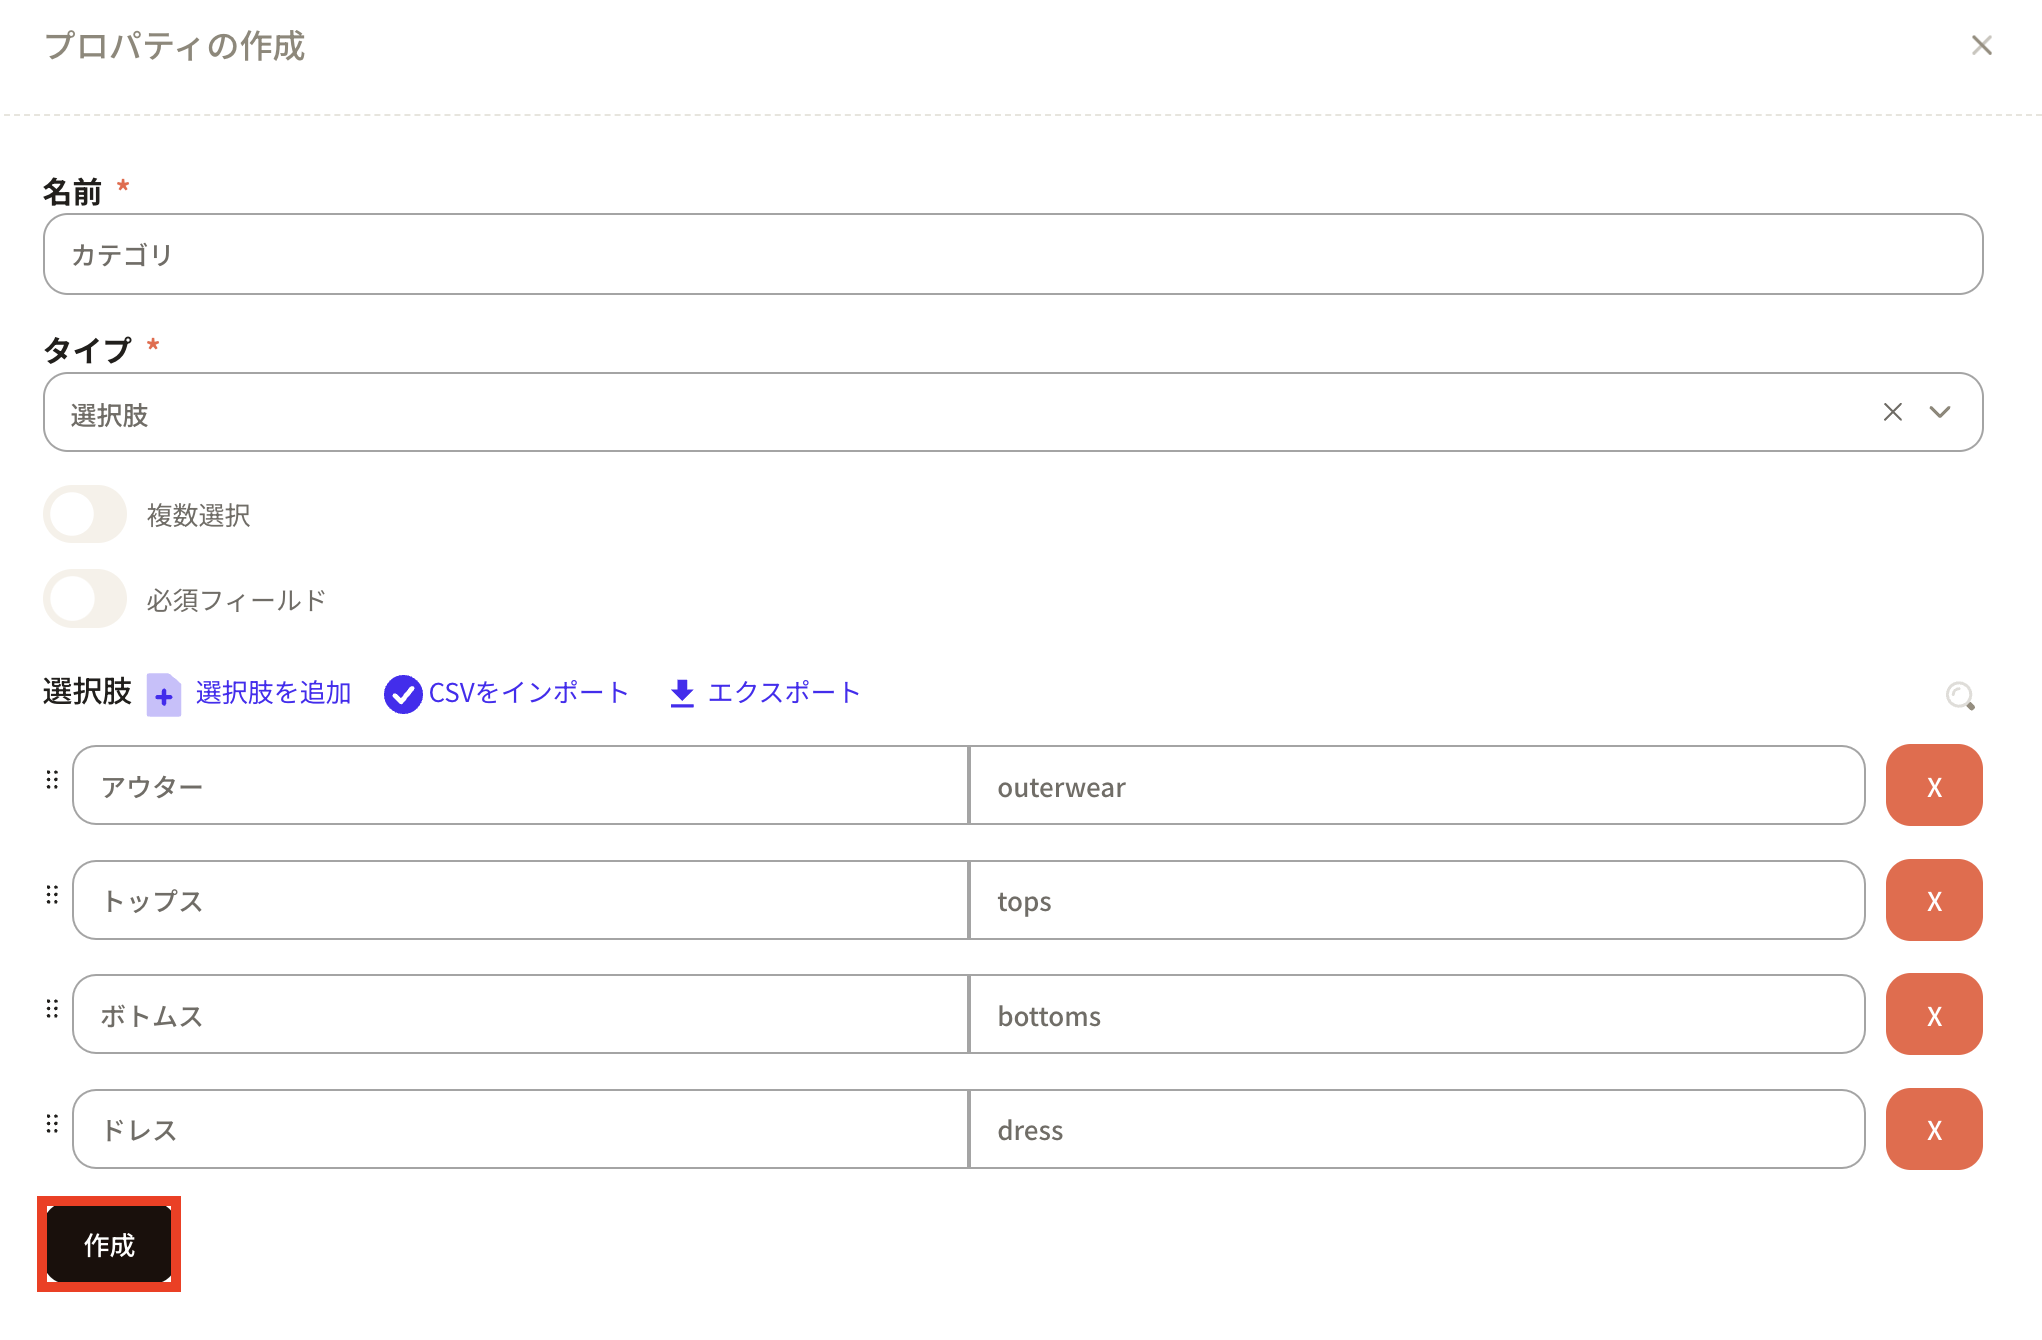
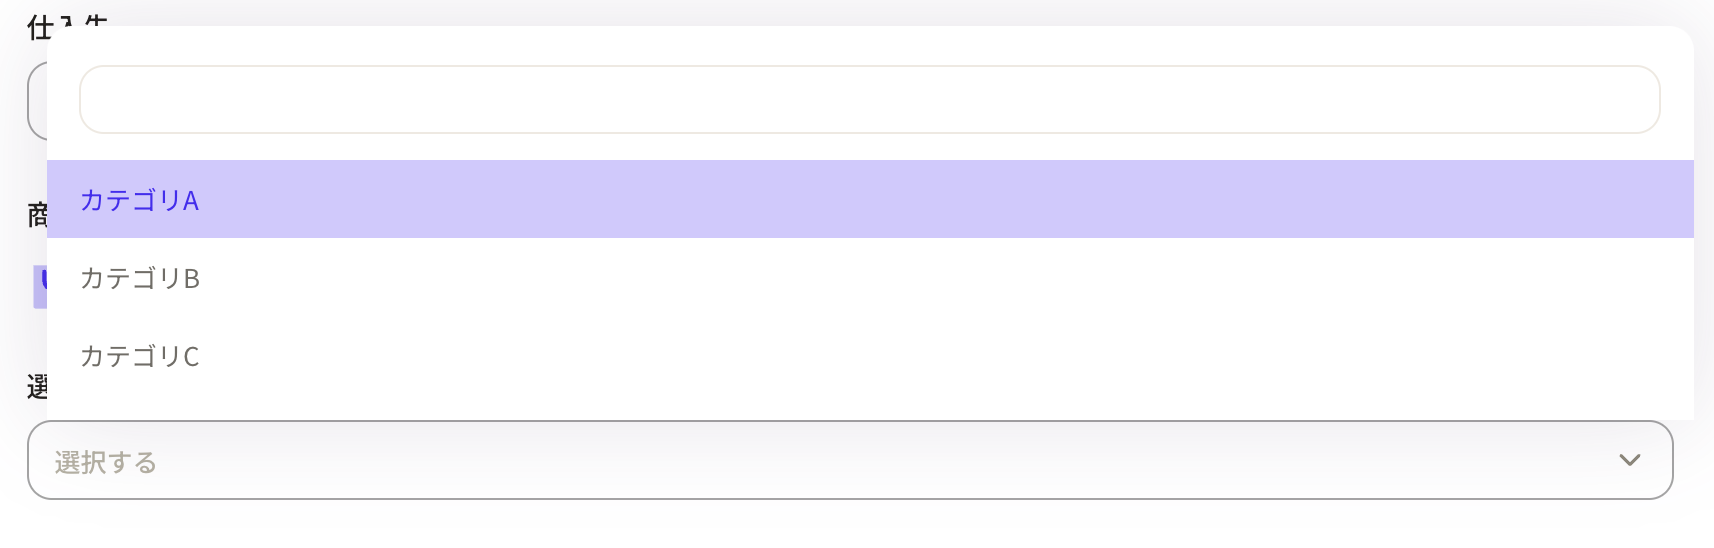
⑦ As an example in this instance, we will add a property for which "Category" can be selected from a list of options.
Name → "Category"

Type → "Options"
The label refers to the display name within Sanka, and the value is the name used internally by the system.
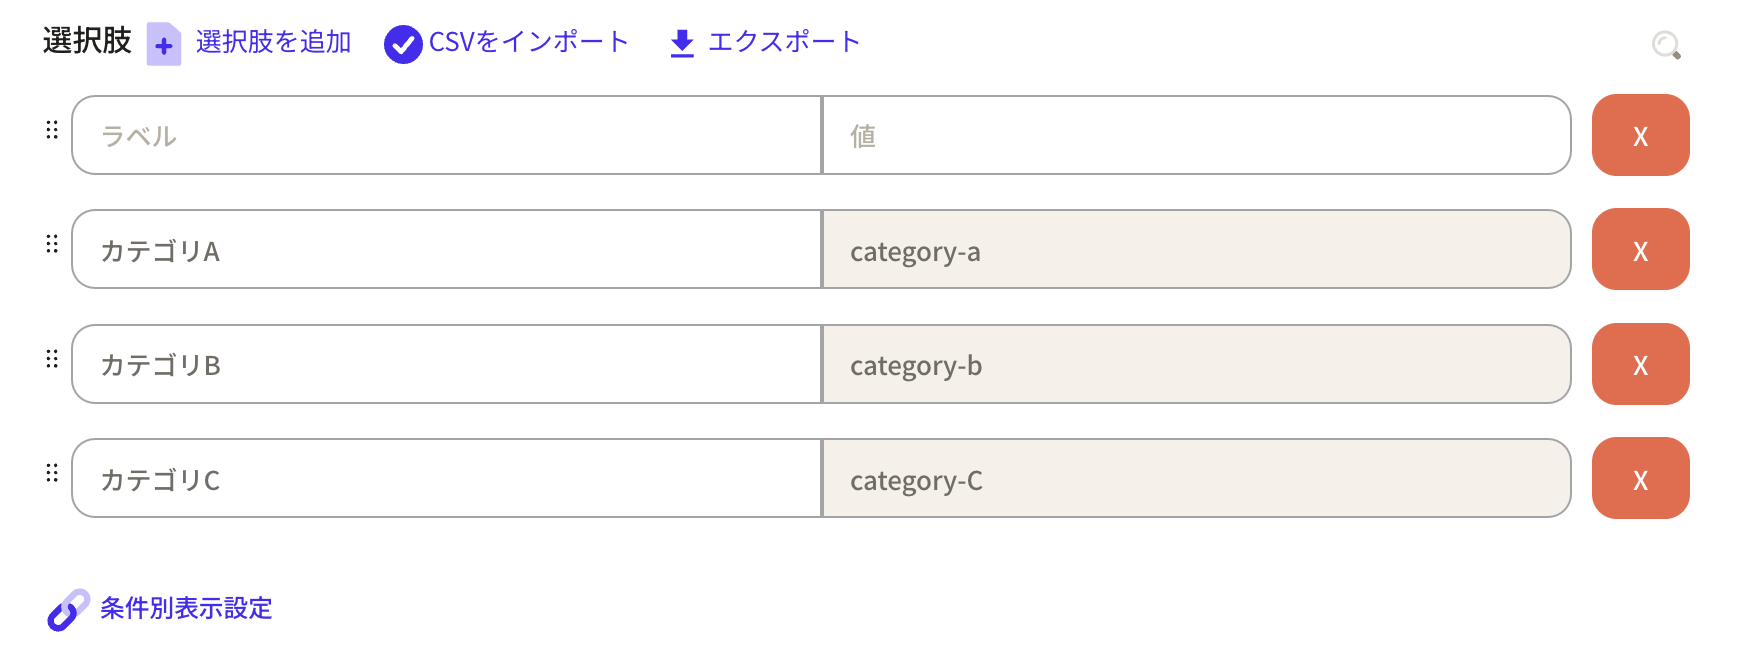
By pressing the "Add Option" button, a new field will appear. It is also possible to enter options using a CSV file.
*Value = The name used internally by the Sanka system. Please note that this value cannot be edited subsequently. It is recommended to assign names that are easy to understand within your organization.
By enabling the multiple selection option, you will be able to select multiple categories in the form.
Once you have entered the required information, click the Create button to register.
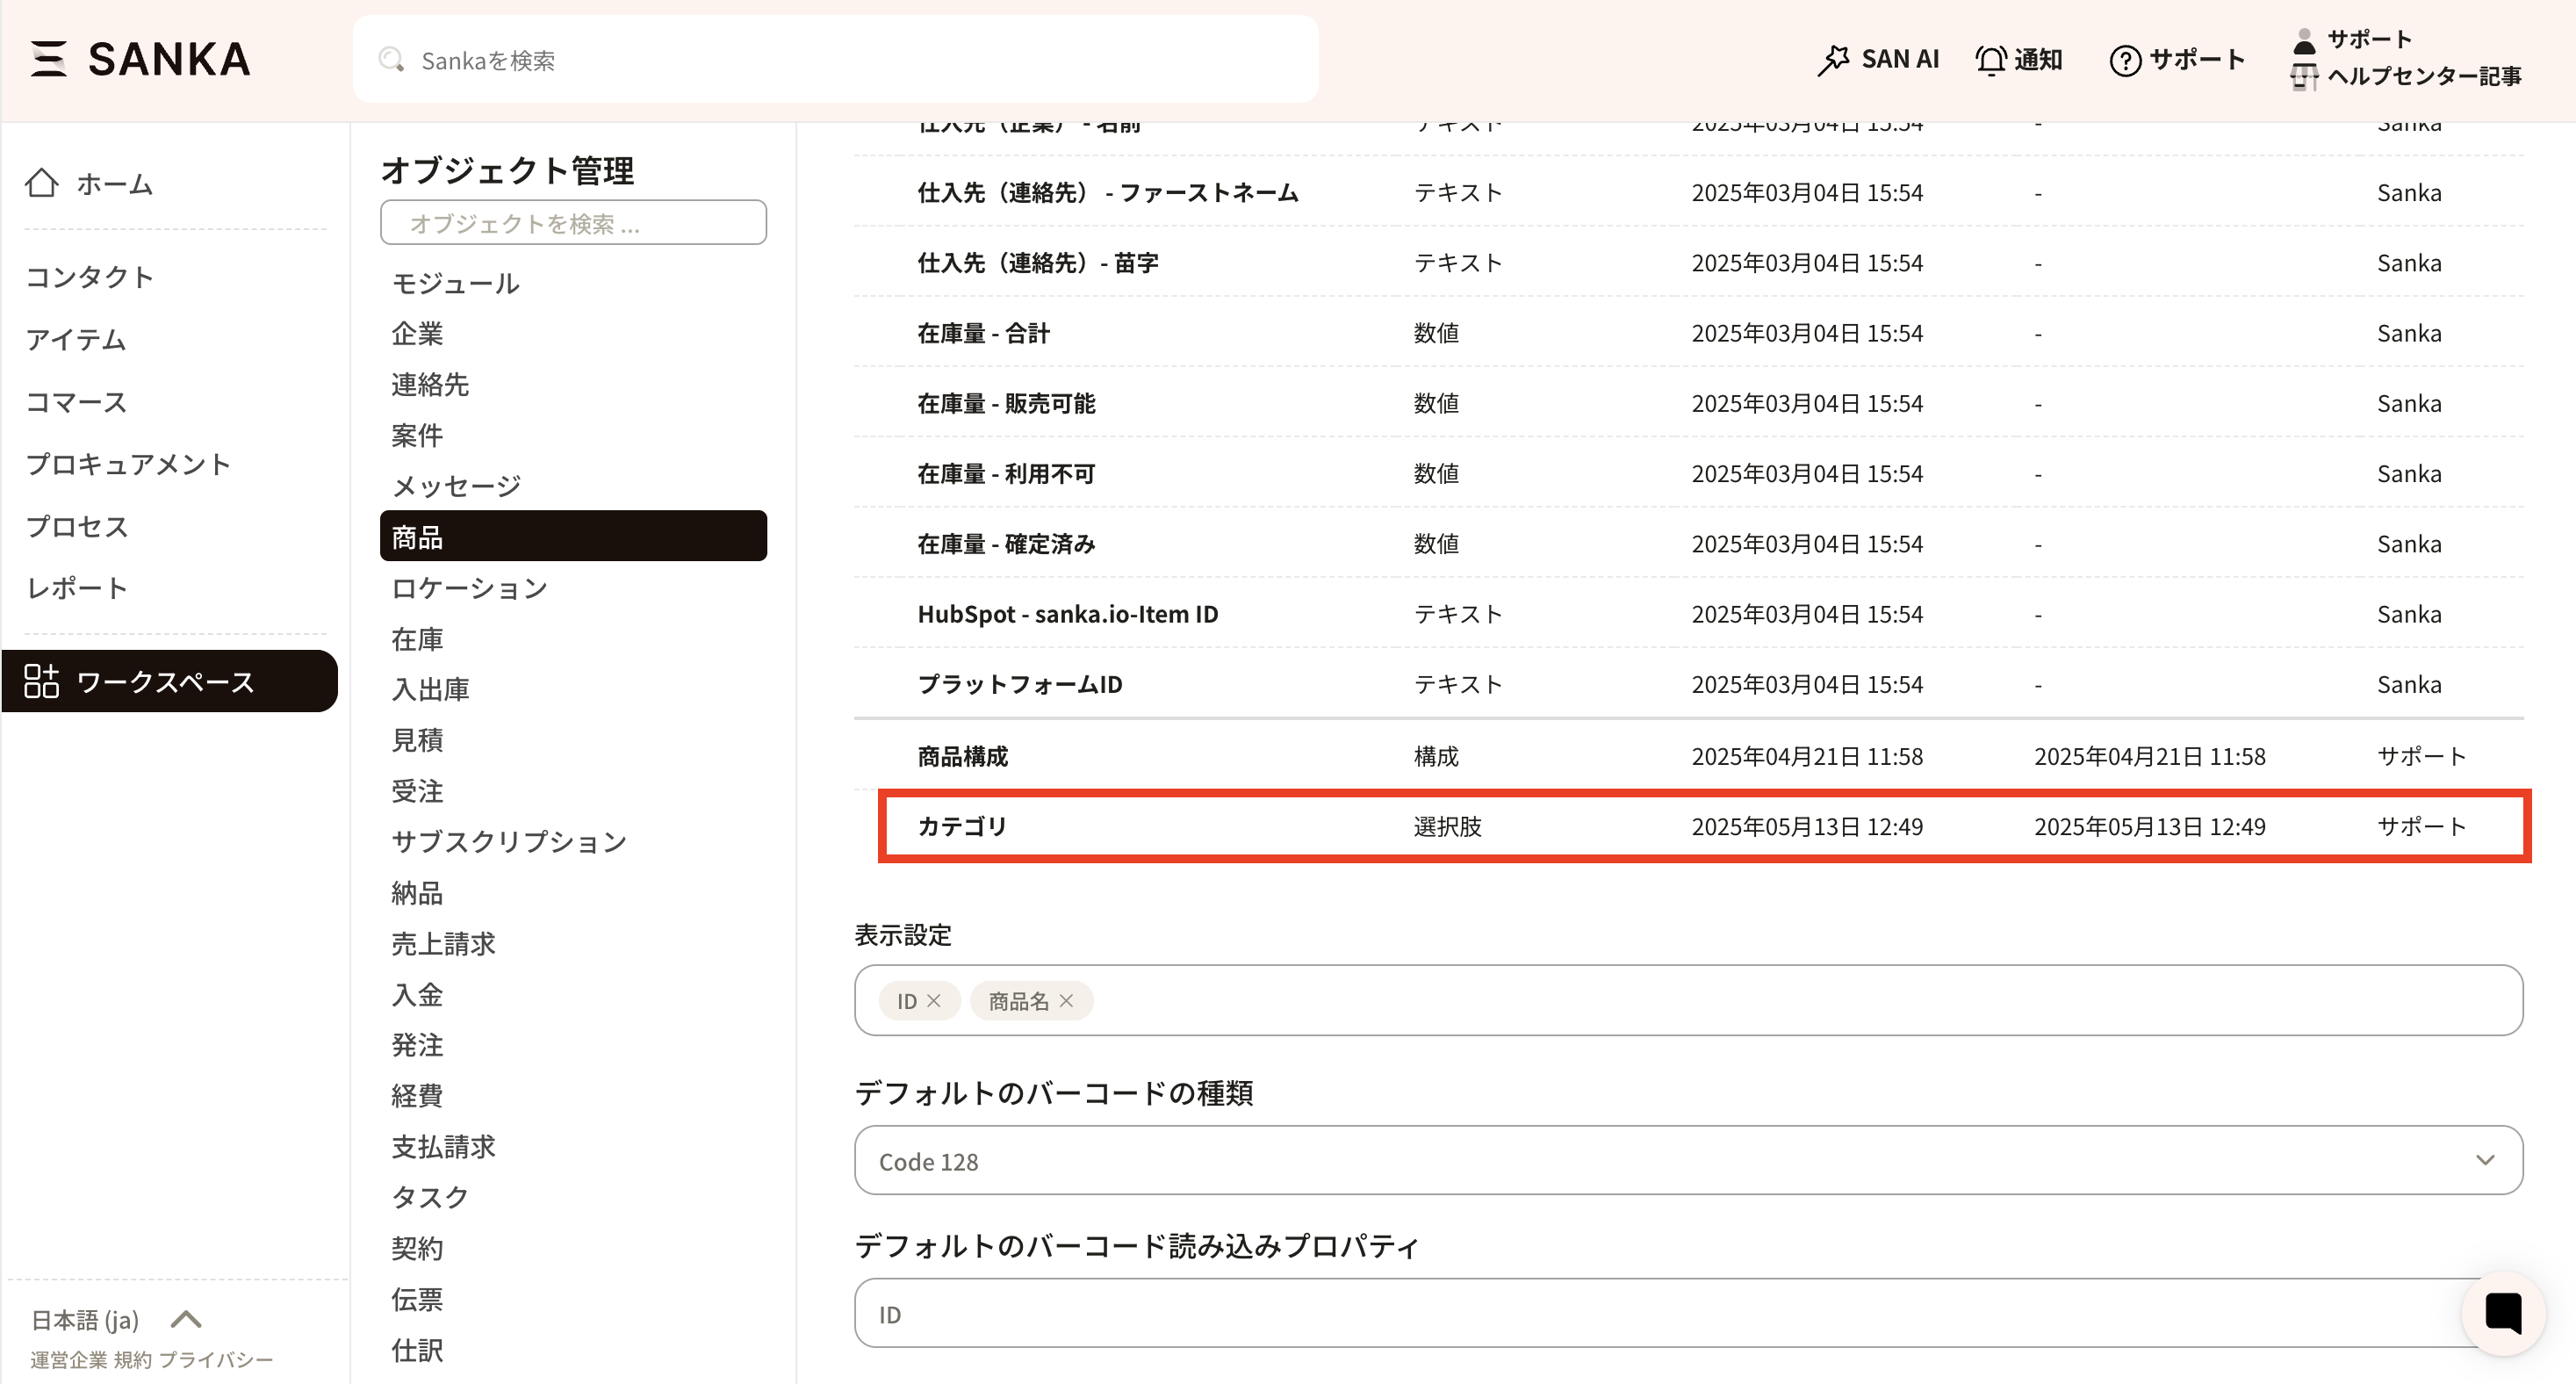
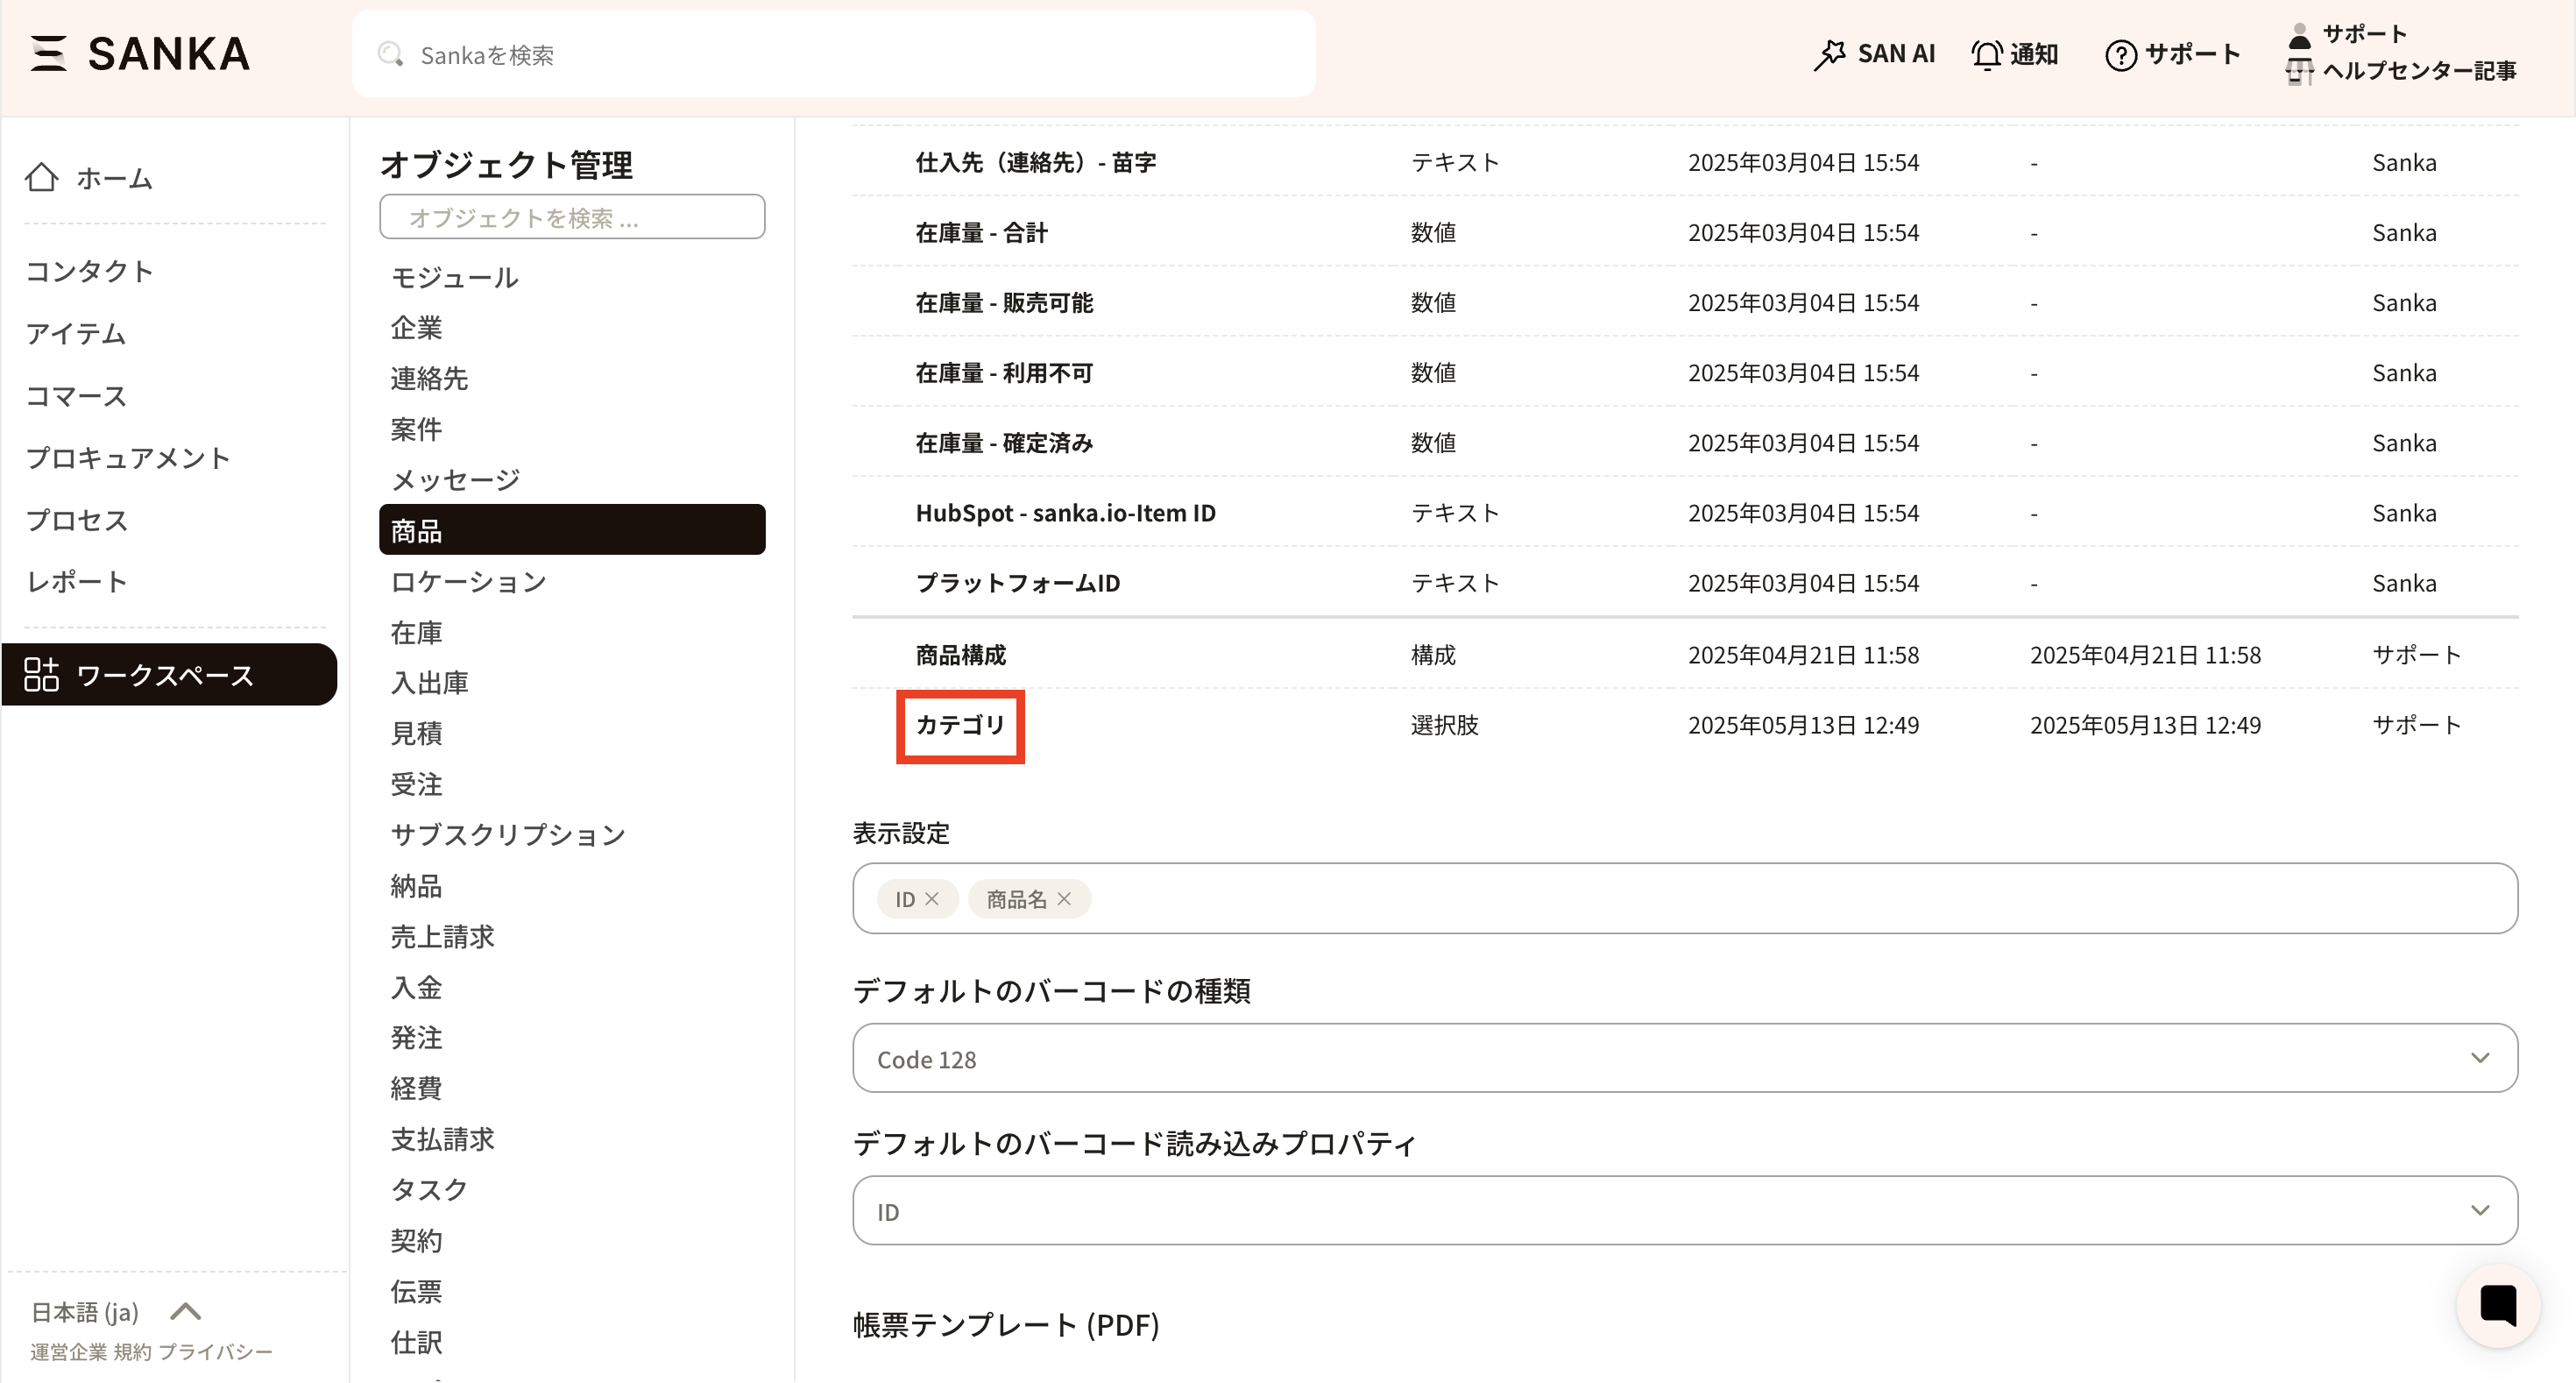
⑧ Once the new property you created has been registered, it will be displayed at the very bottom.
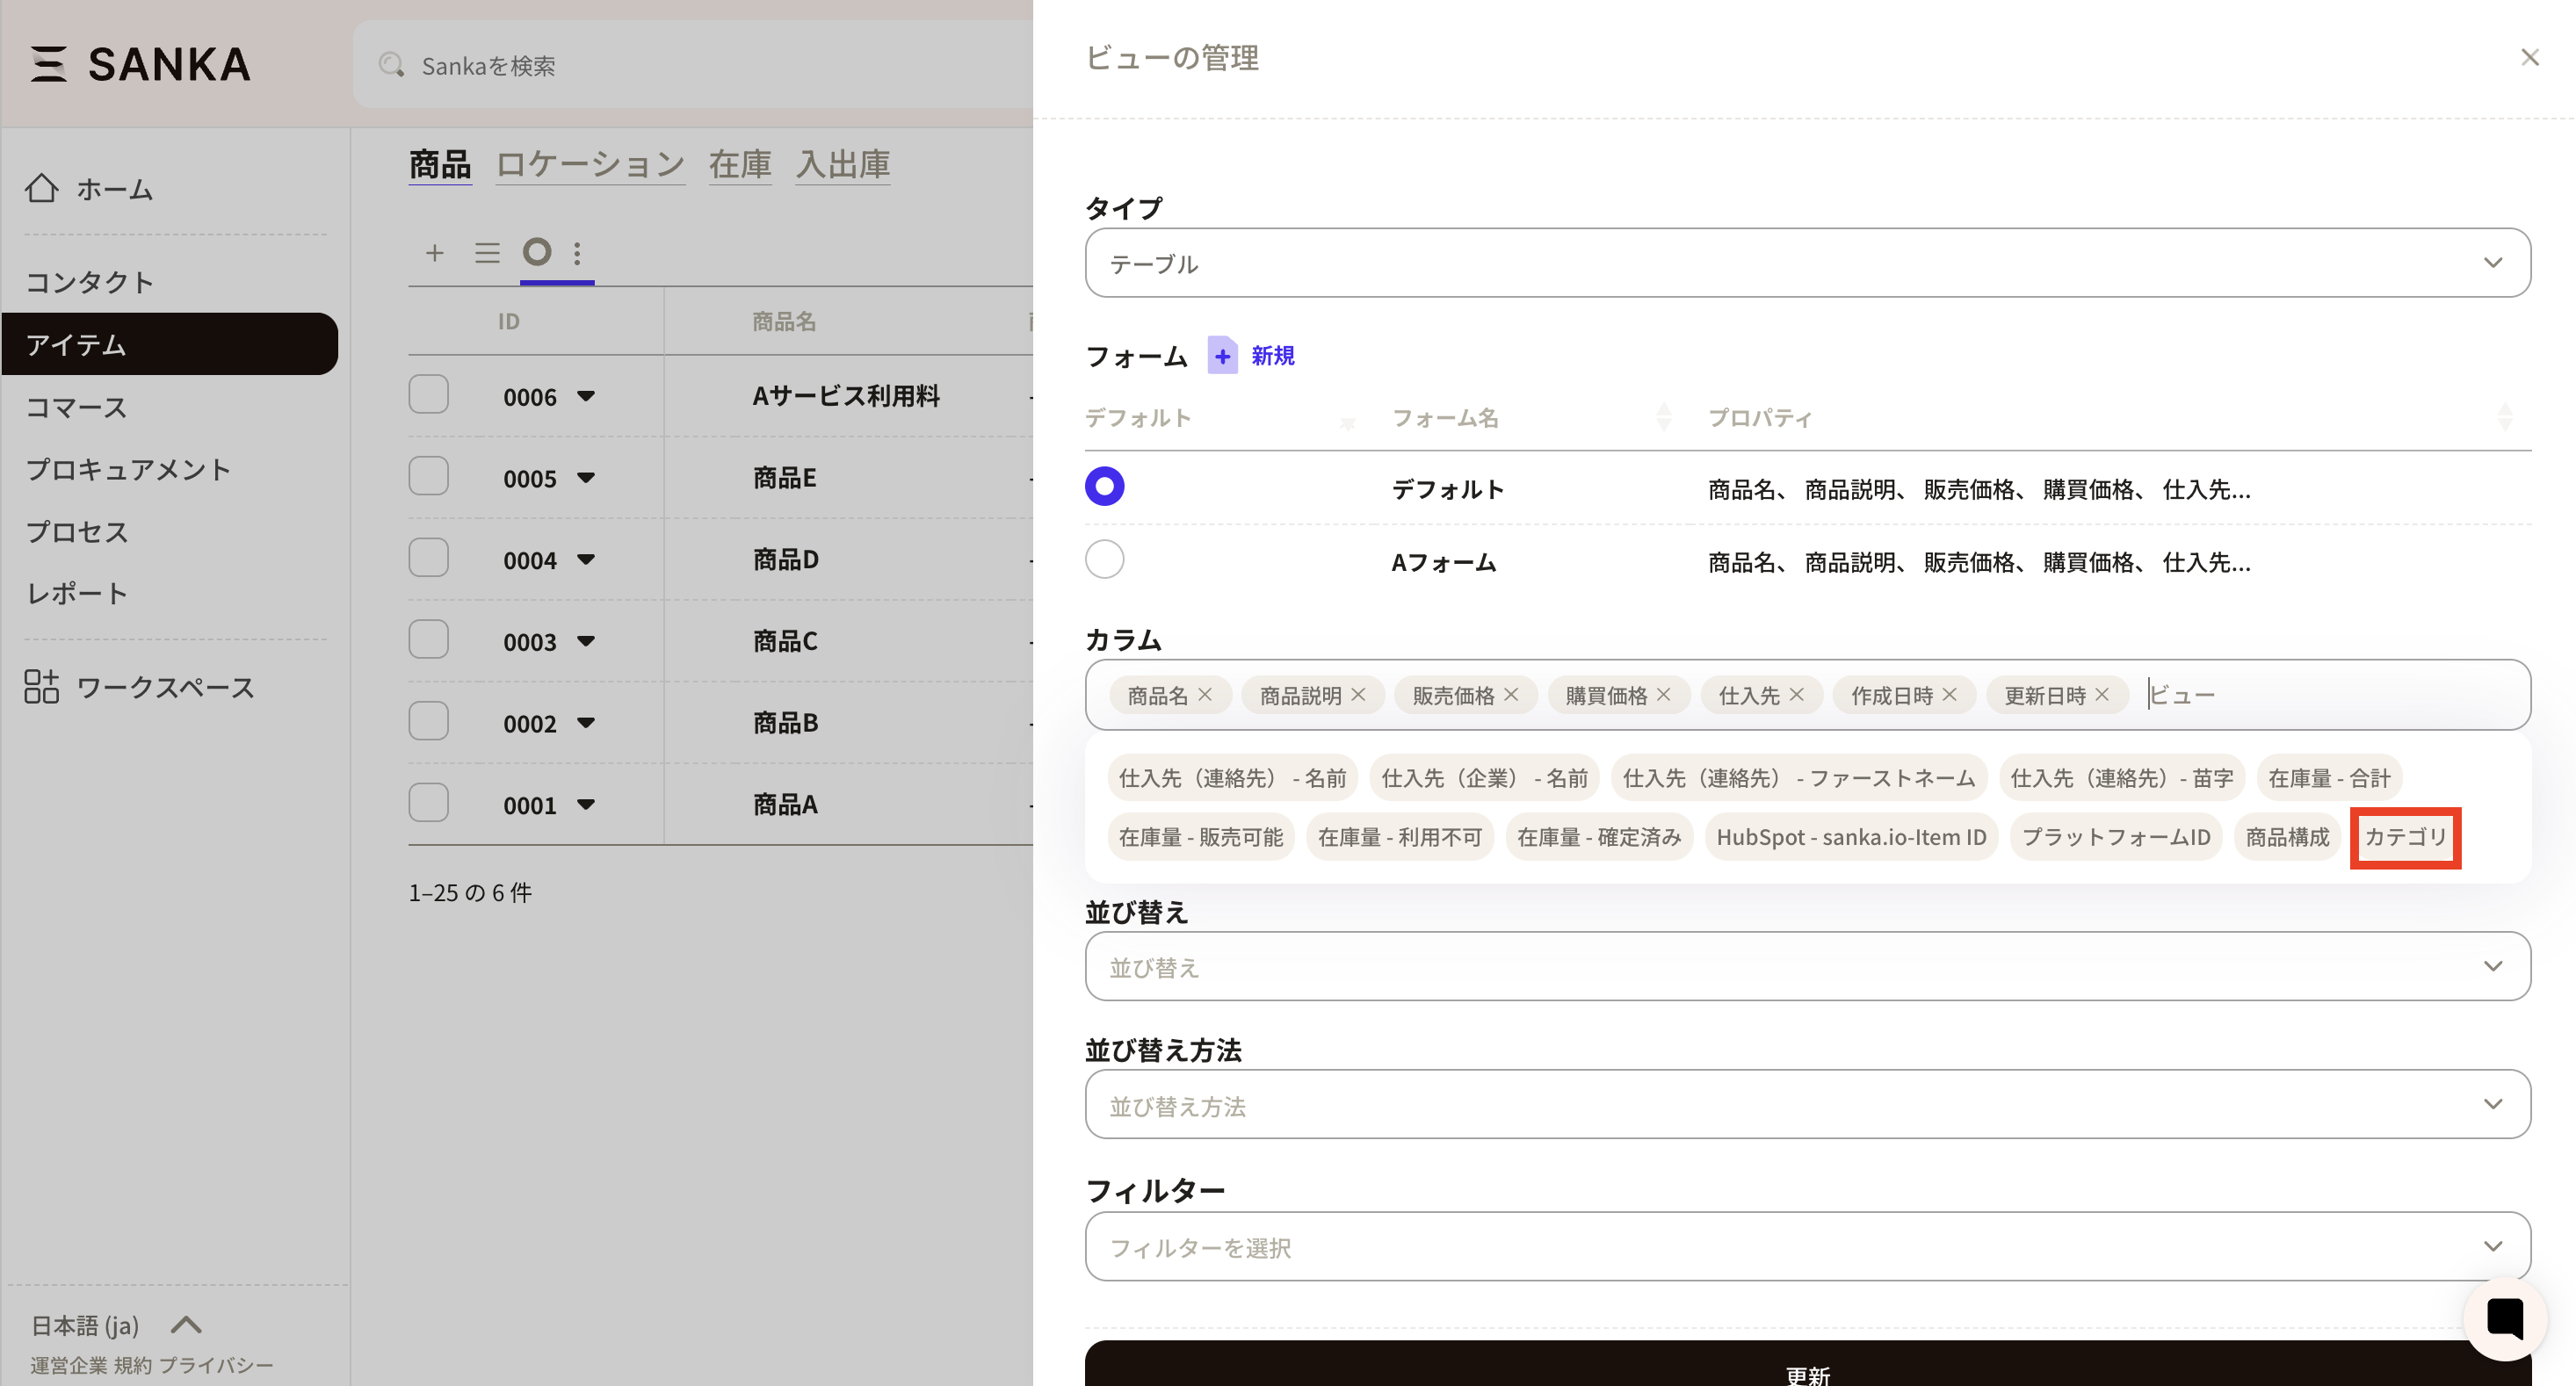
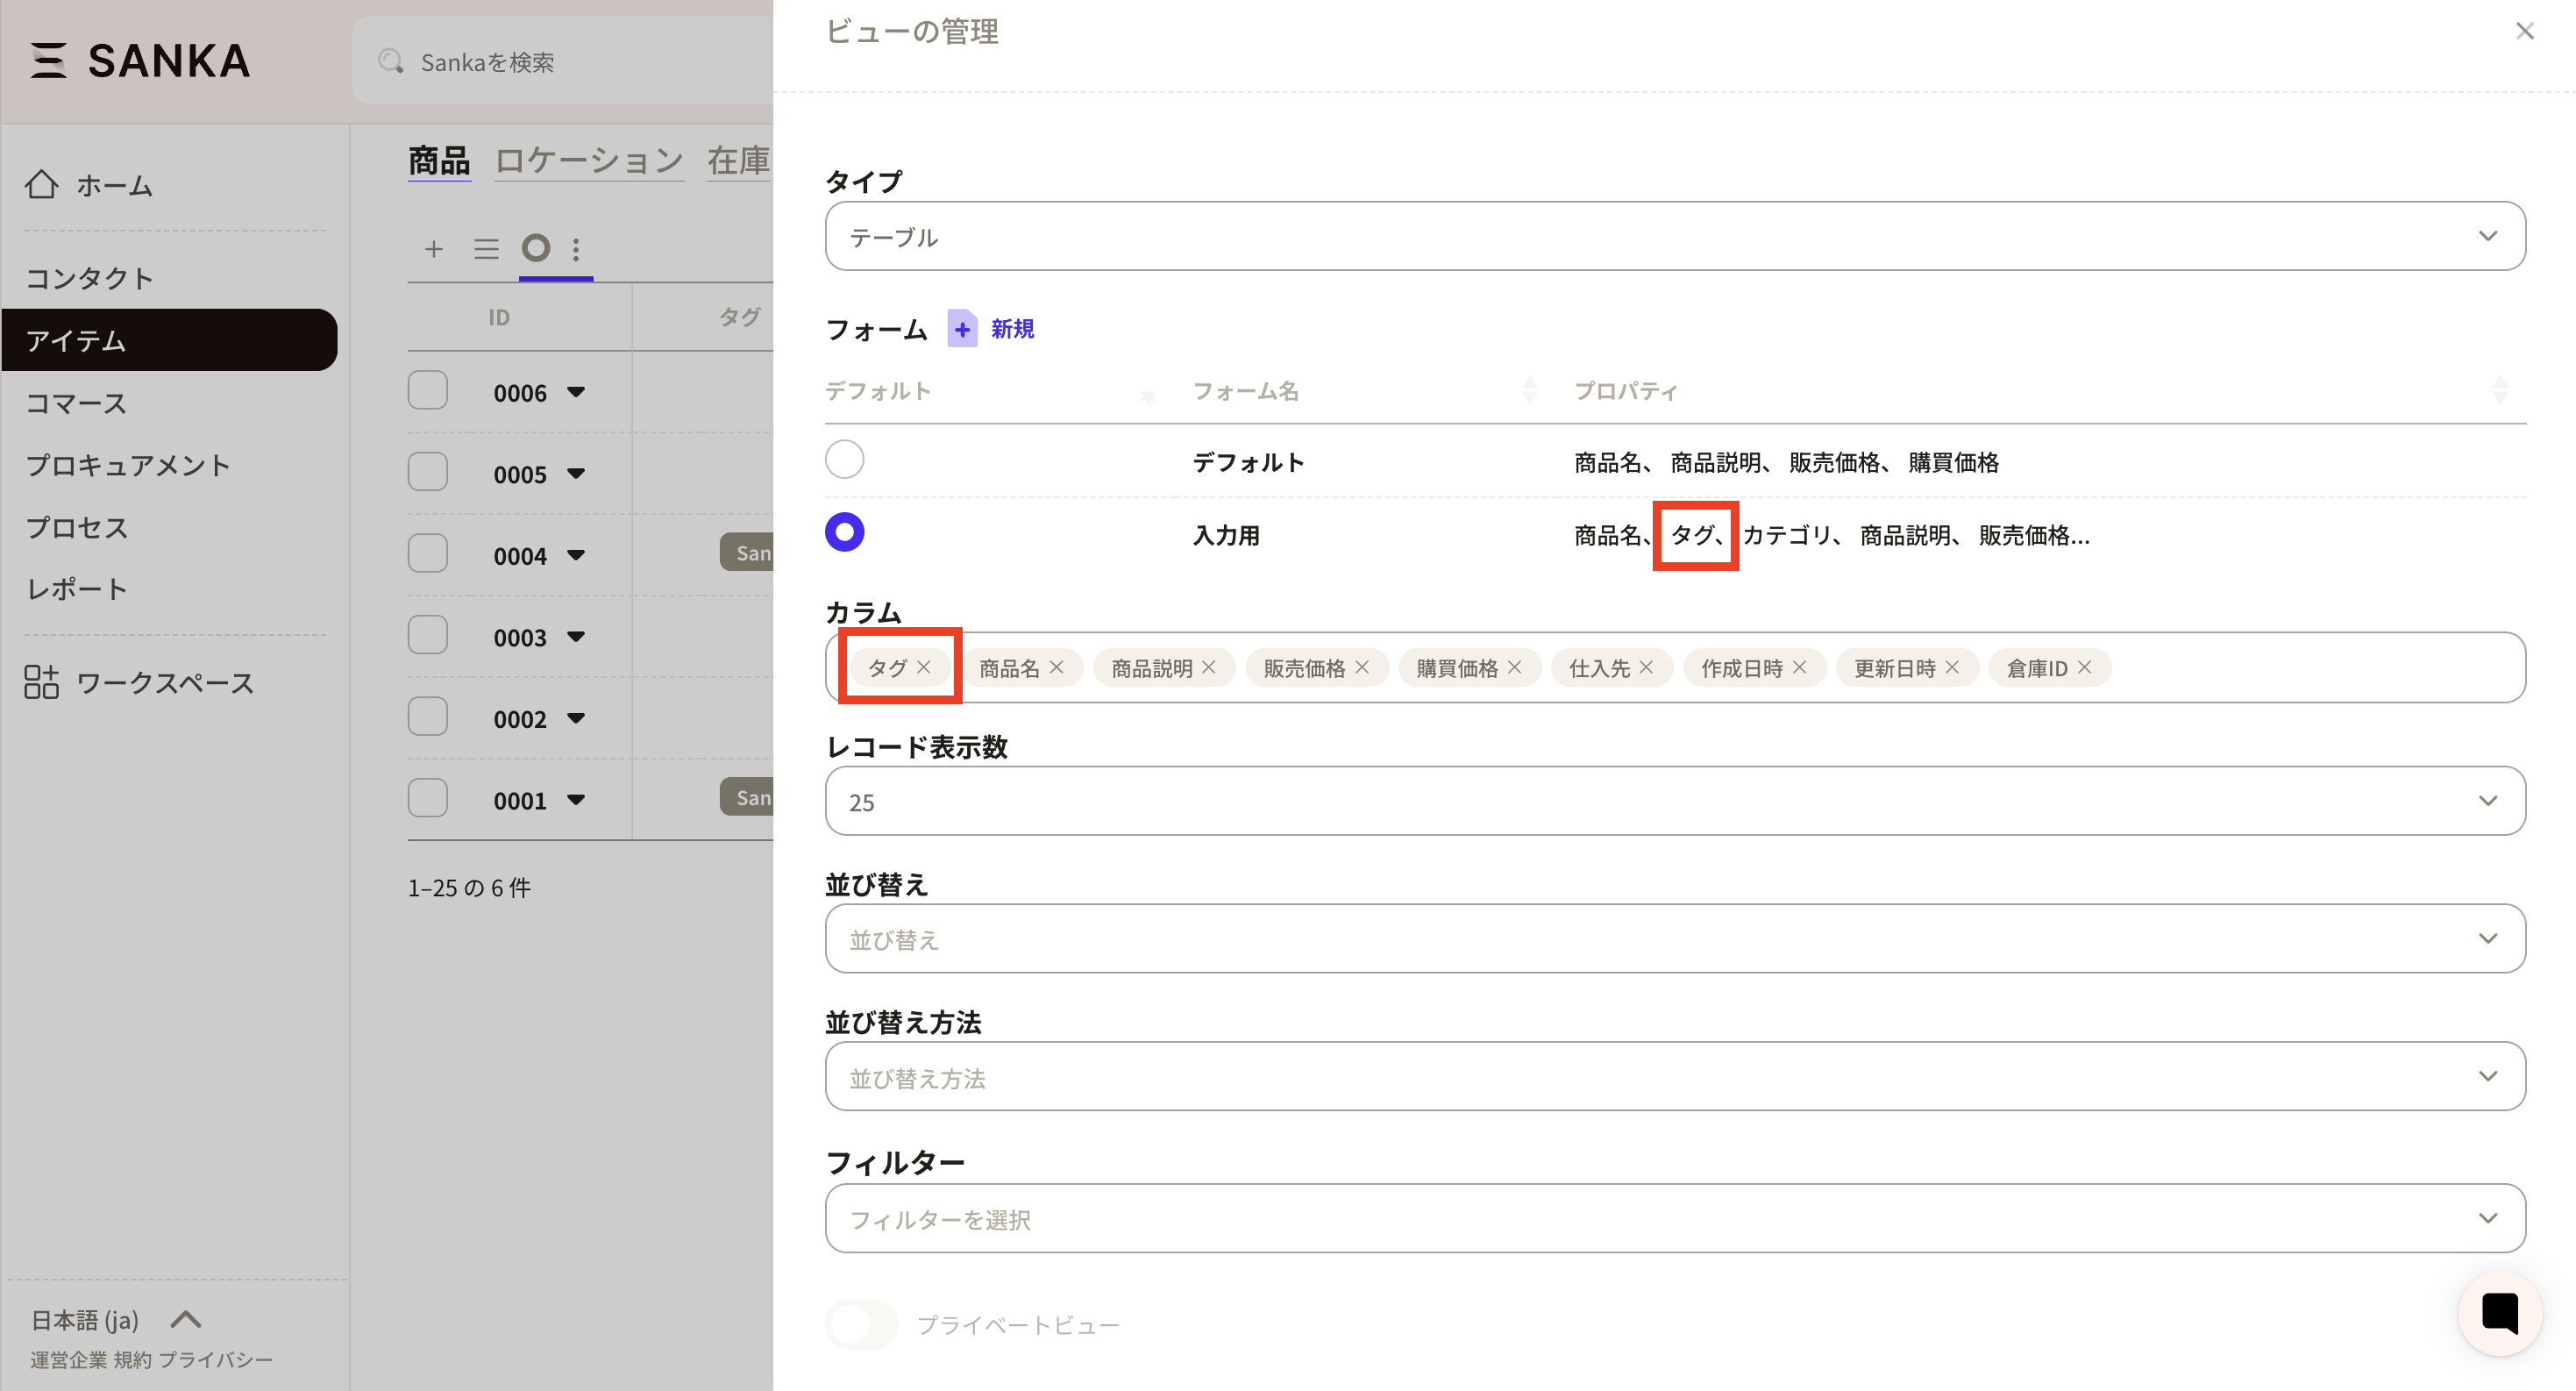
⑨ Next, configure the new property to be displayed in view management. Add it to columns or forms as needed. *Please refer to the section on view and form management in this article for instructions on how to add properties.
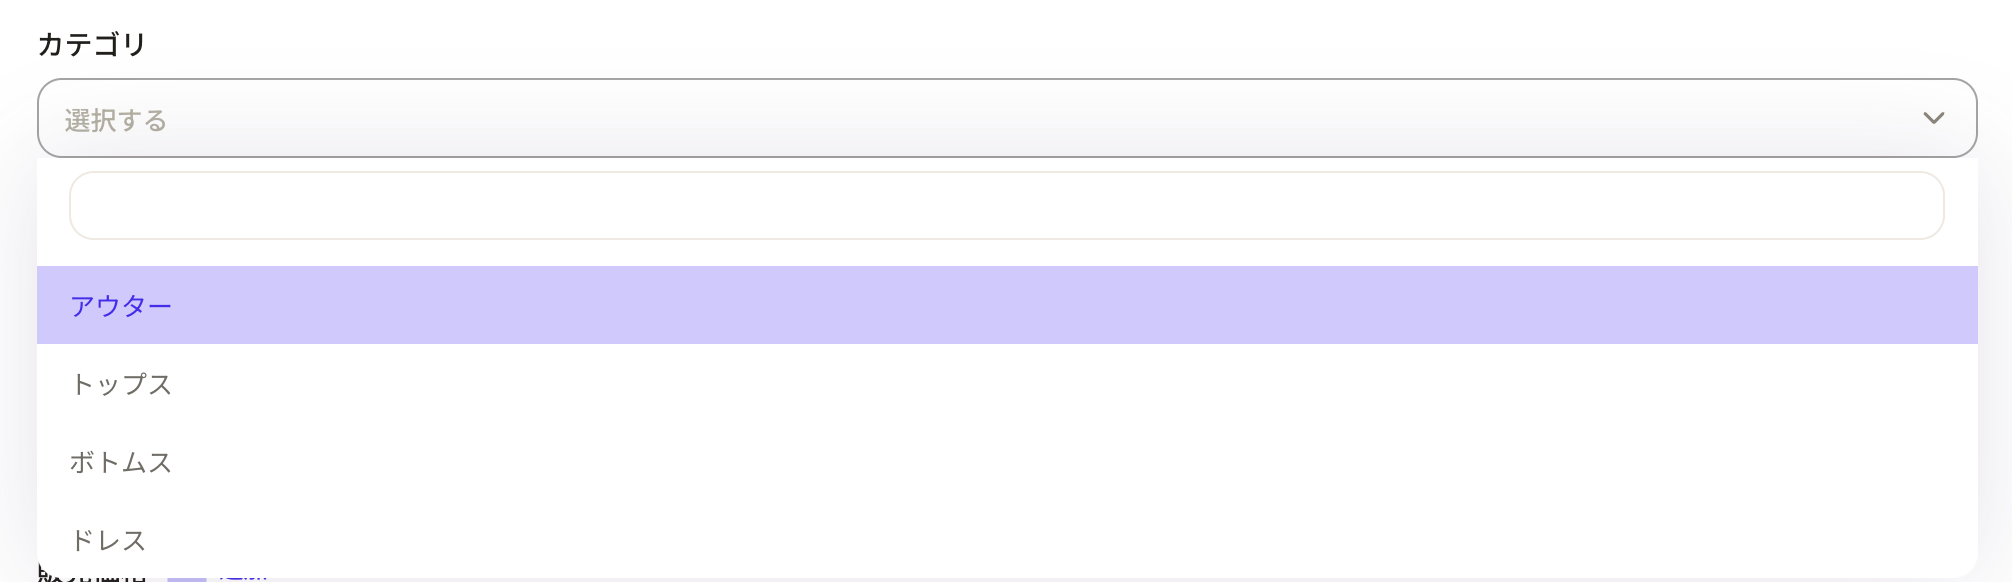
This is how it appears on the record creation form.
① Access object management and select the object for which you wish to edit properties. Then, click on the name of the property you would like to edit.
② Here, you can edit the category properties that were previously added to the product object. Select the product object from the workspace, then select the relevant property.
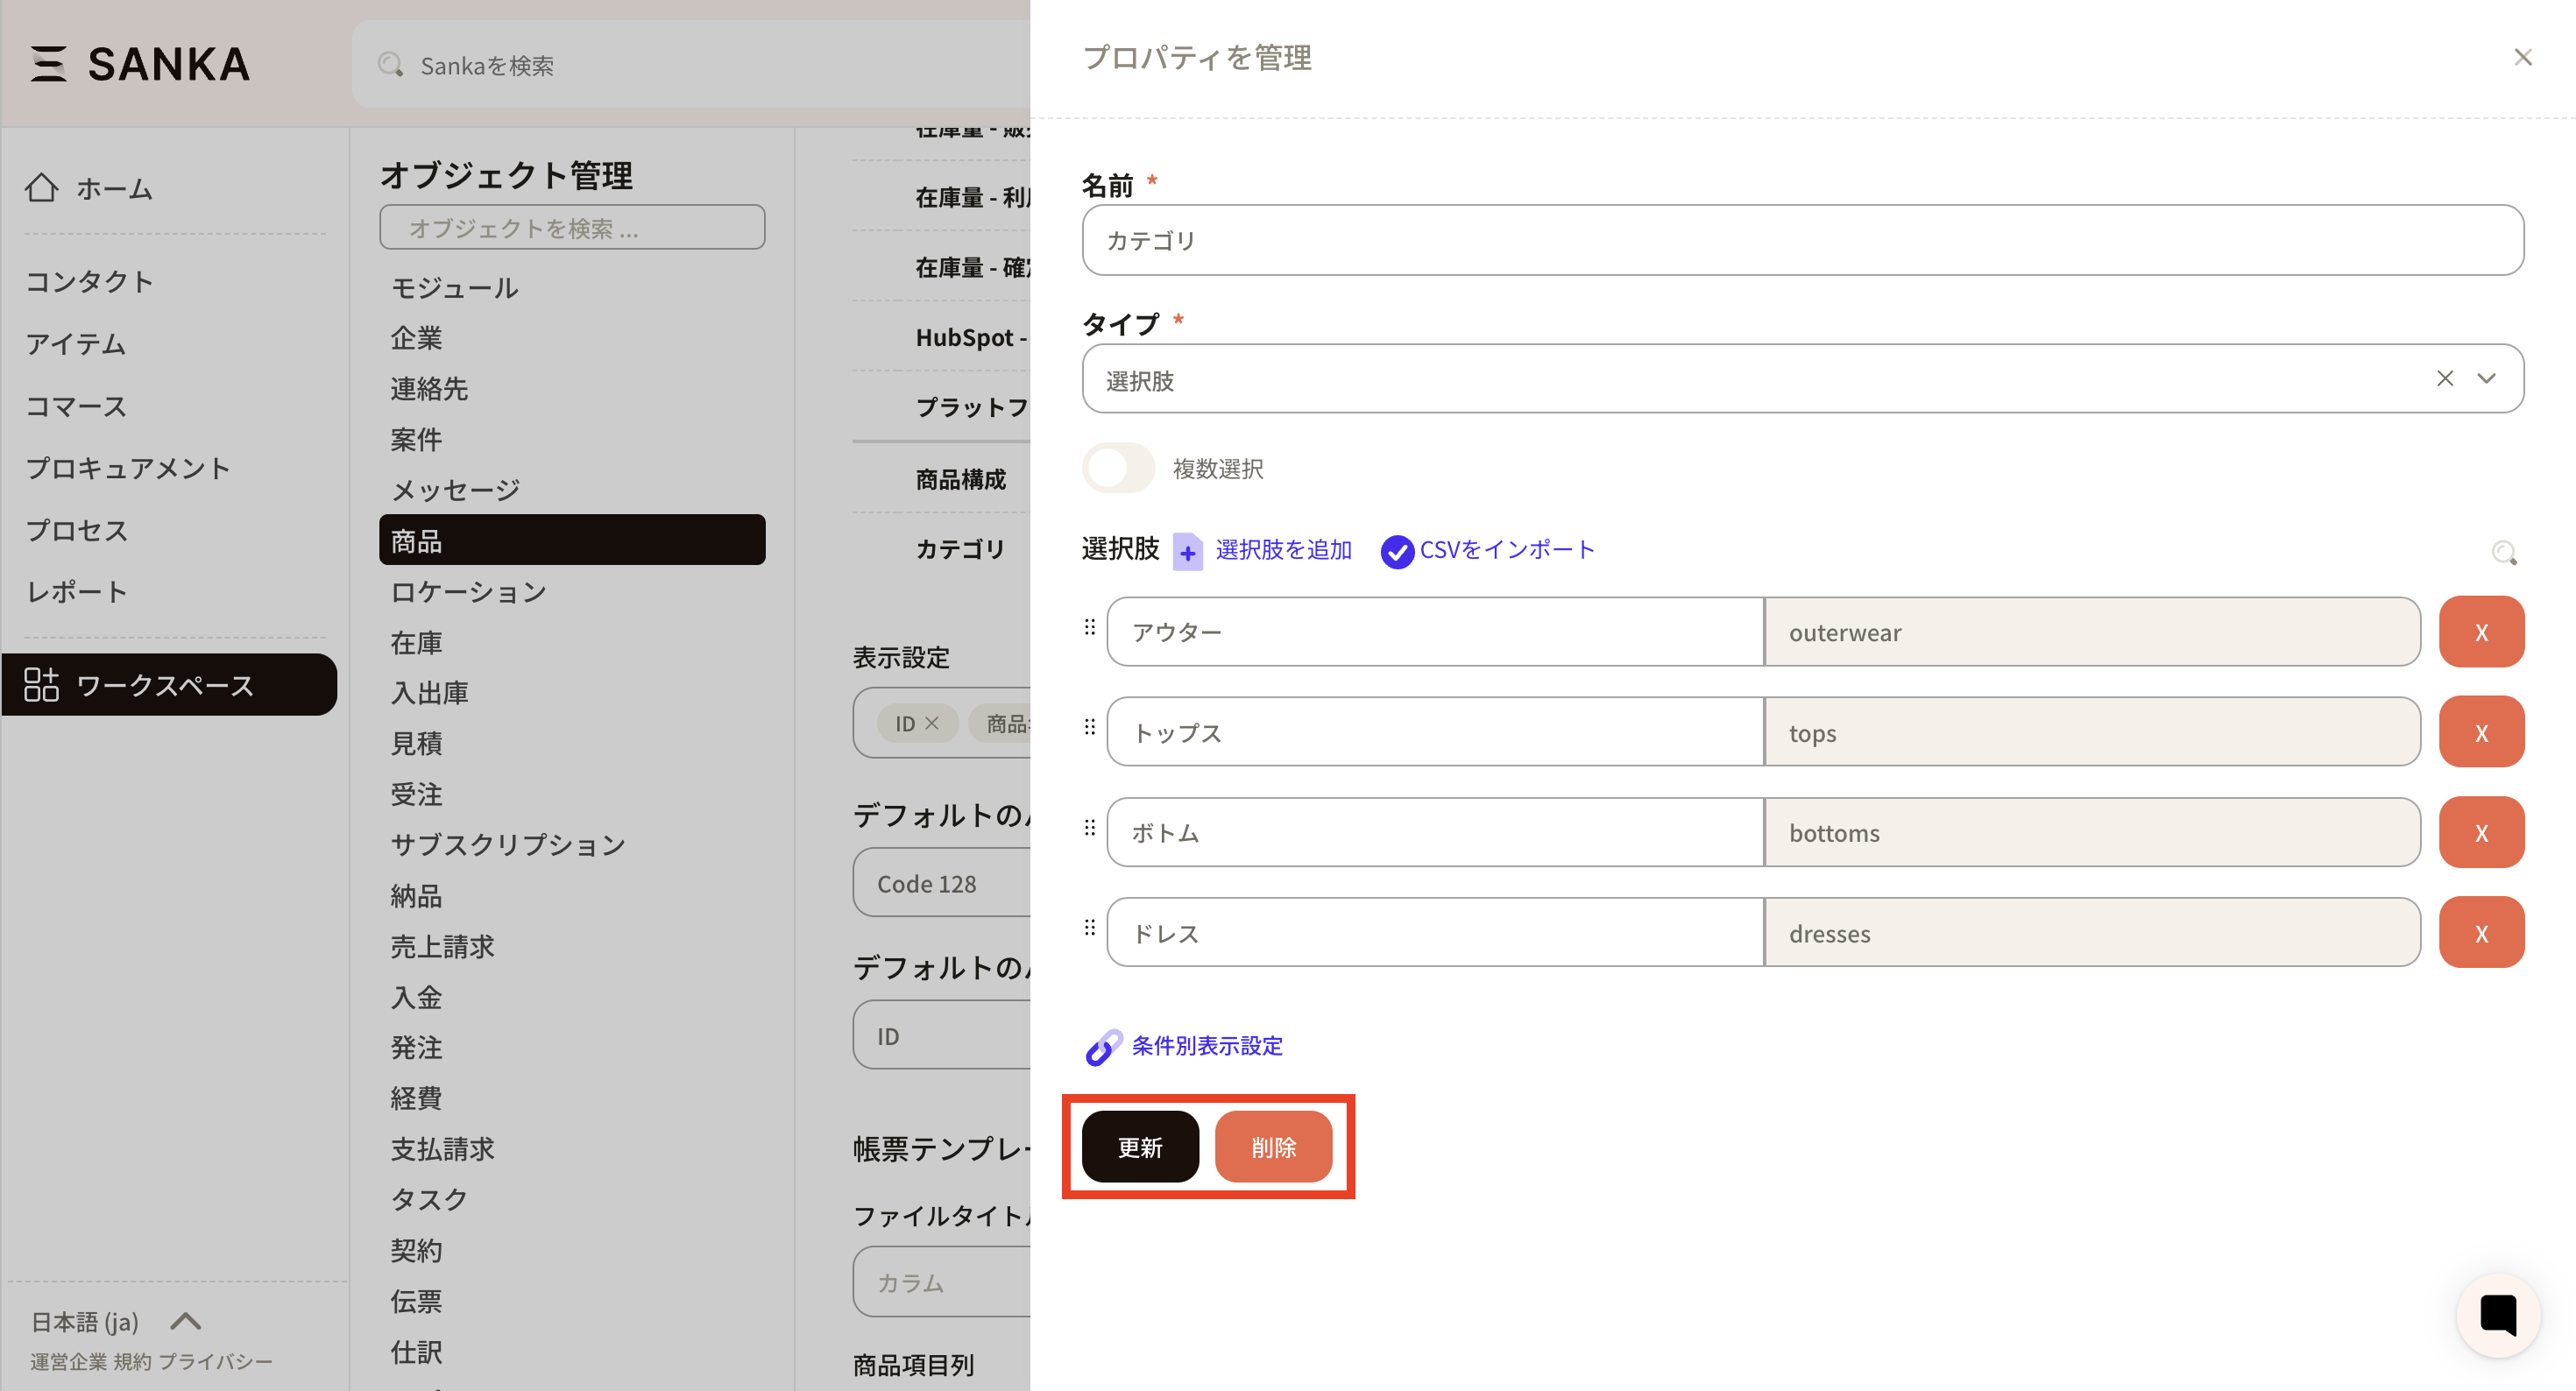
③ The 'Manage Properties' screen will be displayed, so please make the necessary edits as required. Once the changes are complete, click the Update button. If you need to delete a property that is no longer needed, you can do so by clicking the Delete button.
From here, we will explain the types of properties. You can select from options such as text and numbers.
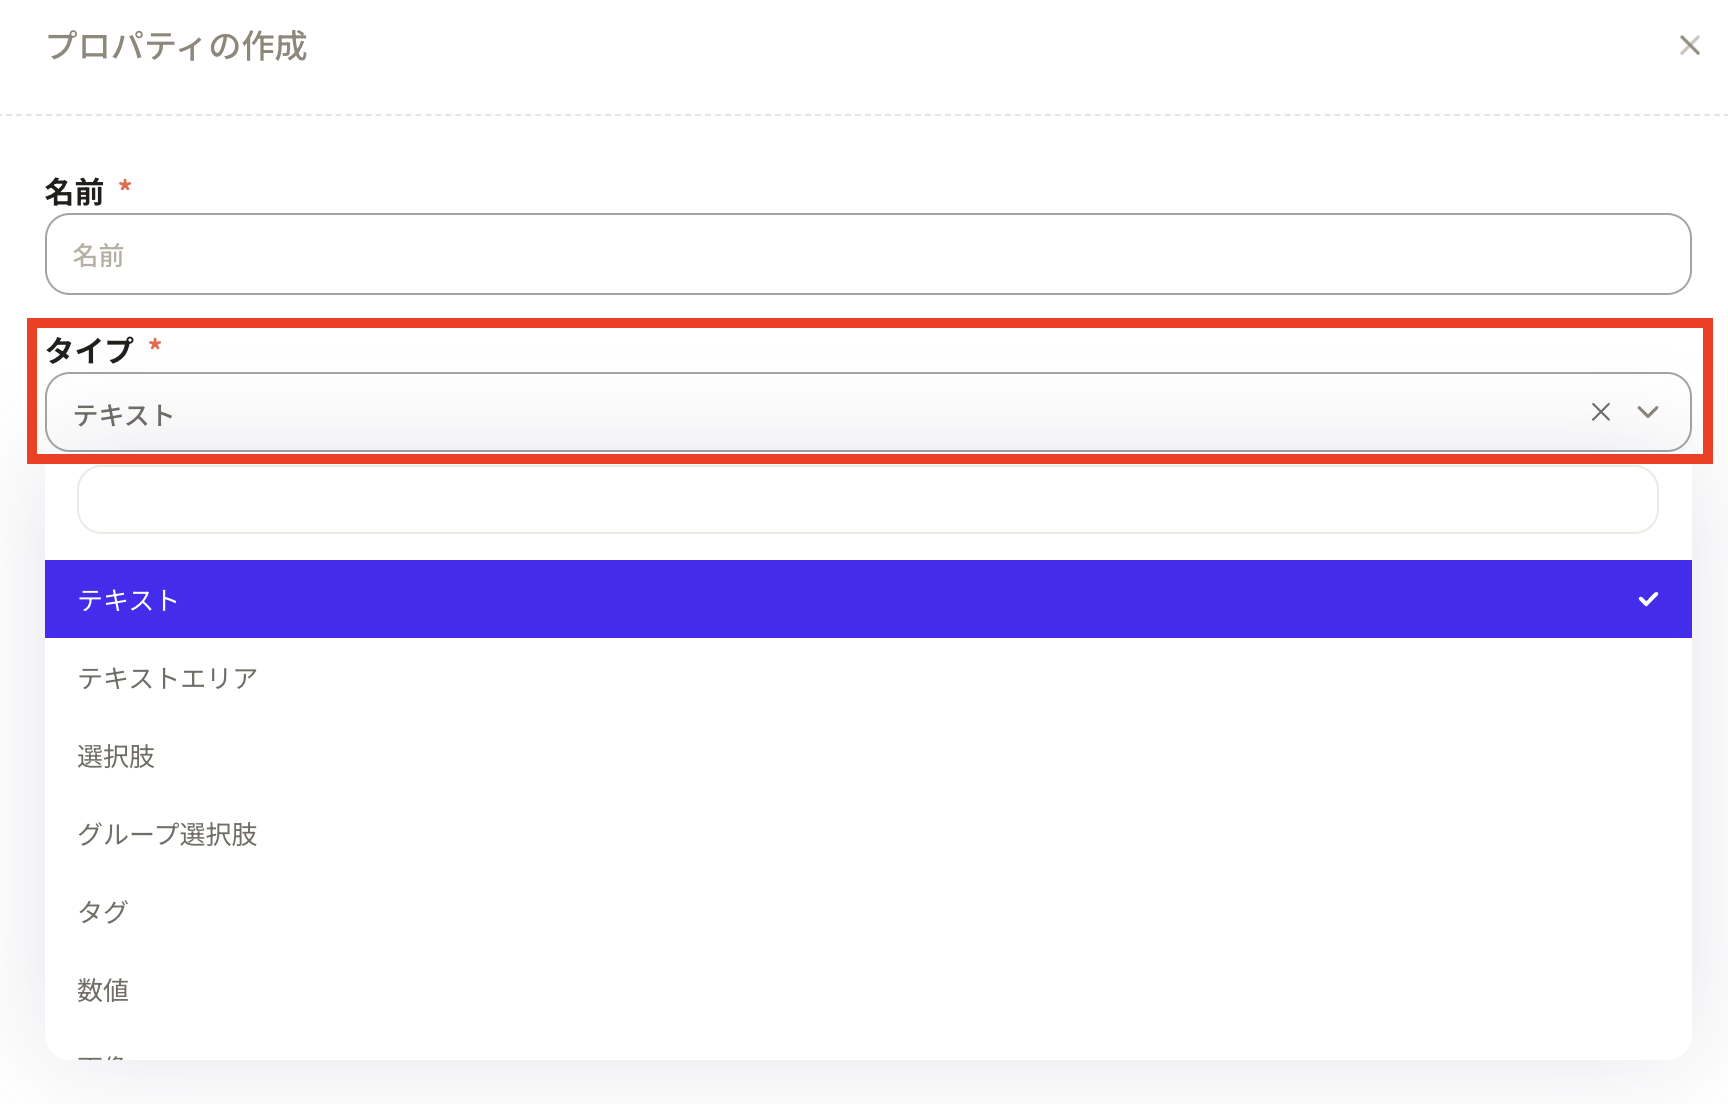
Text: Enter text. This can be used for notes, or for entering numbers as well as other text.

It is also possible to apply a uniqueness restriction.
Text Area: The text input field can be expanded. This option is also convenient for use when entering a large amount of text, such as for descriptions or notes.

There are several types of choices: the standard "choices" that can be viewed in a list; the "conditional display setting" using two choice properties; and the "grouped choices," which allow you to view grouped selections in a list. Please select the appropriate type according to the needs of your business.
Choices: You can create selectable options. This is convenient when you have category groups in your product master, or when you wish to configure selections by type, as it streamlines data entry in forms.
How to configure choices
Pressing the “Add Choice” button will add a new entry.
Label: The name that will be displayed within Sanka
Value: The name to be applied within the Sanka system *Please note that the value cannot be changed later, so set it to something easily recognizable for your company.
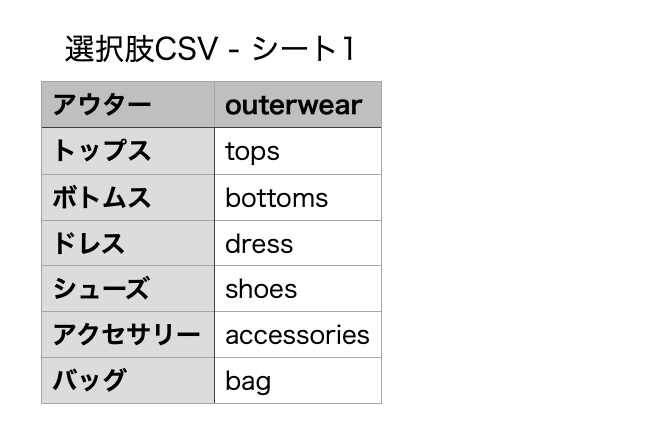
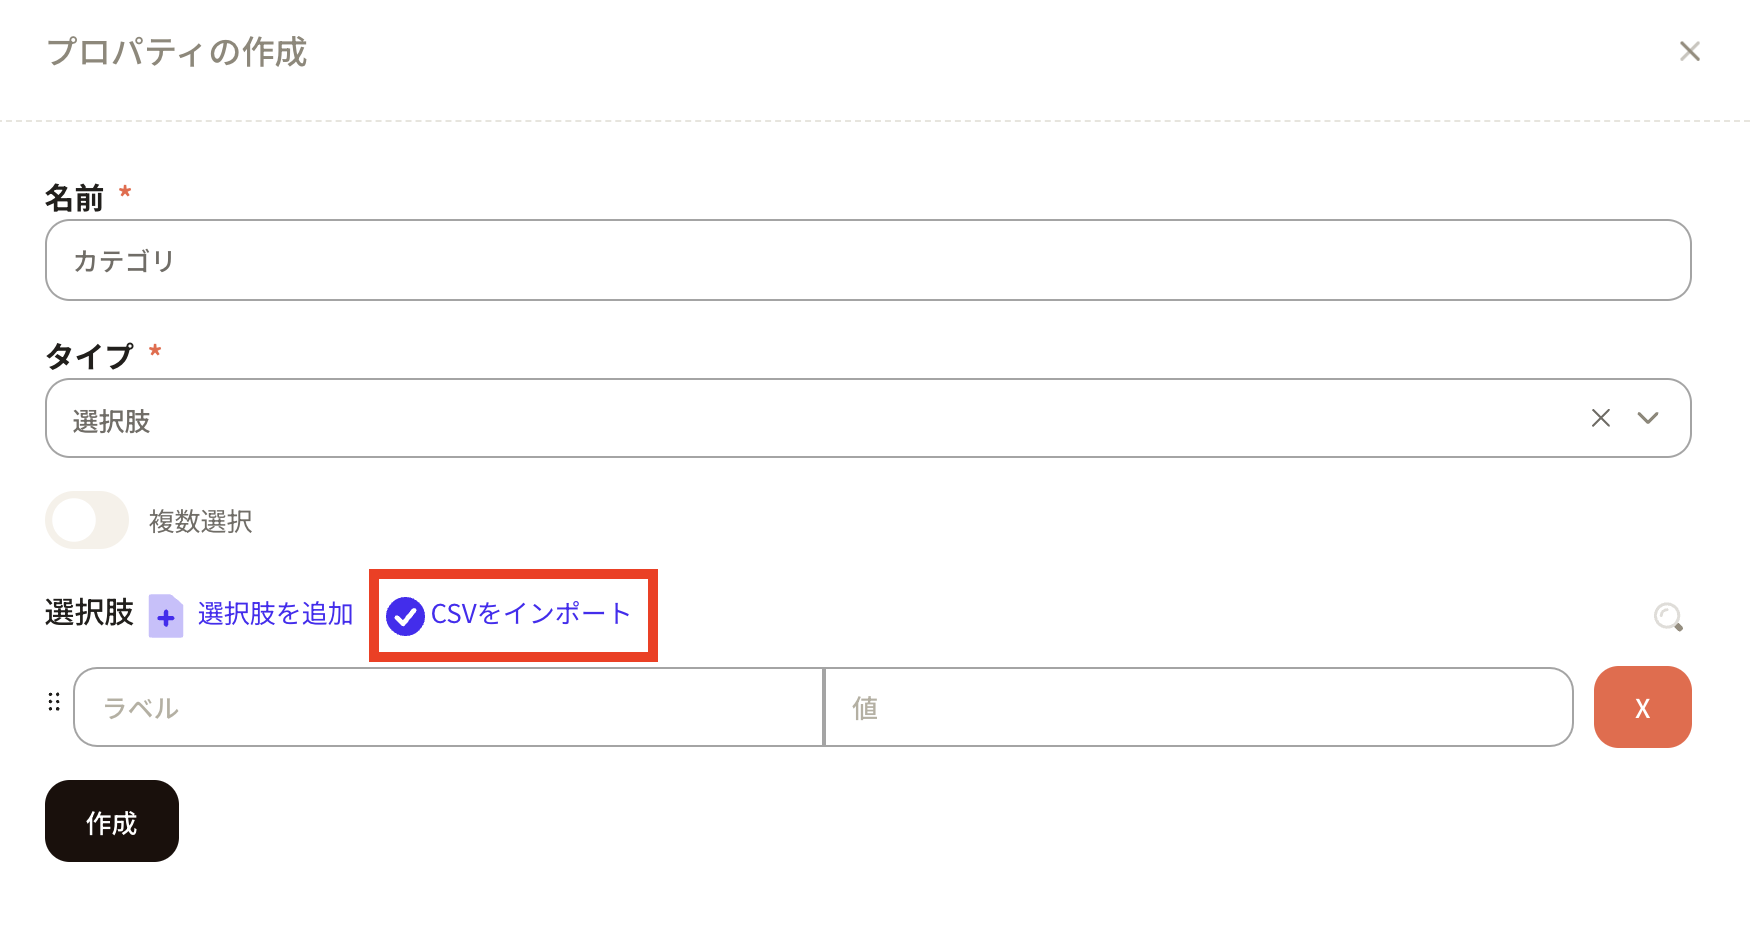
How to input options using CSV
If there are many options, manual input can be time-consuming. Here, we will introduce how to input options using CSV.
① First, prepare the CSV file.
Compose two columns, placing the label on the left and the value on the right. *For the options CSV, label and value headers are not required.*
・Label = The name displayed within Sanka.
・Value = The name used internally by the Sanka system. Please note that values cannot be modified later. It is recommended to create values that are easy for your company to understand.
② Next, on the property creation screen, enter the name, then select "Options" as the type. The options field will be displayed. Click "Import CSV" and import the CSV file you created earlier.
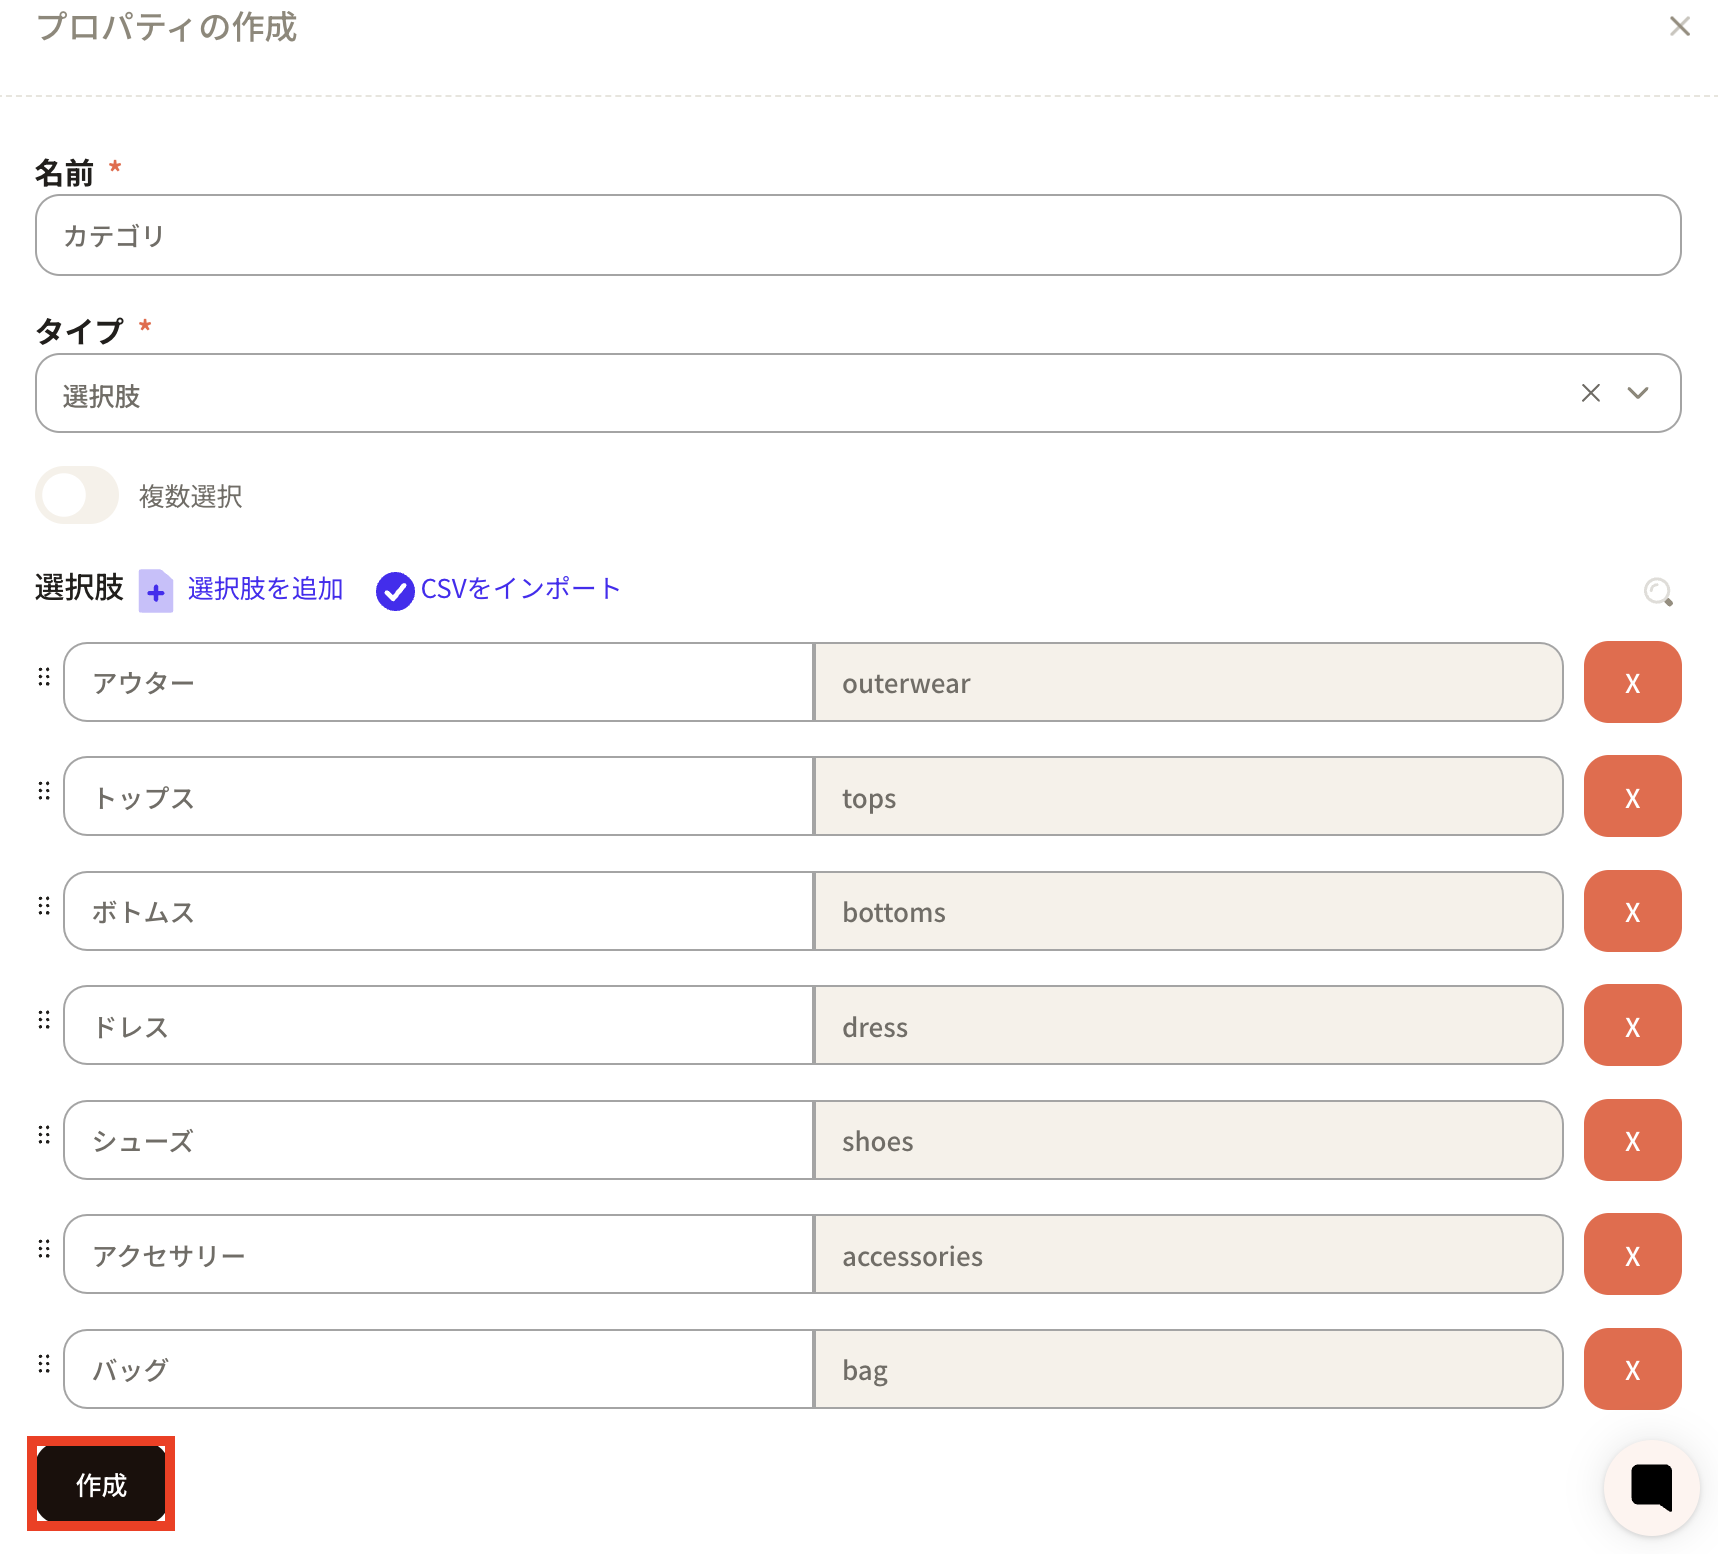
③When you import a CSV, the options will be created. Press the Create button to apply them to Sanka.
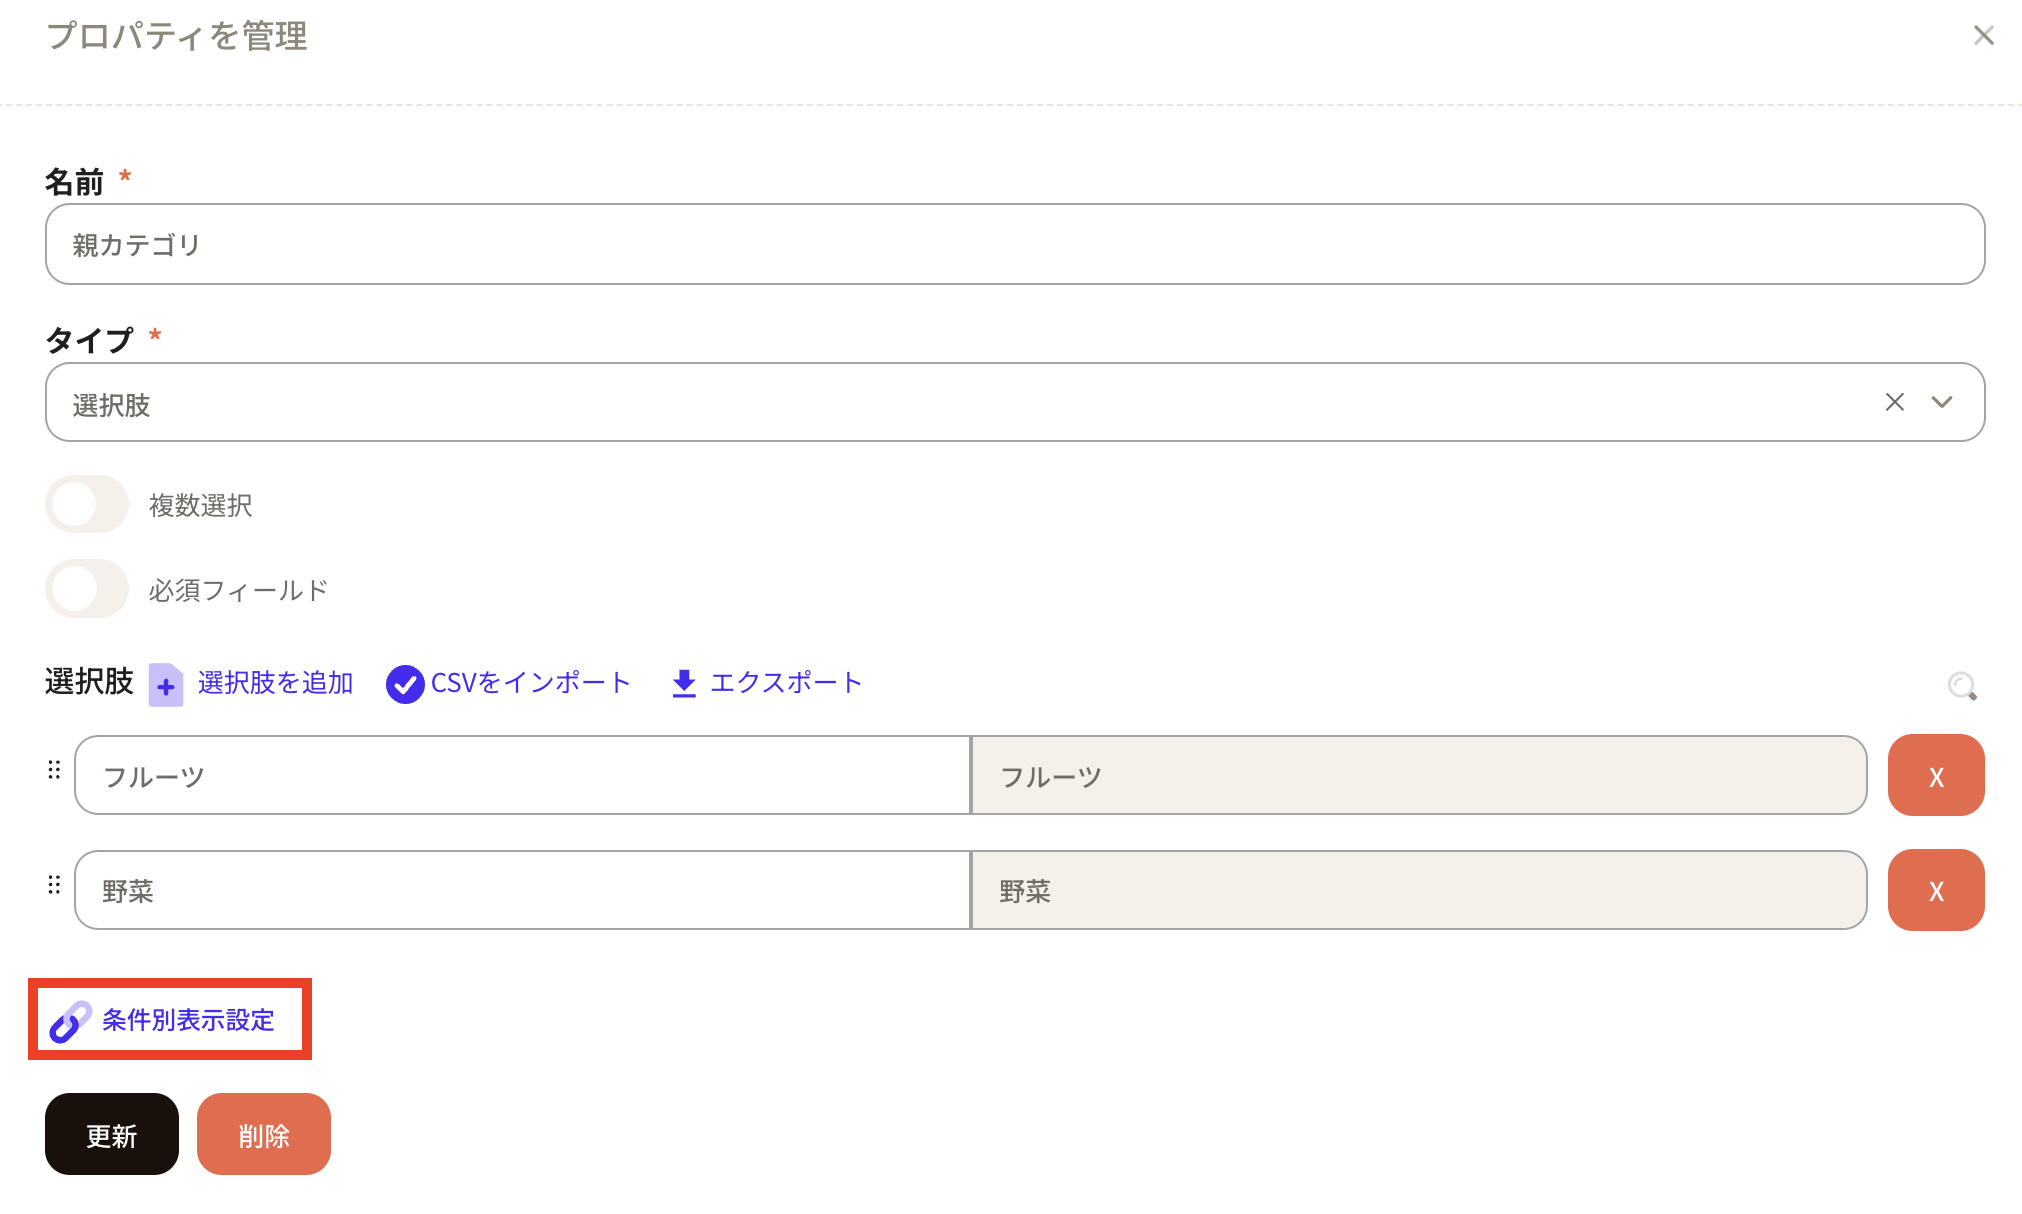
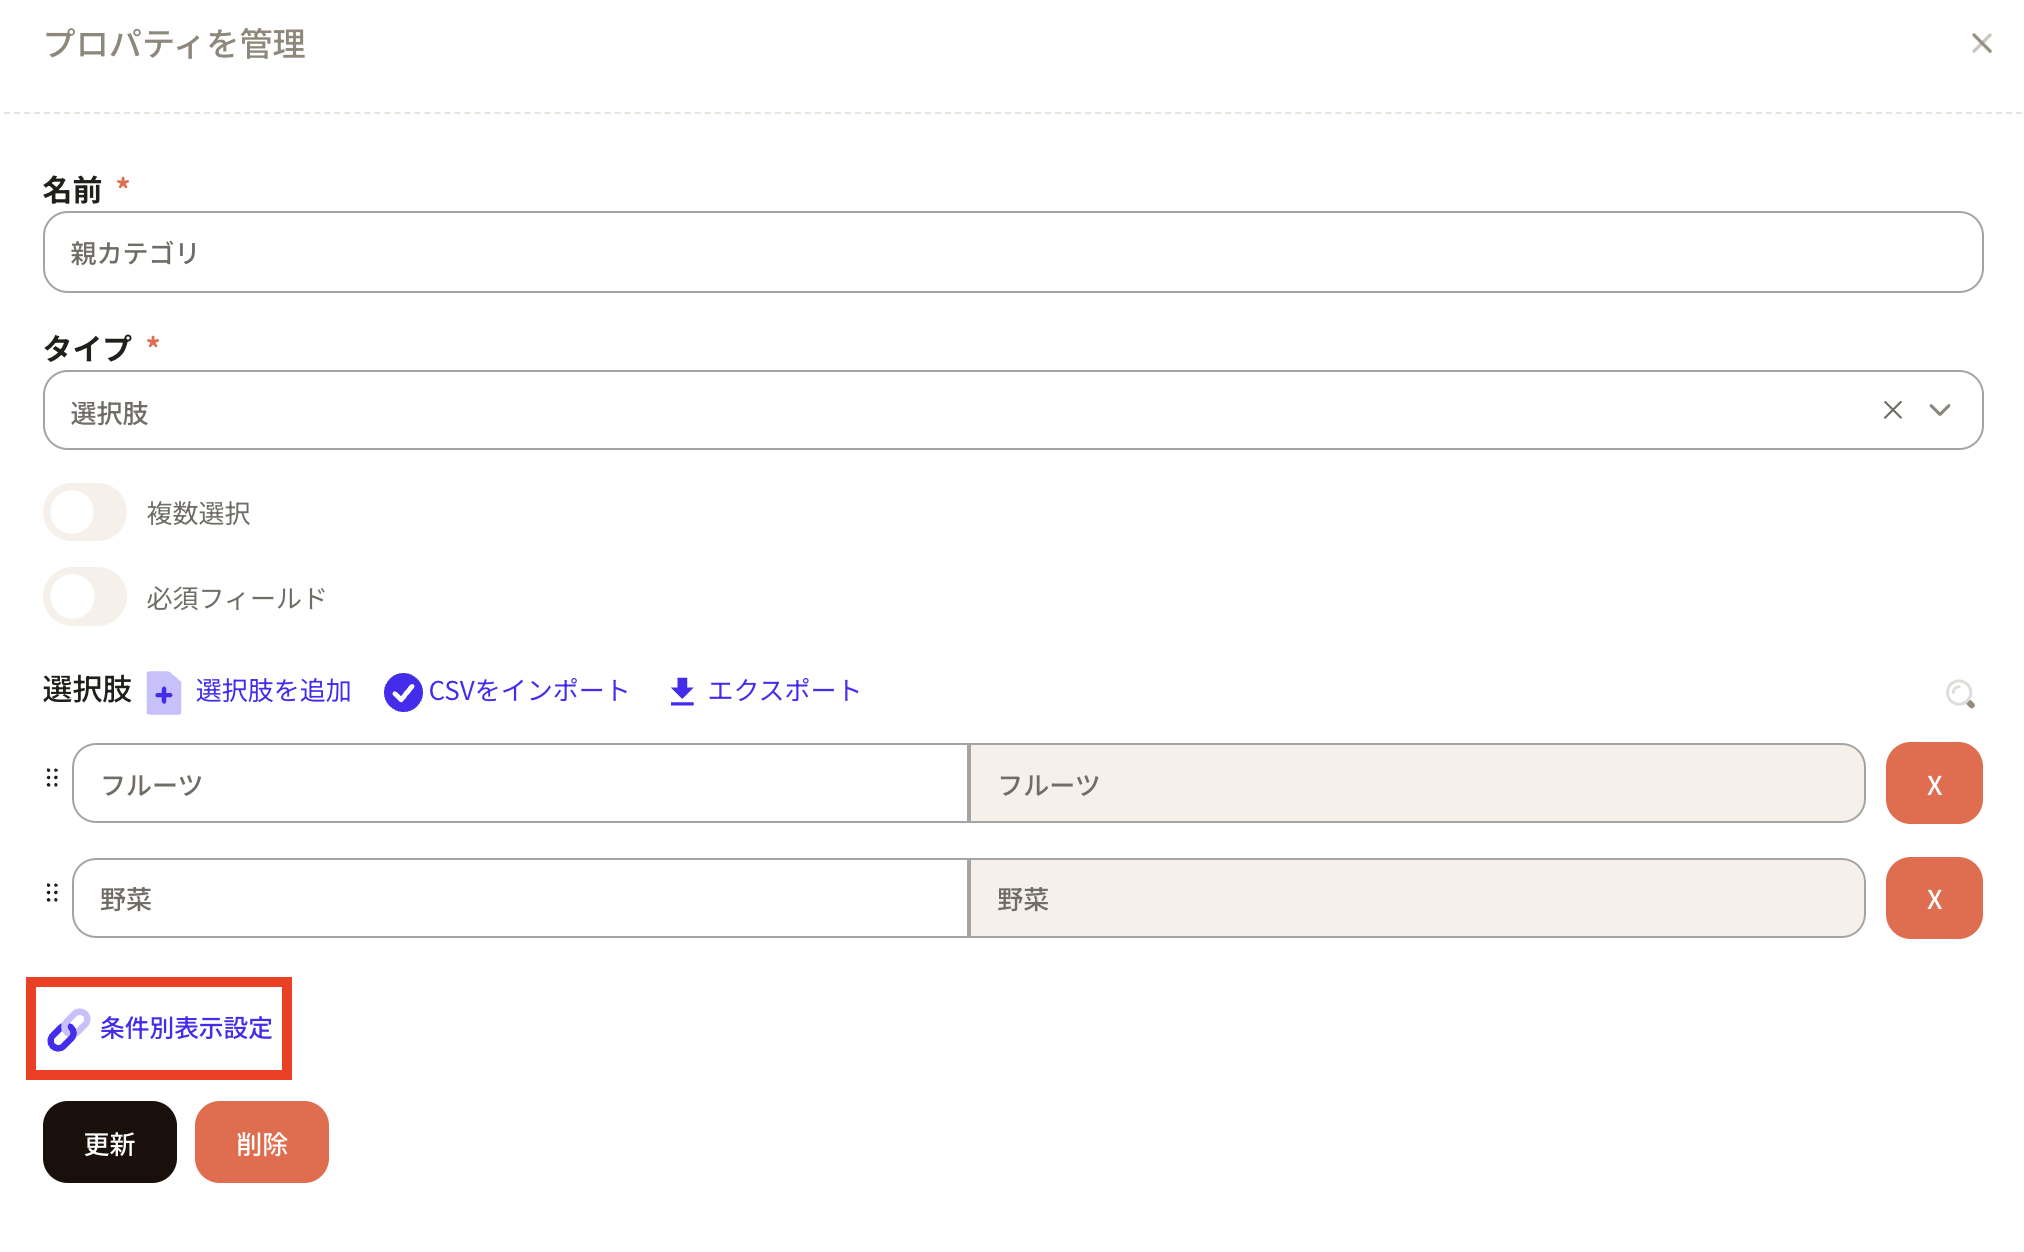
Conditional Display Settings: Conditional display settings is a function that allows you to use two or more option properties to restrict display. For example, if property A of an option is selected, you can set the system to display only properties X and Y of another option.
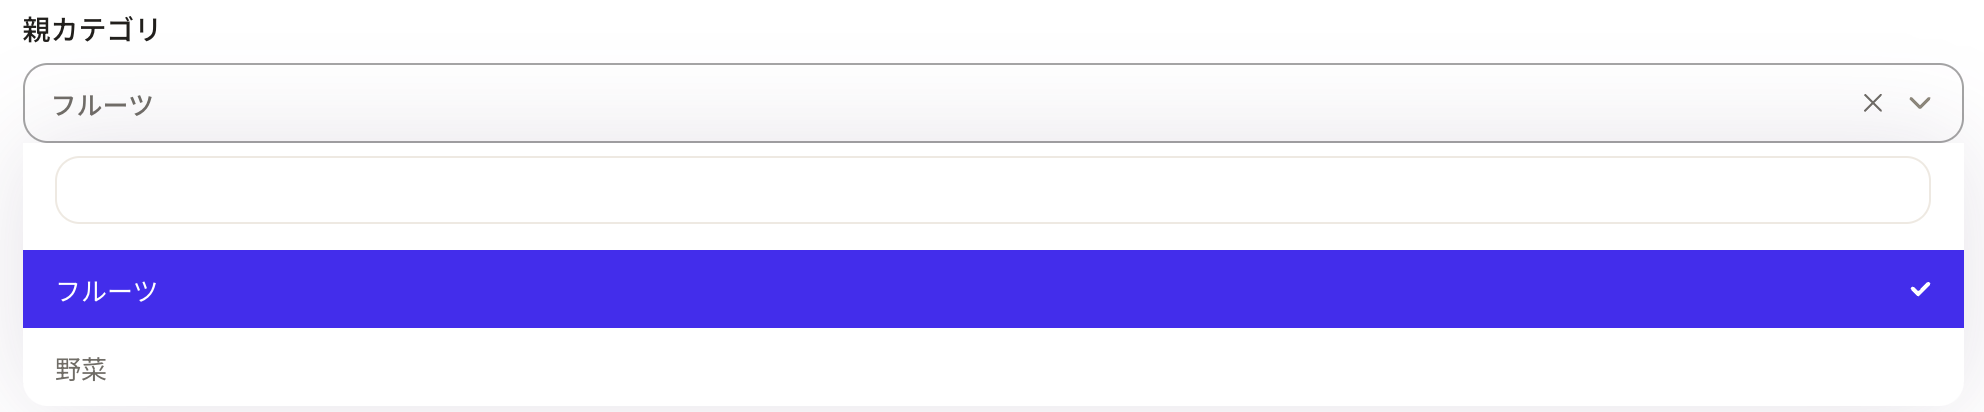
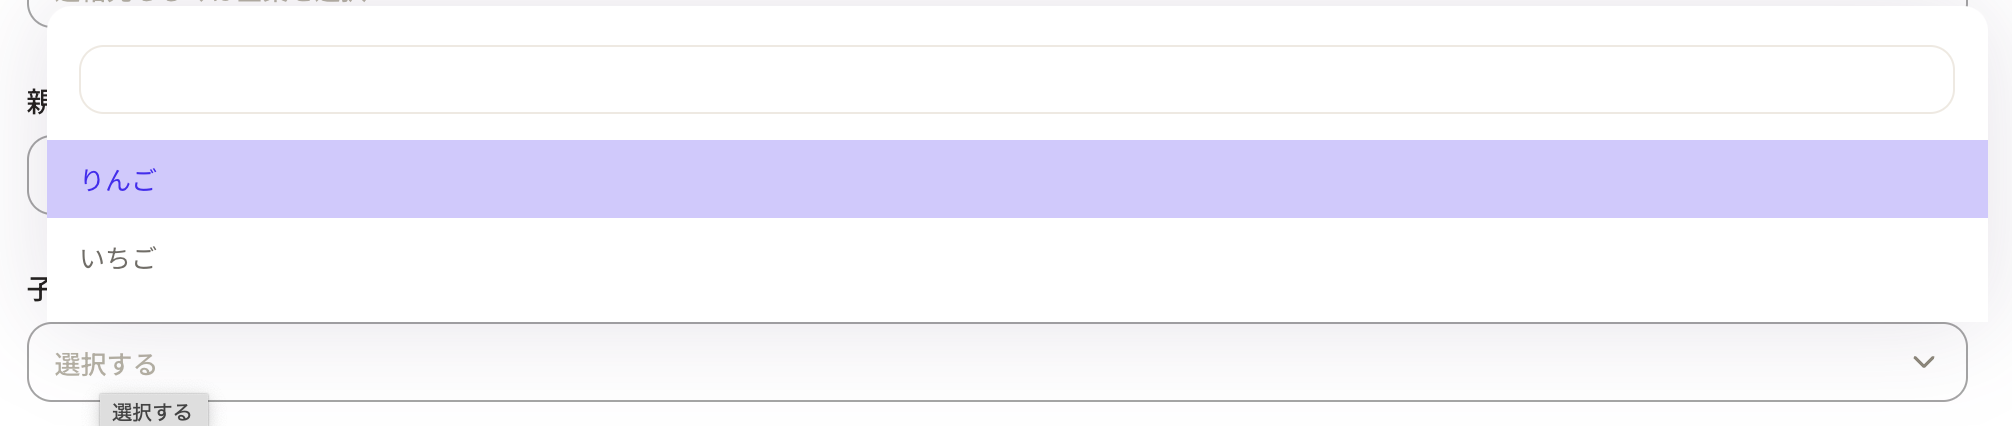
Here is an example of using conditional display settings for options. When you select the parent category, you will then be able to select the child category.

The major categories "Fruit" and "Vegetable" are registered under the parent categories. Here, "Fruit" has been selected.
Subsequently, the subcategories "Apple" and "Strawberry" will be displayed. Please select the relevant option.
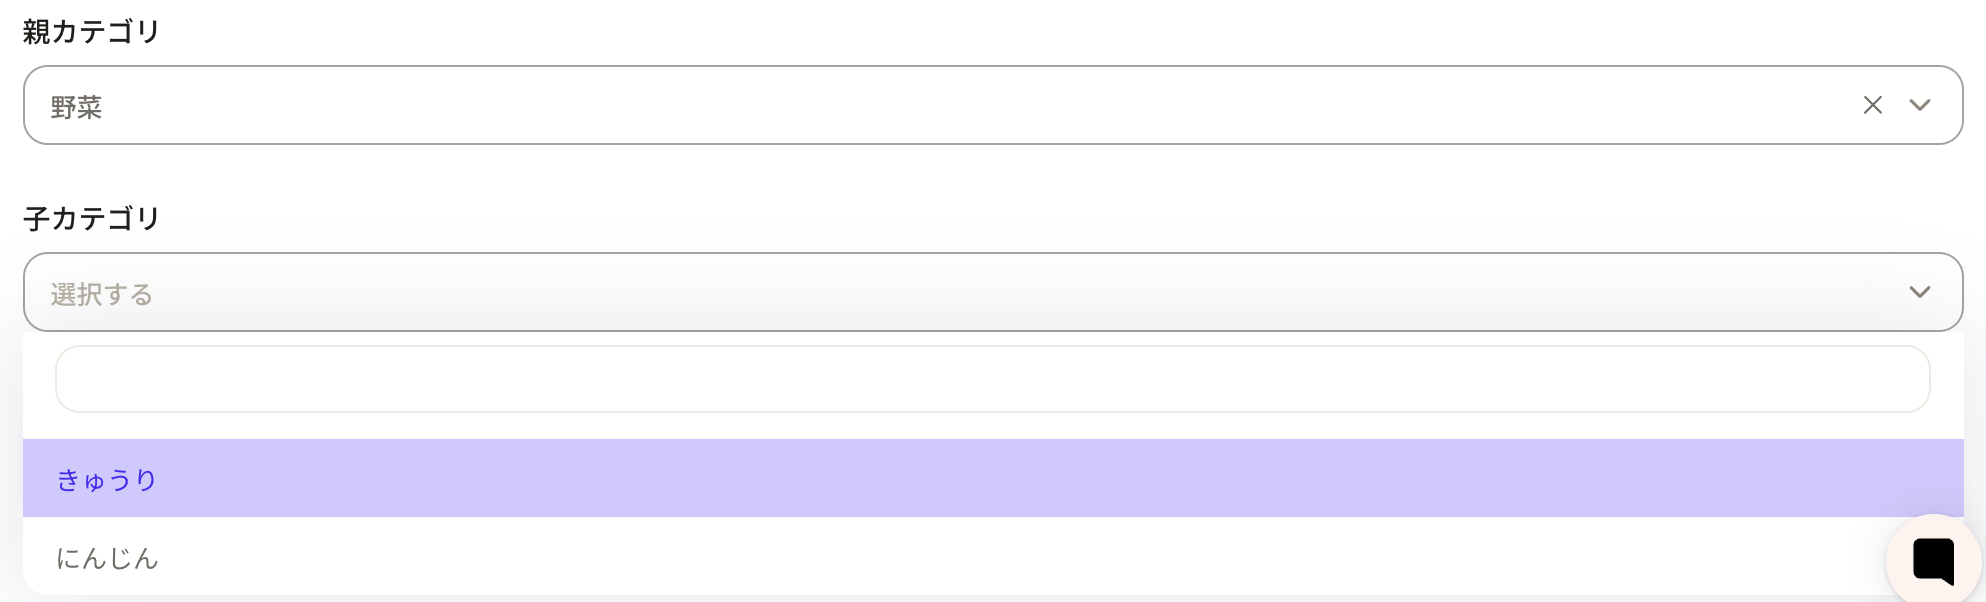
For your information, if you select "Vegetables" as the parent category, "Cucumber" and "Carrot" will be displayed as options in the child category. This type of functionality is provided by conditional display settings.
How to Configure Conditional Display Settings
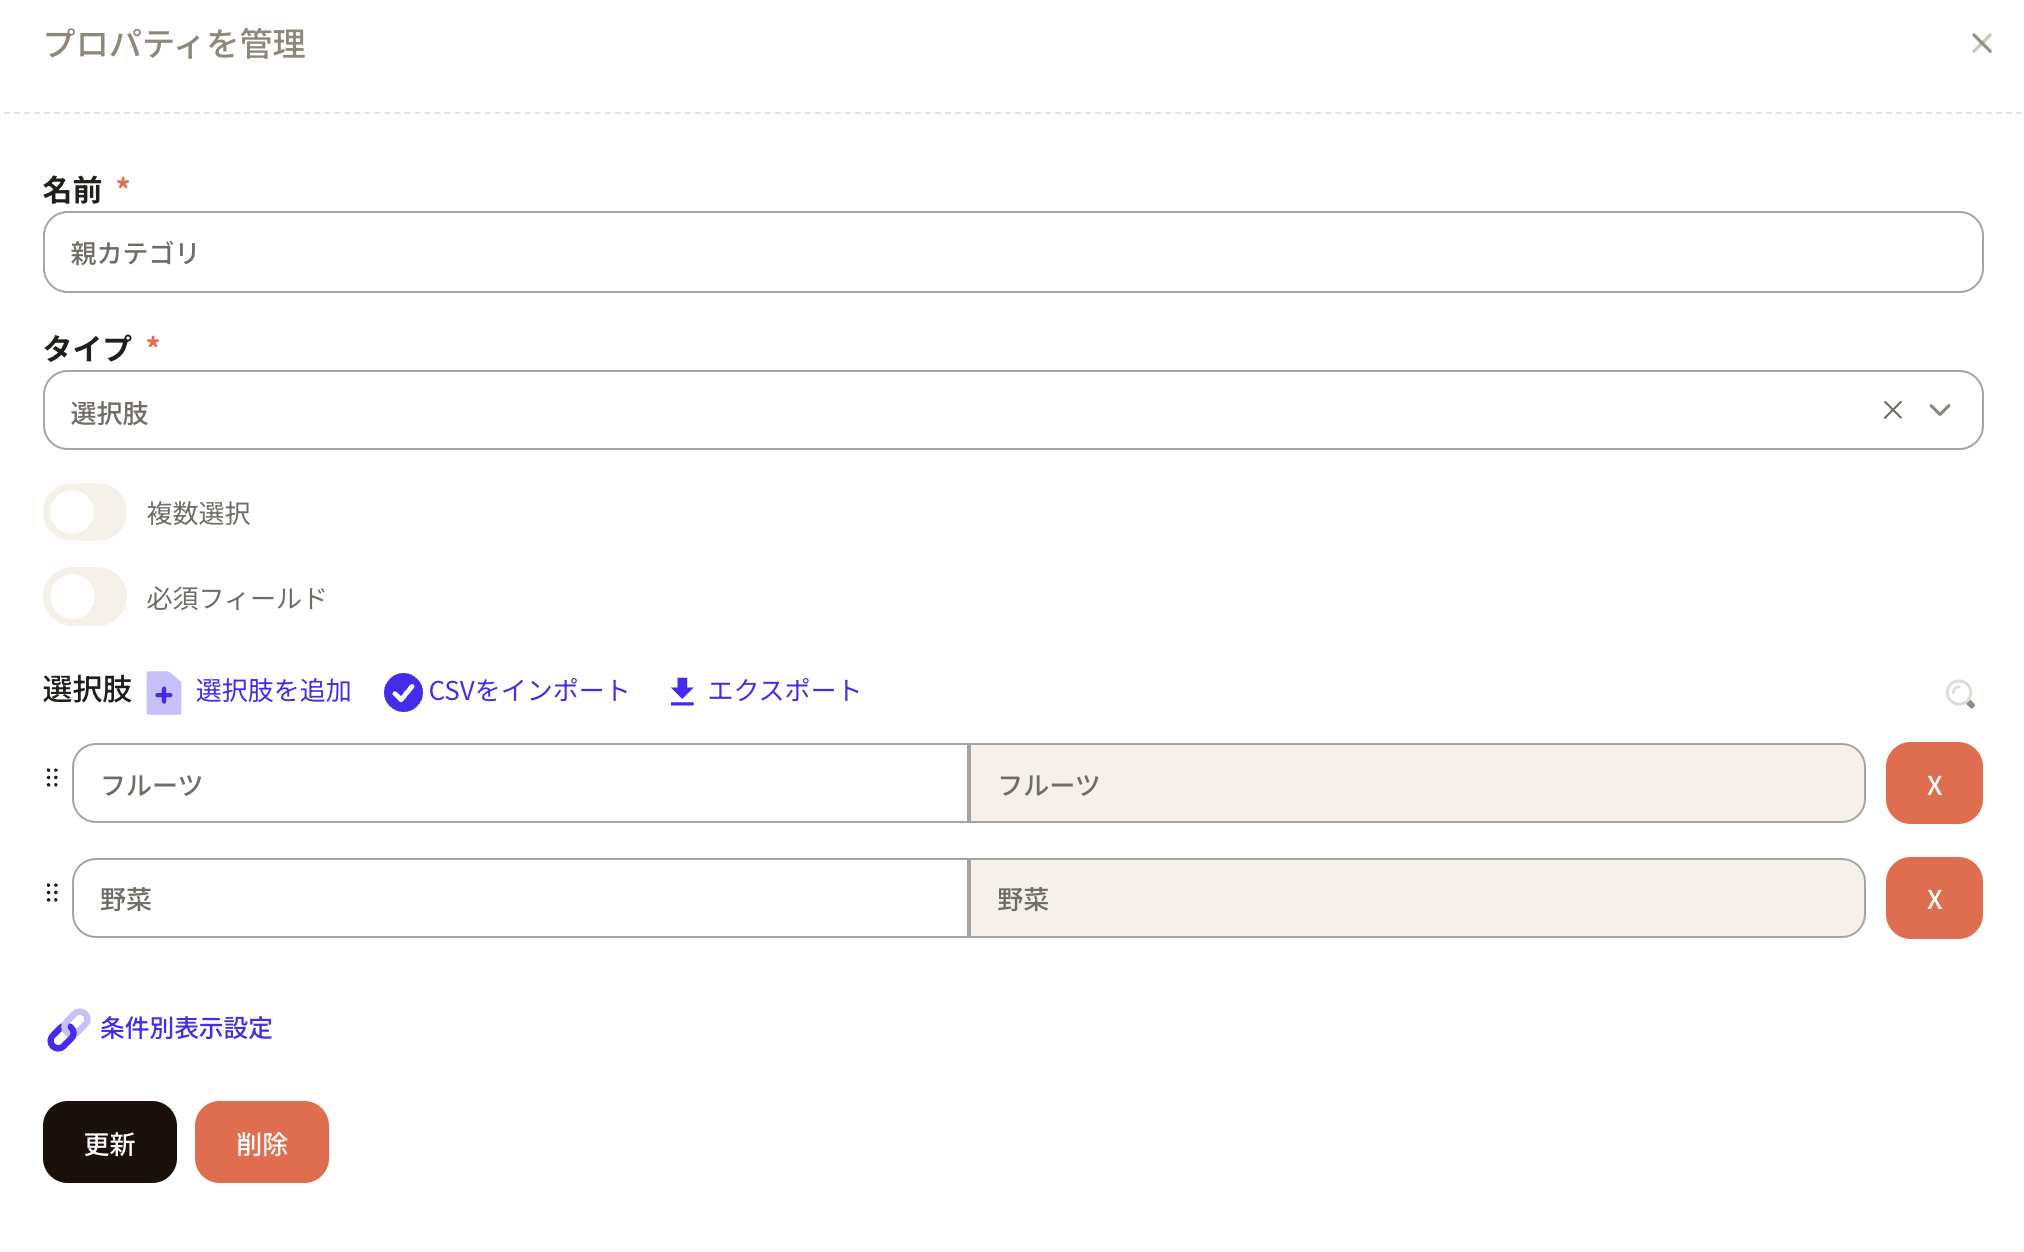
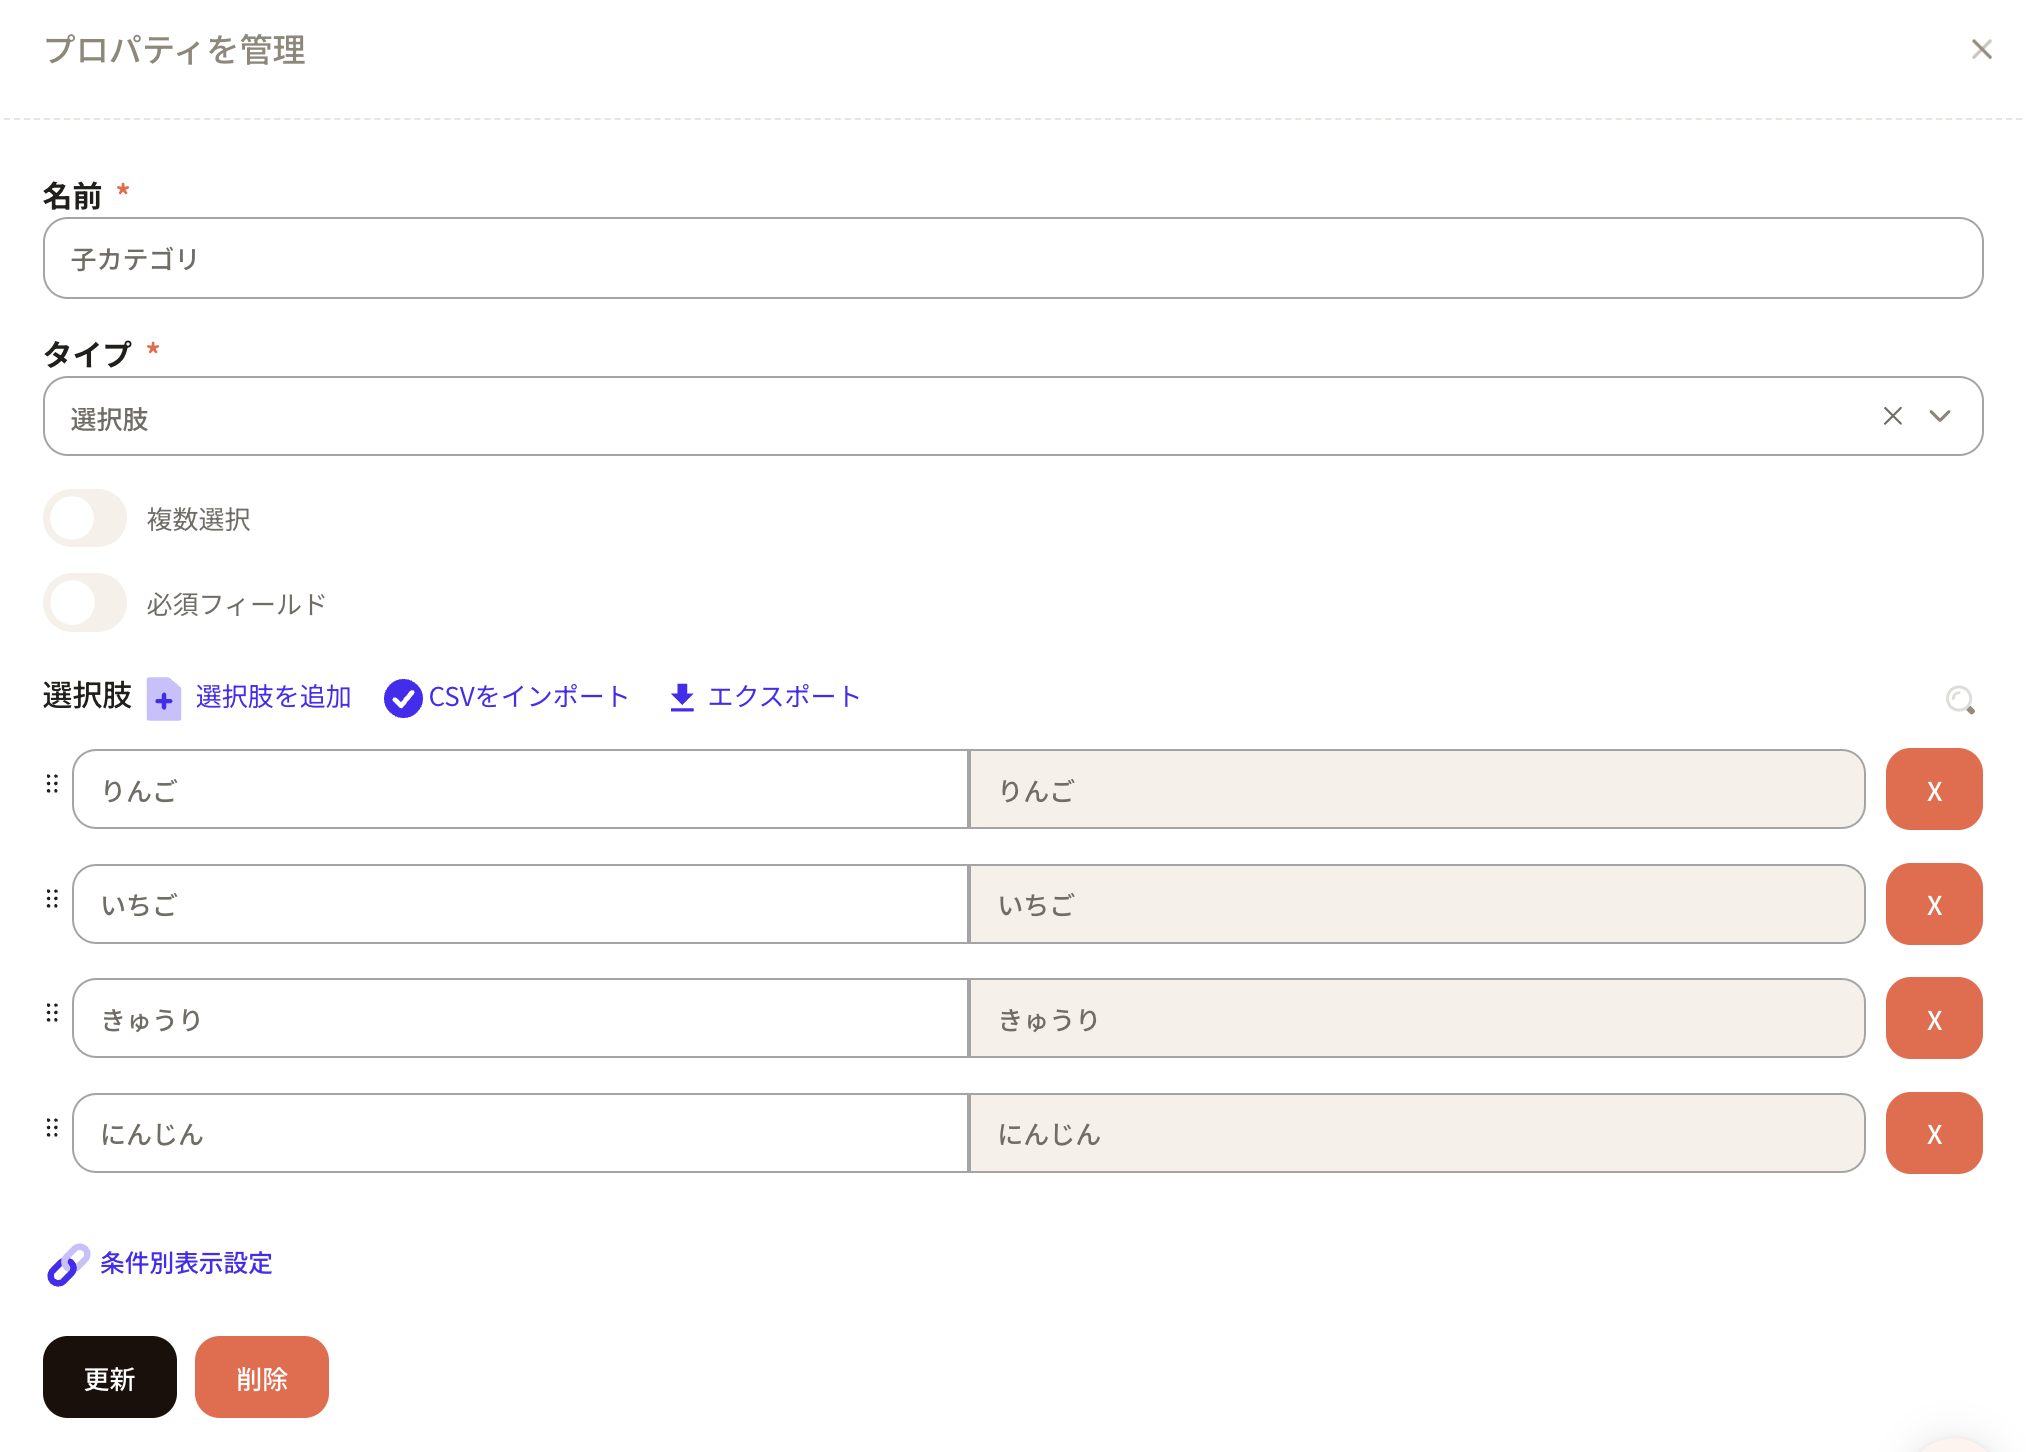
First, create option properties for the "Parent Category" and the "Child Category".
Press the Display Conditional Settings button for the parent category property.
Next, the Conditional Display Settings will appear. Set the source property to the child category.
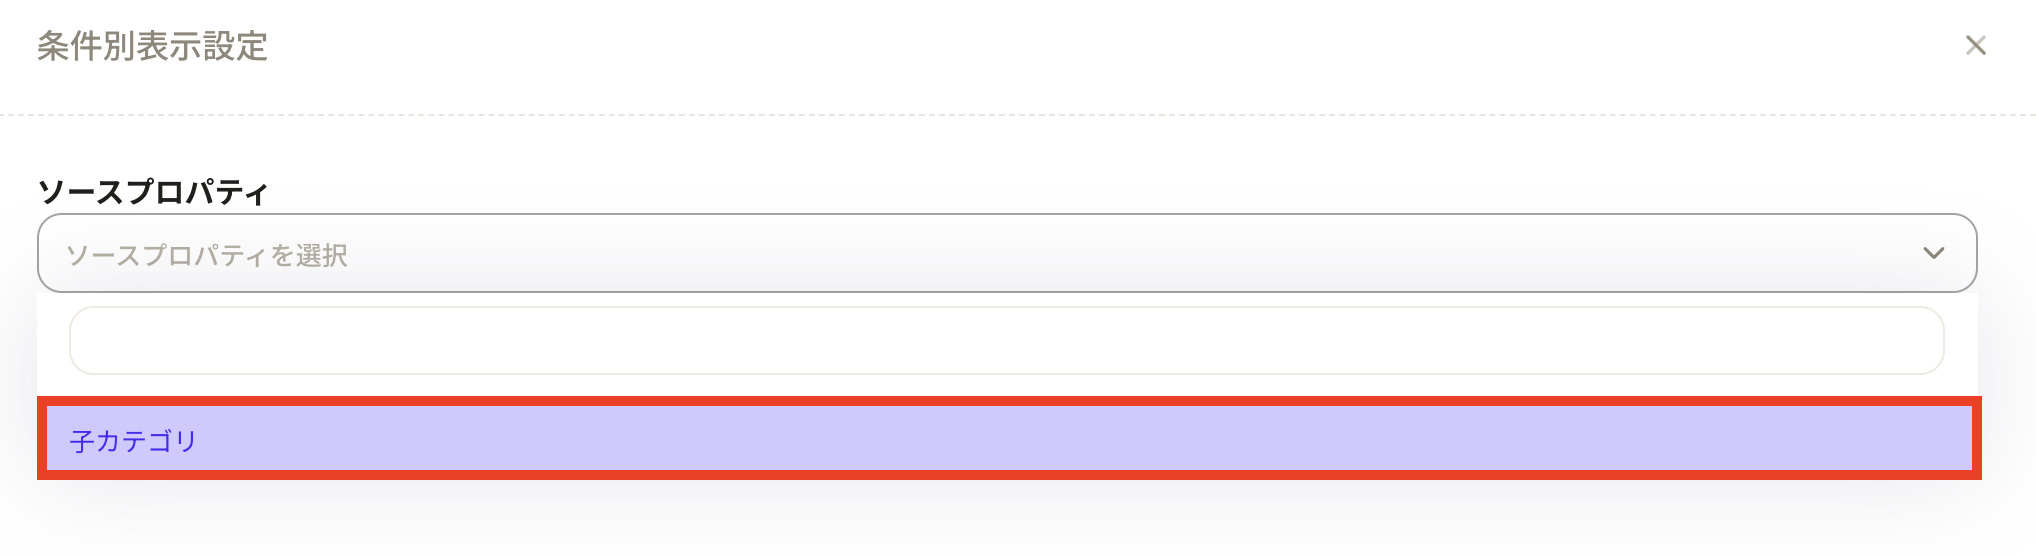
The options registered in the child category will be displayed under the properties of the action.
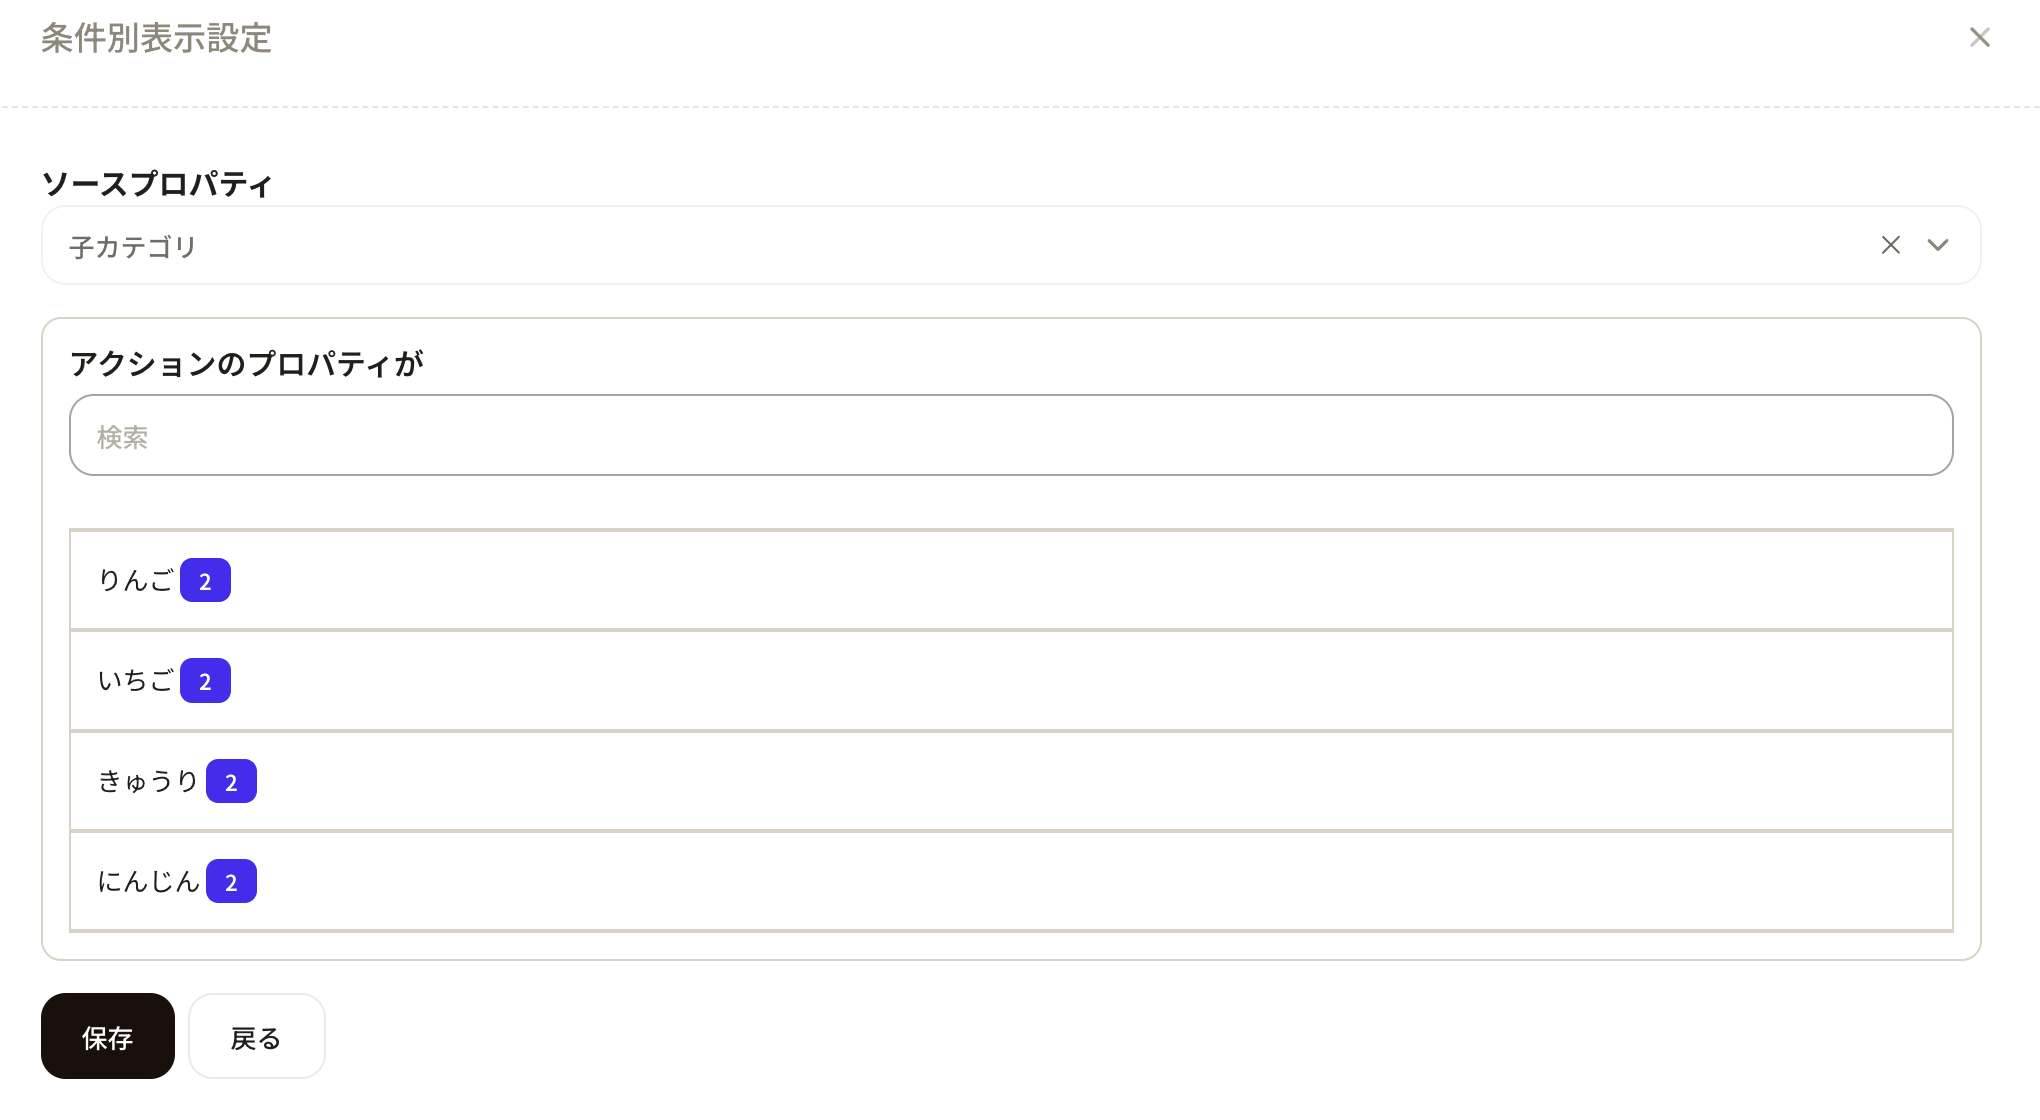
Next, configure each of the subcategories individually.
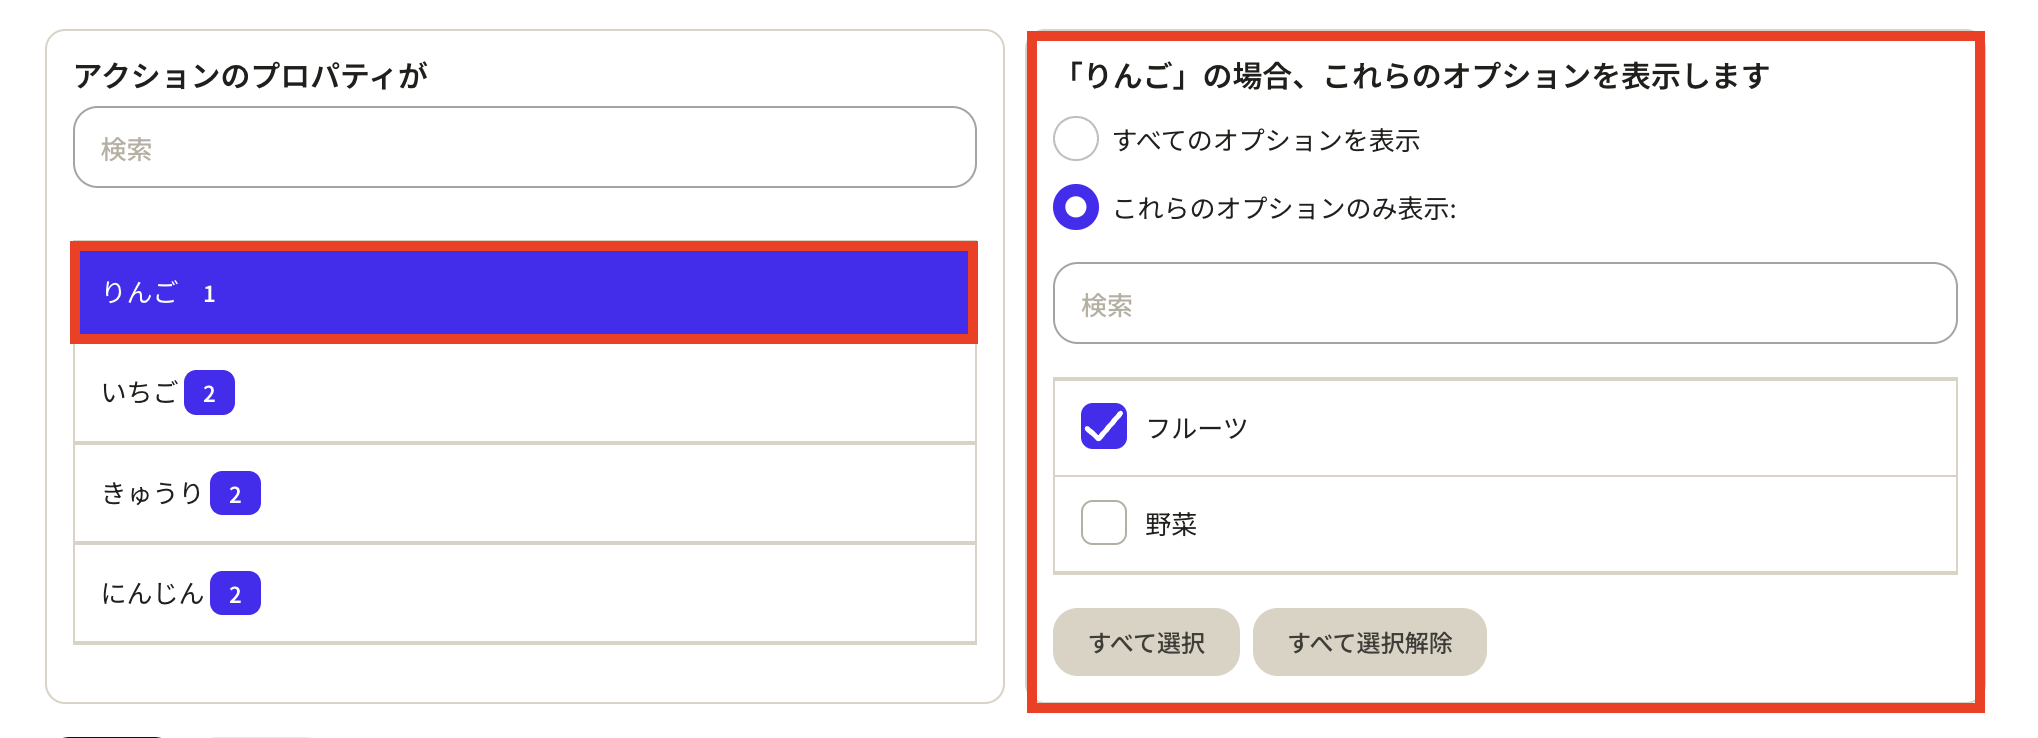
In the case of 'Apple,' since you want it to be displayed when 'Fruits' is selected as the parent category, select 'Show only these options' and check only 'Fruits.'
Apply the relevant settings to 'Strawberry,' 'Cucumber,' and 'Carrot' as well.
Once all settings are configured, click the save button.
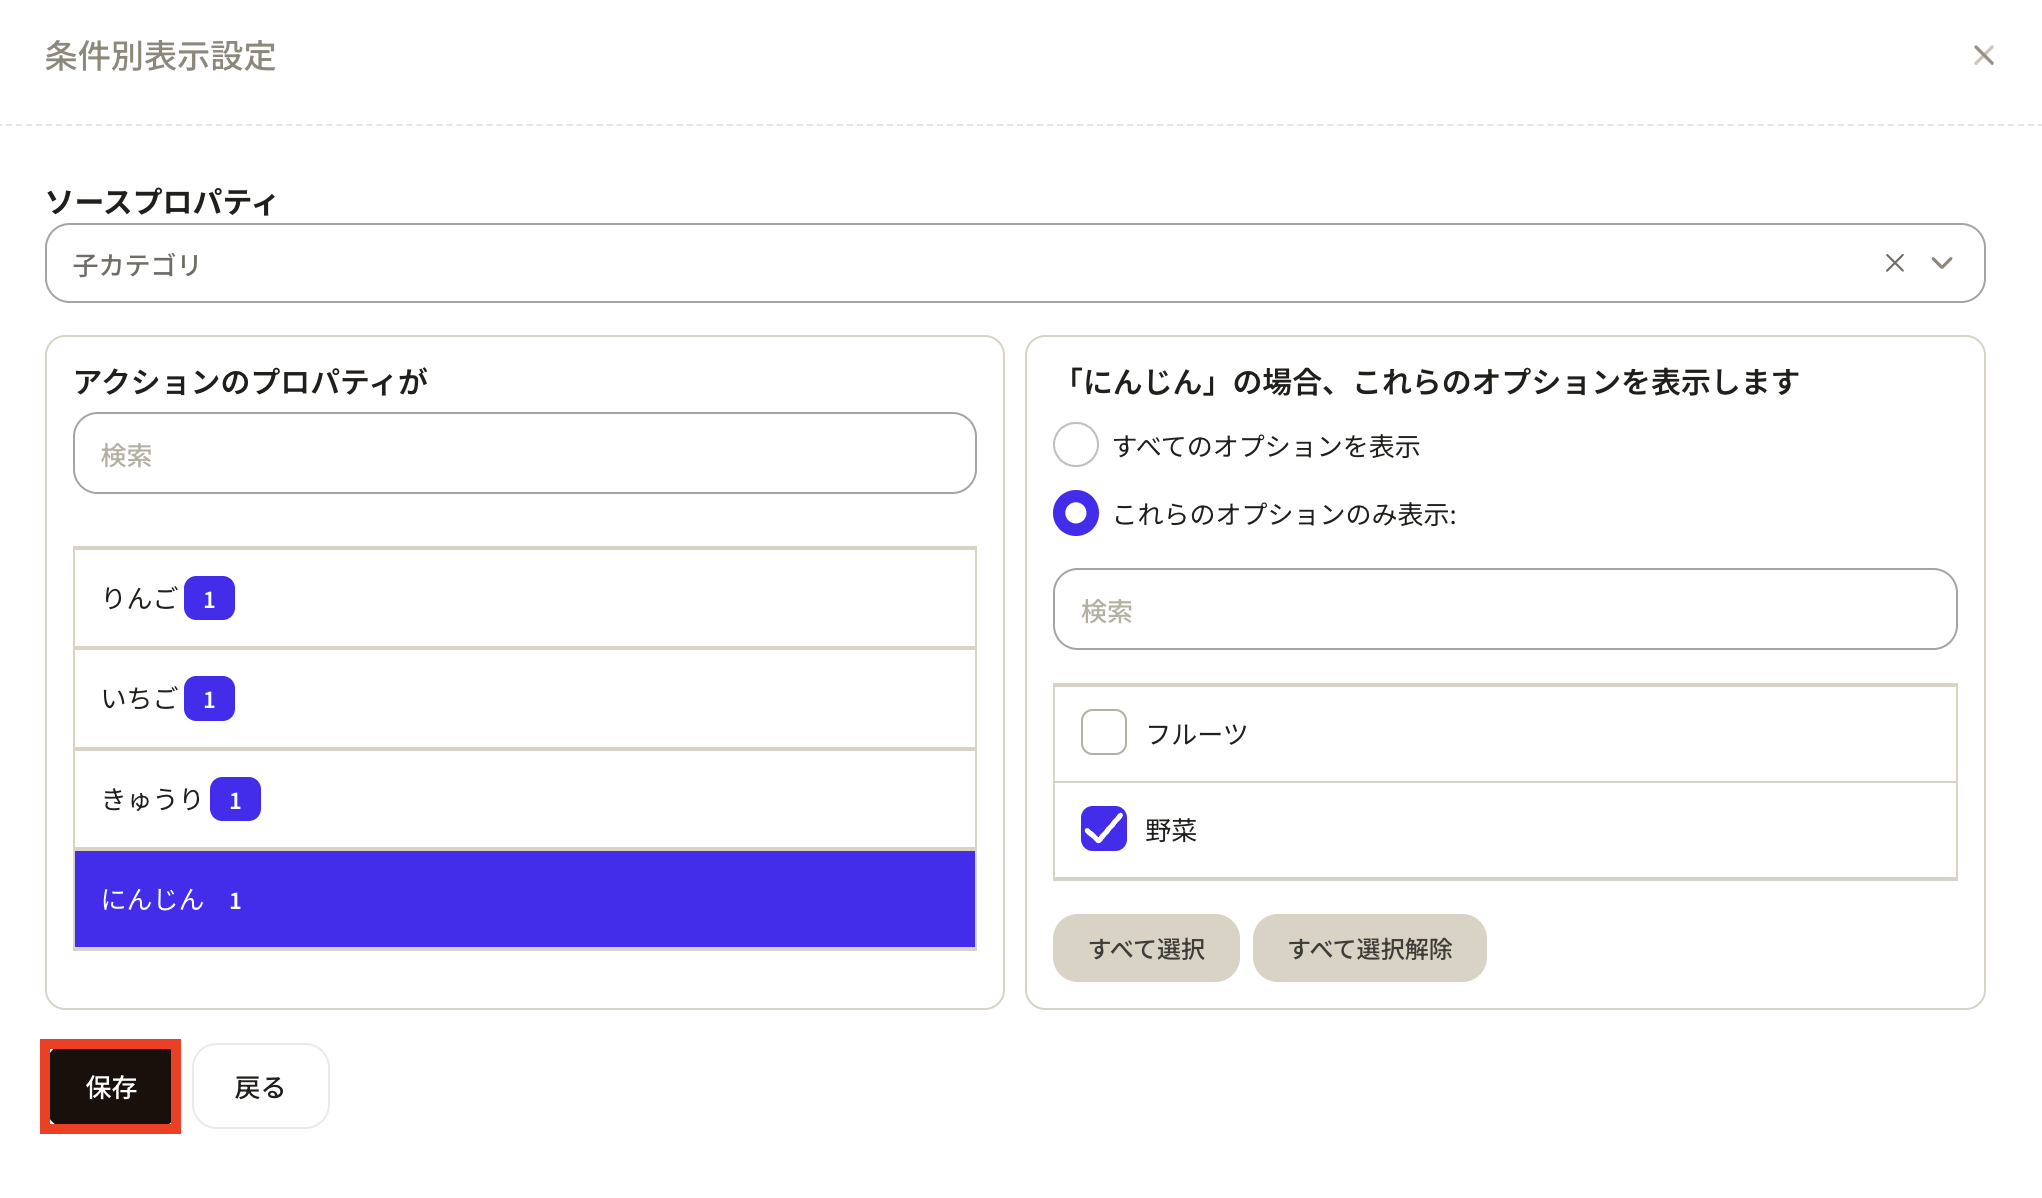
Once you save, you will return to property management of the parent category, so please be sure to click the update button to apply the changes.
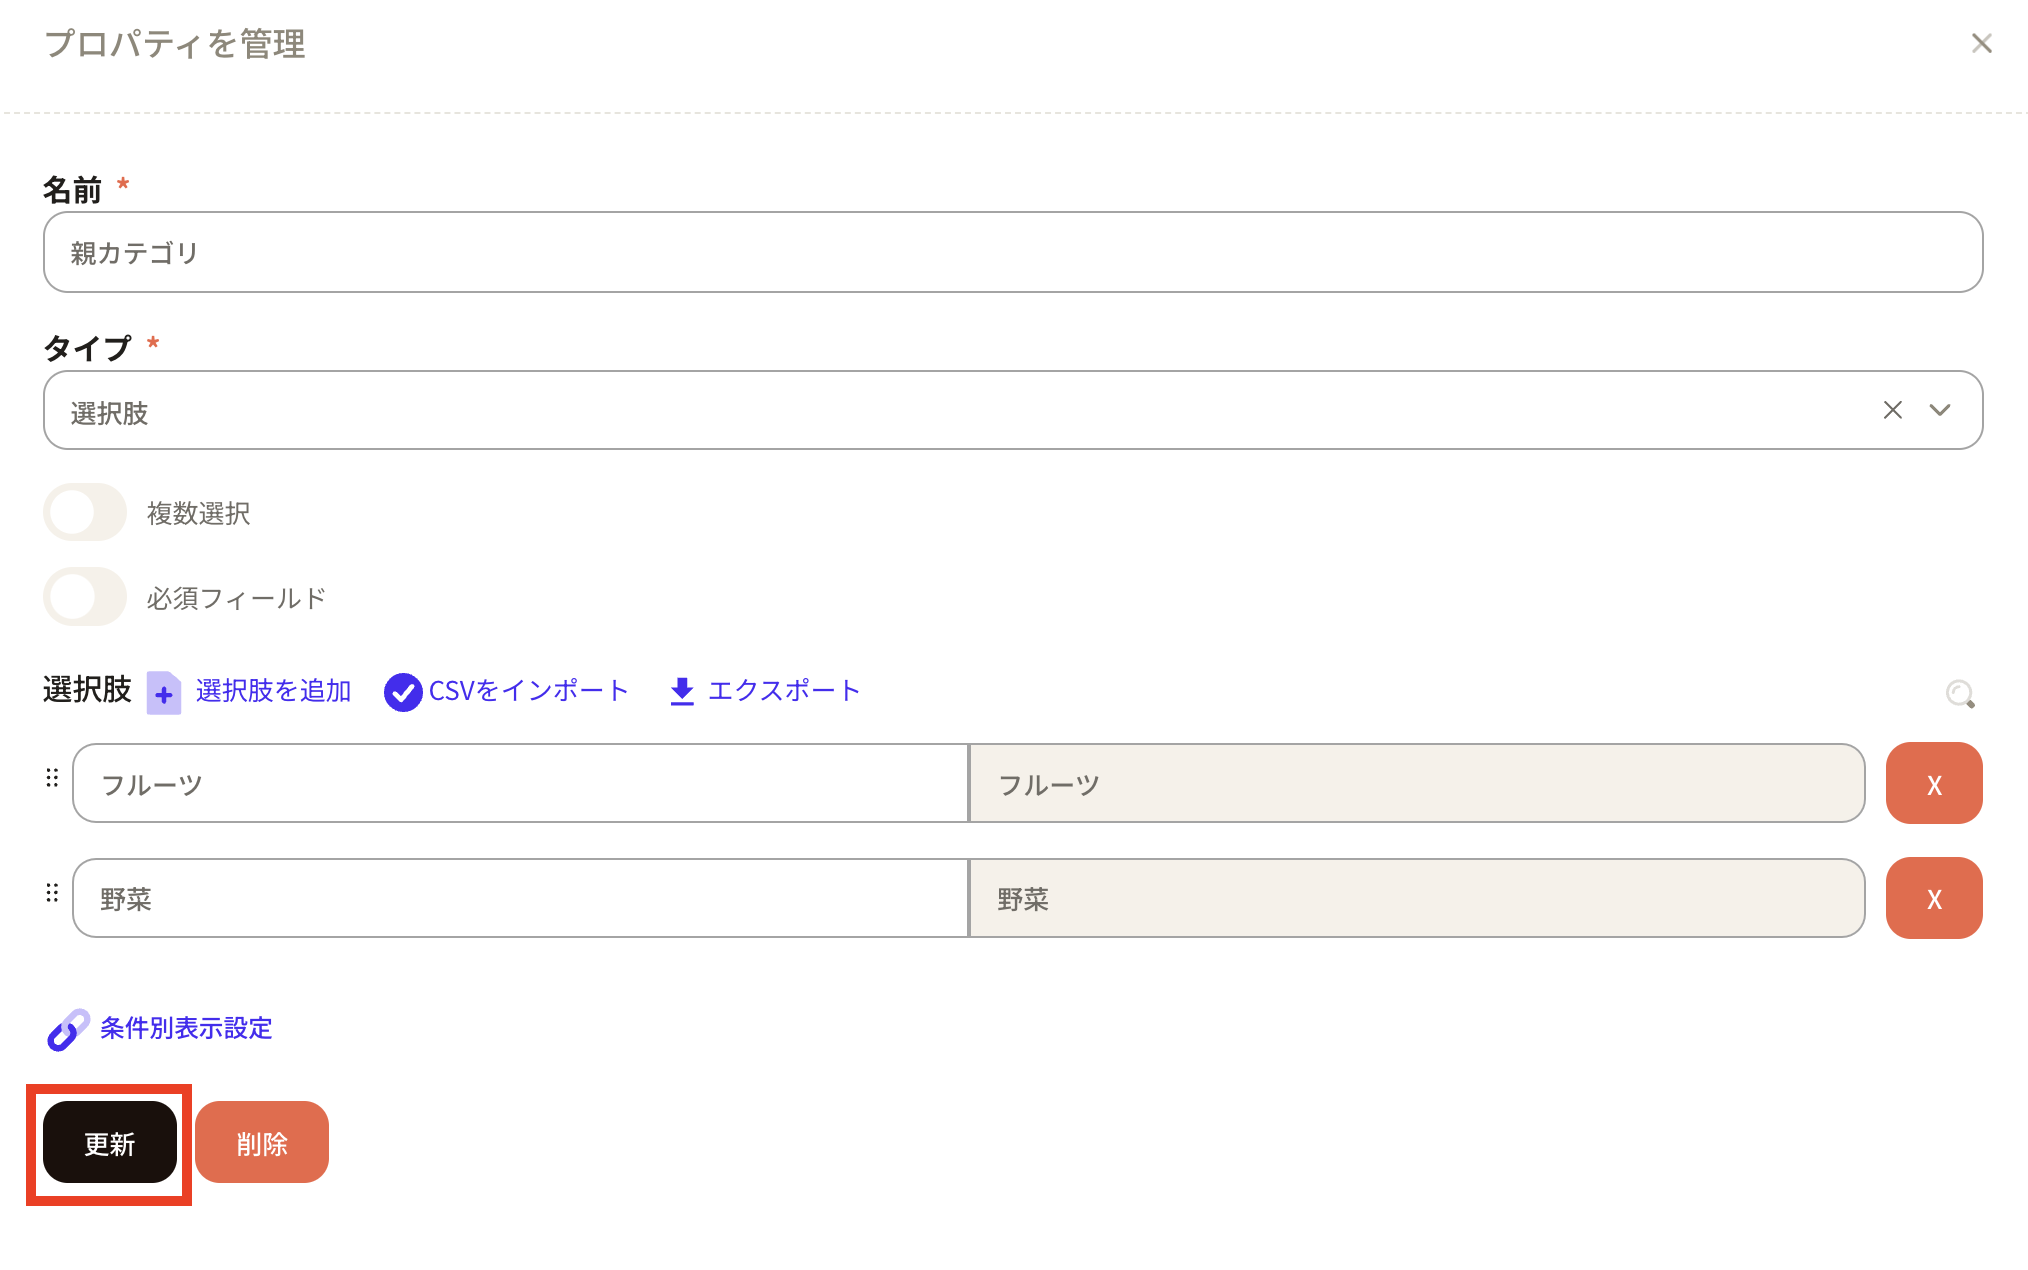
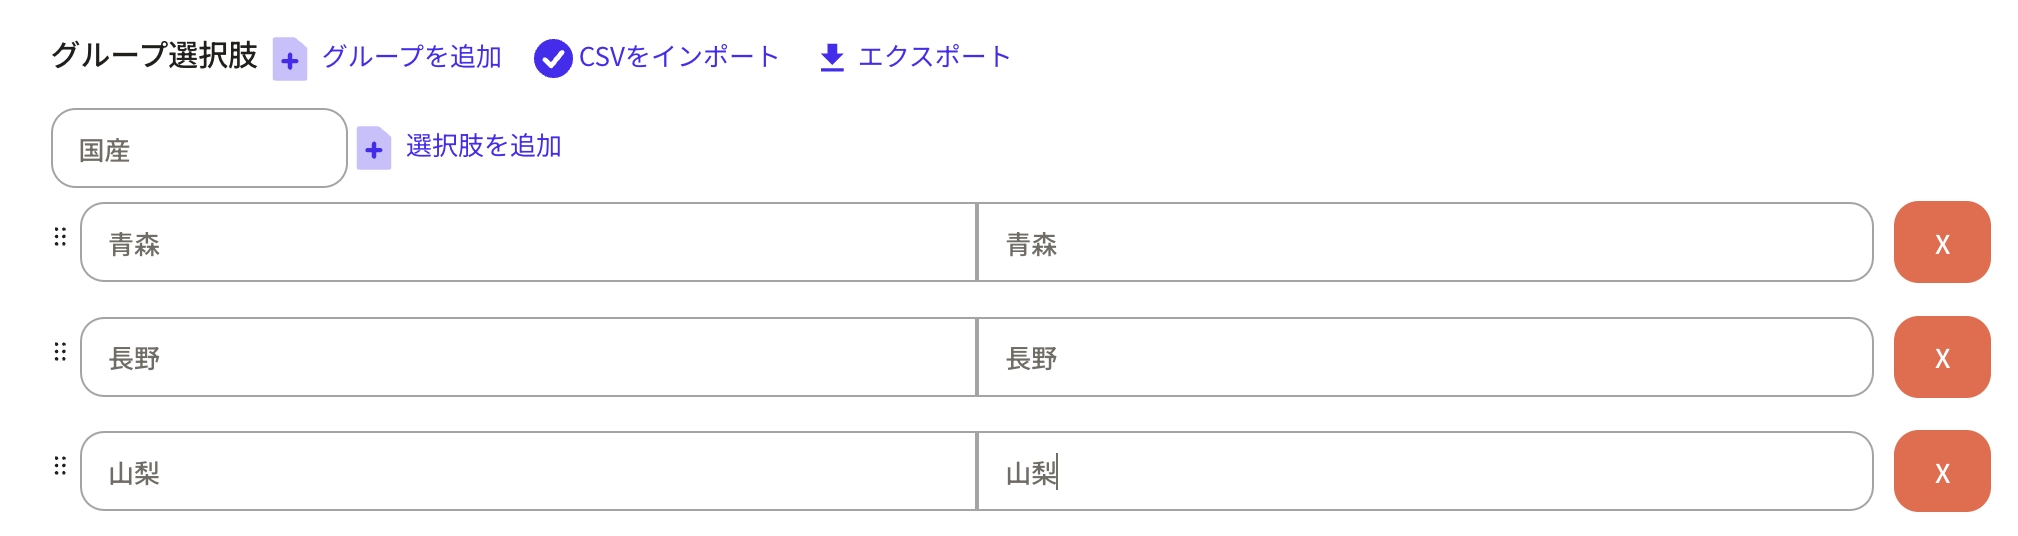
Group Options: You can display options by group.
How to Configure Group Choices
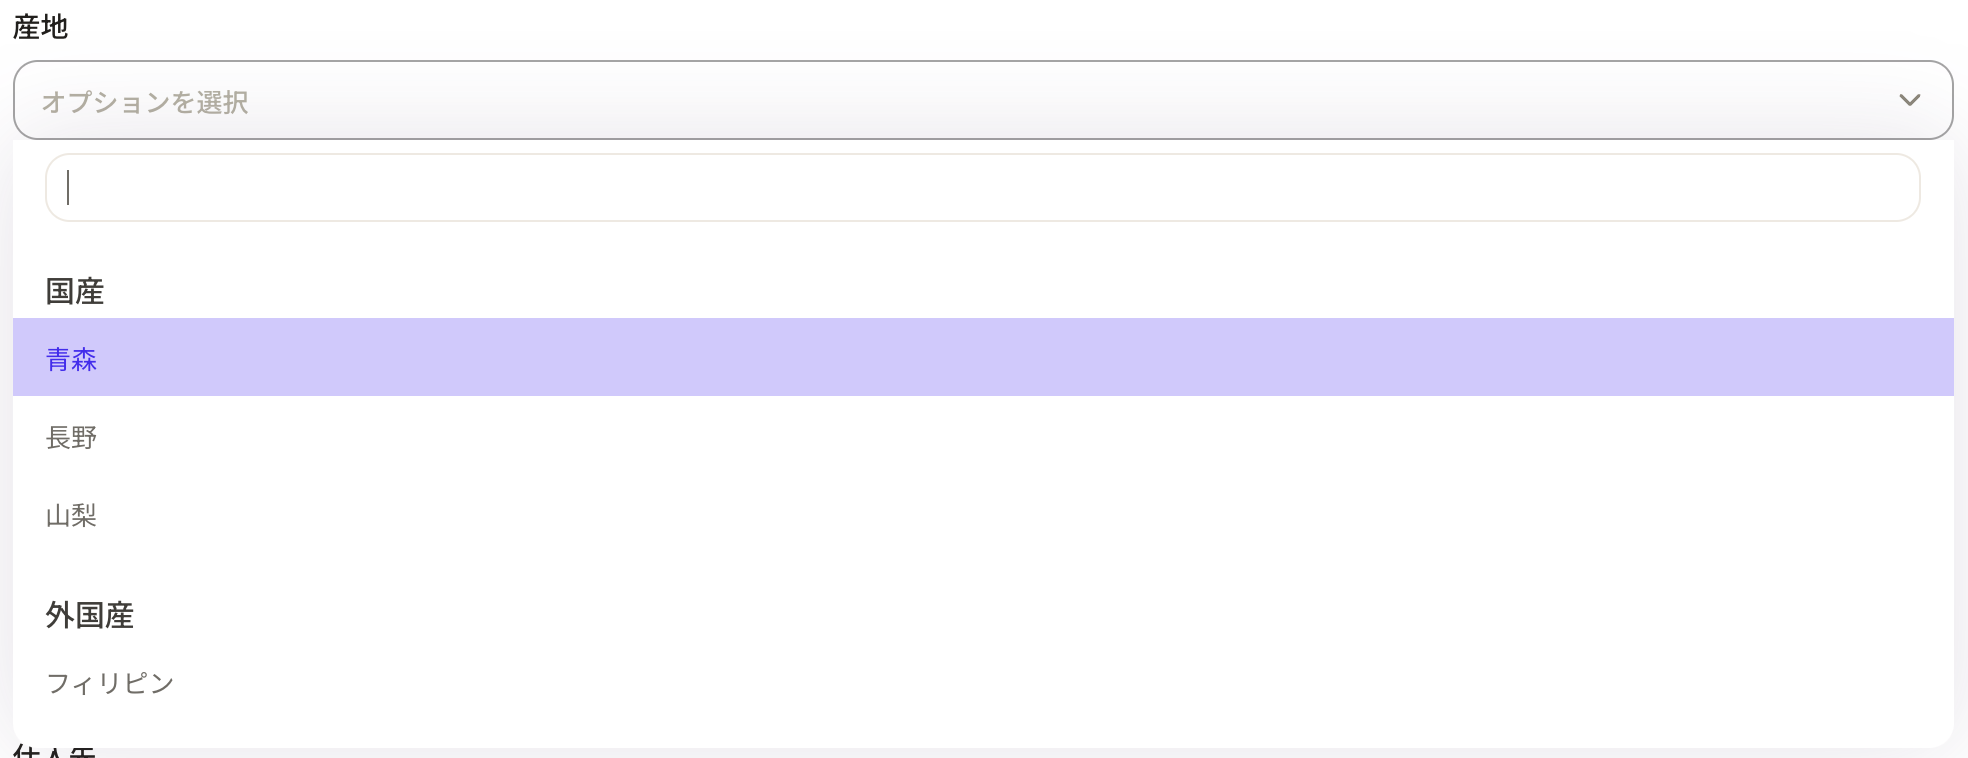
Here, as an example, we will create group choices for production area.
Main category: Domestic Subcategory: Aomori, Nagano, Yamanashi
Main category: Imported Subcategory: Philippines, Vietnam, China
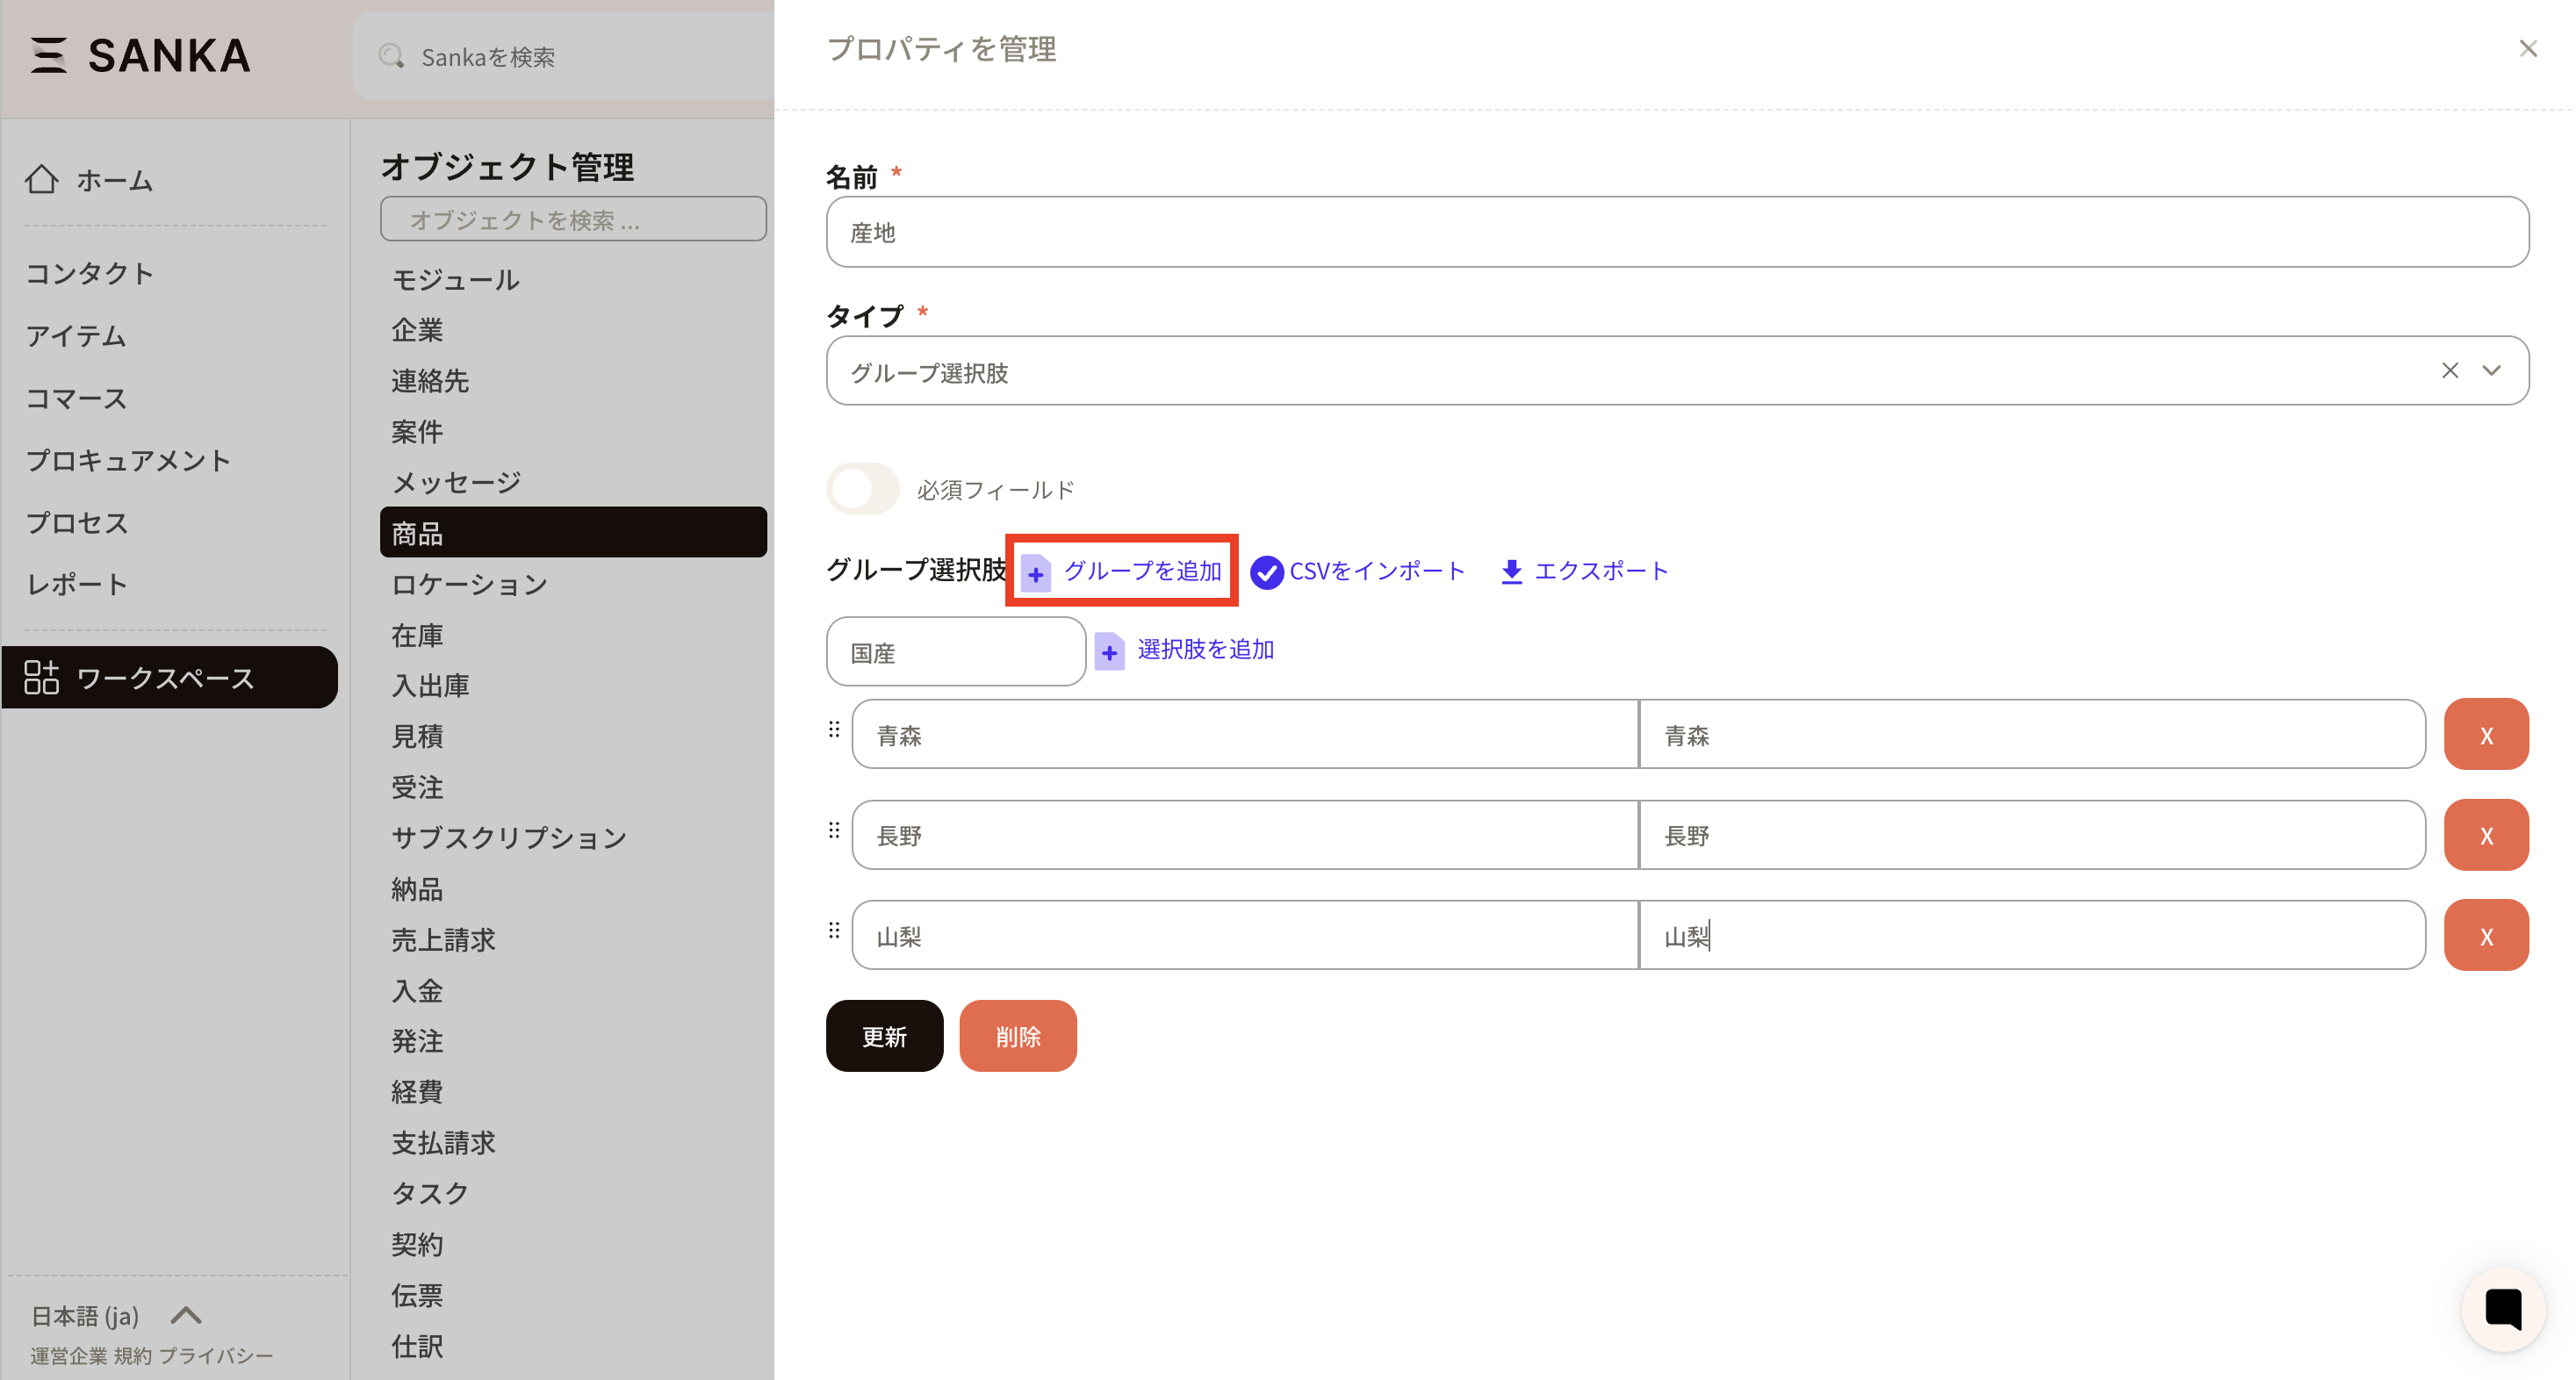
Select "Group Choice" as the property type. Click the "Add Group" button.
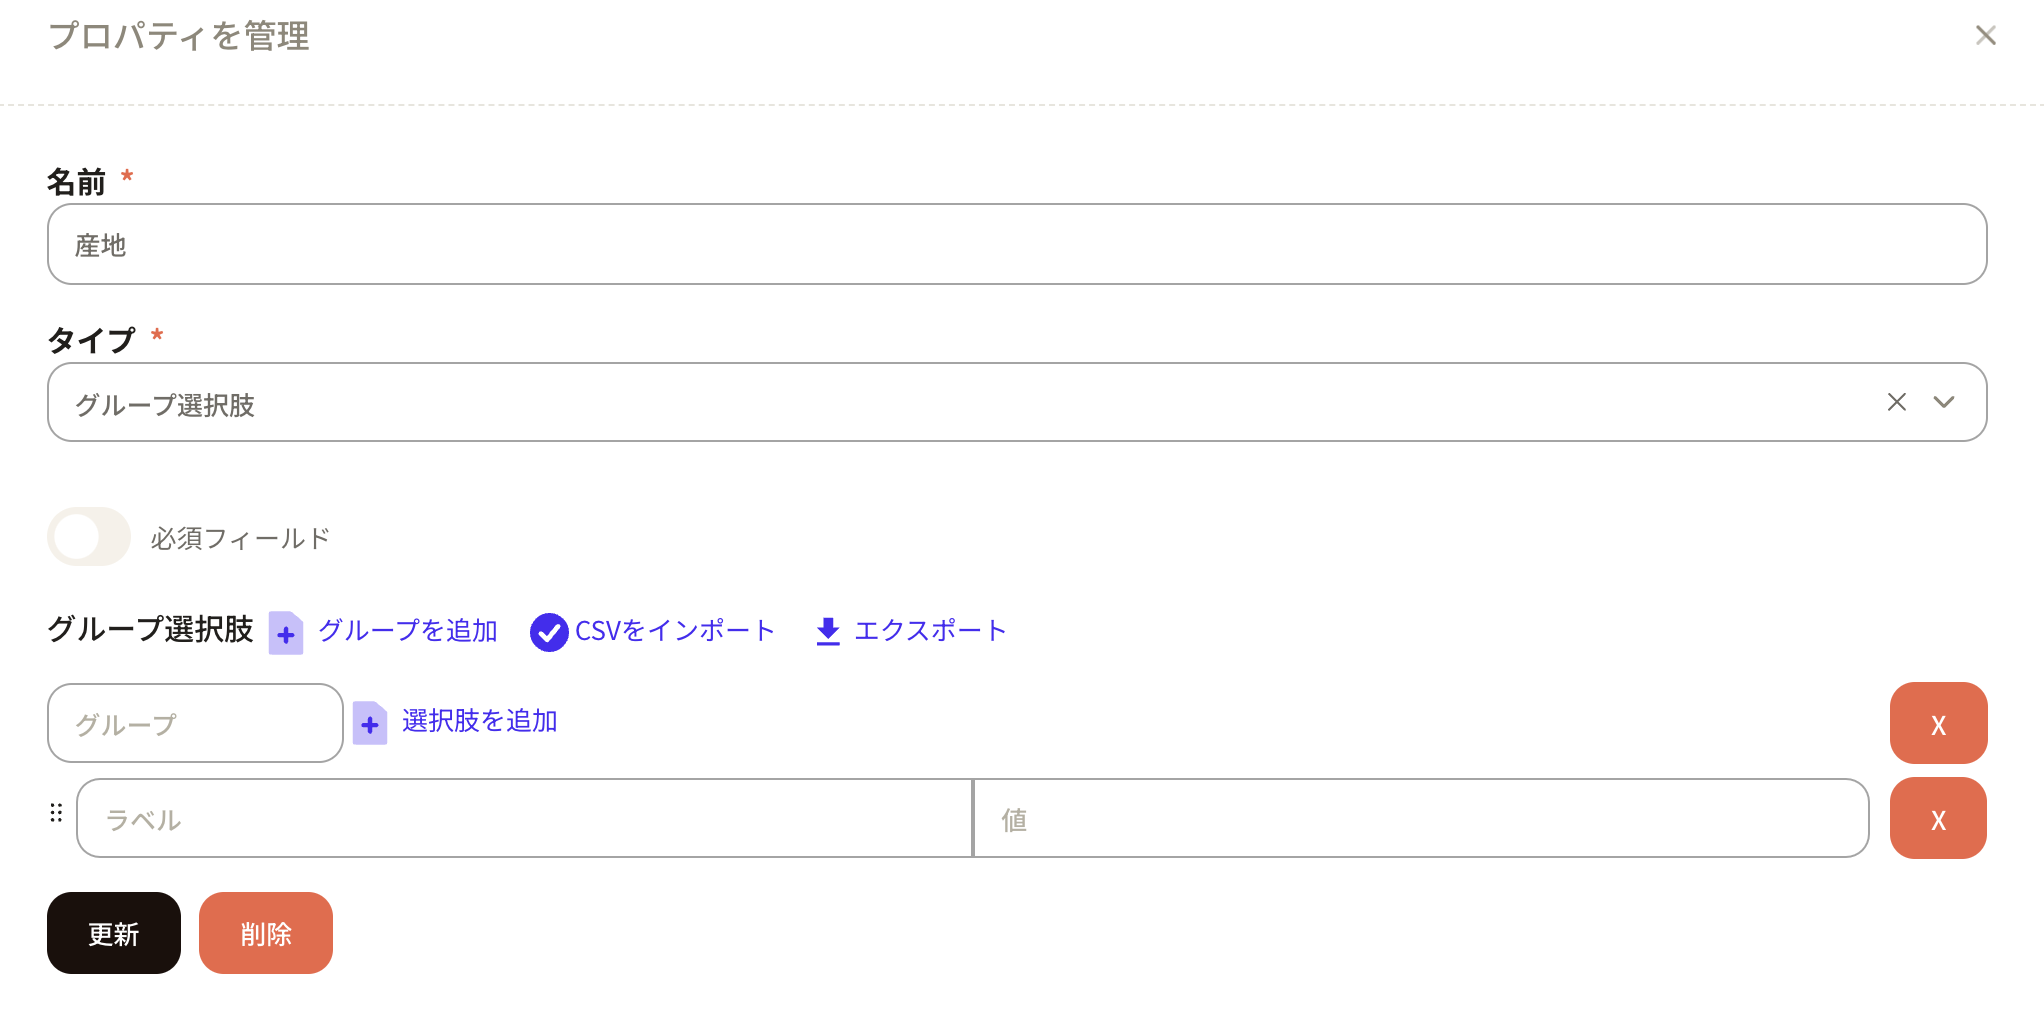
Set the group name for the main category.
The label of the option field for subcategories is the name displayed within Sanka, while the value is the name used internally by the system.
You can add more fields for this subcategory by clicking the “Add Option” button.

Main category: Domestic; Subcategories: Aomori, Nagano, Yamanashi have been entered.
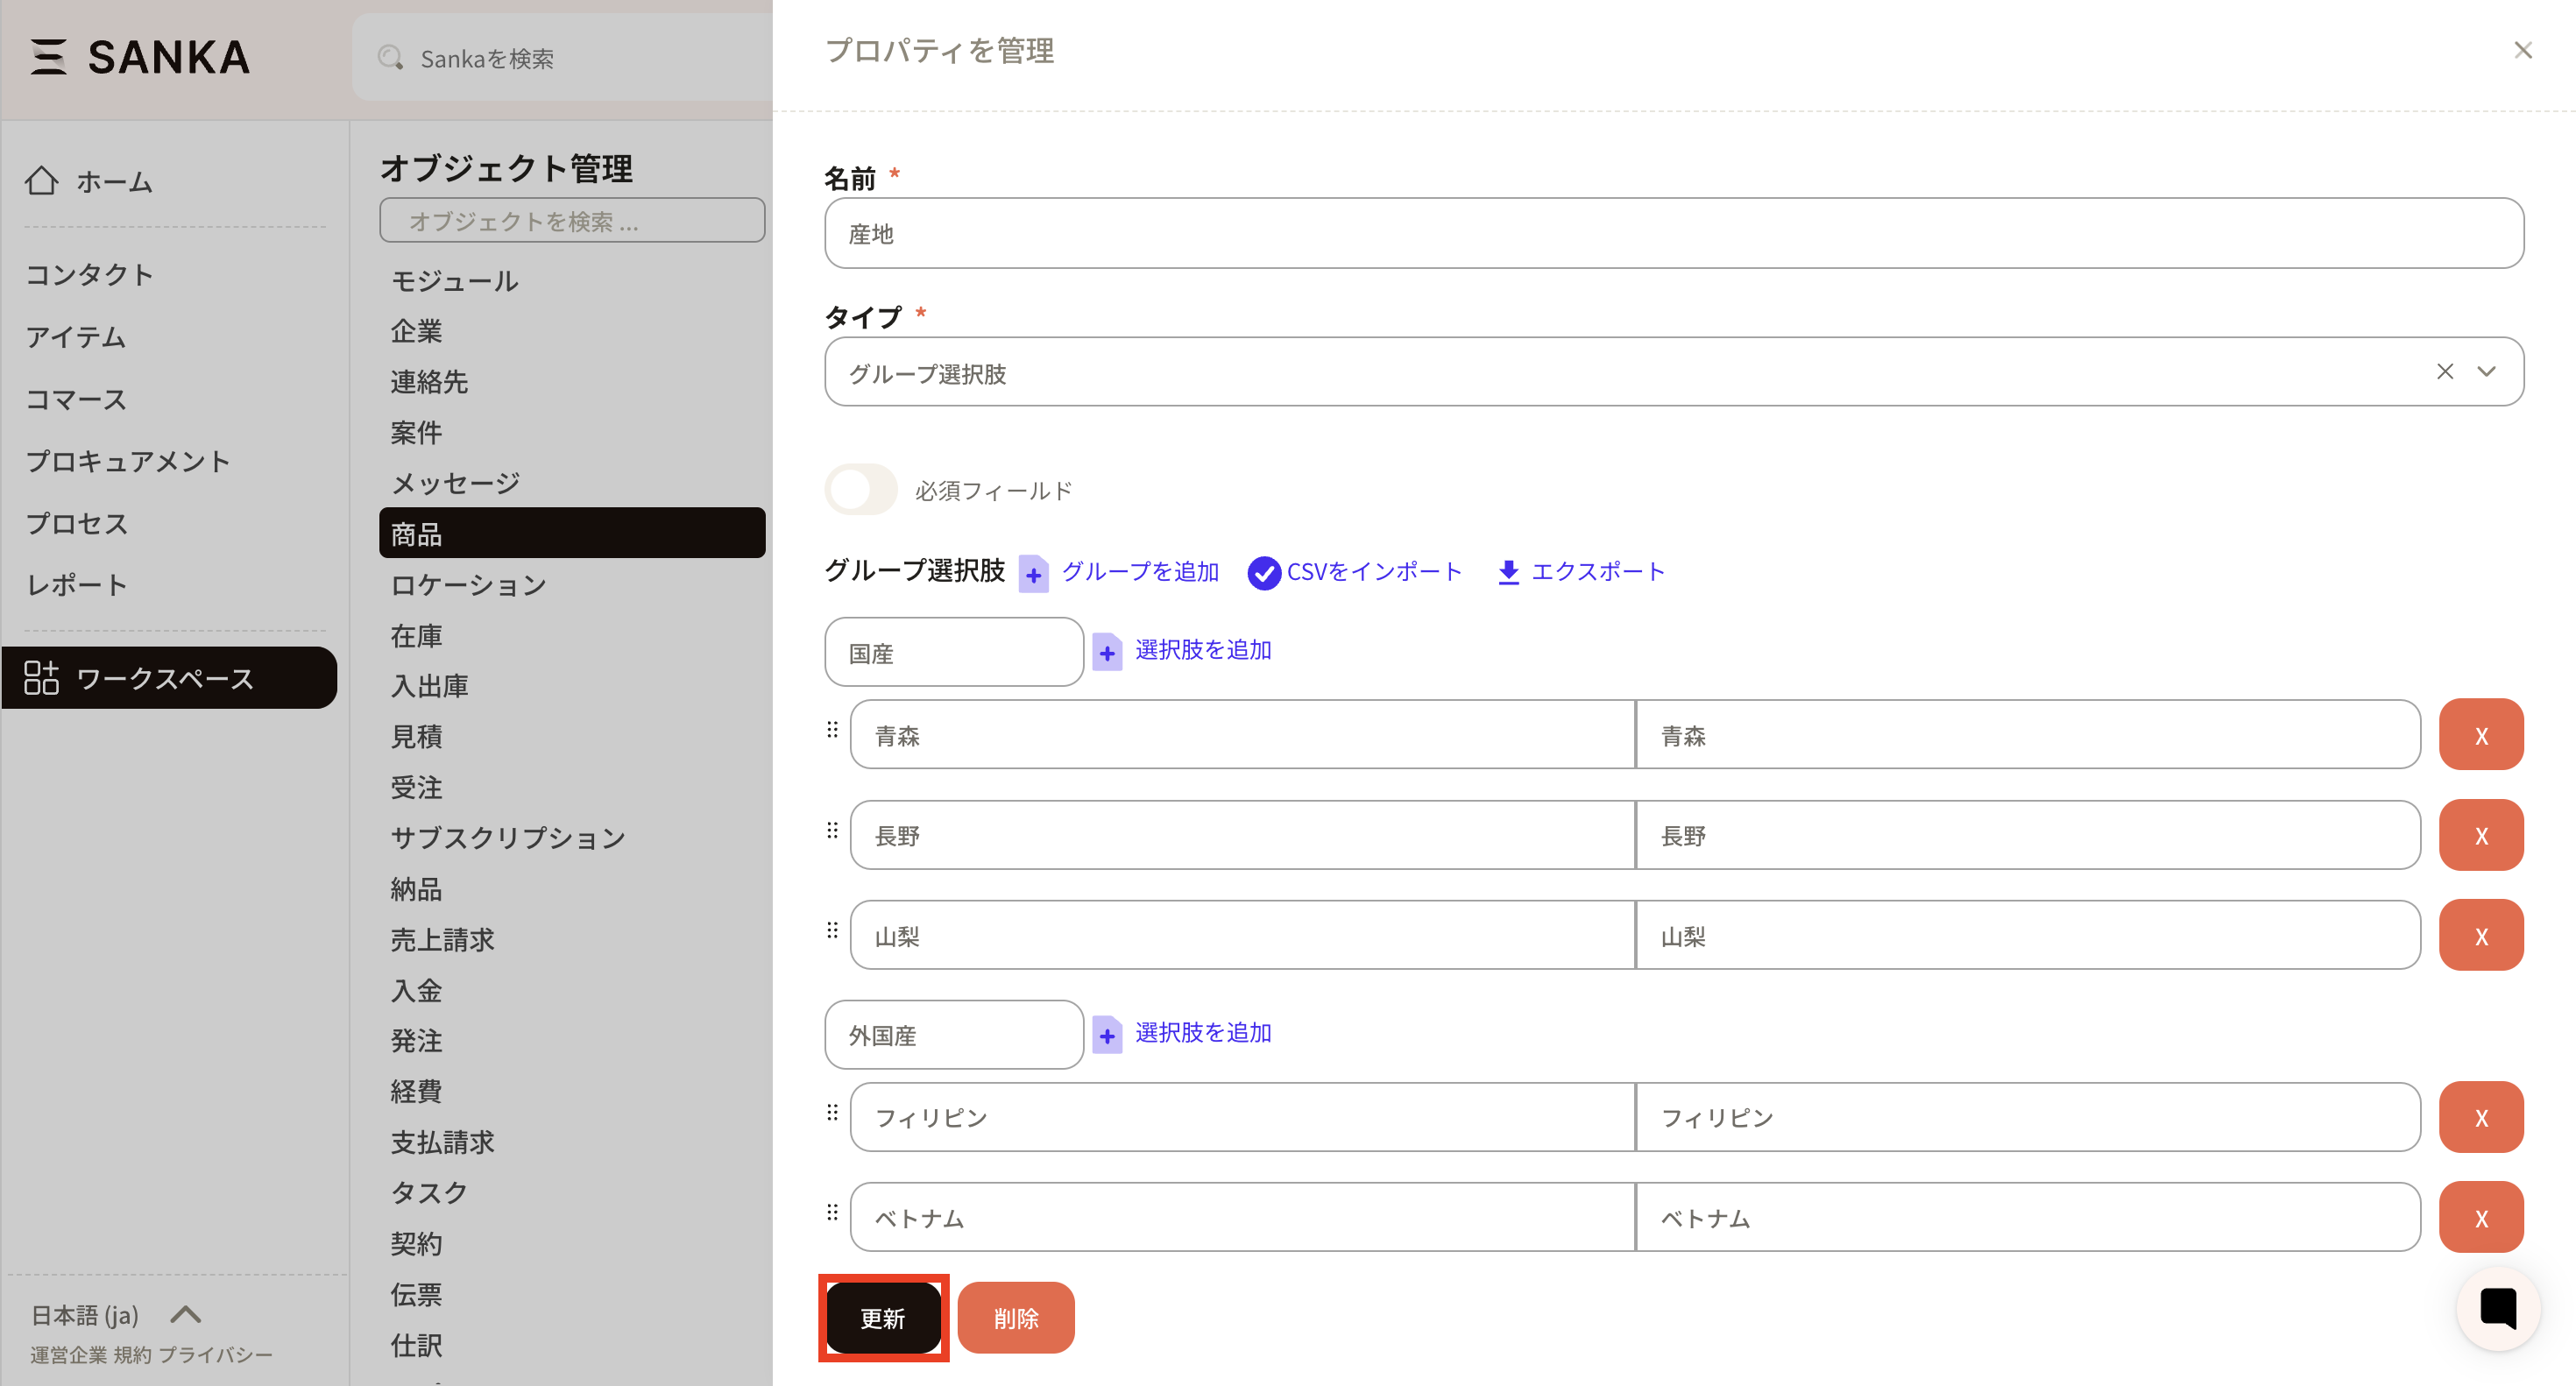
Next, press the “Add Group” button again to create a group for imported items.
A group of foreign origin has been added. Press the update button to apply the changes.
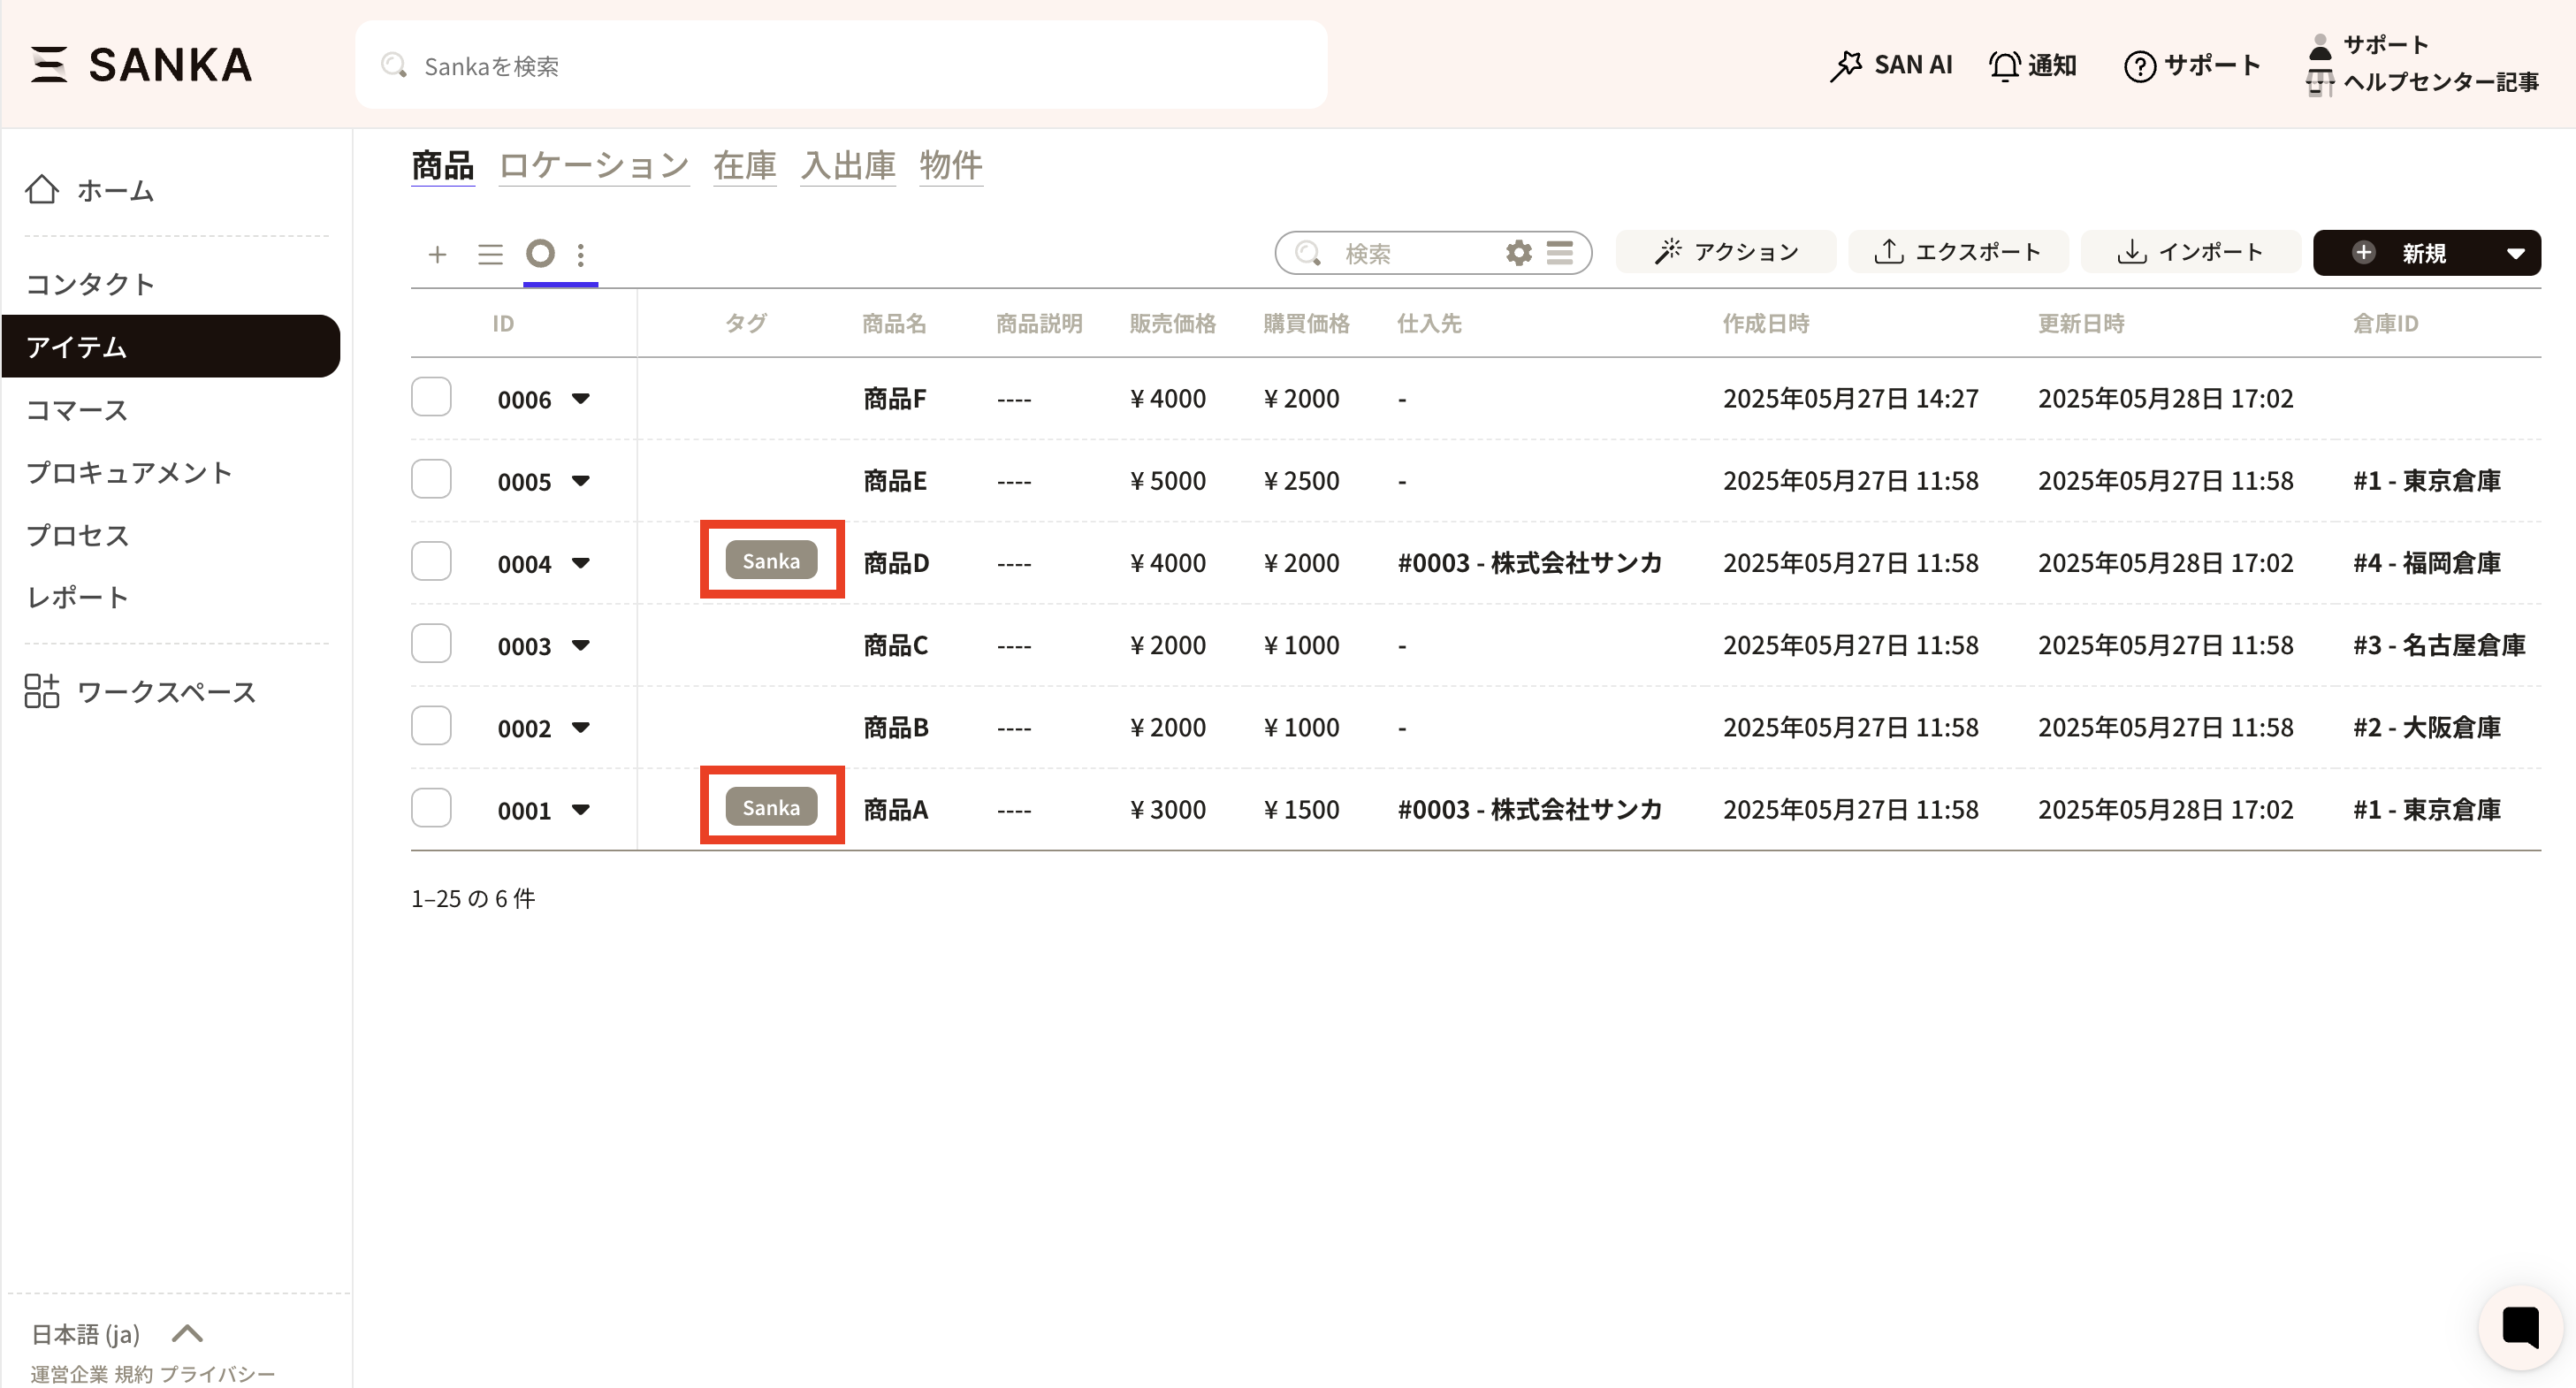
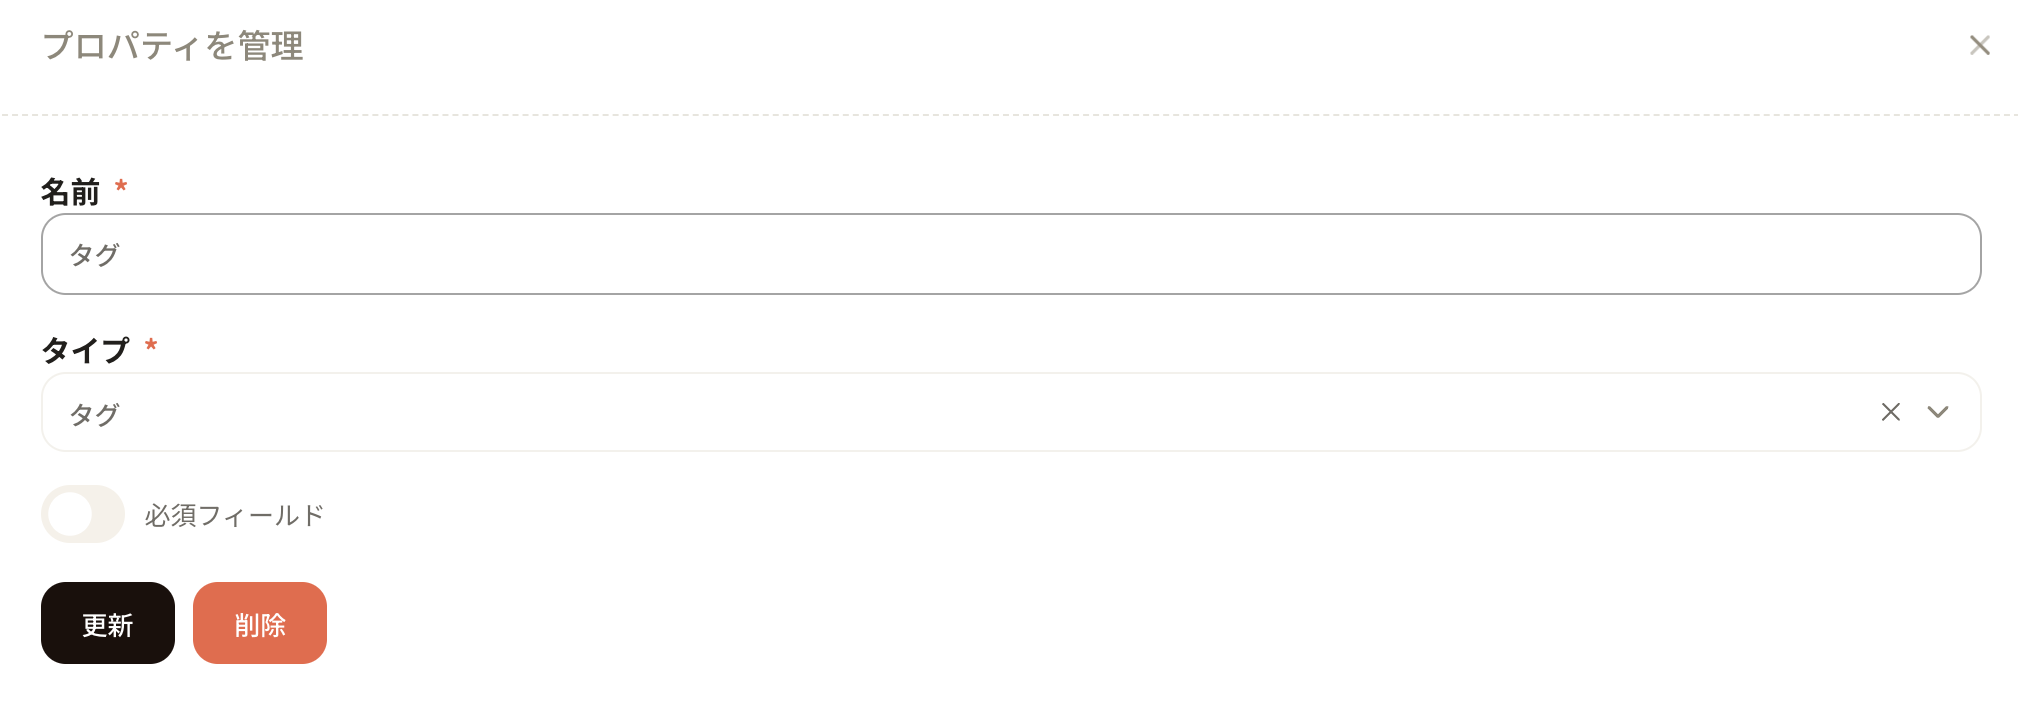
A tag is something that can serve as a marker within record information.
How to Set Tags
When configuring the property, simply set the type to tag.
Next, add a tag property to the form of the applicable object.
Next, click the tag from the record screen.
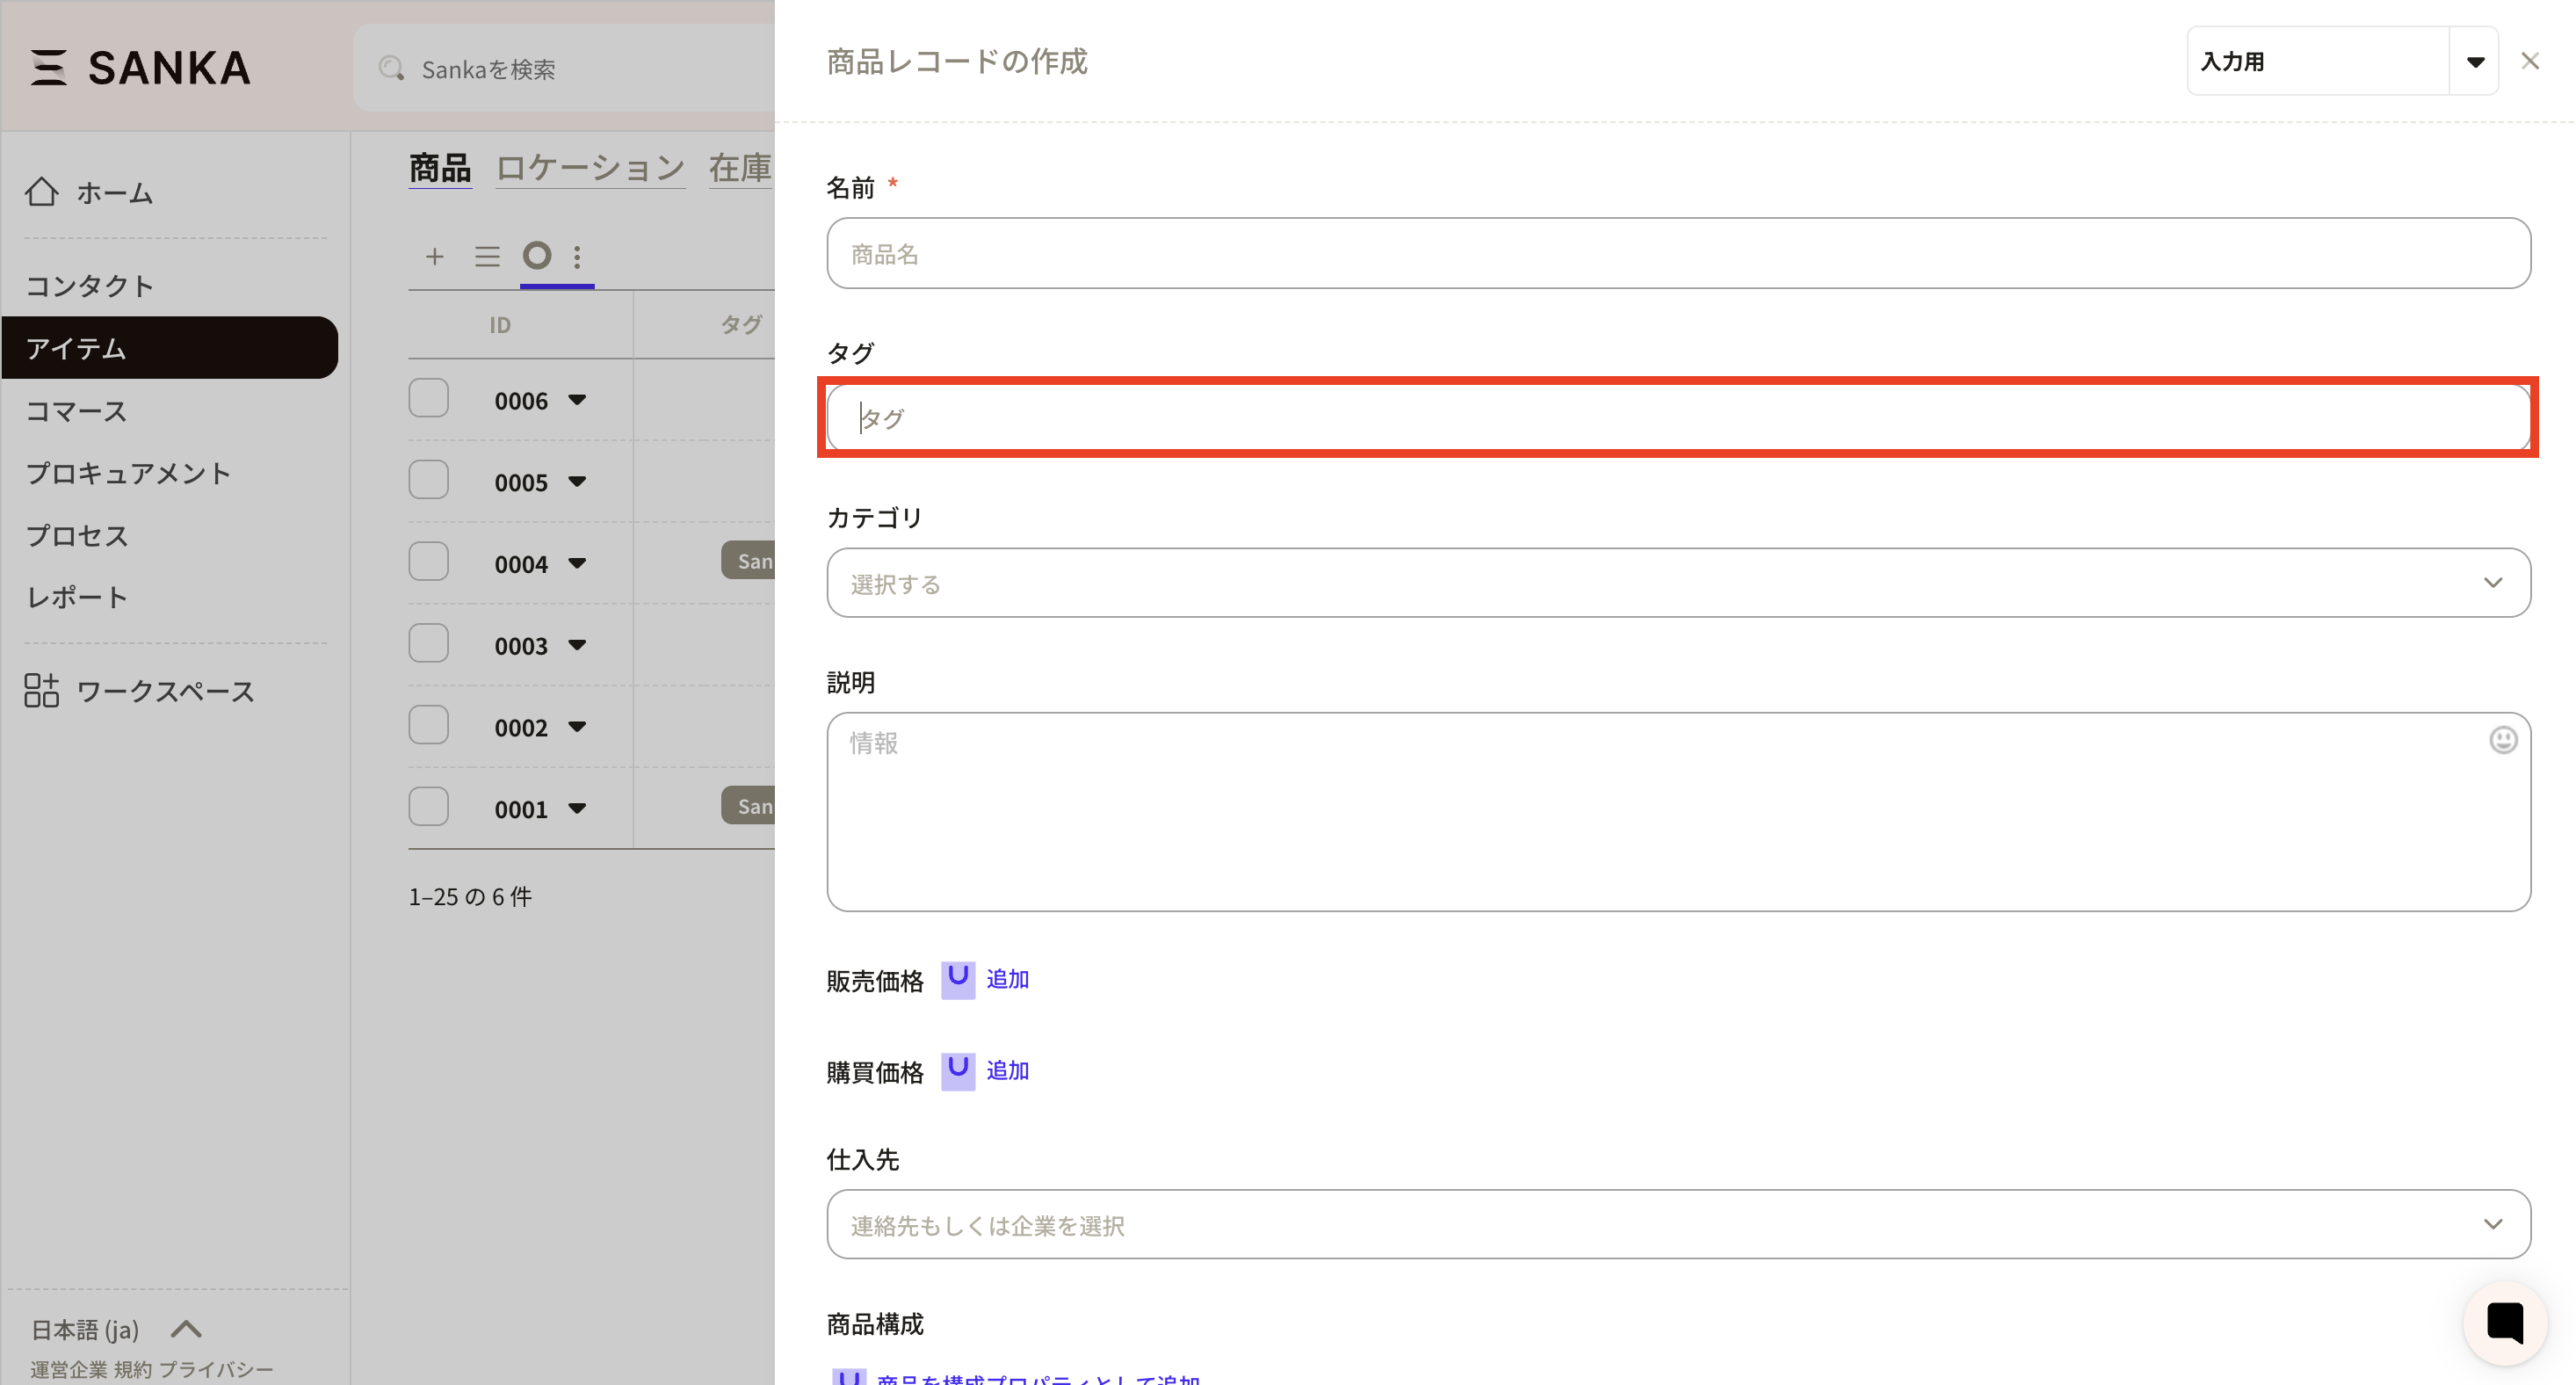
Enter the tag text manually. Once registered, the tag will be saved and will appear as an option below.

