Within Sanka, it is possible to create modules tailored to your business requirements, allowing you to customize your workspace.
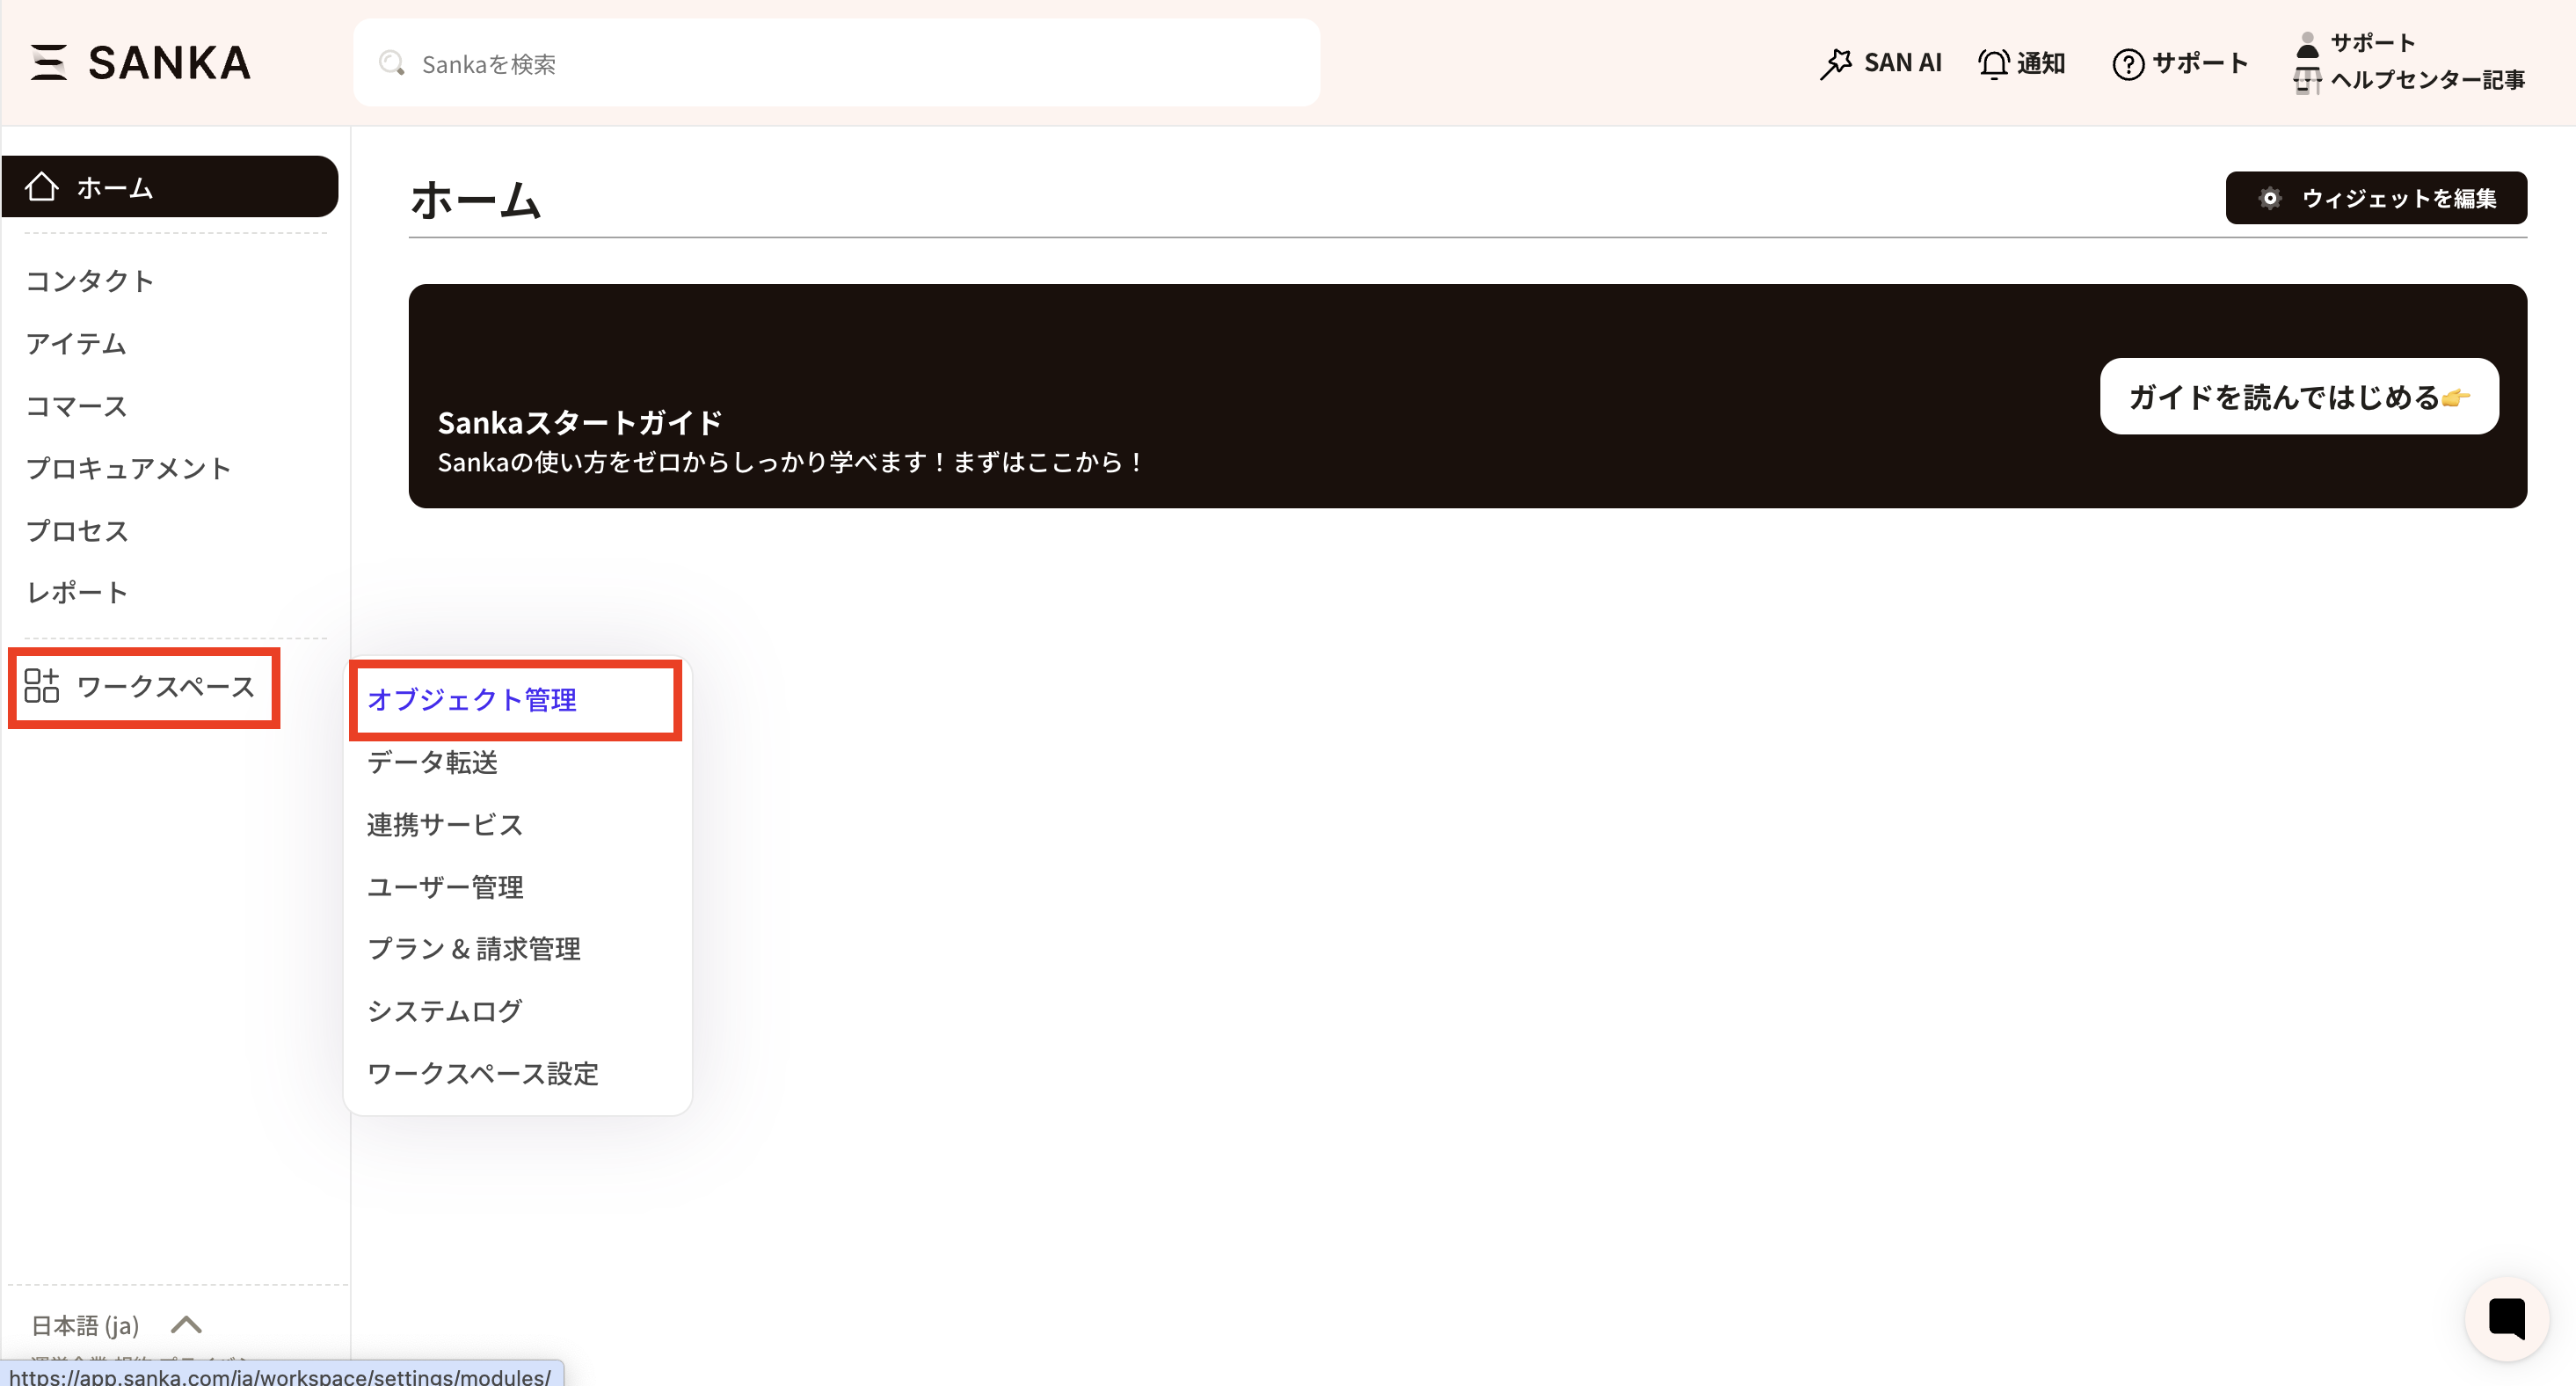
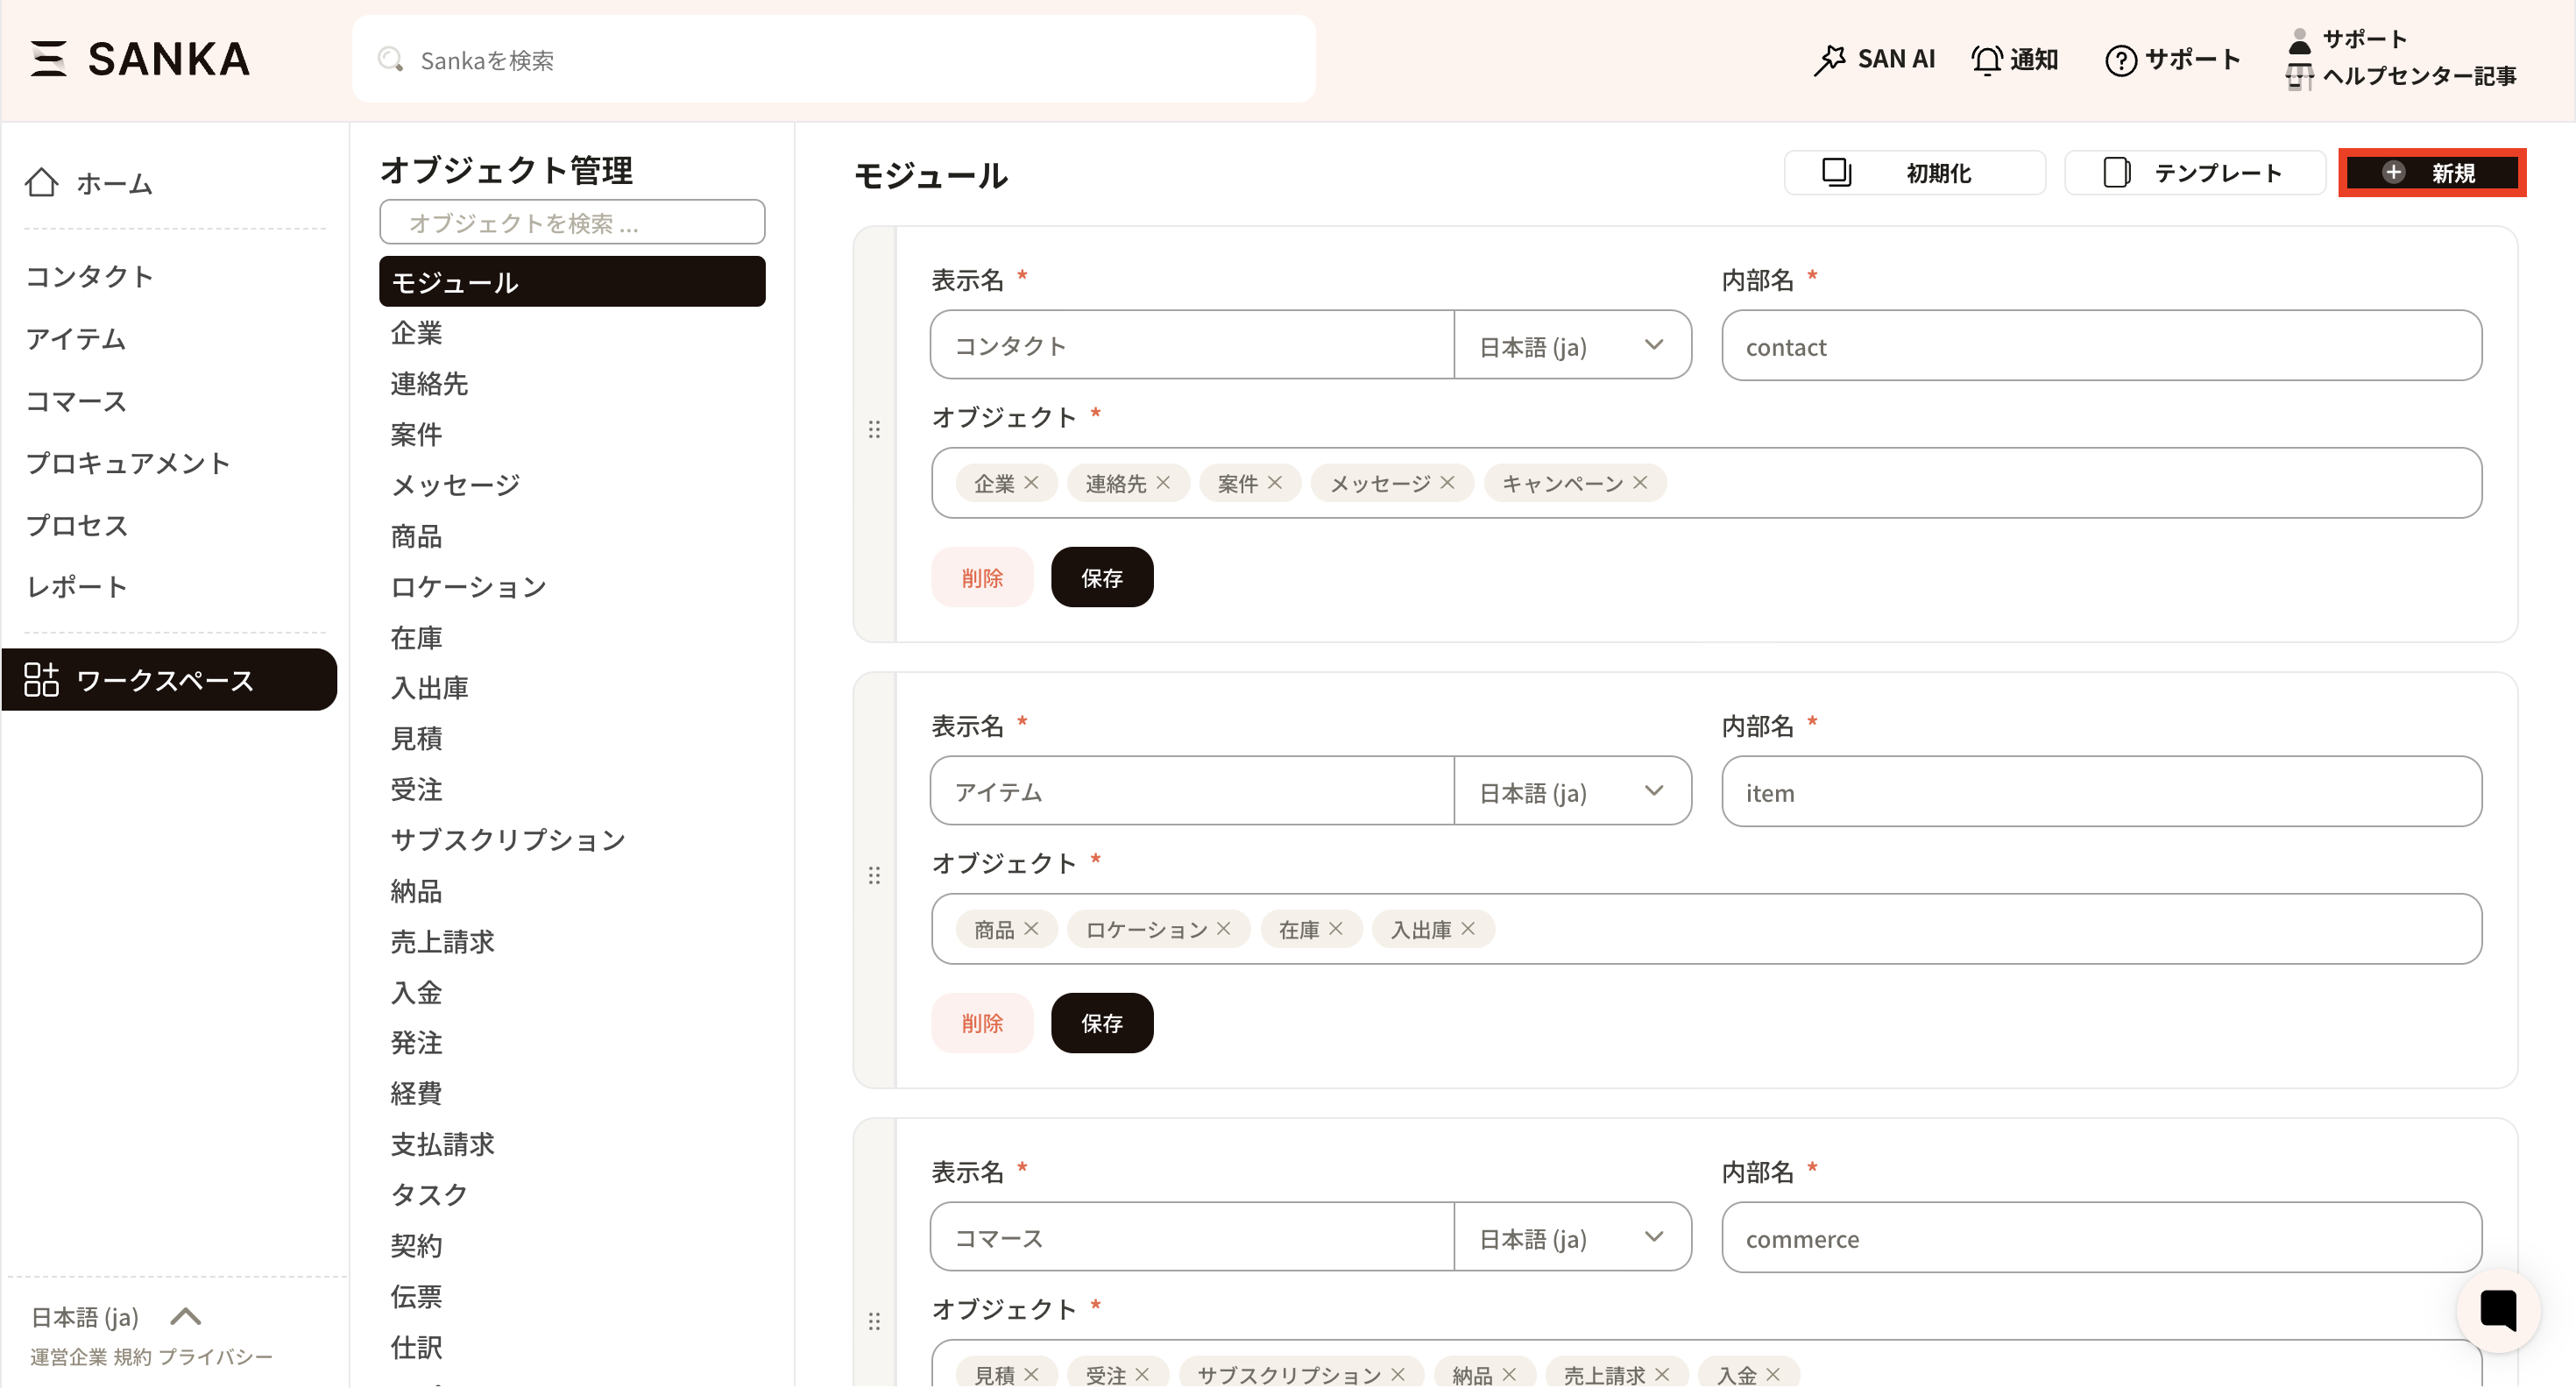
① On the SANKA home screen, select Workspace → Object Management.
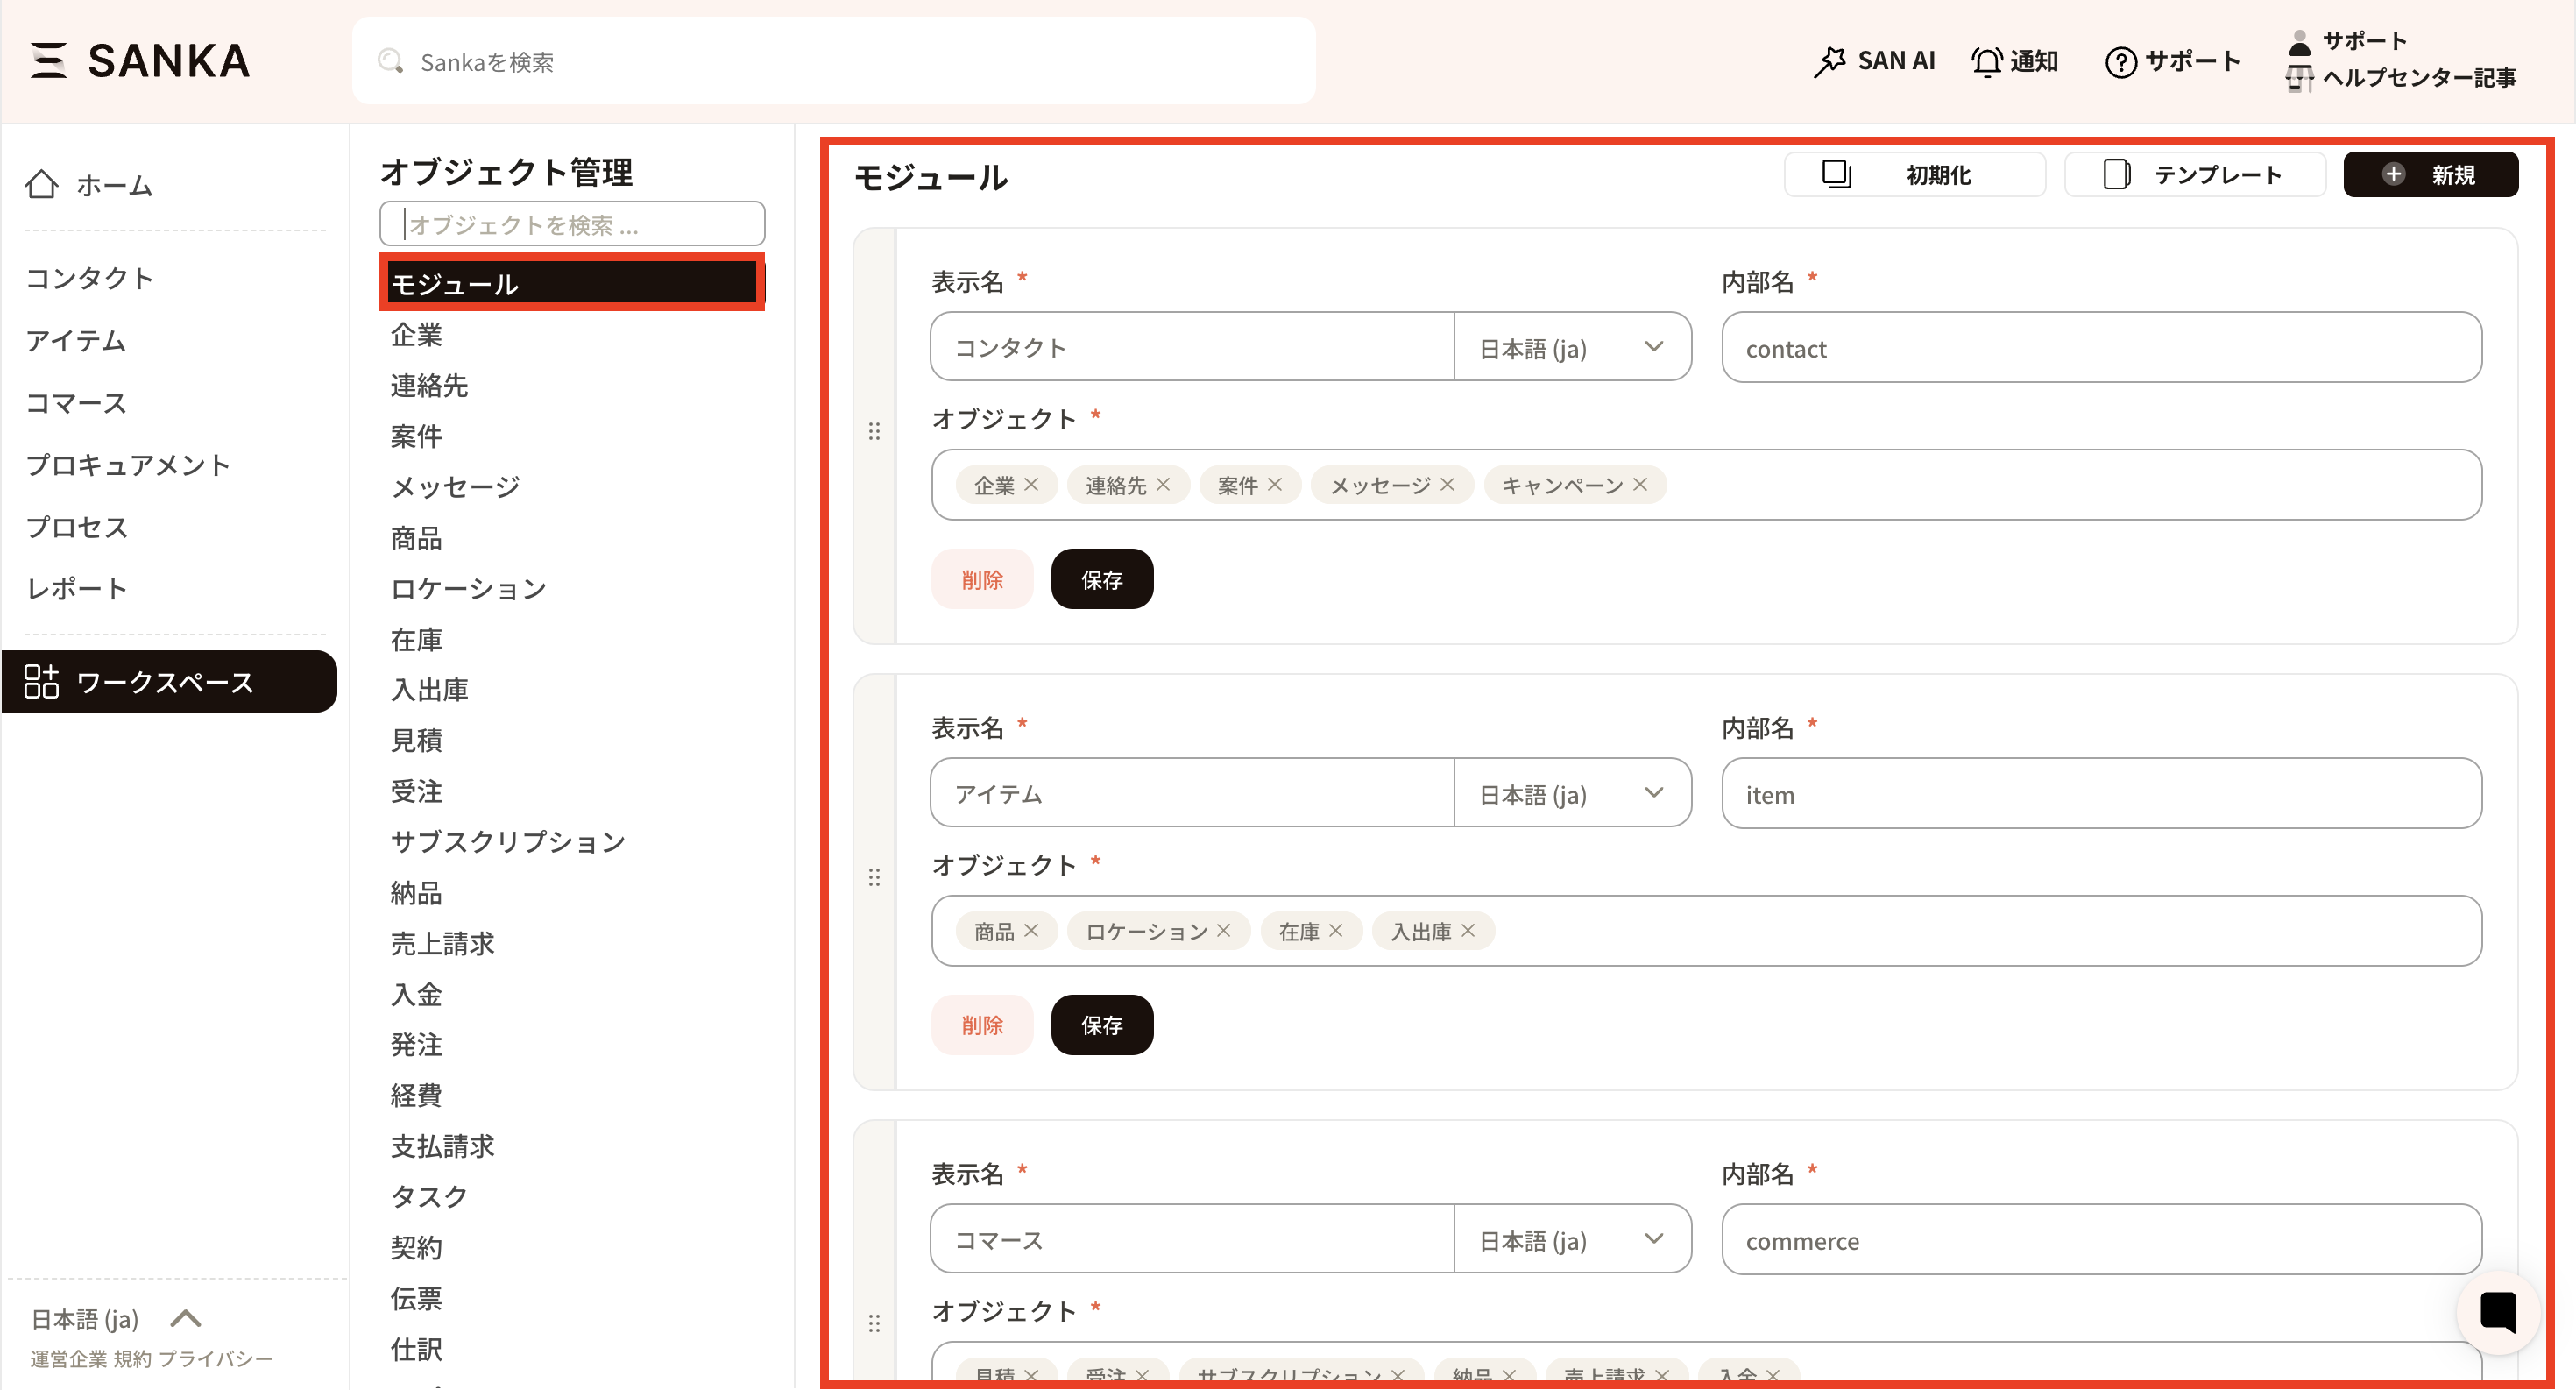
② When you select a module, a list of existing modules will be displayed. The modules displayed here are those selected when creating a new workspace.
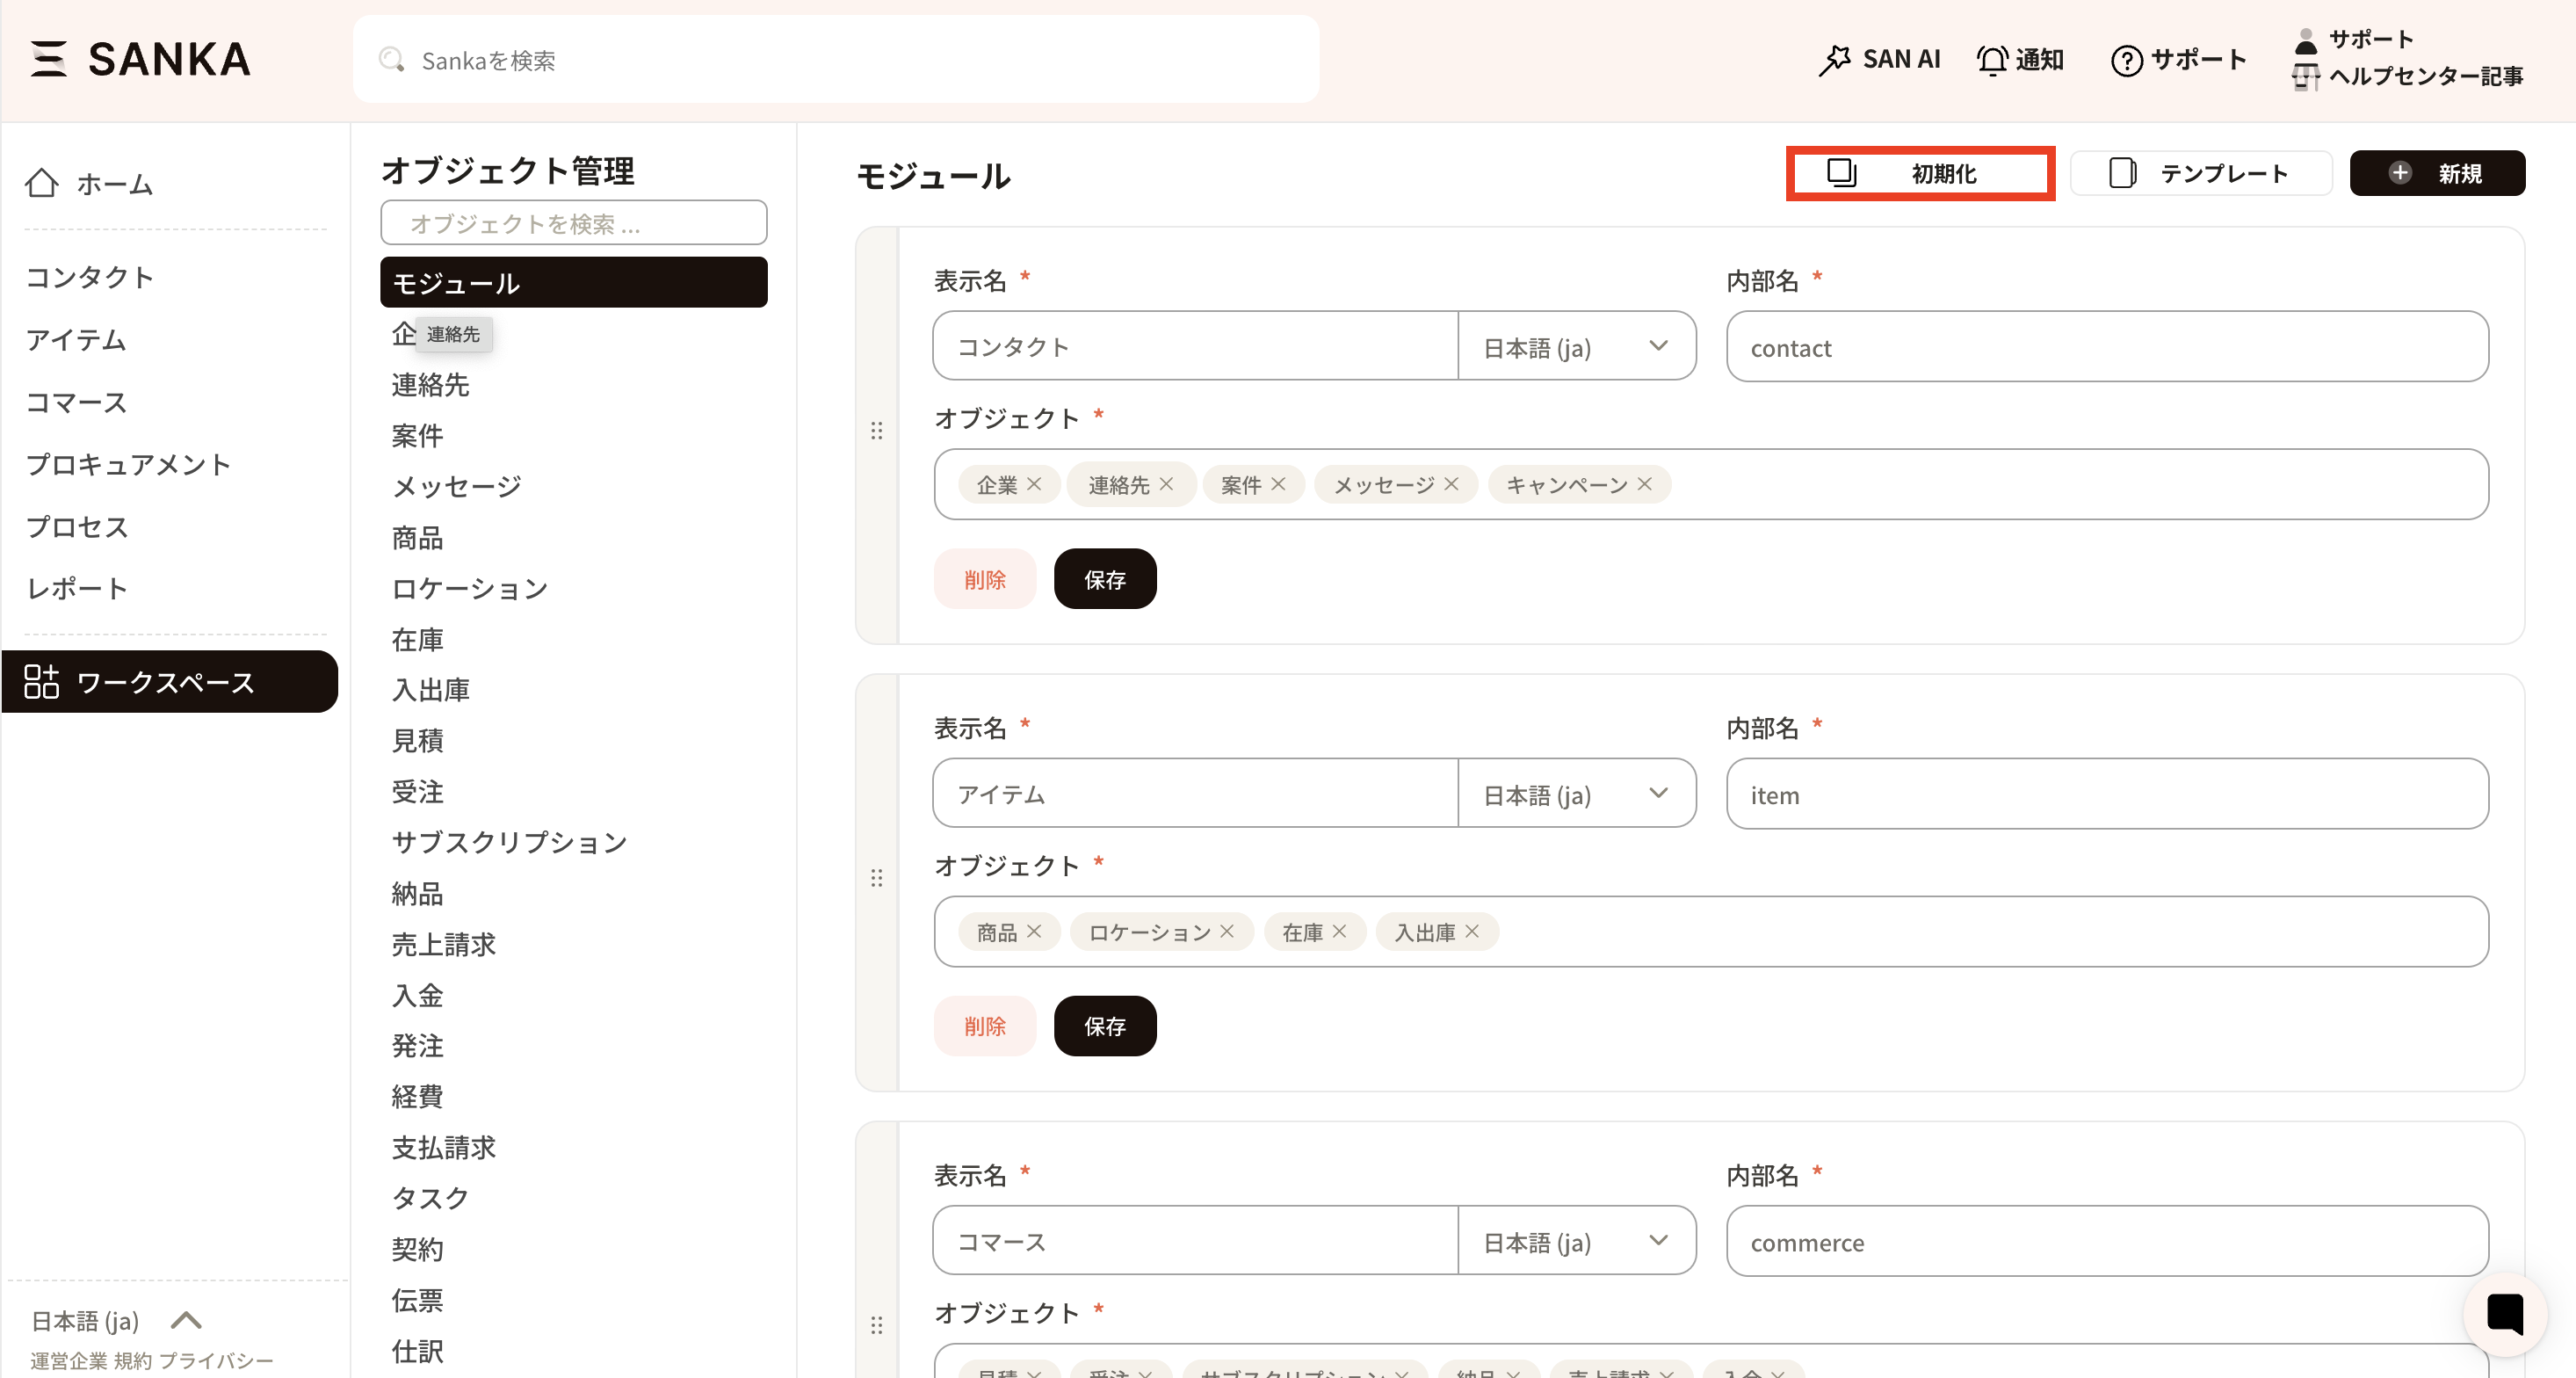
③ If you wish to revert the module to its default settings, please press the initialization button. *Even after initializing the module, the record information registered in each object will not be deleted.
④ Alternatively, you can delete only a specific module by pressing the "Delete" button configured for each module.
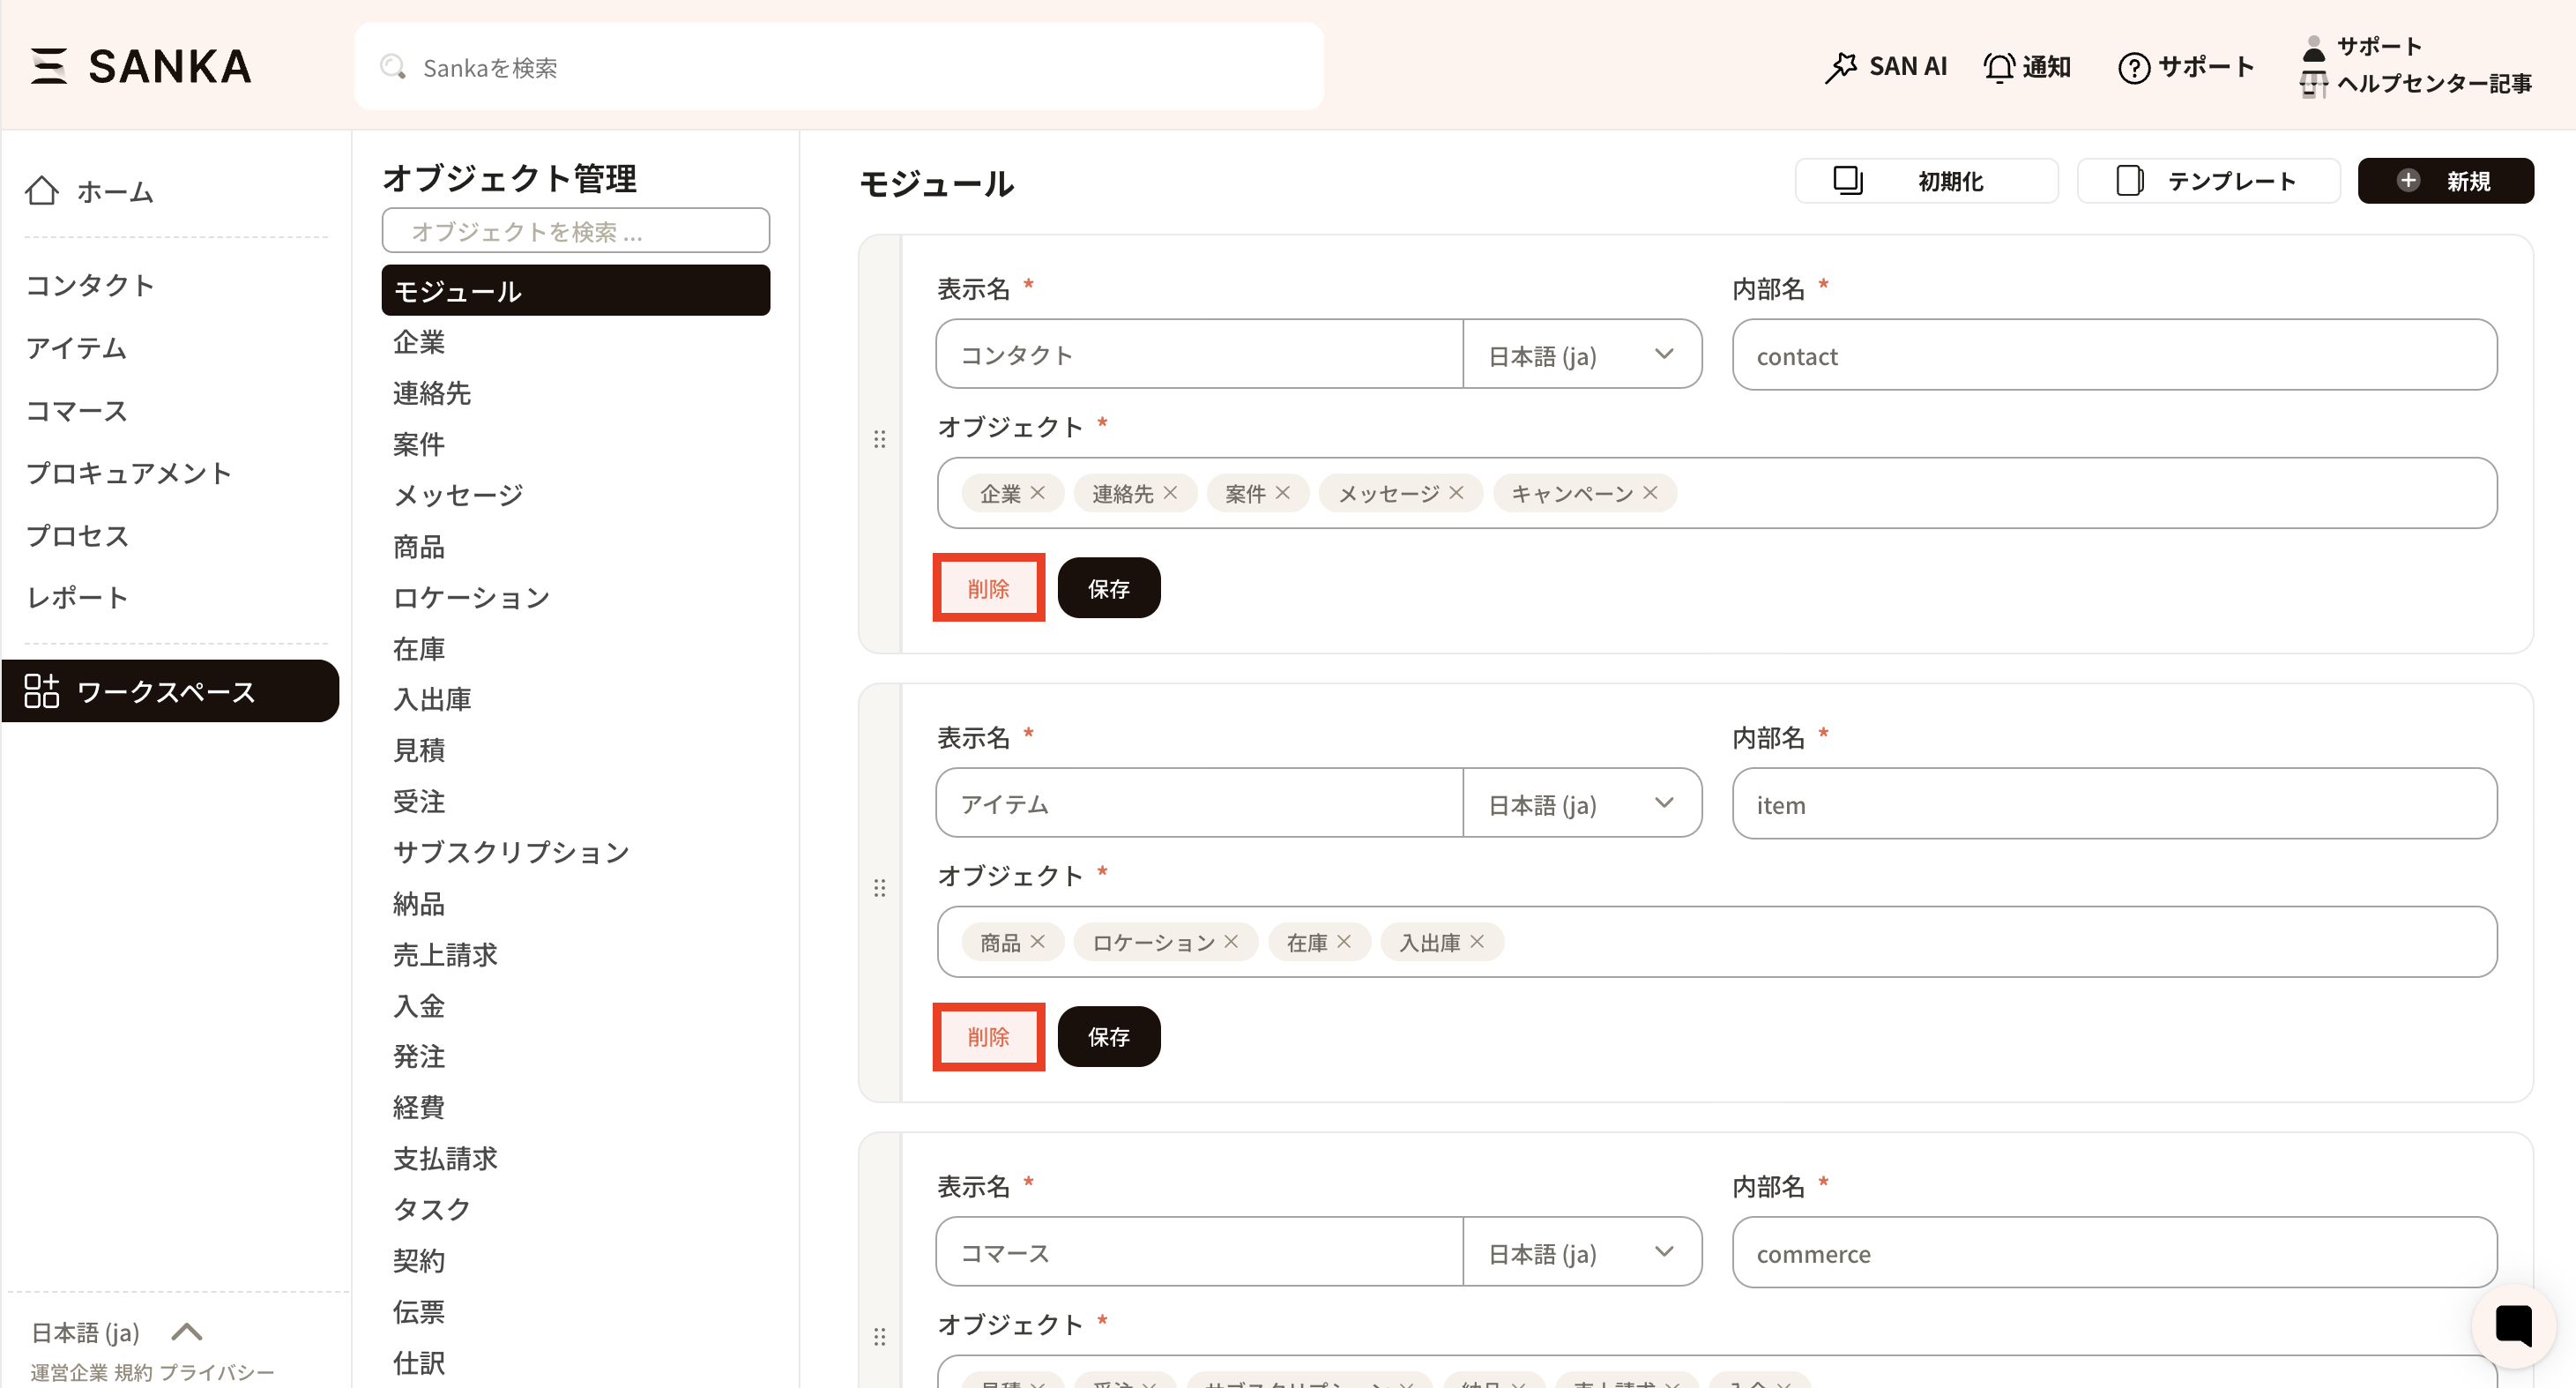
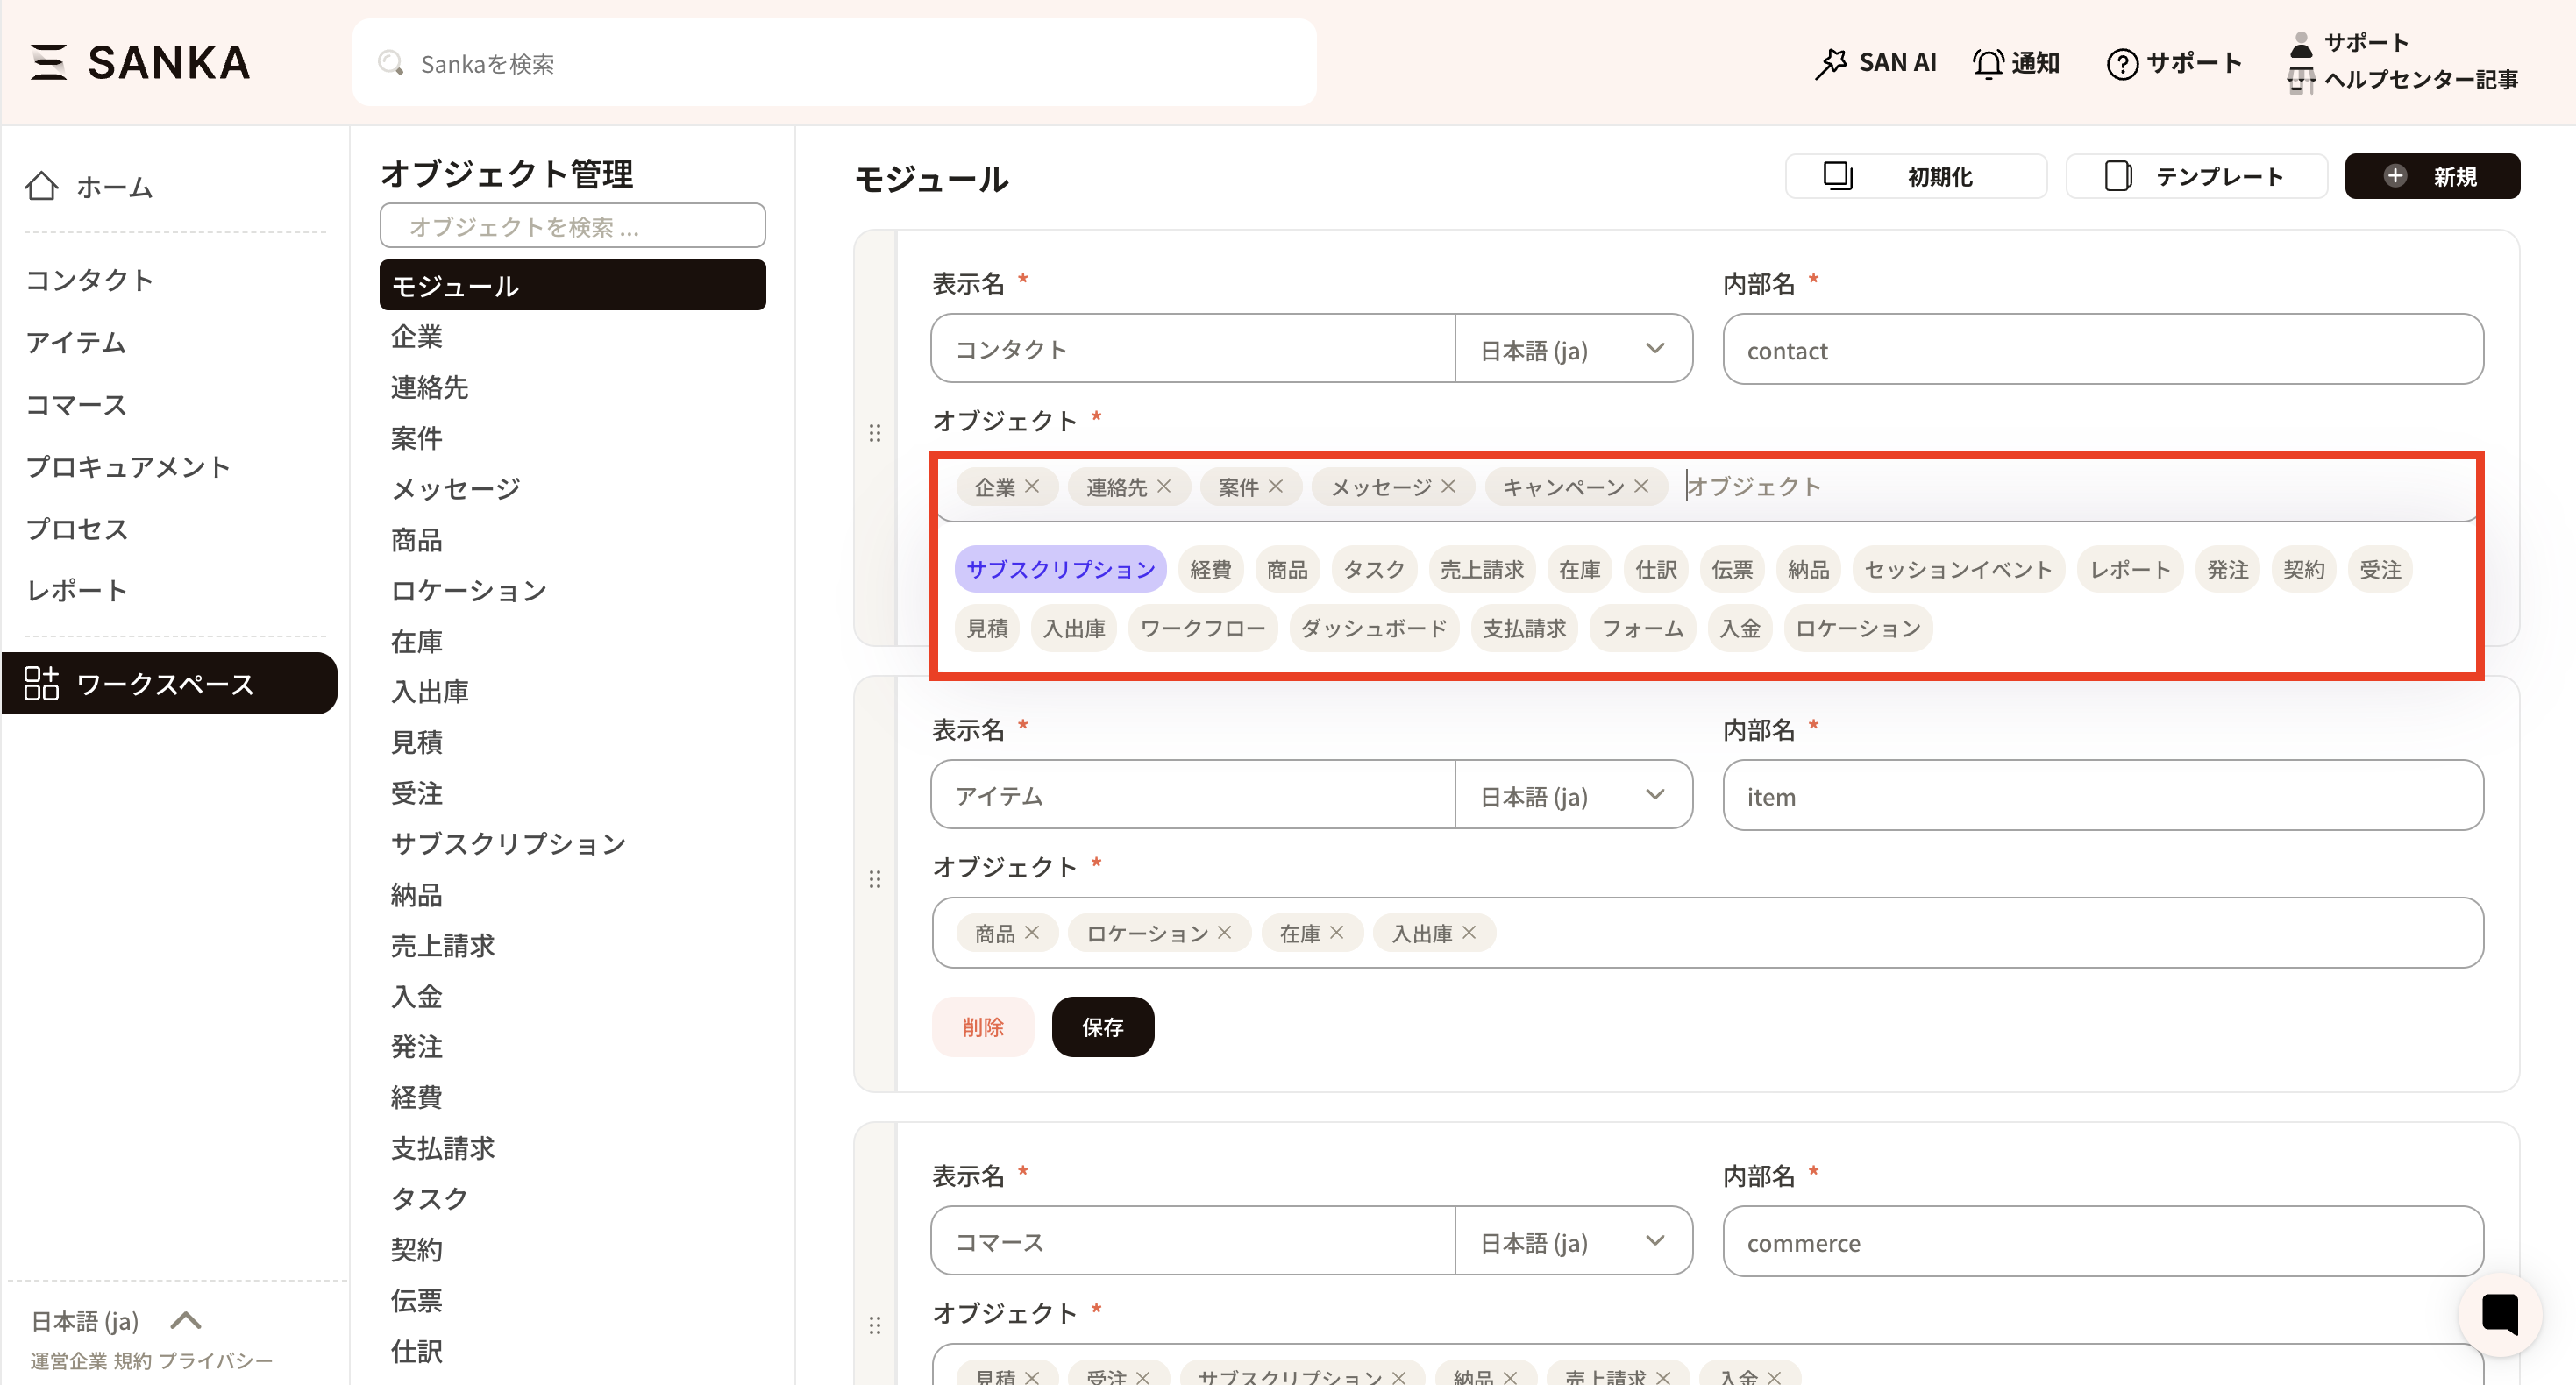
⑤ If you wish to modify the objects set within a module, click inside the object's frame. Each object will be displayed, making it easy to add or remove them as needed. By pressing the × next to the column, you can delete it, and by dragging the column, you can also change the order in which objects are arranged. Once you have finished editing, be sure to click the save button.
From here on, we will explain how to create a module for those who wish to customize.
How to Make Use of Templates
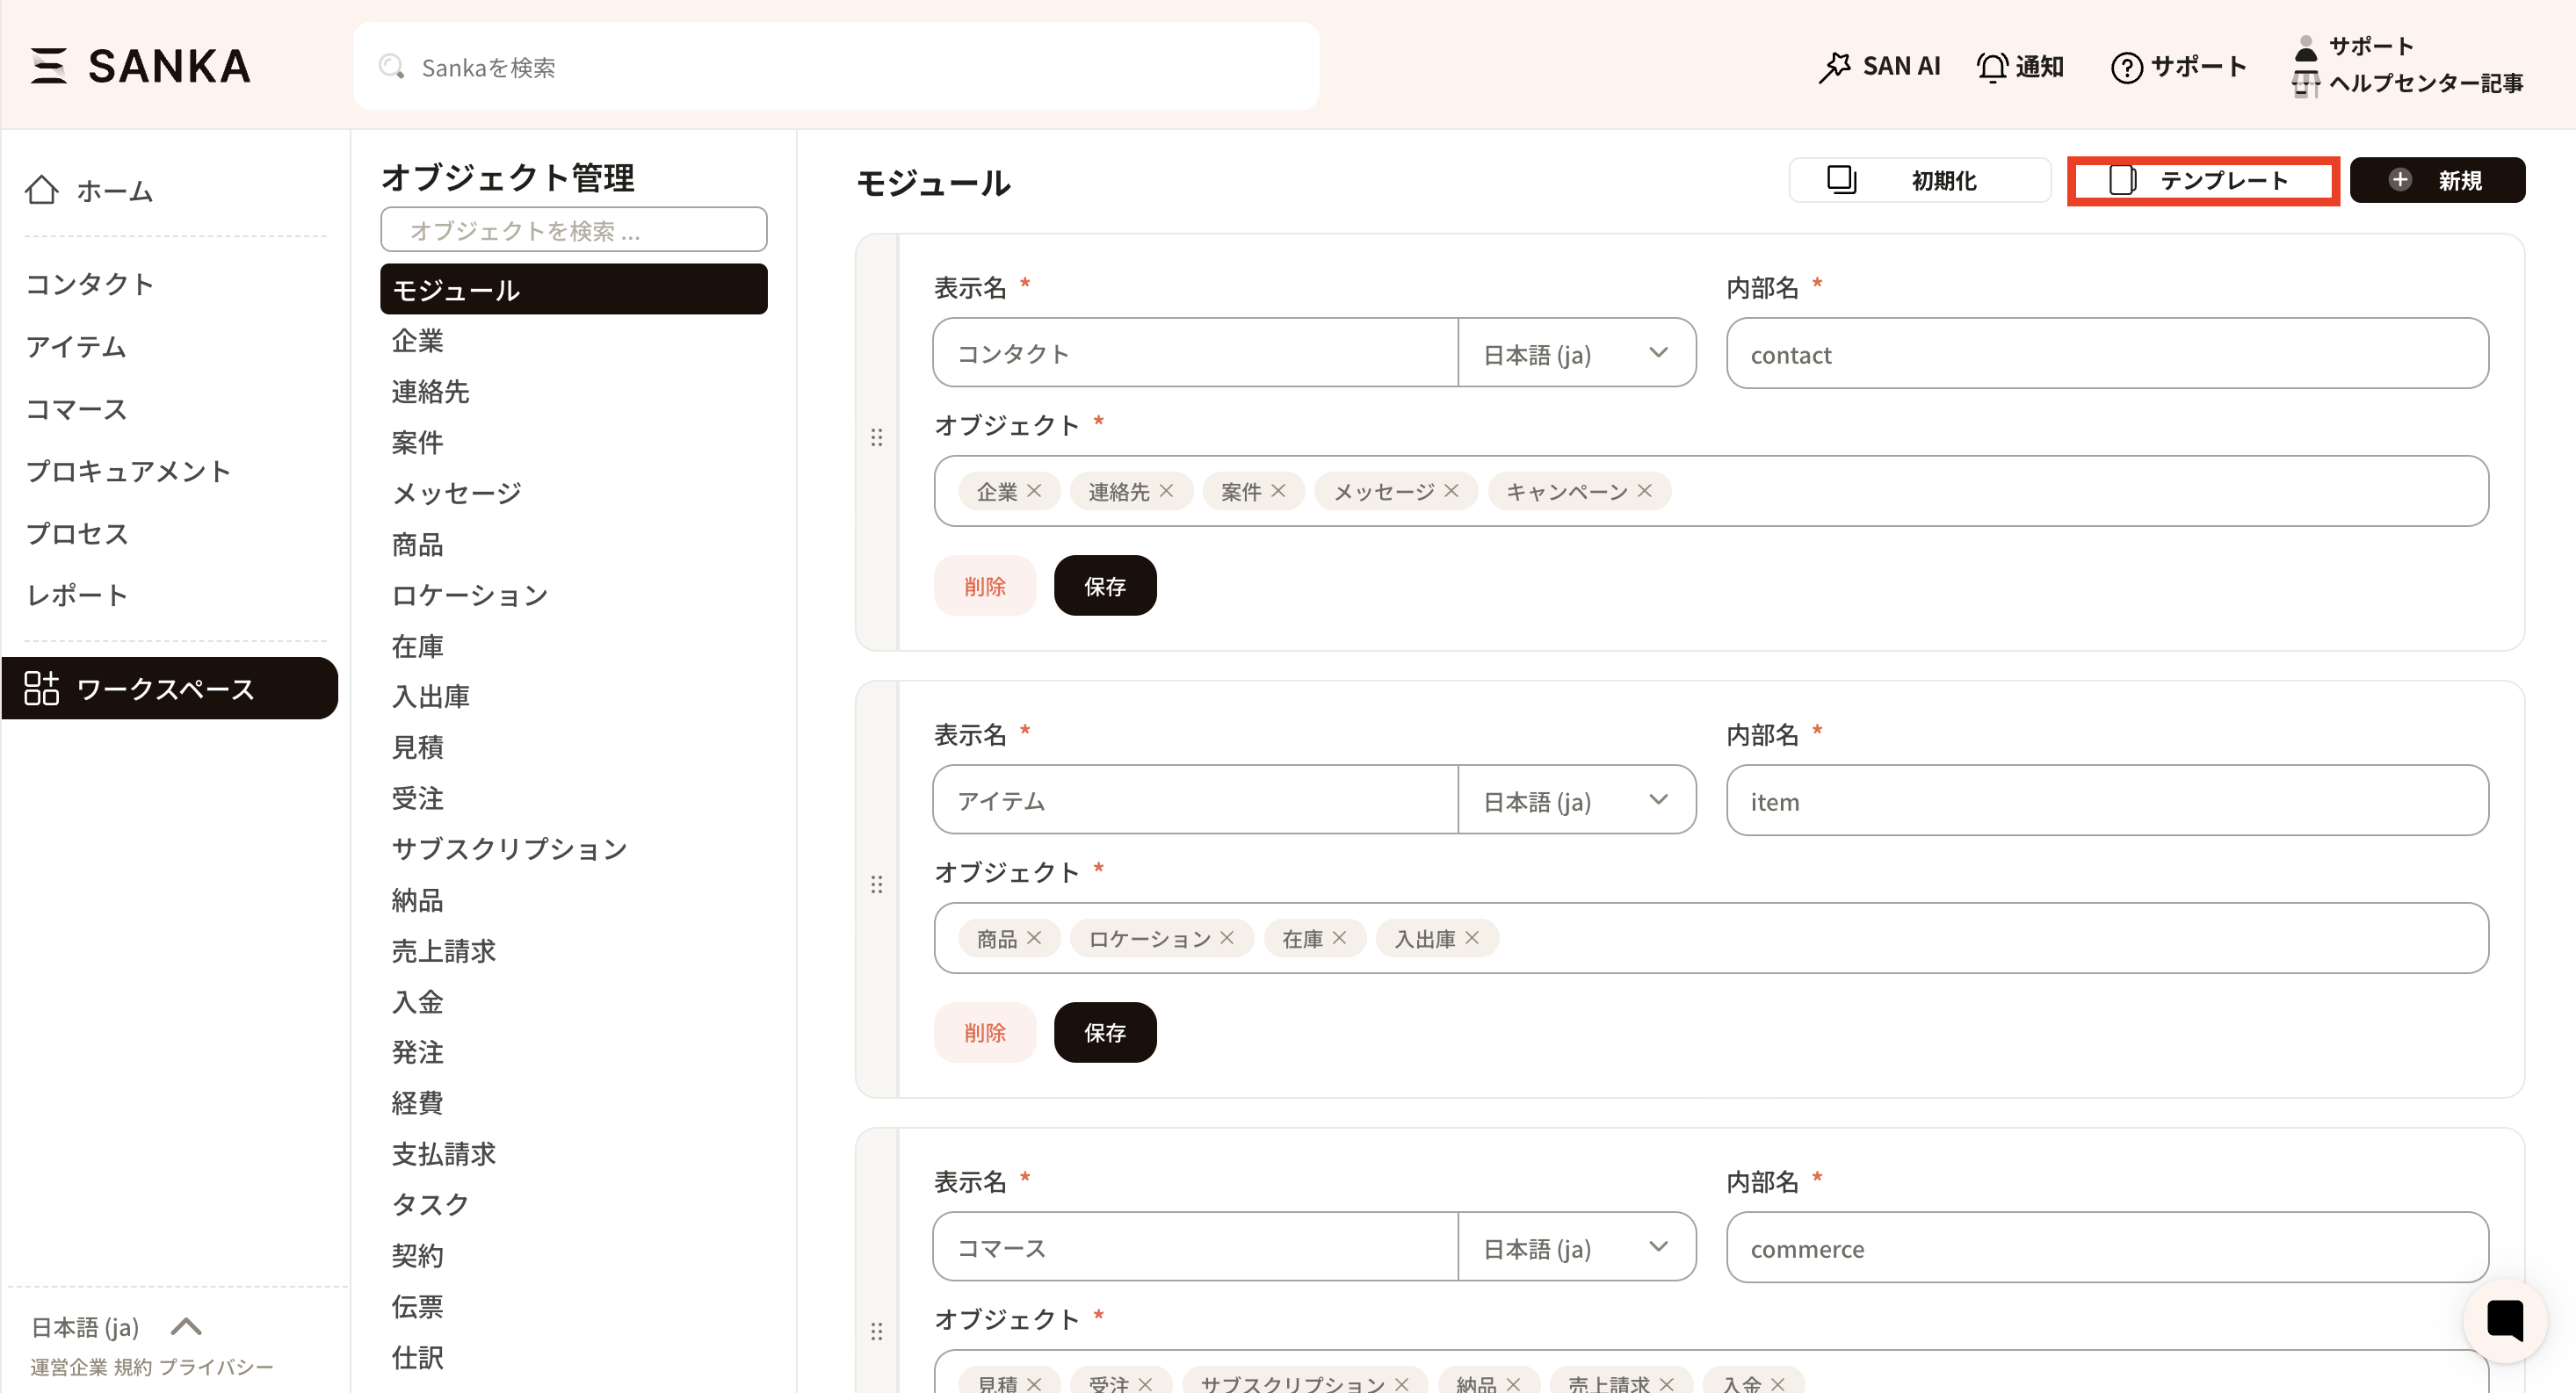
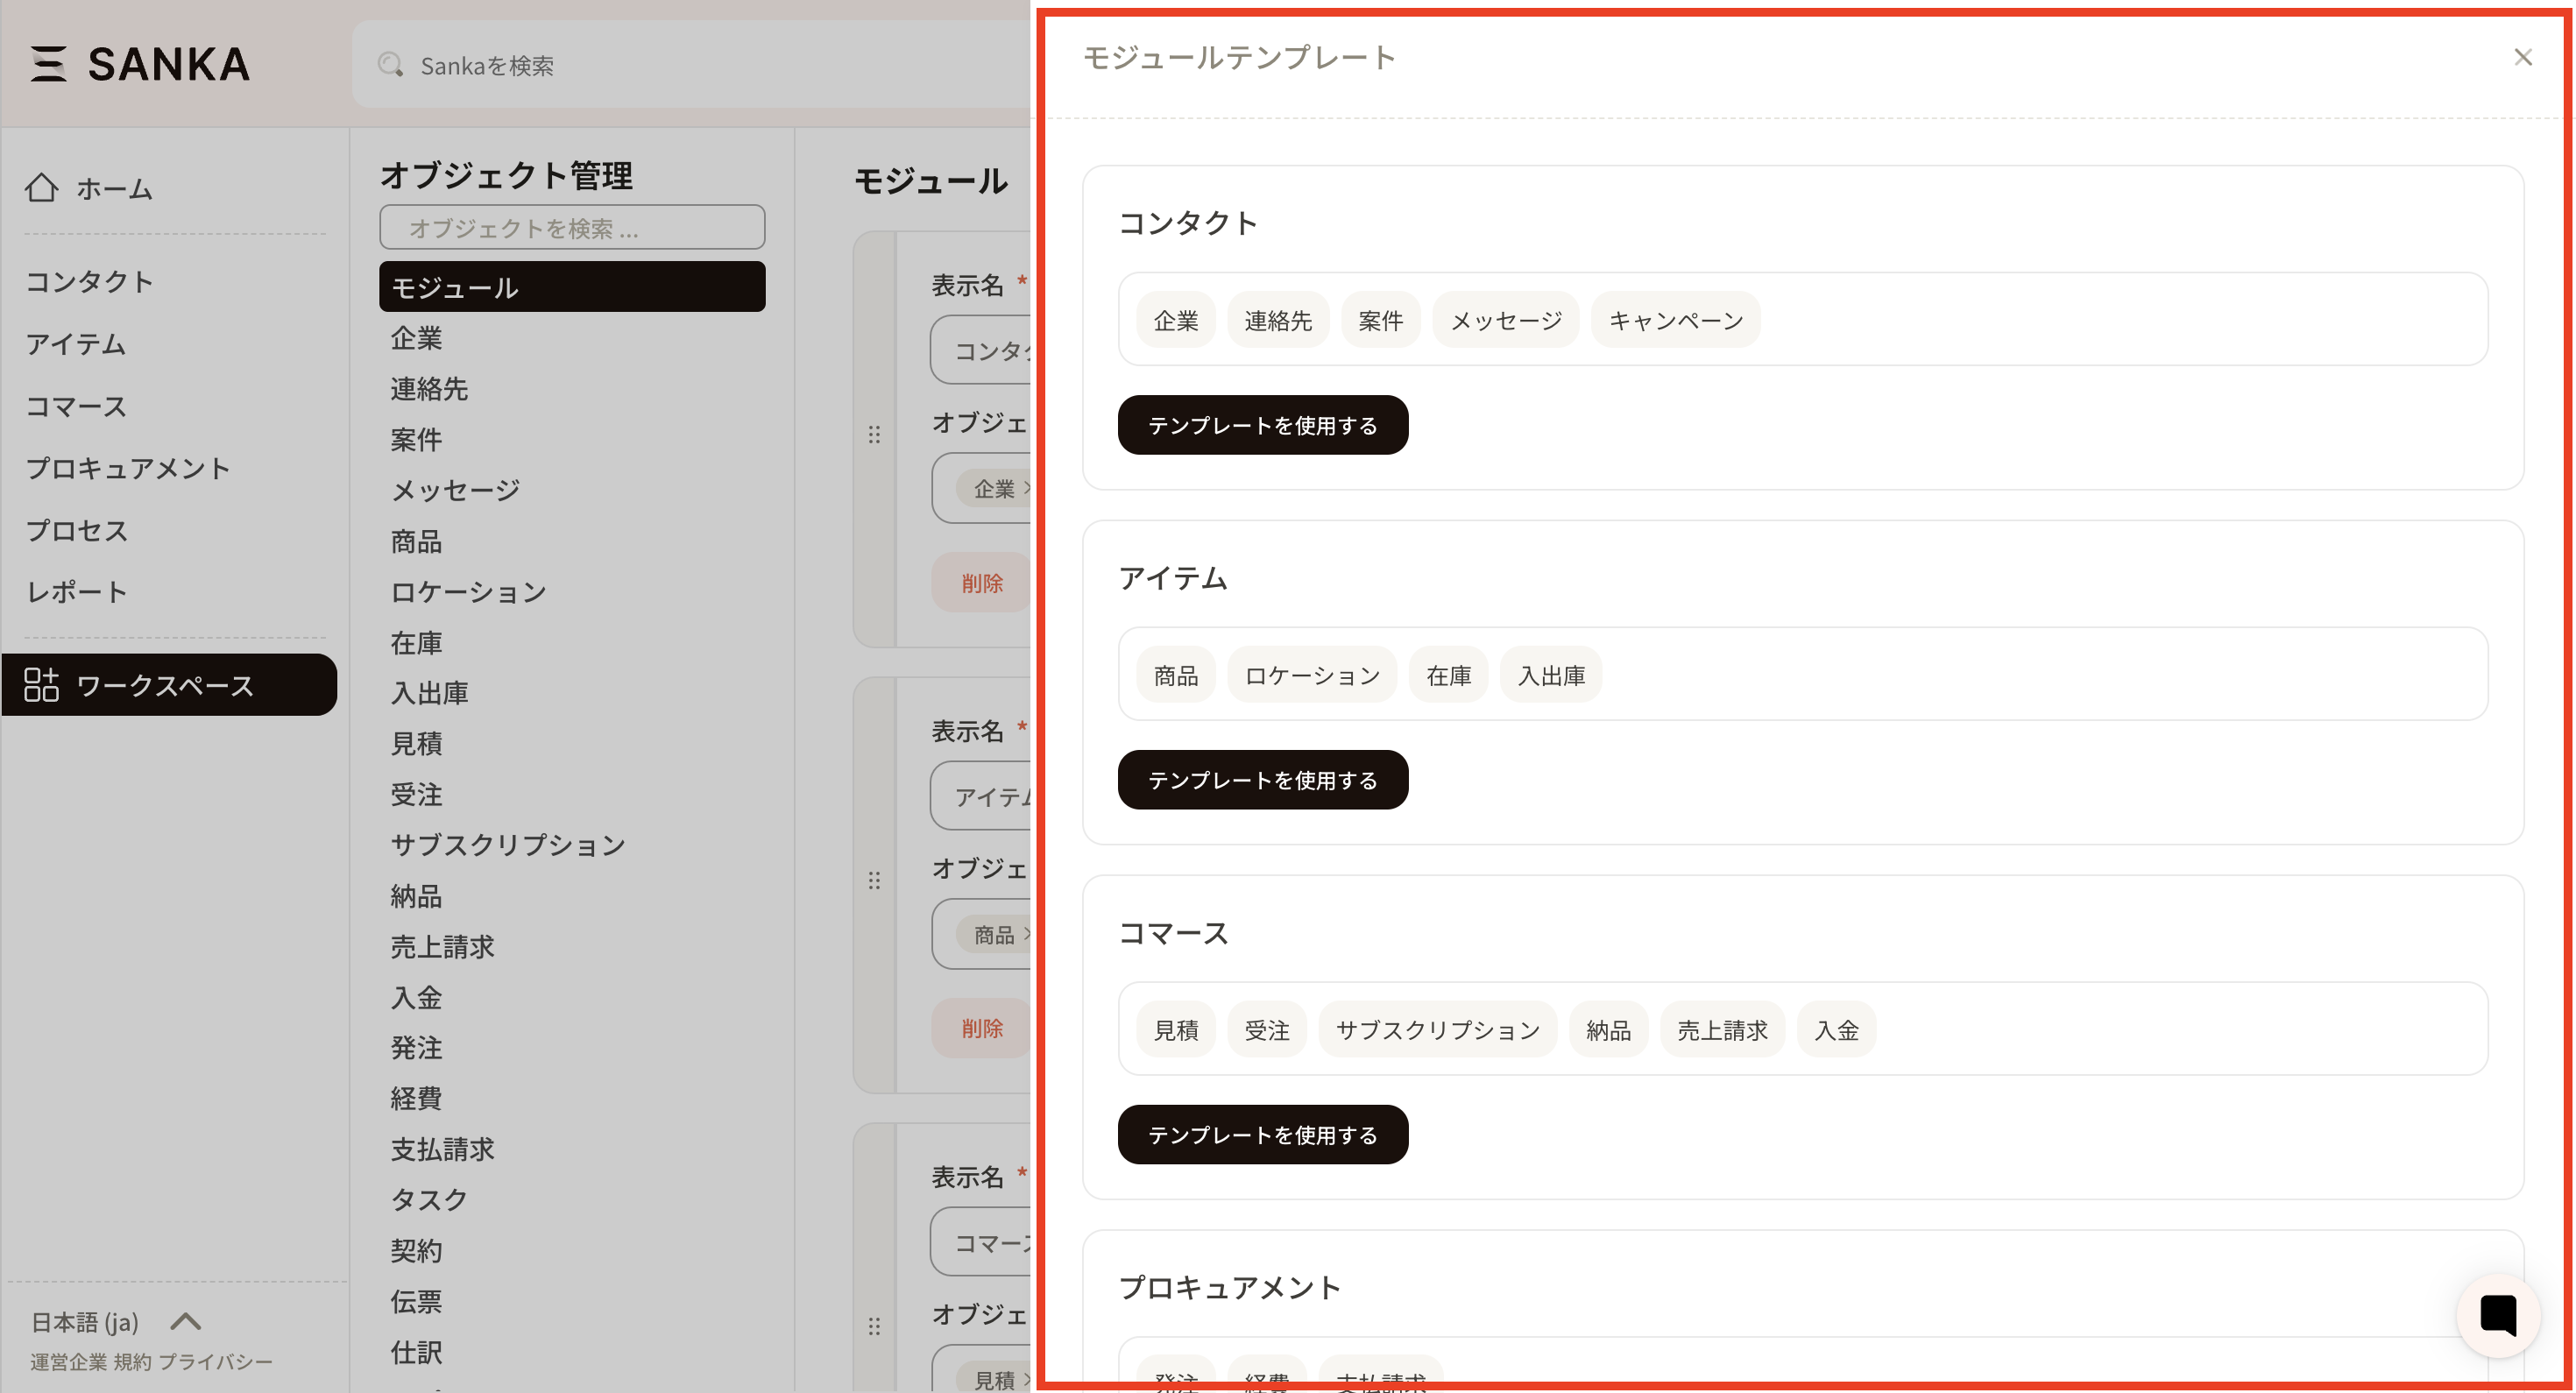
If you wish to create a new module using a pre-prepared template (e.g., contact, item, etc.), click the template button. If the template matches your business needs, you can use it as it is.
It will be applied when you press the "Use Template" button.
How to customize a module
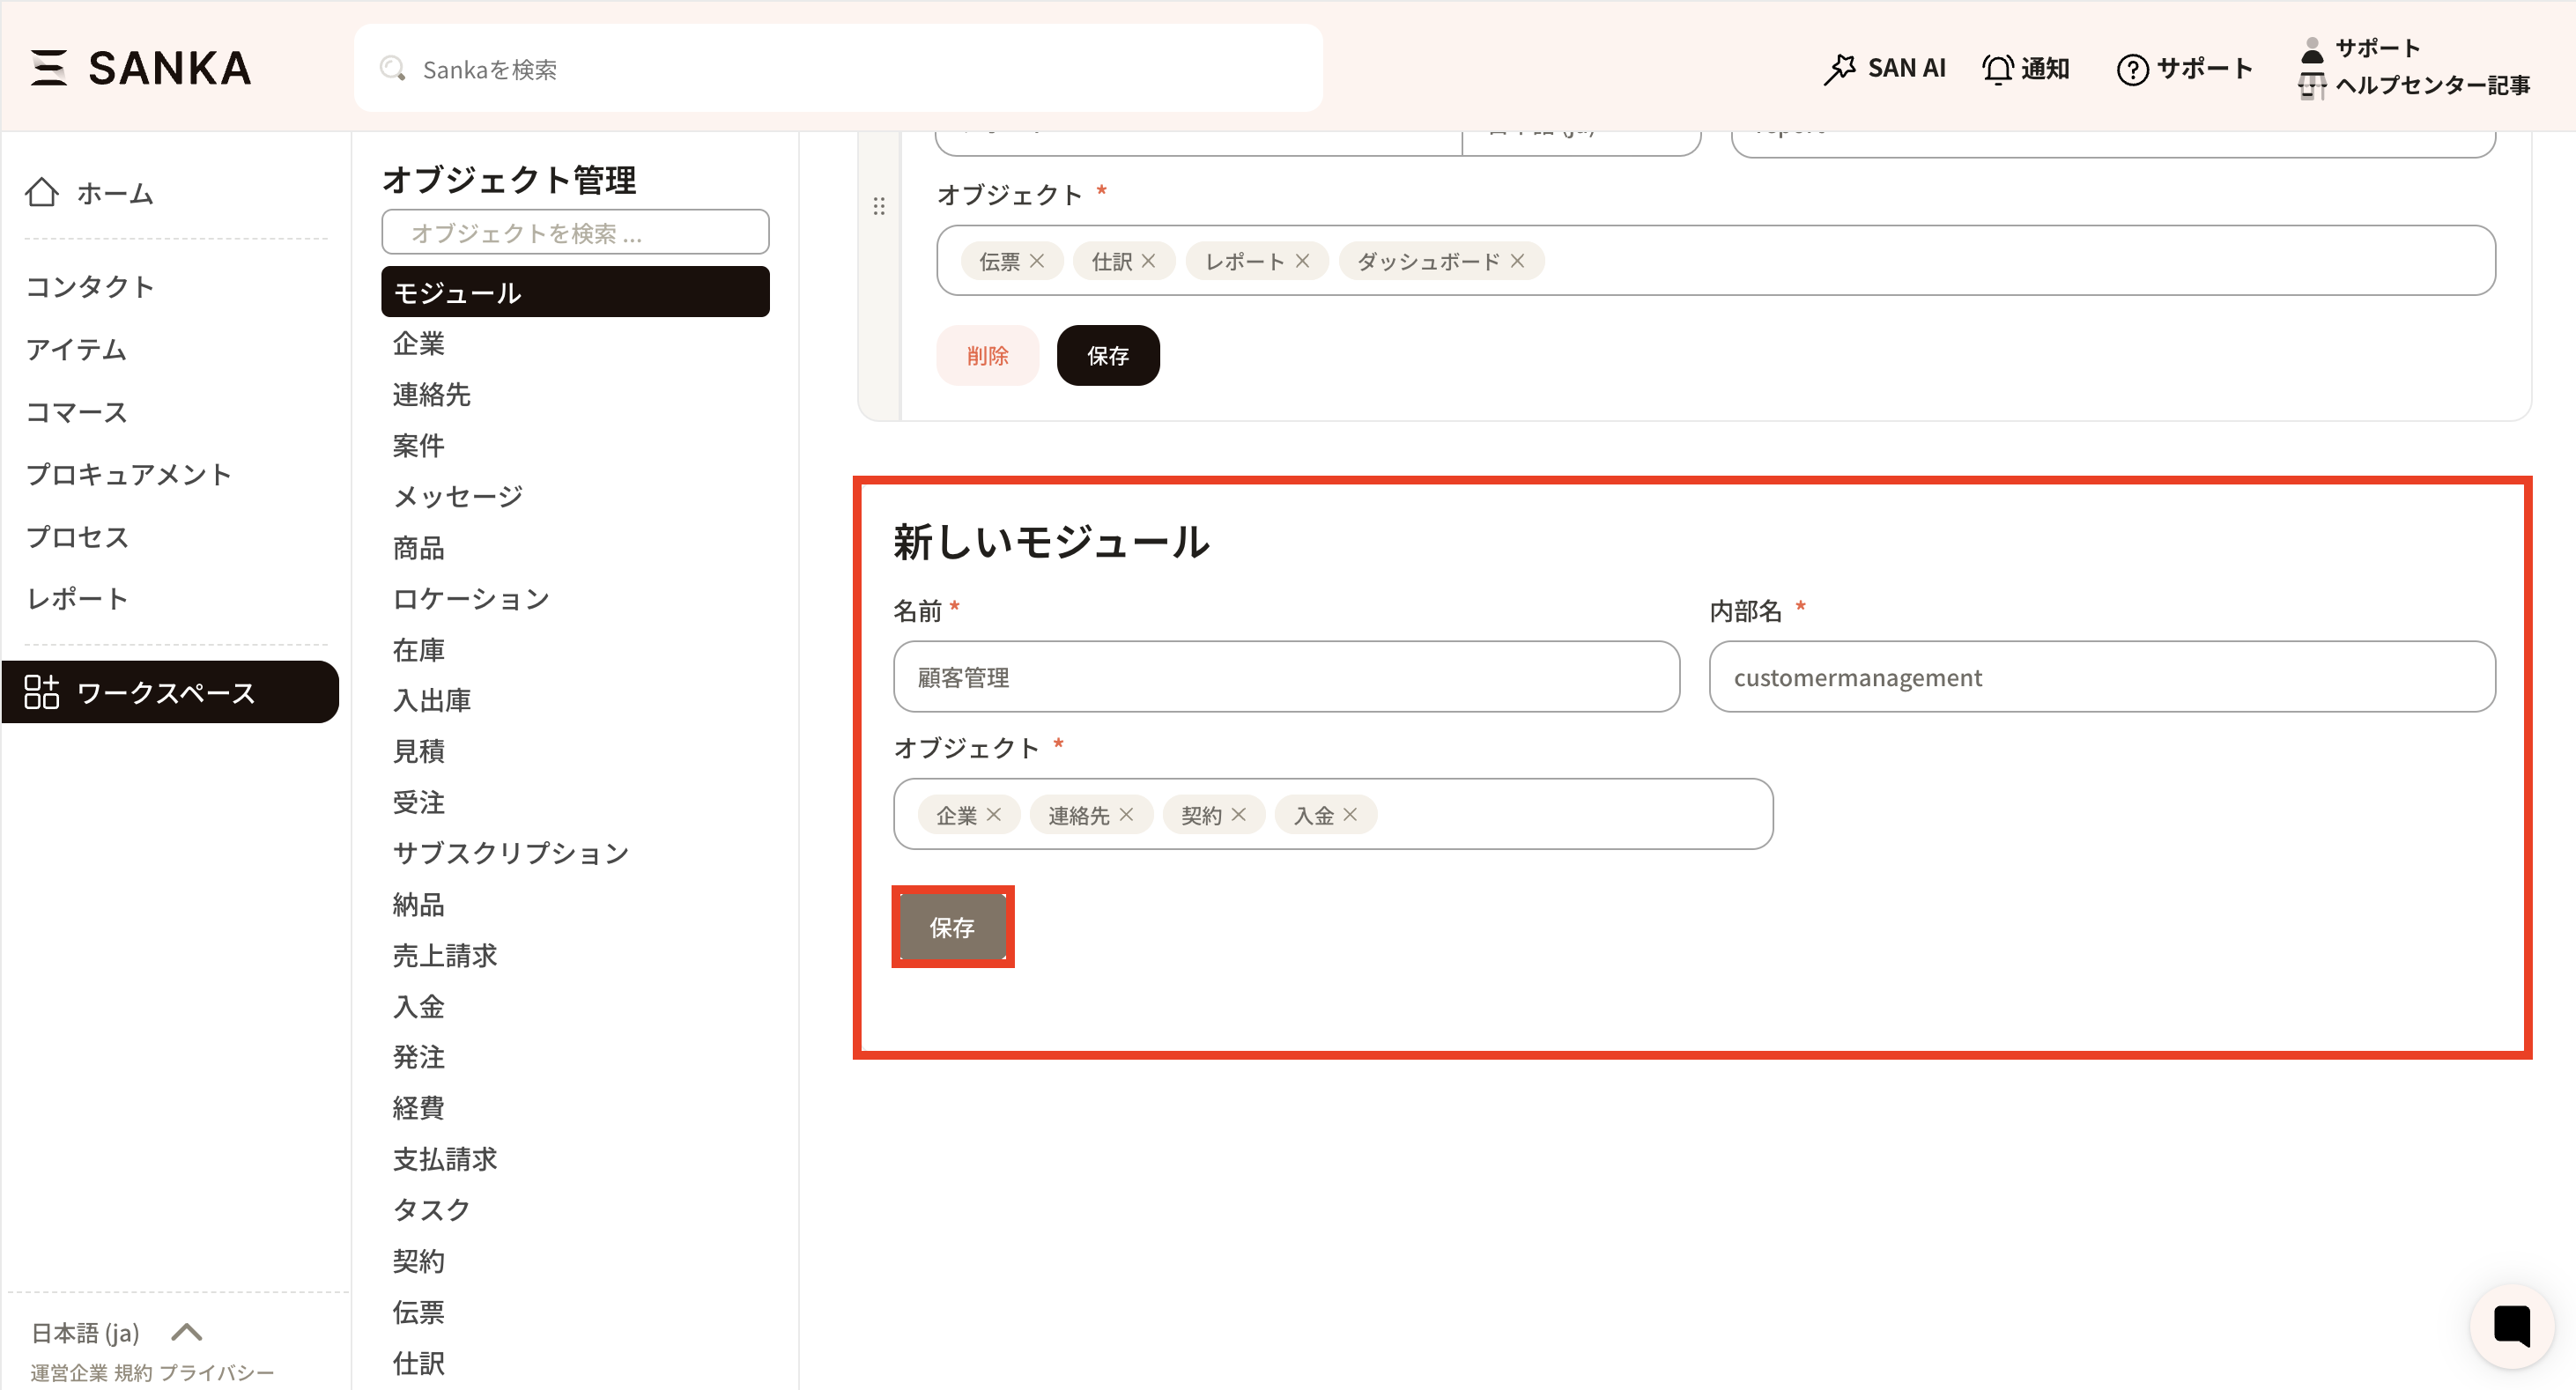
If you would like to customize it to suit your business operations, you can create a new one from scratch by clicking the new button.
A new module frame will be displayed.
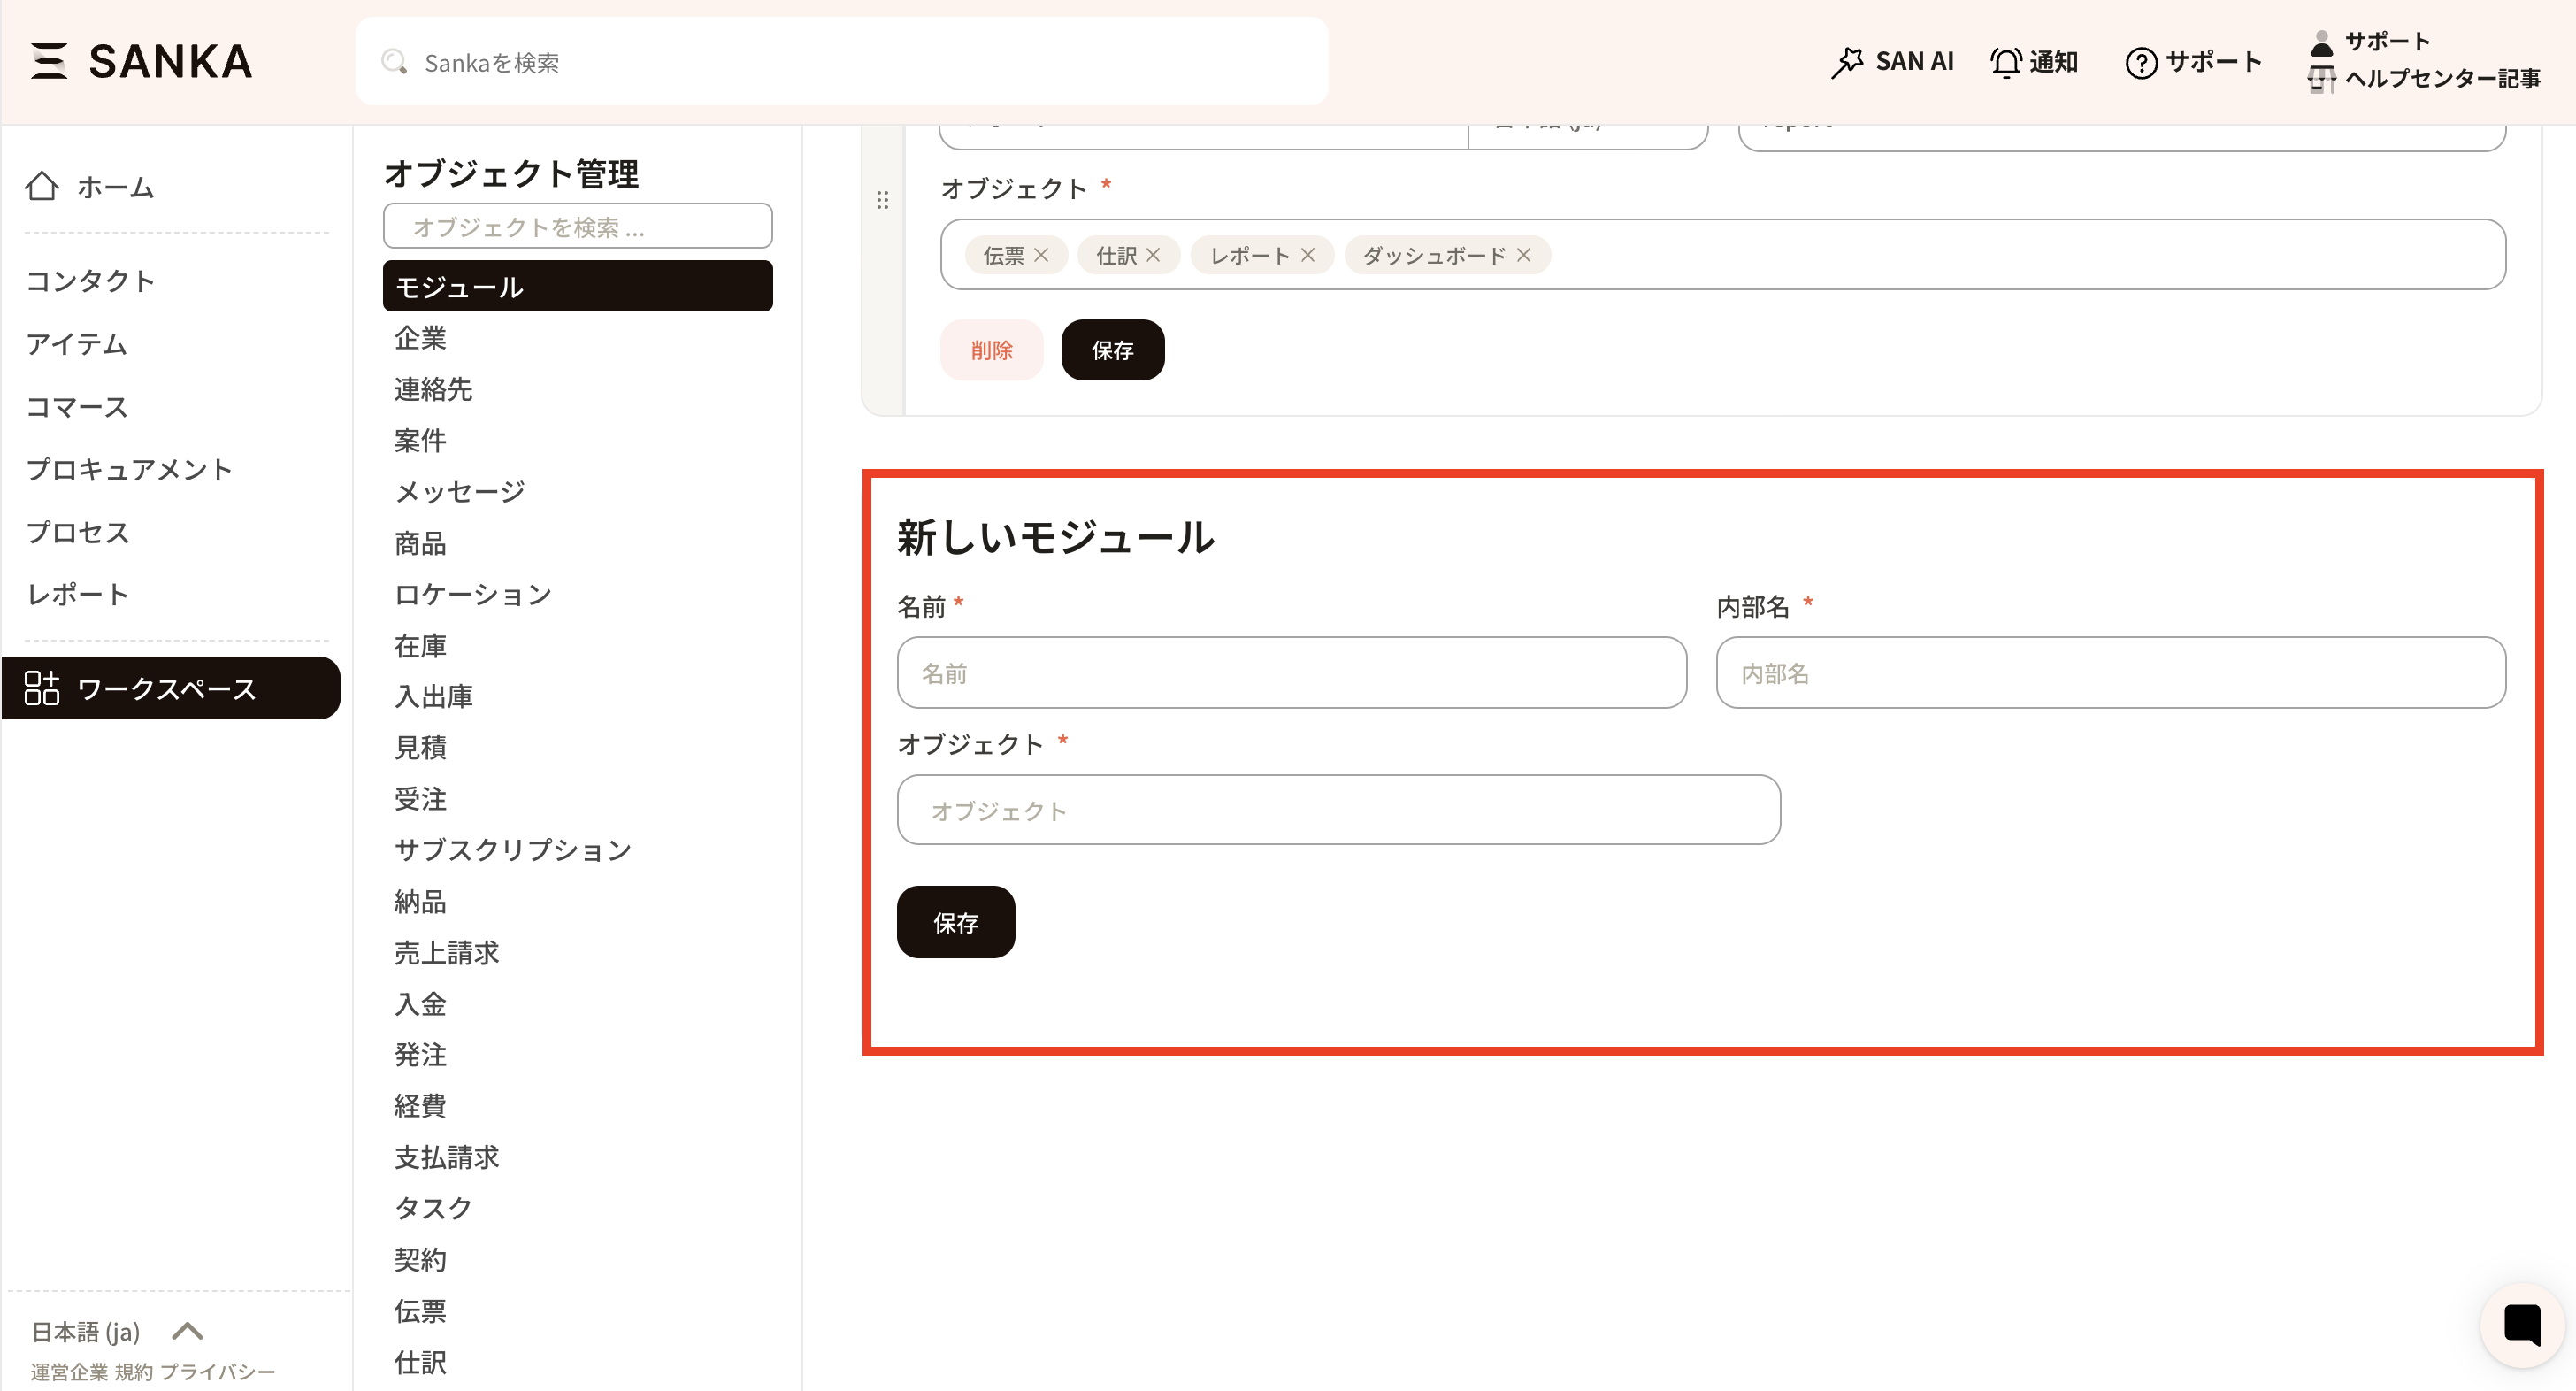
Enter the module name and internal name. The name will be displayed within Sanka, and the internal name will be used as the system’s internal identifier.
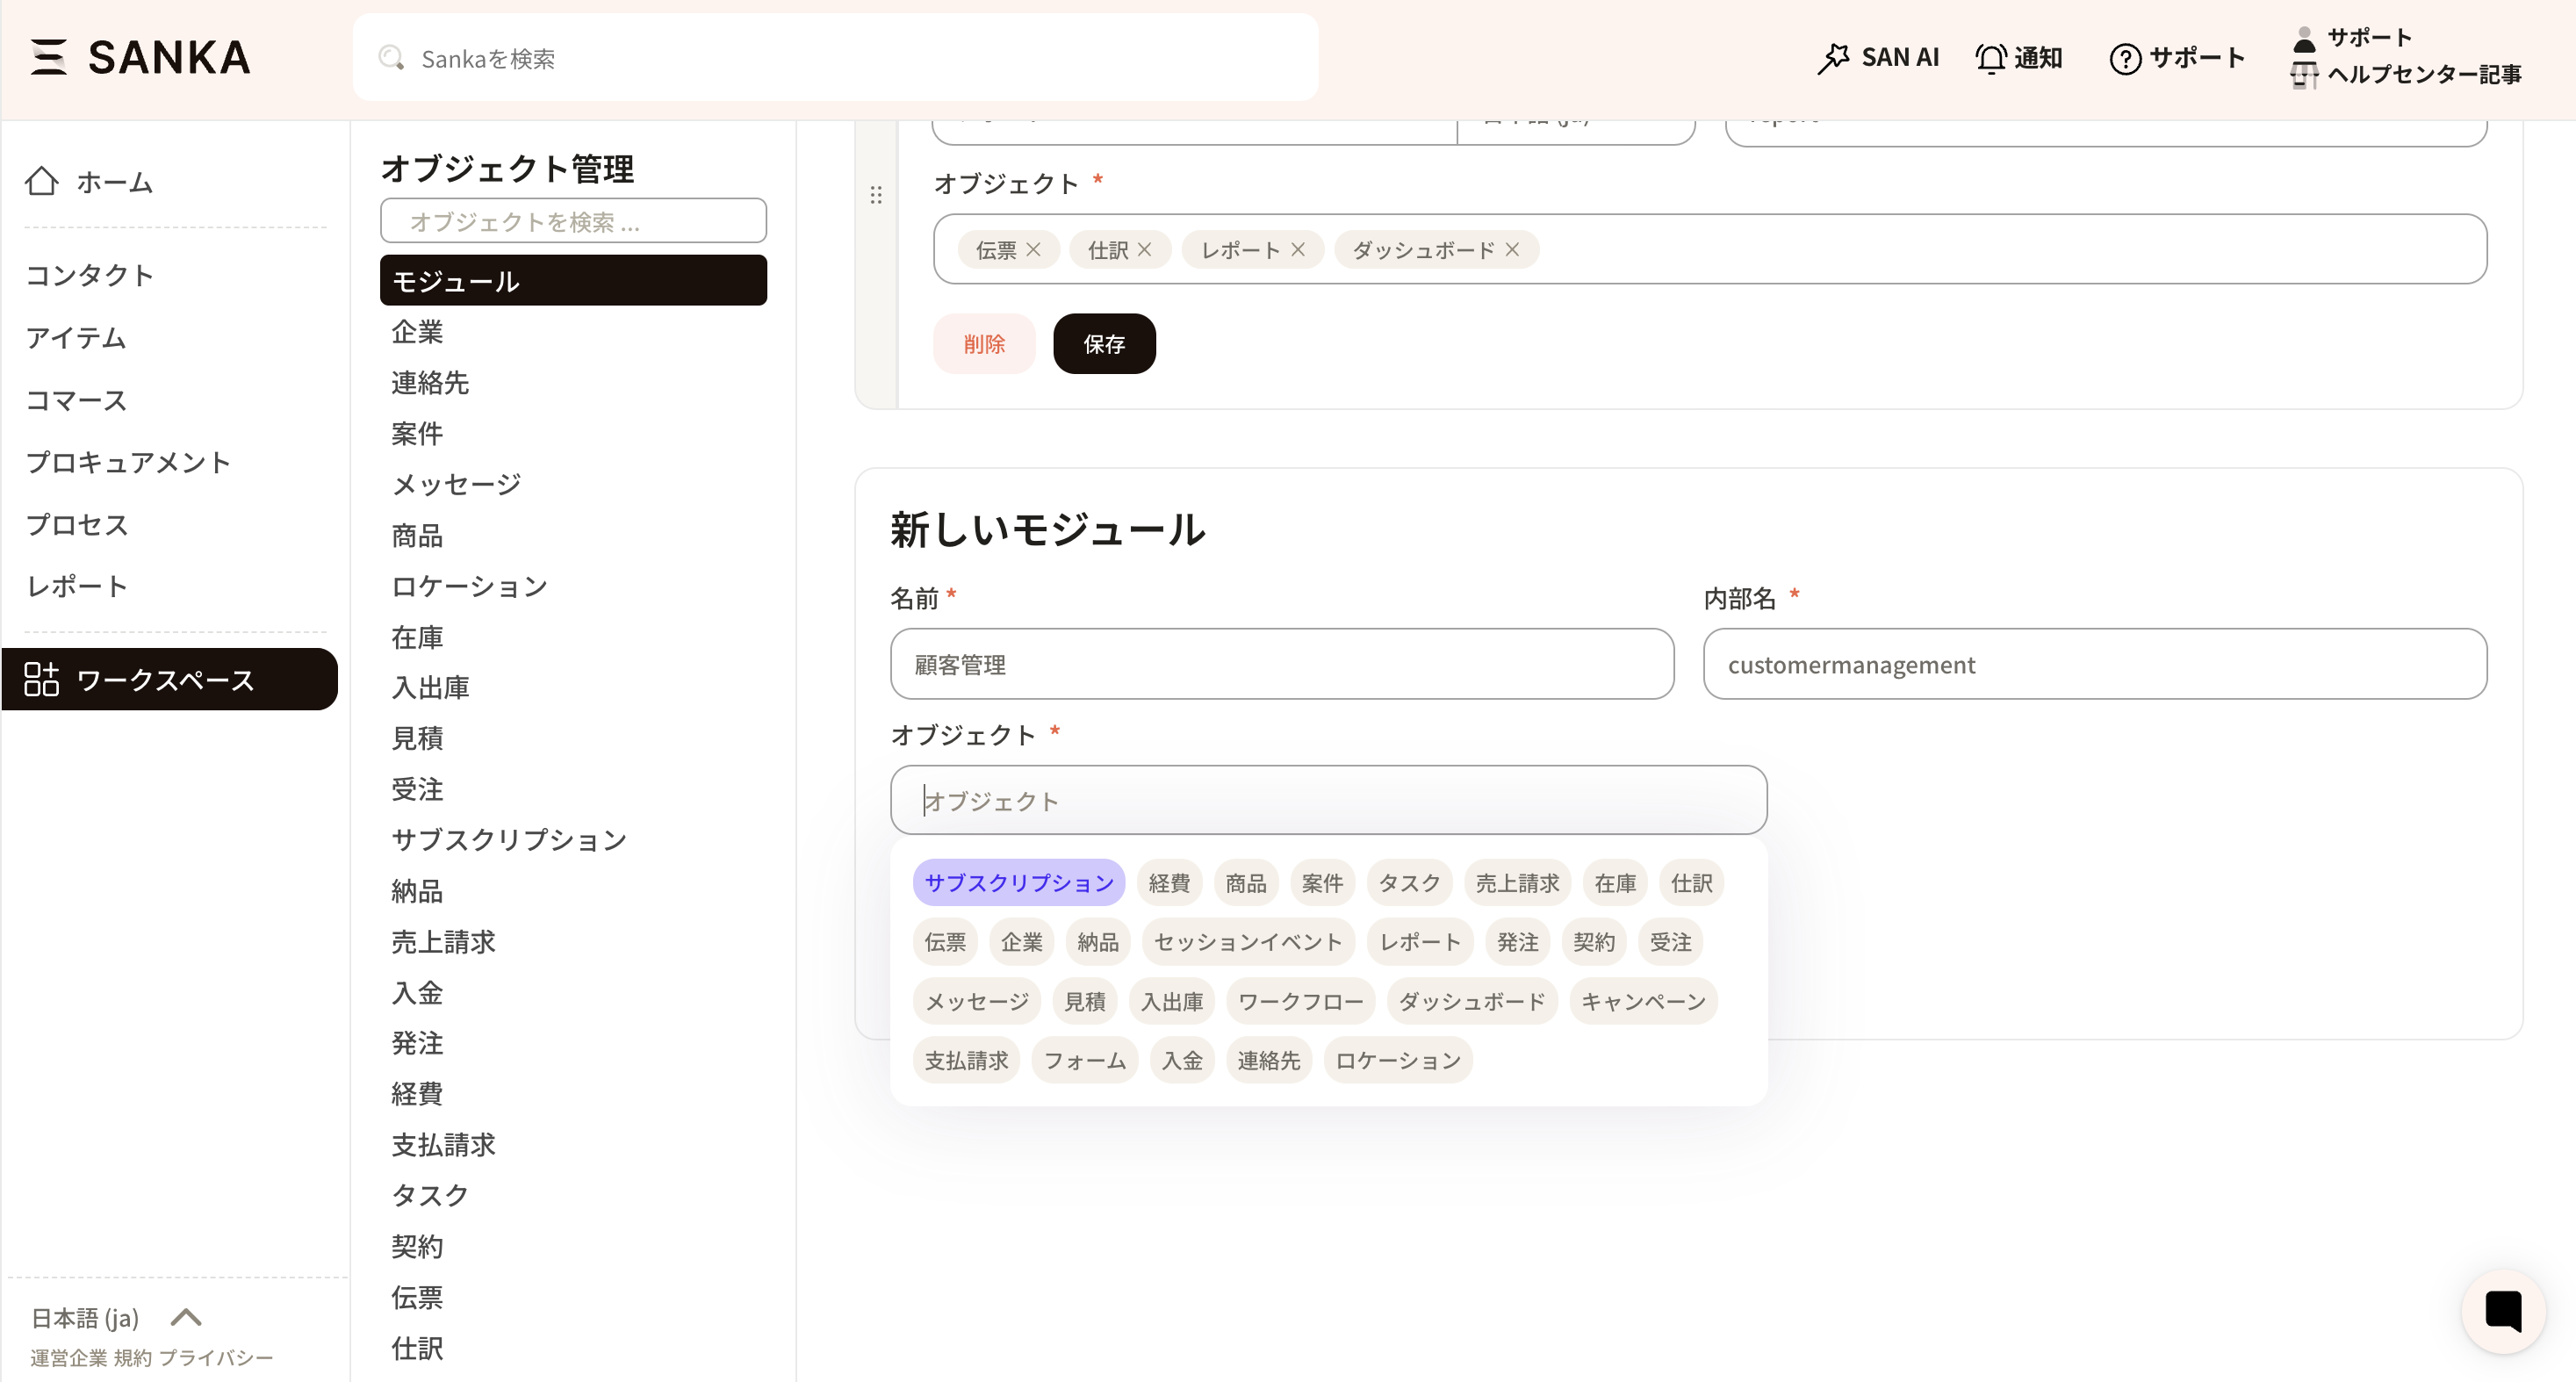
Click inside the object frame to display the columns, then select the relevant object. The registration will be completed upon pressing the save button.