This help article explains how to invite users and manage permissions using Sanka. We will introduce how to easily invite team members and set appropriate permissions for each member.
In the following video, you can review the procedure while viewing the demonstration screen. Please check it together.
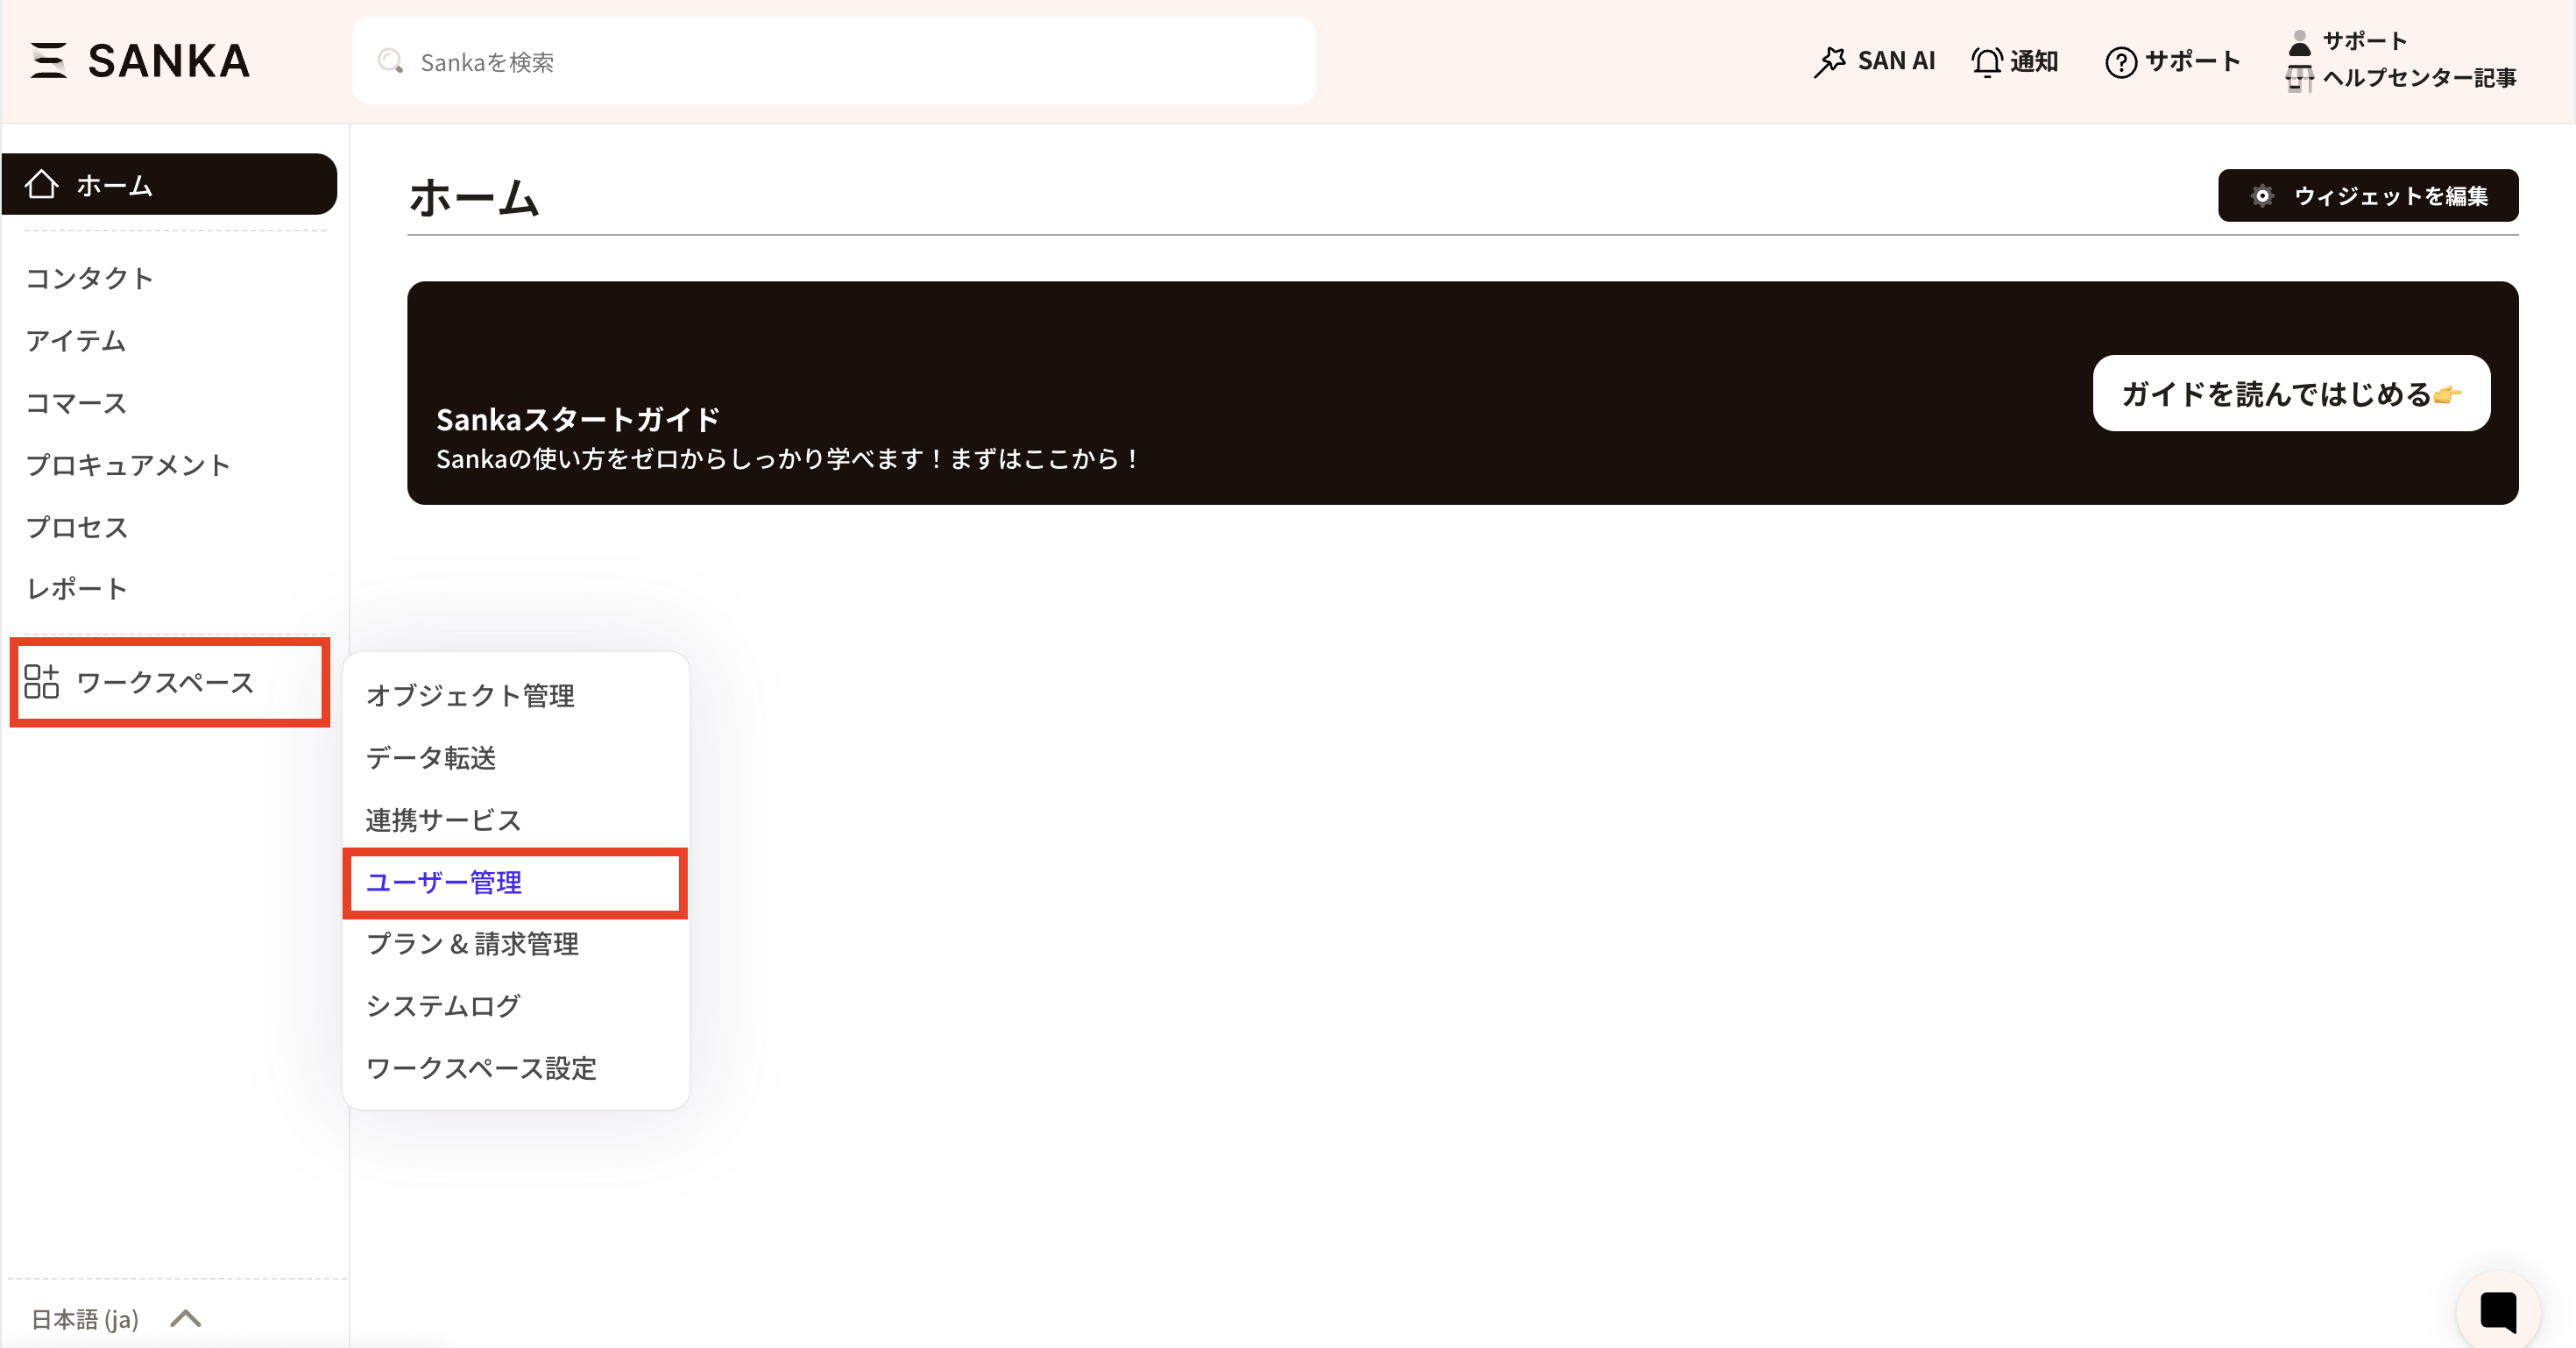
① From the menu on the left side of Sanka, select “Workspace”. Click “User Management” to move to the user management screen. *Only administrators can add users.
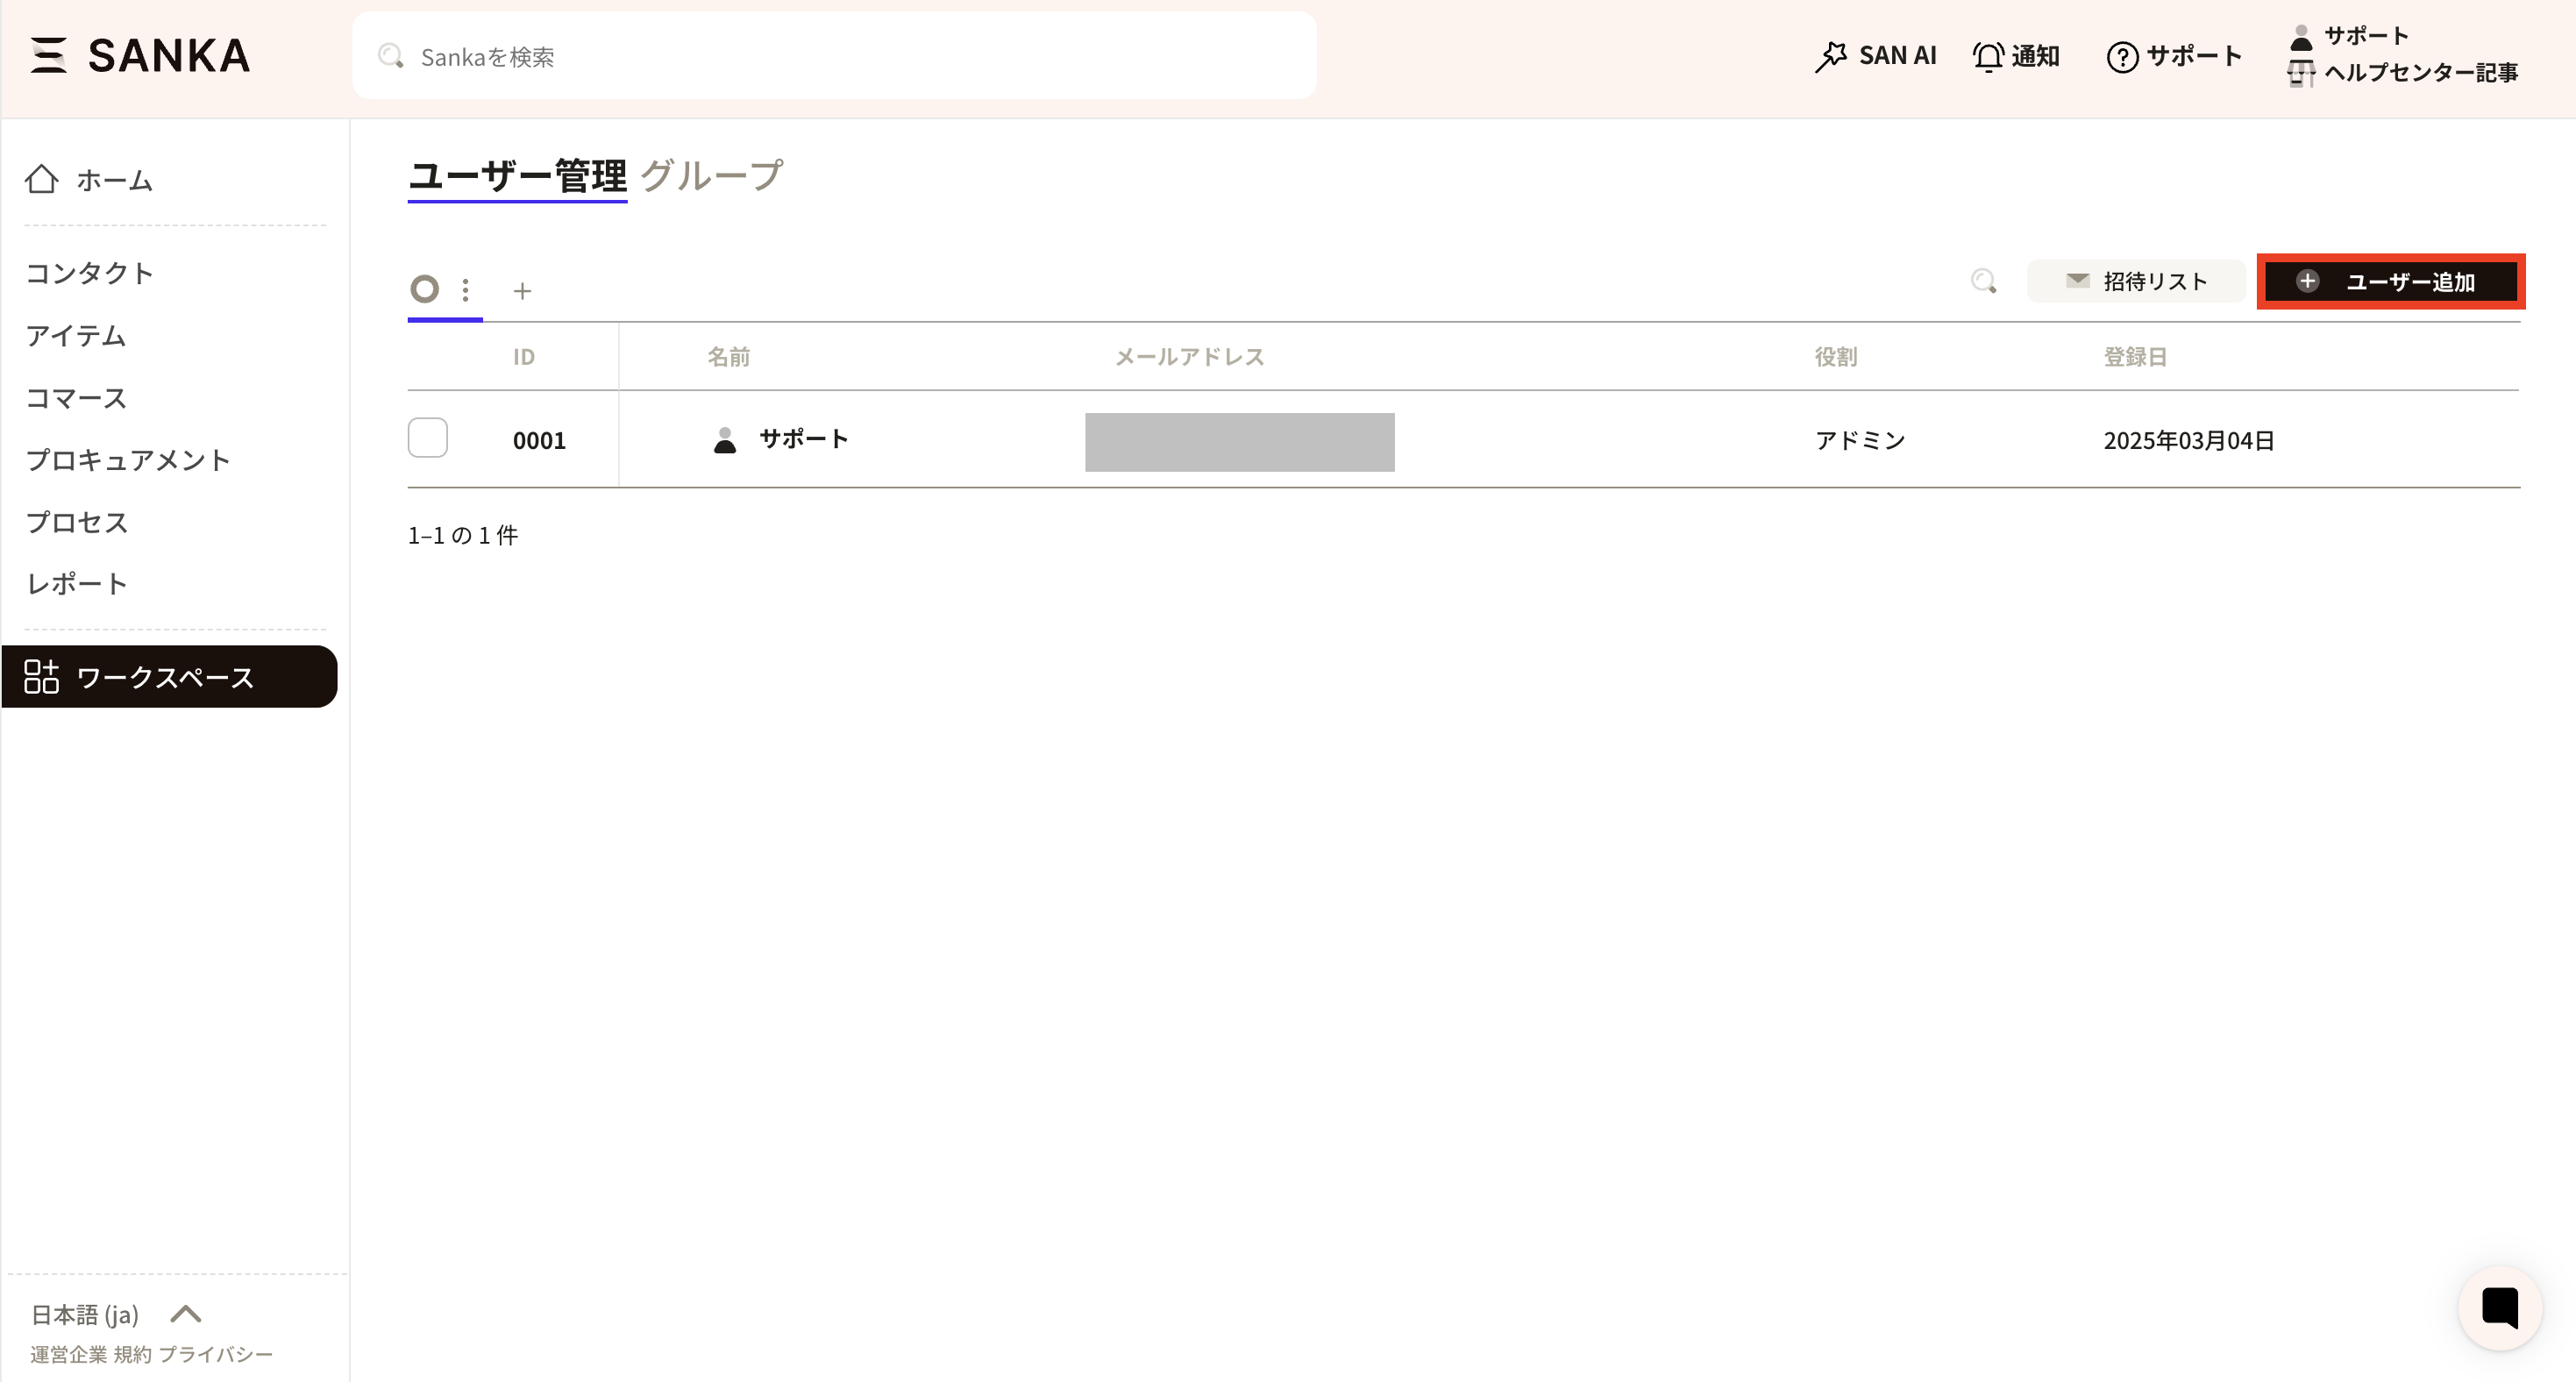
① Click the "Add User" button on the left side of the user management screen.
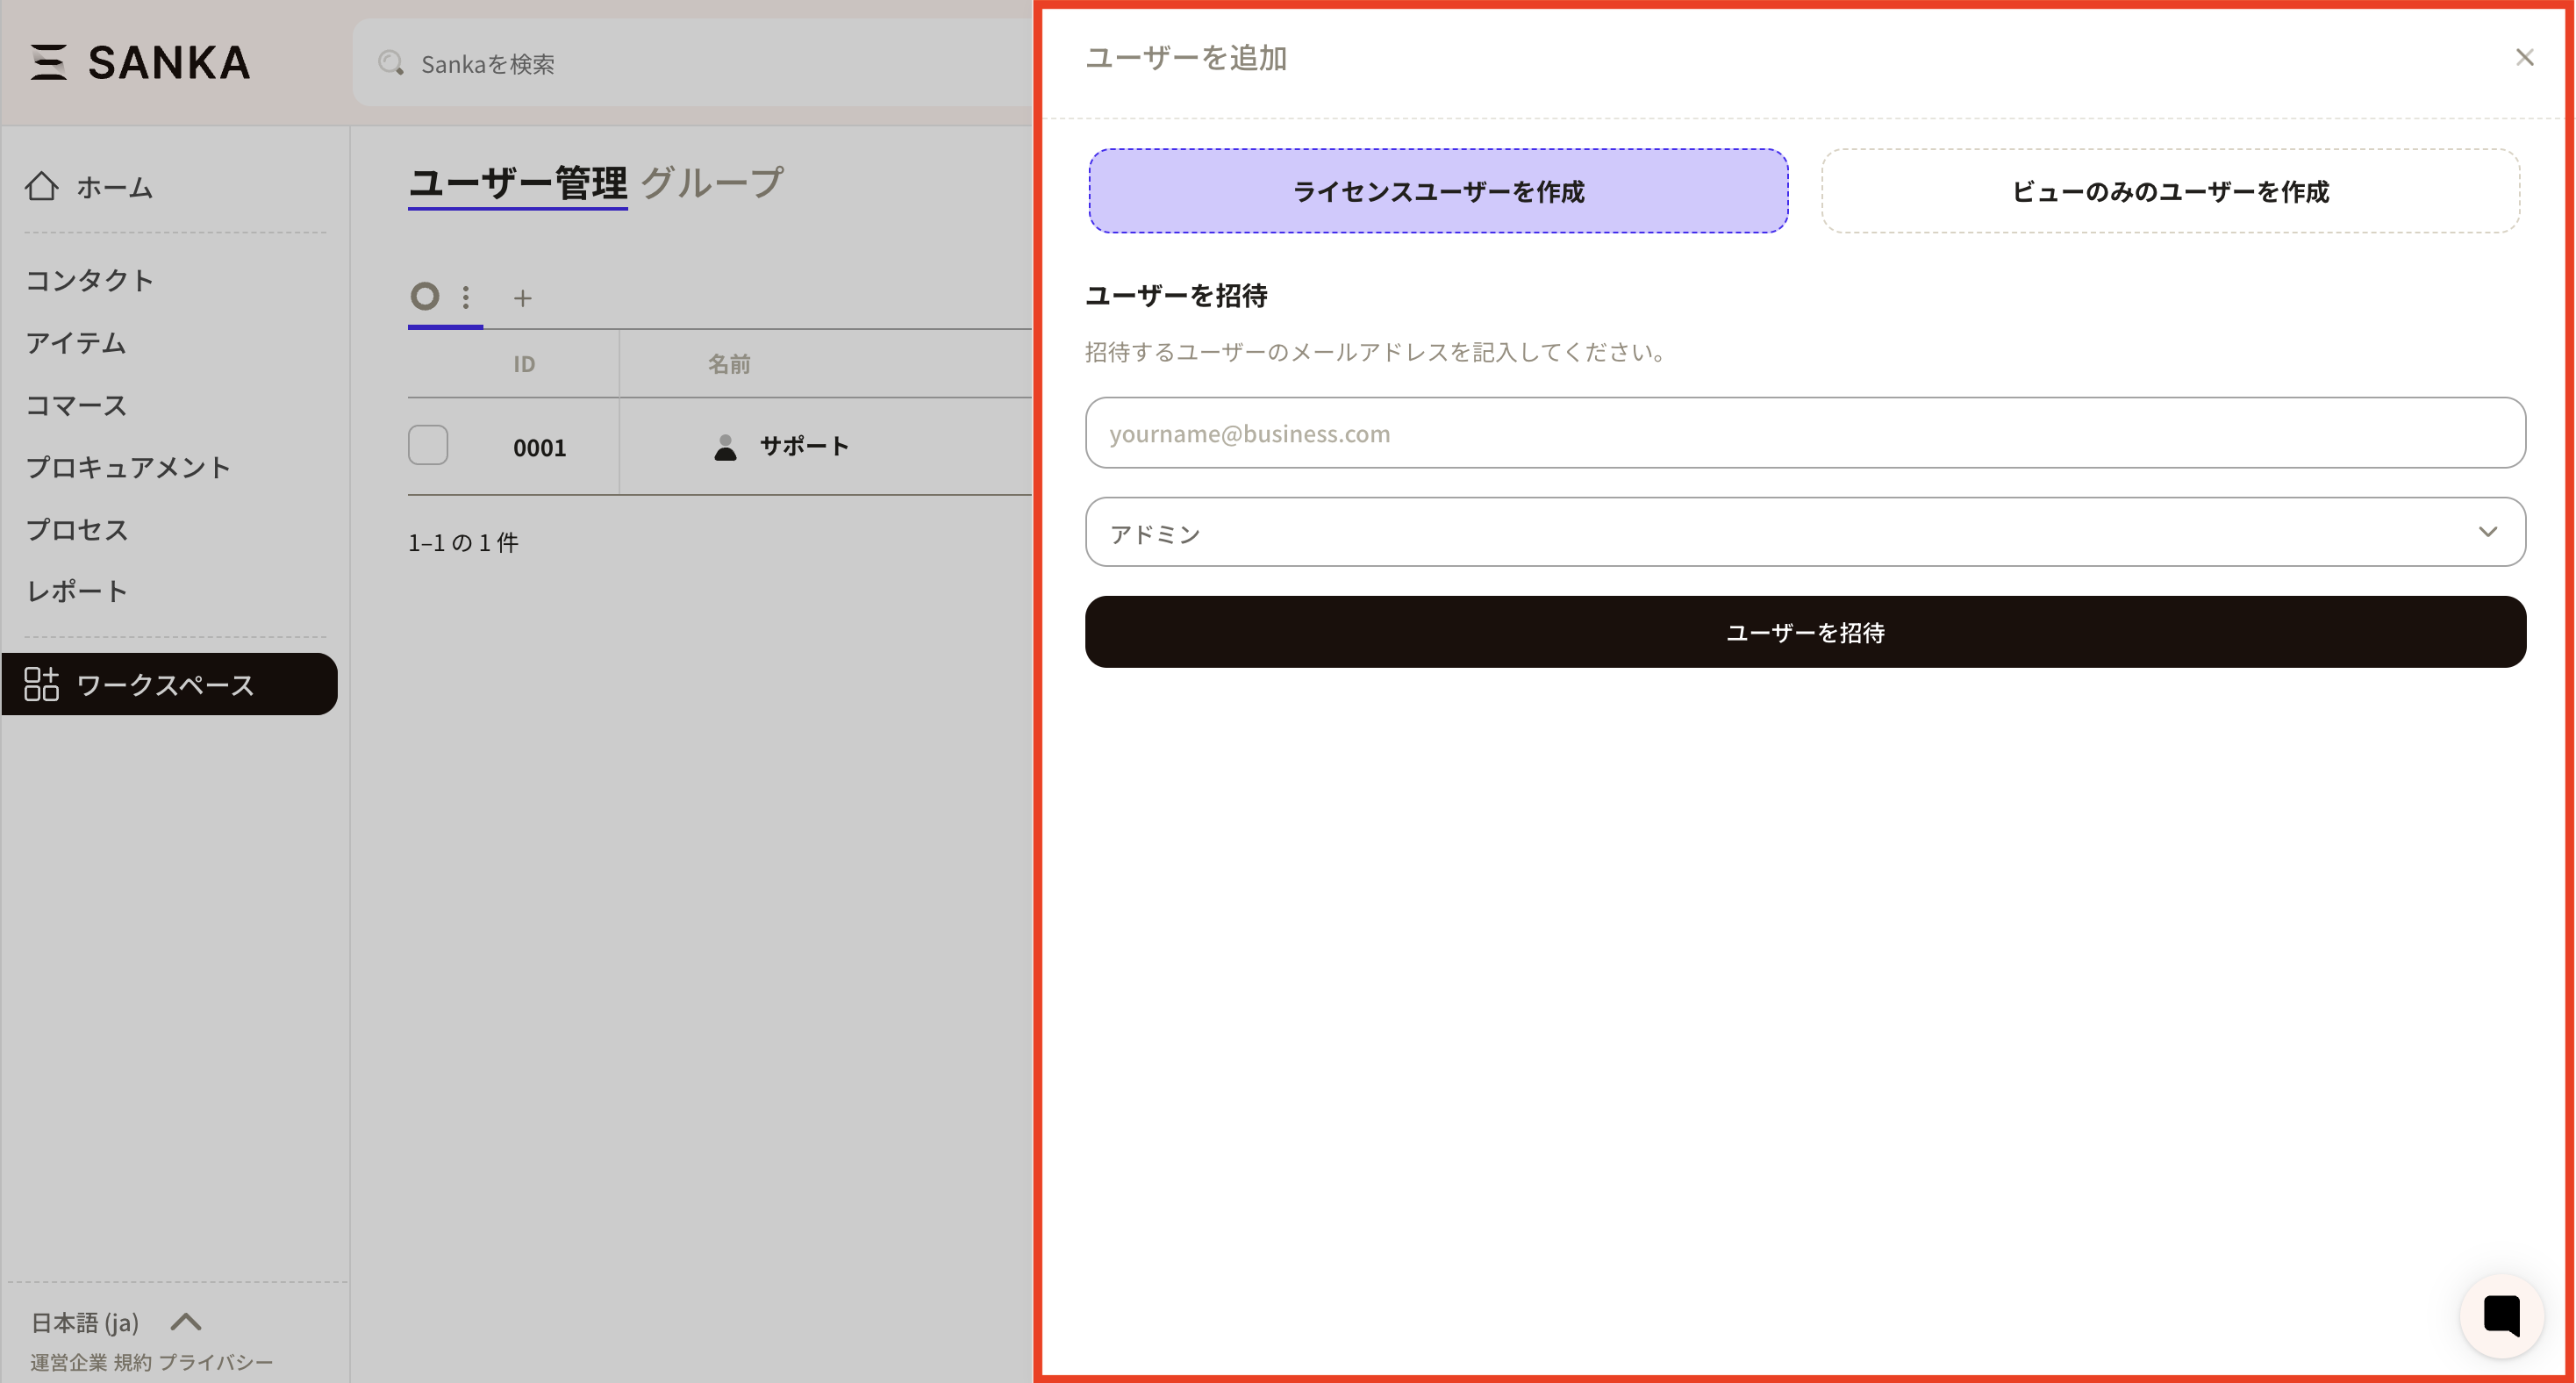
② Proceed to add users. Select whether the user is a "Licensed User" or a "View-Only User." Next, enter the email address of the individual to be invited. Then, set either admin privileges or staff privileges.
Licensed User: A user who is permitted to perform editing and is counted as one license. View-Only User: A user with view-only access who is not counted as a license.
An invitation email will be sent to the invited user’s email address. Please follow the instructions in the email to log in to Sanka.
Once approved, they are newly added.


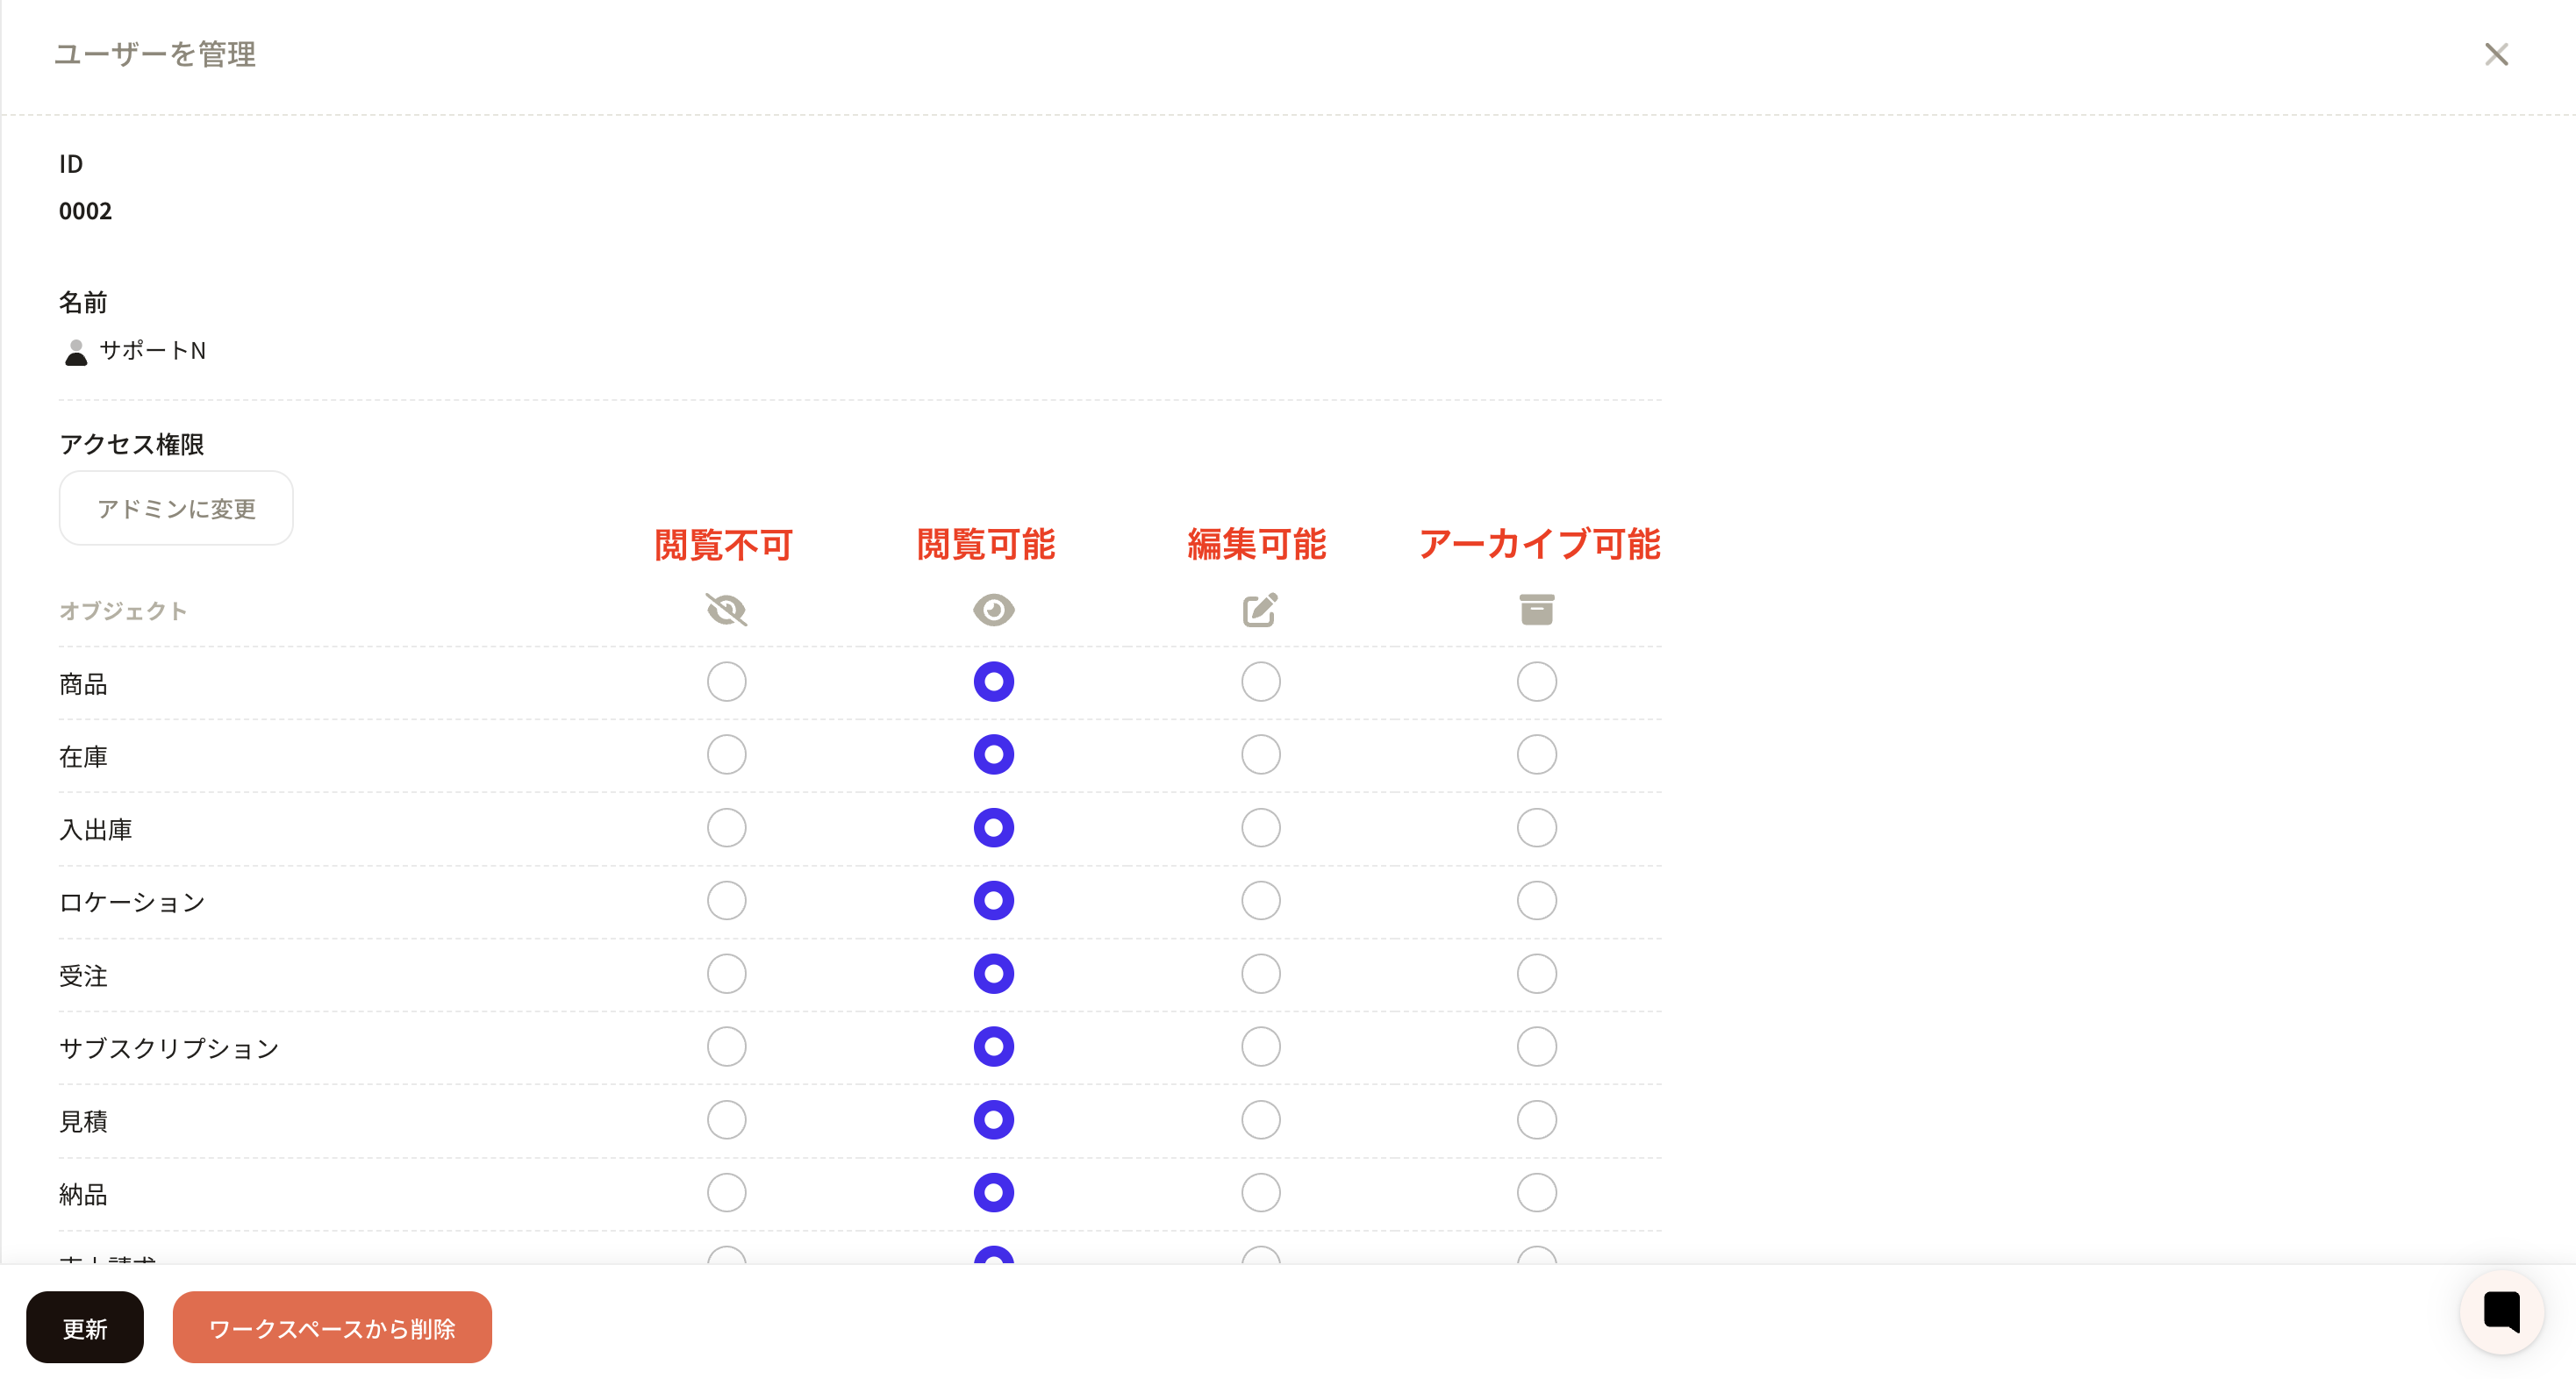
Admin: This permission grants access to all functions, including registering, editing, and deleting records, inviting users, managing payment information, and reviewing logs.
Staff: Based on thefunction access restrictions set by the Admin, this permission allows the use of Sanka. For example, it is possible to view products, but not edit them. These settings can be configured by the Admin.
Partner: When implementing Sanka through an external vendor, you can grant the same privileges as an admin without incurring license fees.
Support: This privilege enables access to the workspace with the same permissions as an admin during Sanka support. As with partners, no license fees are required.
Click the ID of the relevant staff member to display the user management screen. Set the privileges according to the items of the object. Once set, please click the update button.