This guide explains how to configure user permissions in Sanka's sales management software.
In Sanka, you can mainly manage two roles: Admin and Staff.
You can manage all staff and their permissions.
Functions are granted according to the permissions below.
This section explains the procedures for setting appropriate access rights according to the roles of each user and restricting access to unnecessary functions. In the following video, you can check the methods while viewing a demonstration screen. Please review it together.
Log in to Sanka and click "Workspace Management" on the left side.
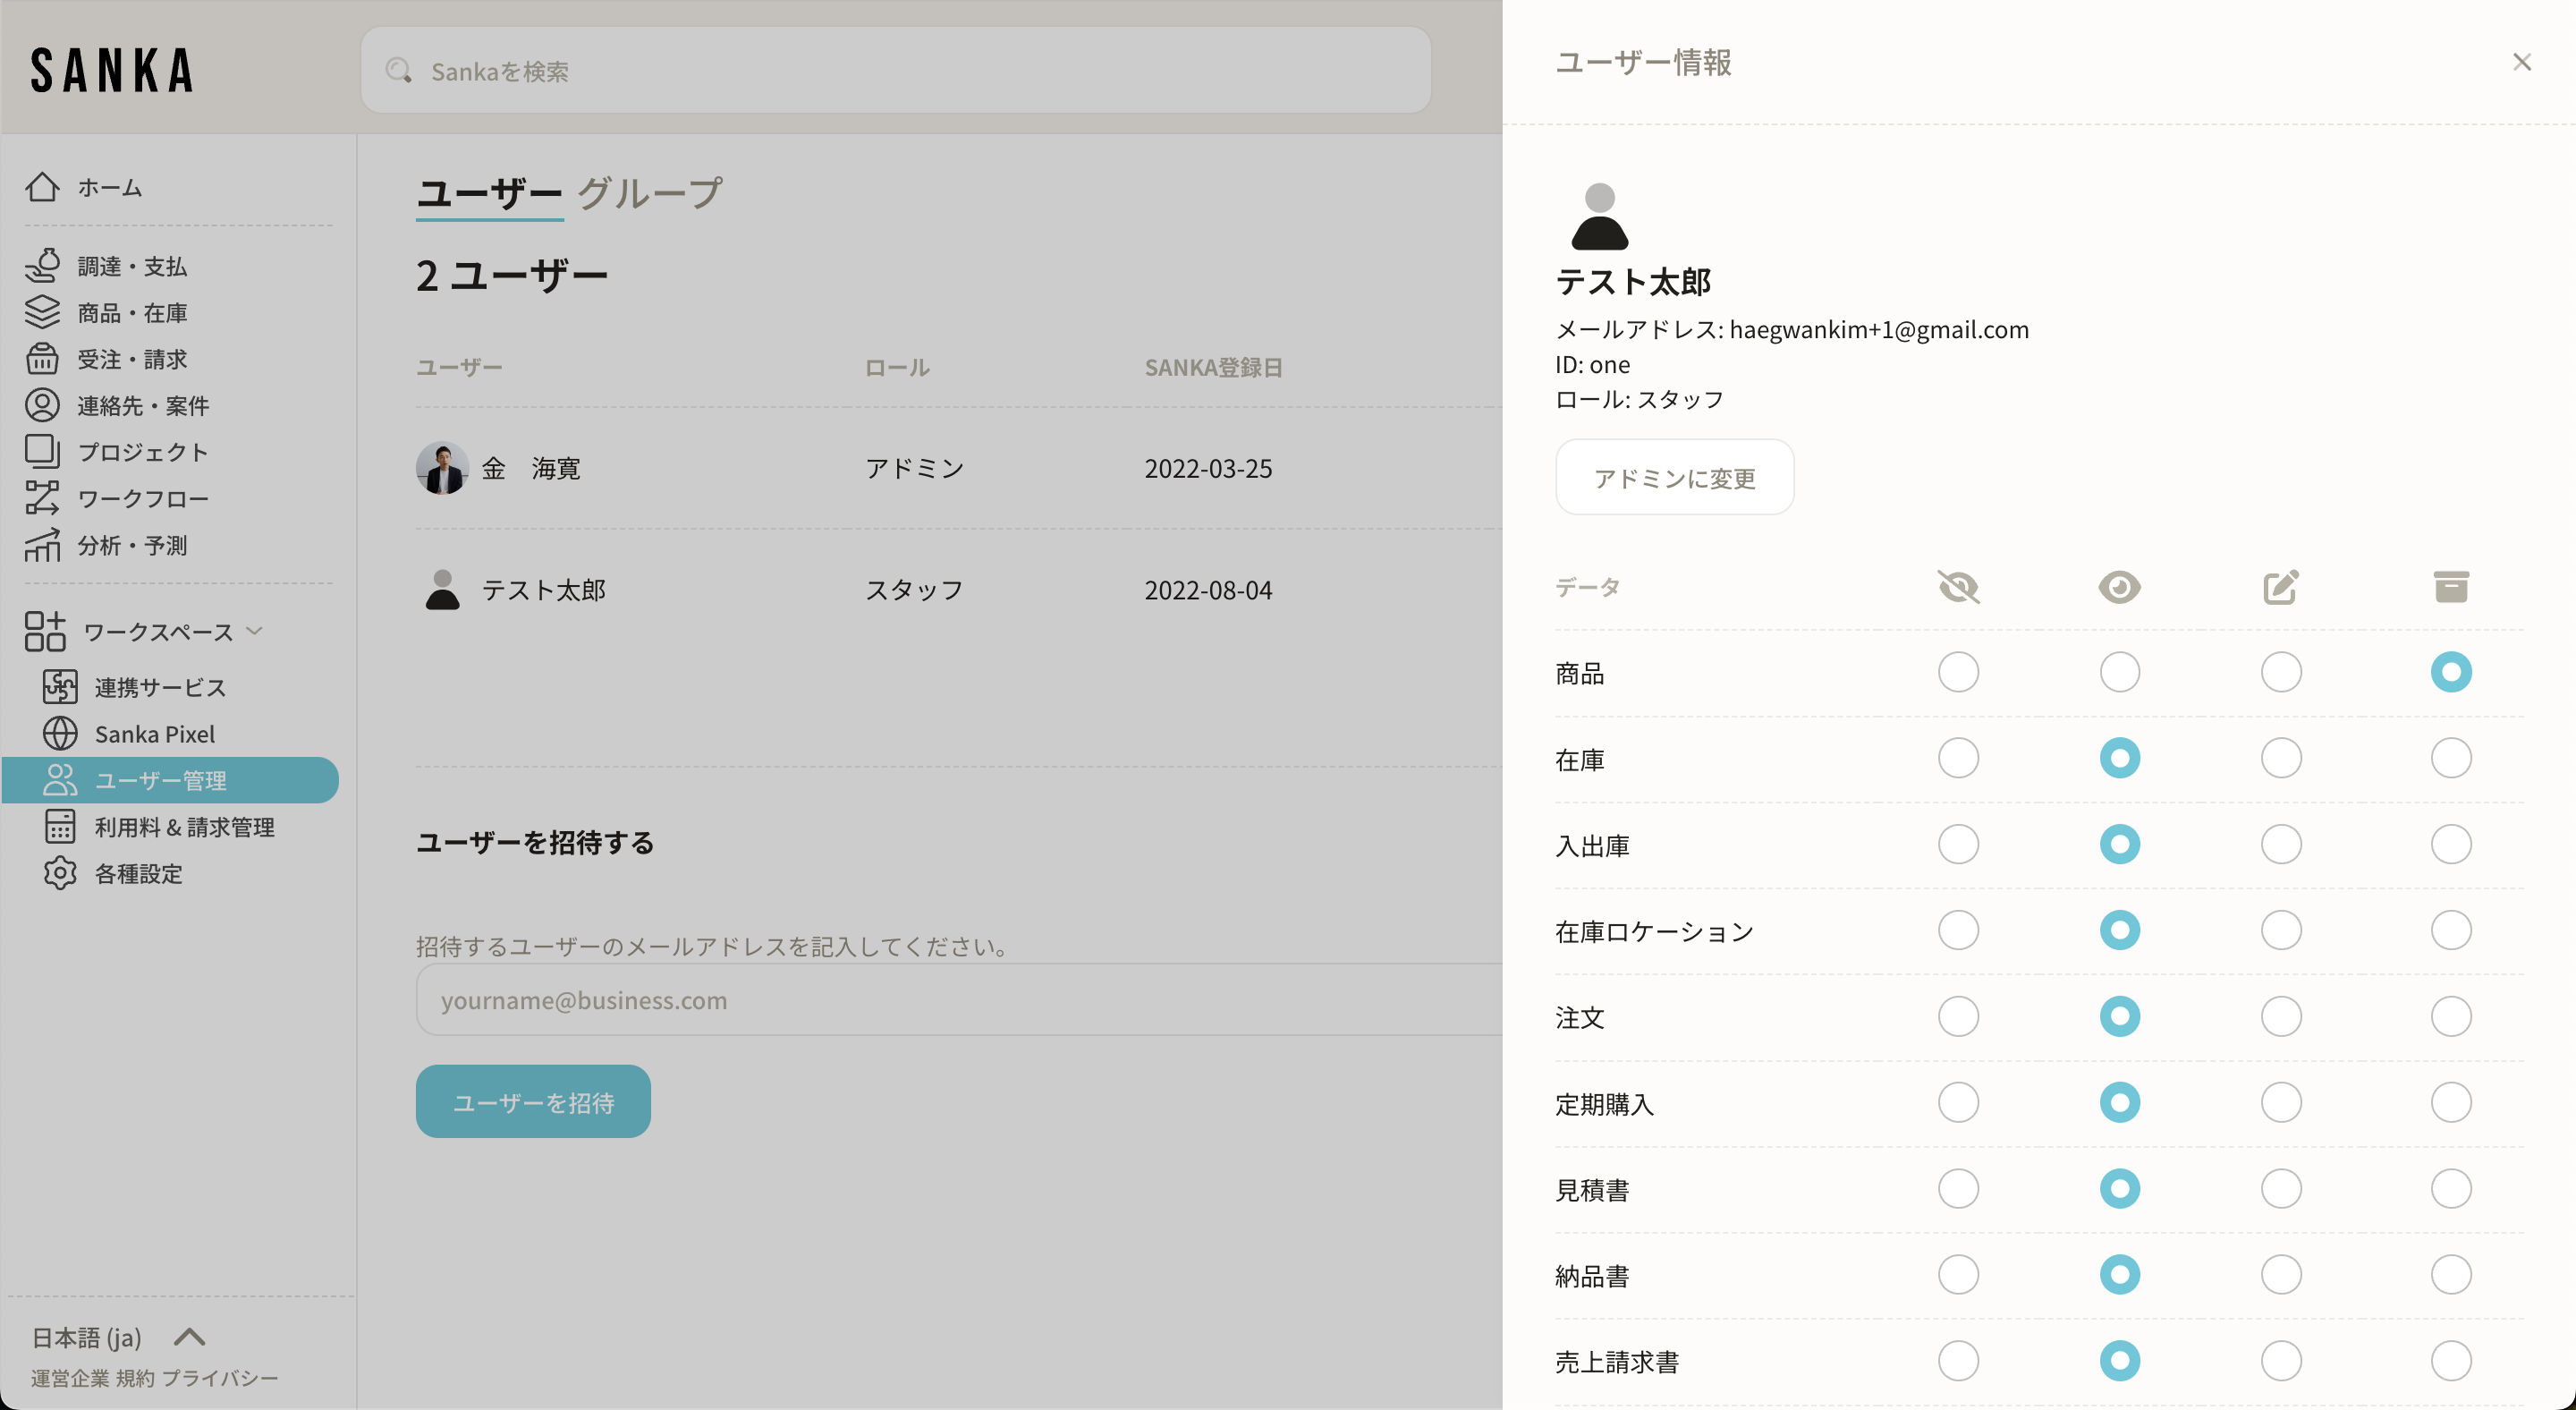
Select "User Management" and the current user list will be displayed.
To invite a new user, enter their email address and click "Invite."
Invited users are assigned the "Staff" role by default.
When setting roles for each user, you can restrict access to specific features.
For example, to allow users to view but not edit the product list, set the corresponding permission to "No Access" and click Save.
If access is restricted, the page will display “You do not have permission to access this page.”
If you wish to set permissions in bulk, you can apply the same permission to multiple items by clicking the corresponding icon.
This is useful when you need to restrict all access or allow viewing only.
If a designated user has permission to edit a product, they may click the Edit Product button to update the product information.
In addition, it is possible to exclude a product from the data by archiving it.
This guide has introduced the procedure for setting user permissions in Sanka's sales management software.
By properly managing permissions, you can improve your team's productivity and protect important data.
If you have any questions, please feel free to contact us via the comments section or the Help Center.
