This guide will also explain the "Workflow" feature.
The Workflow feature enables you to freely create automation programs such as "reducing inventory when an order is received," "sending notifications or automatically placing orders when inventory runs out," and "generating reports."
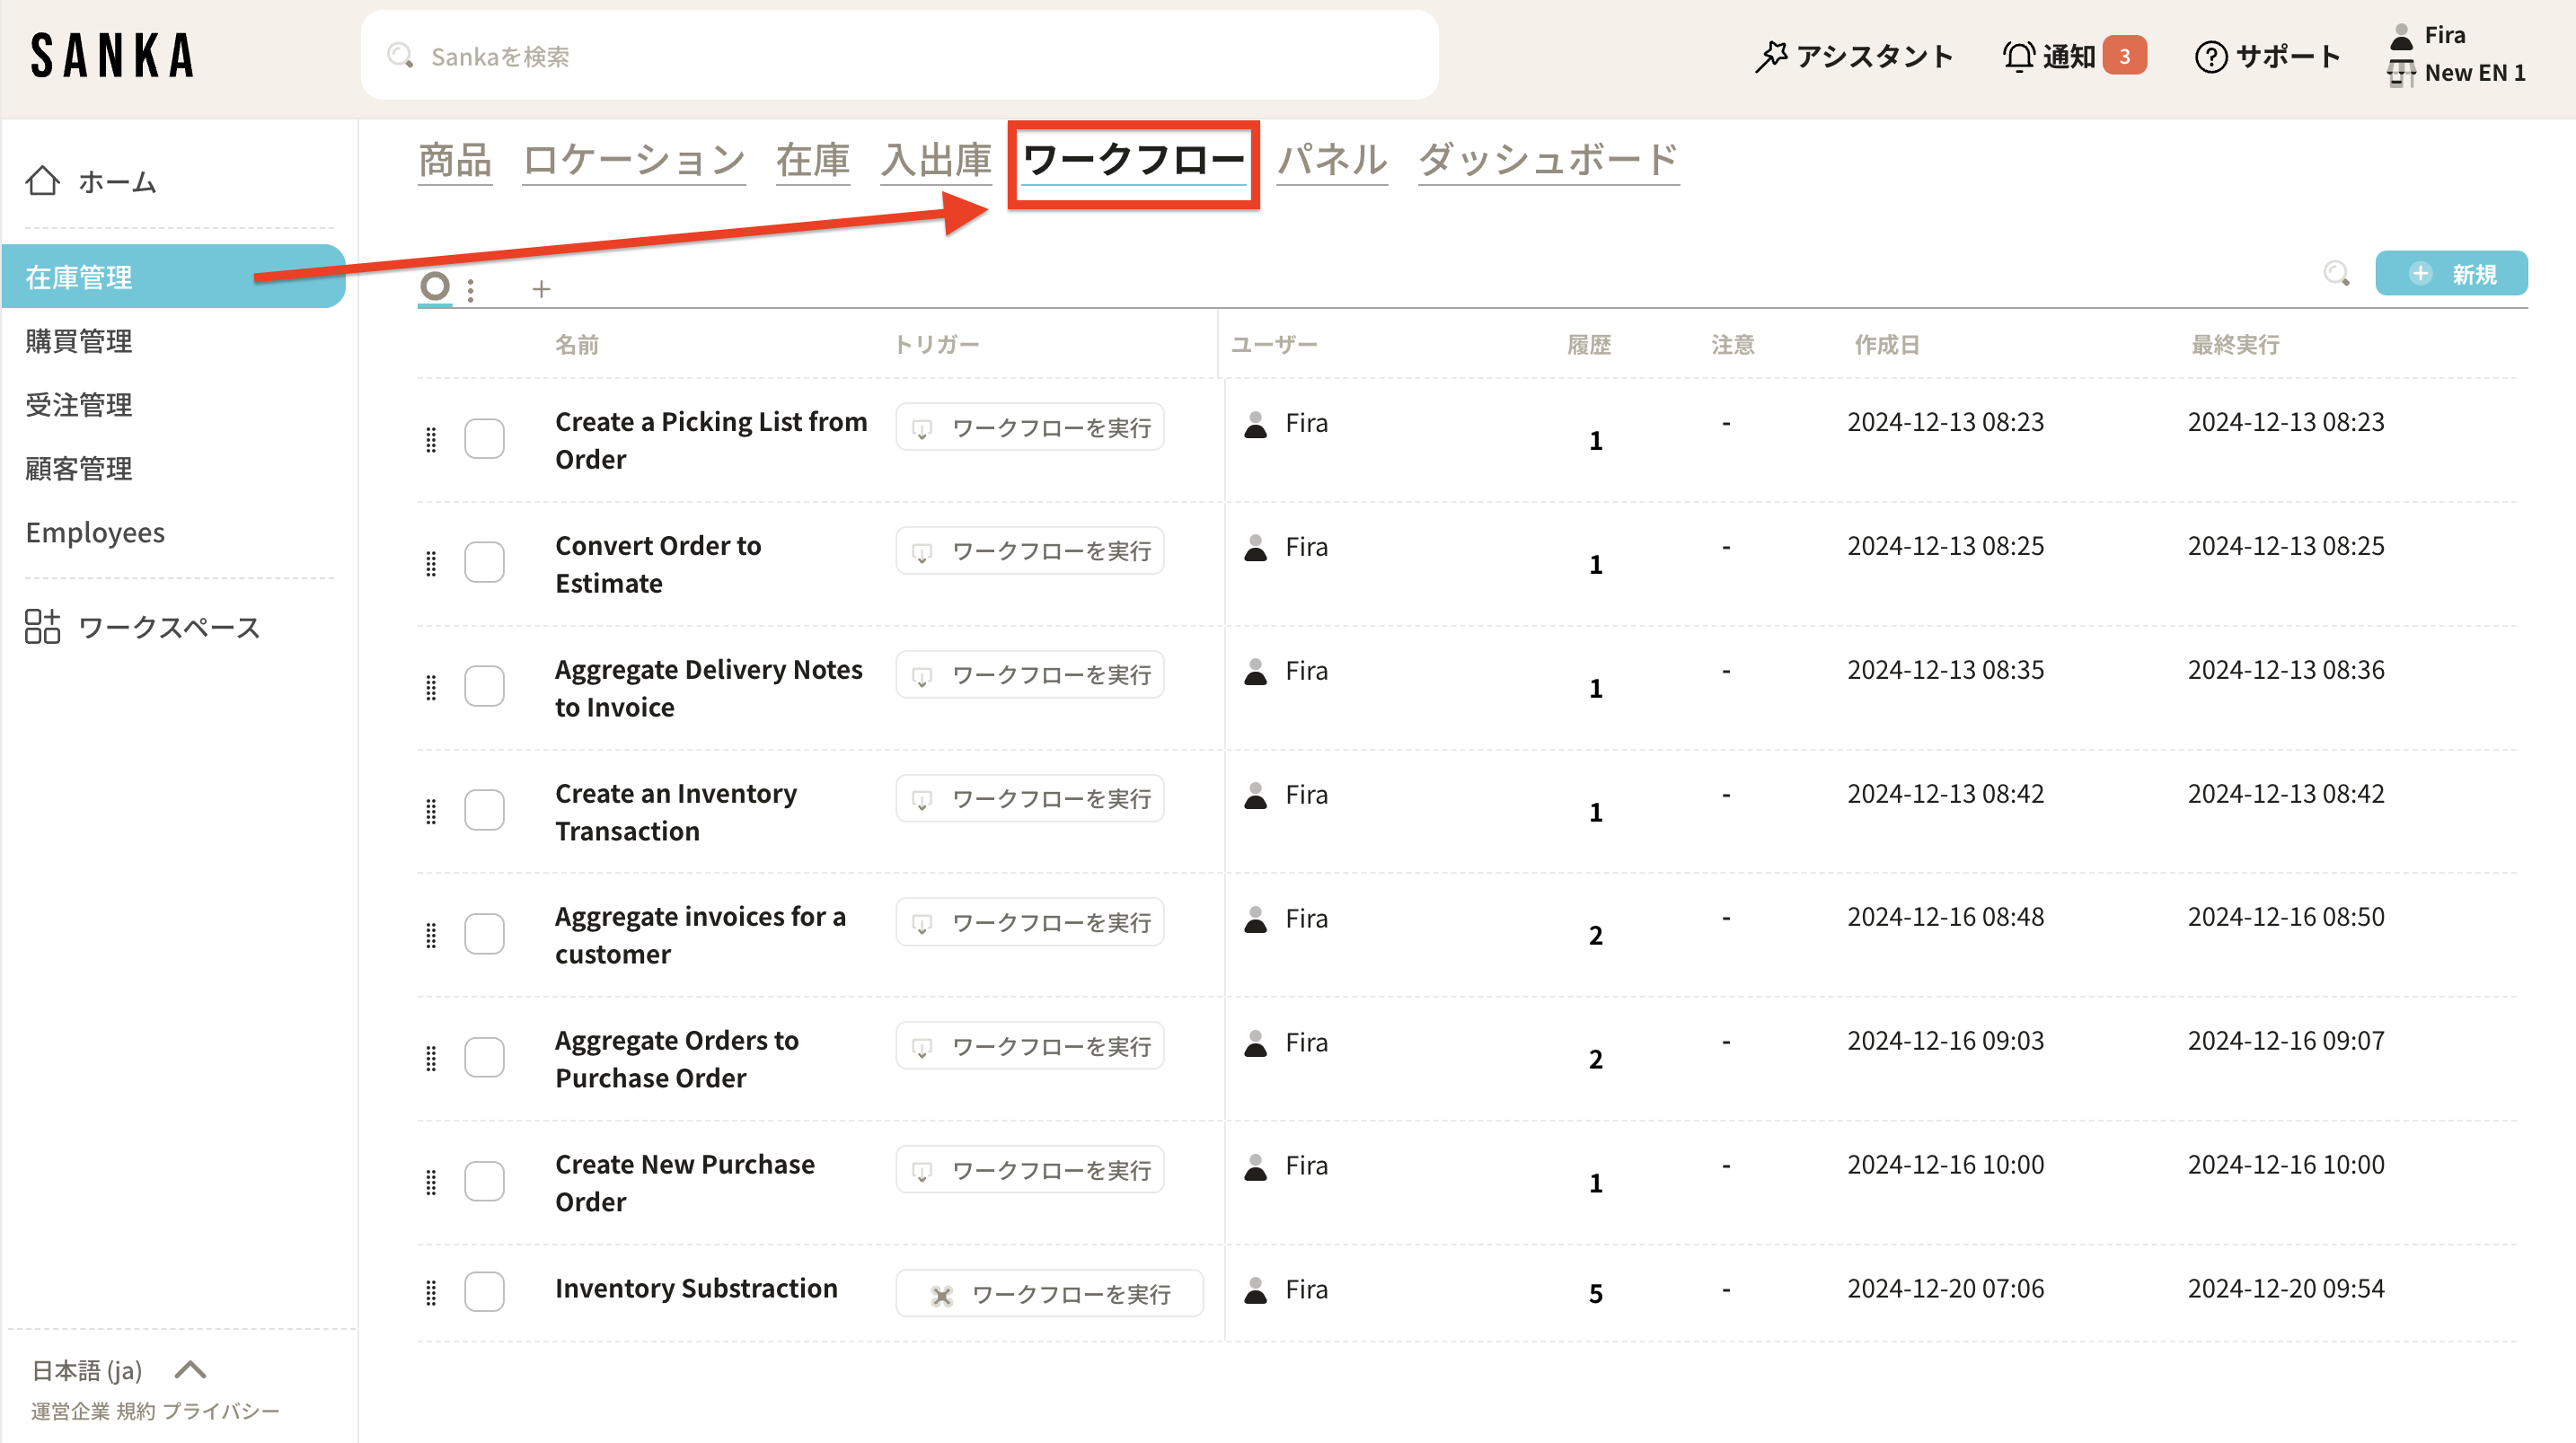
The Workflow "Gallery" feature introduces various workflow templates, allowing users to easily copy them to their own workspace and run identical workflows.
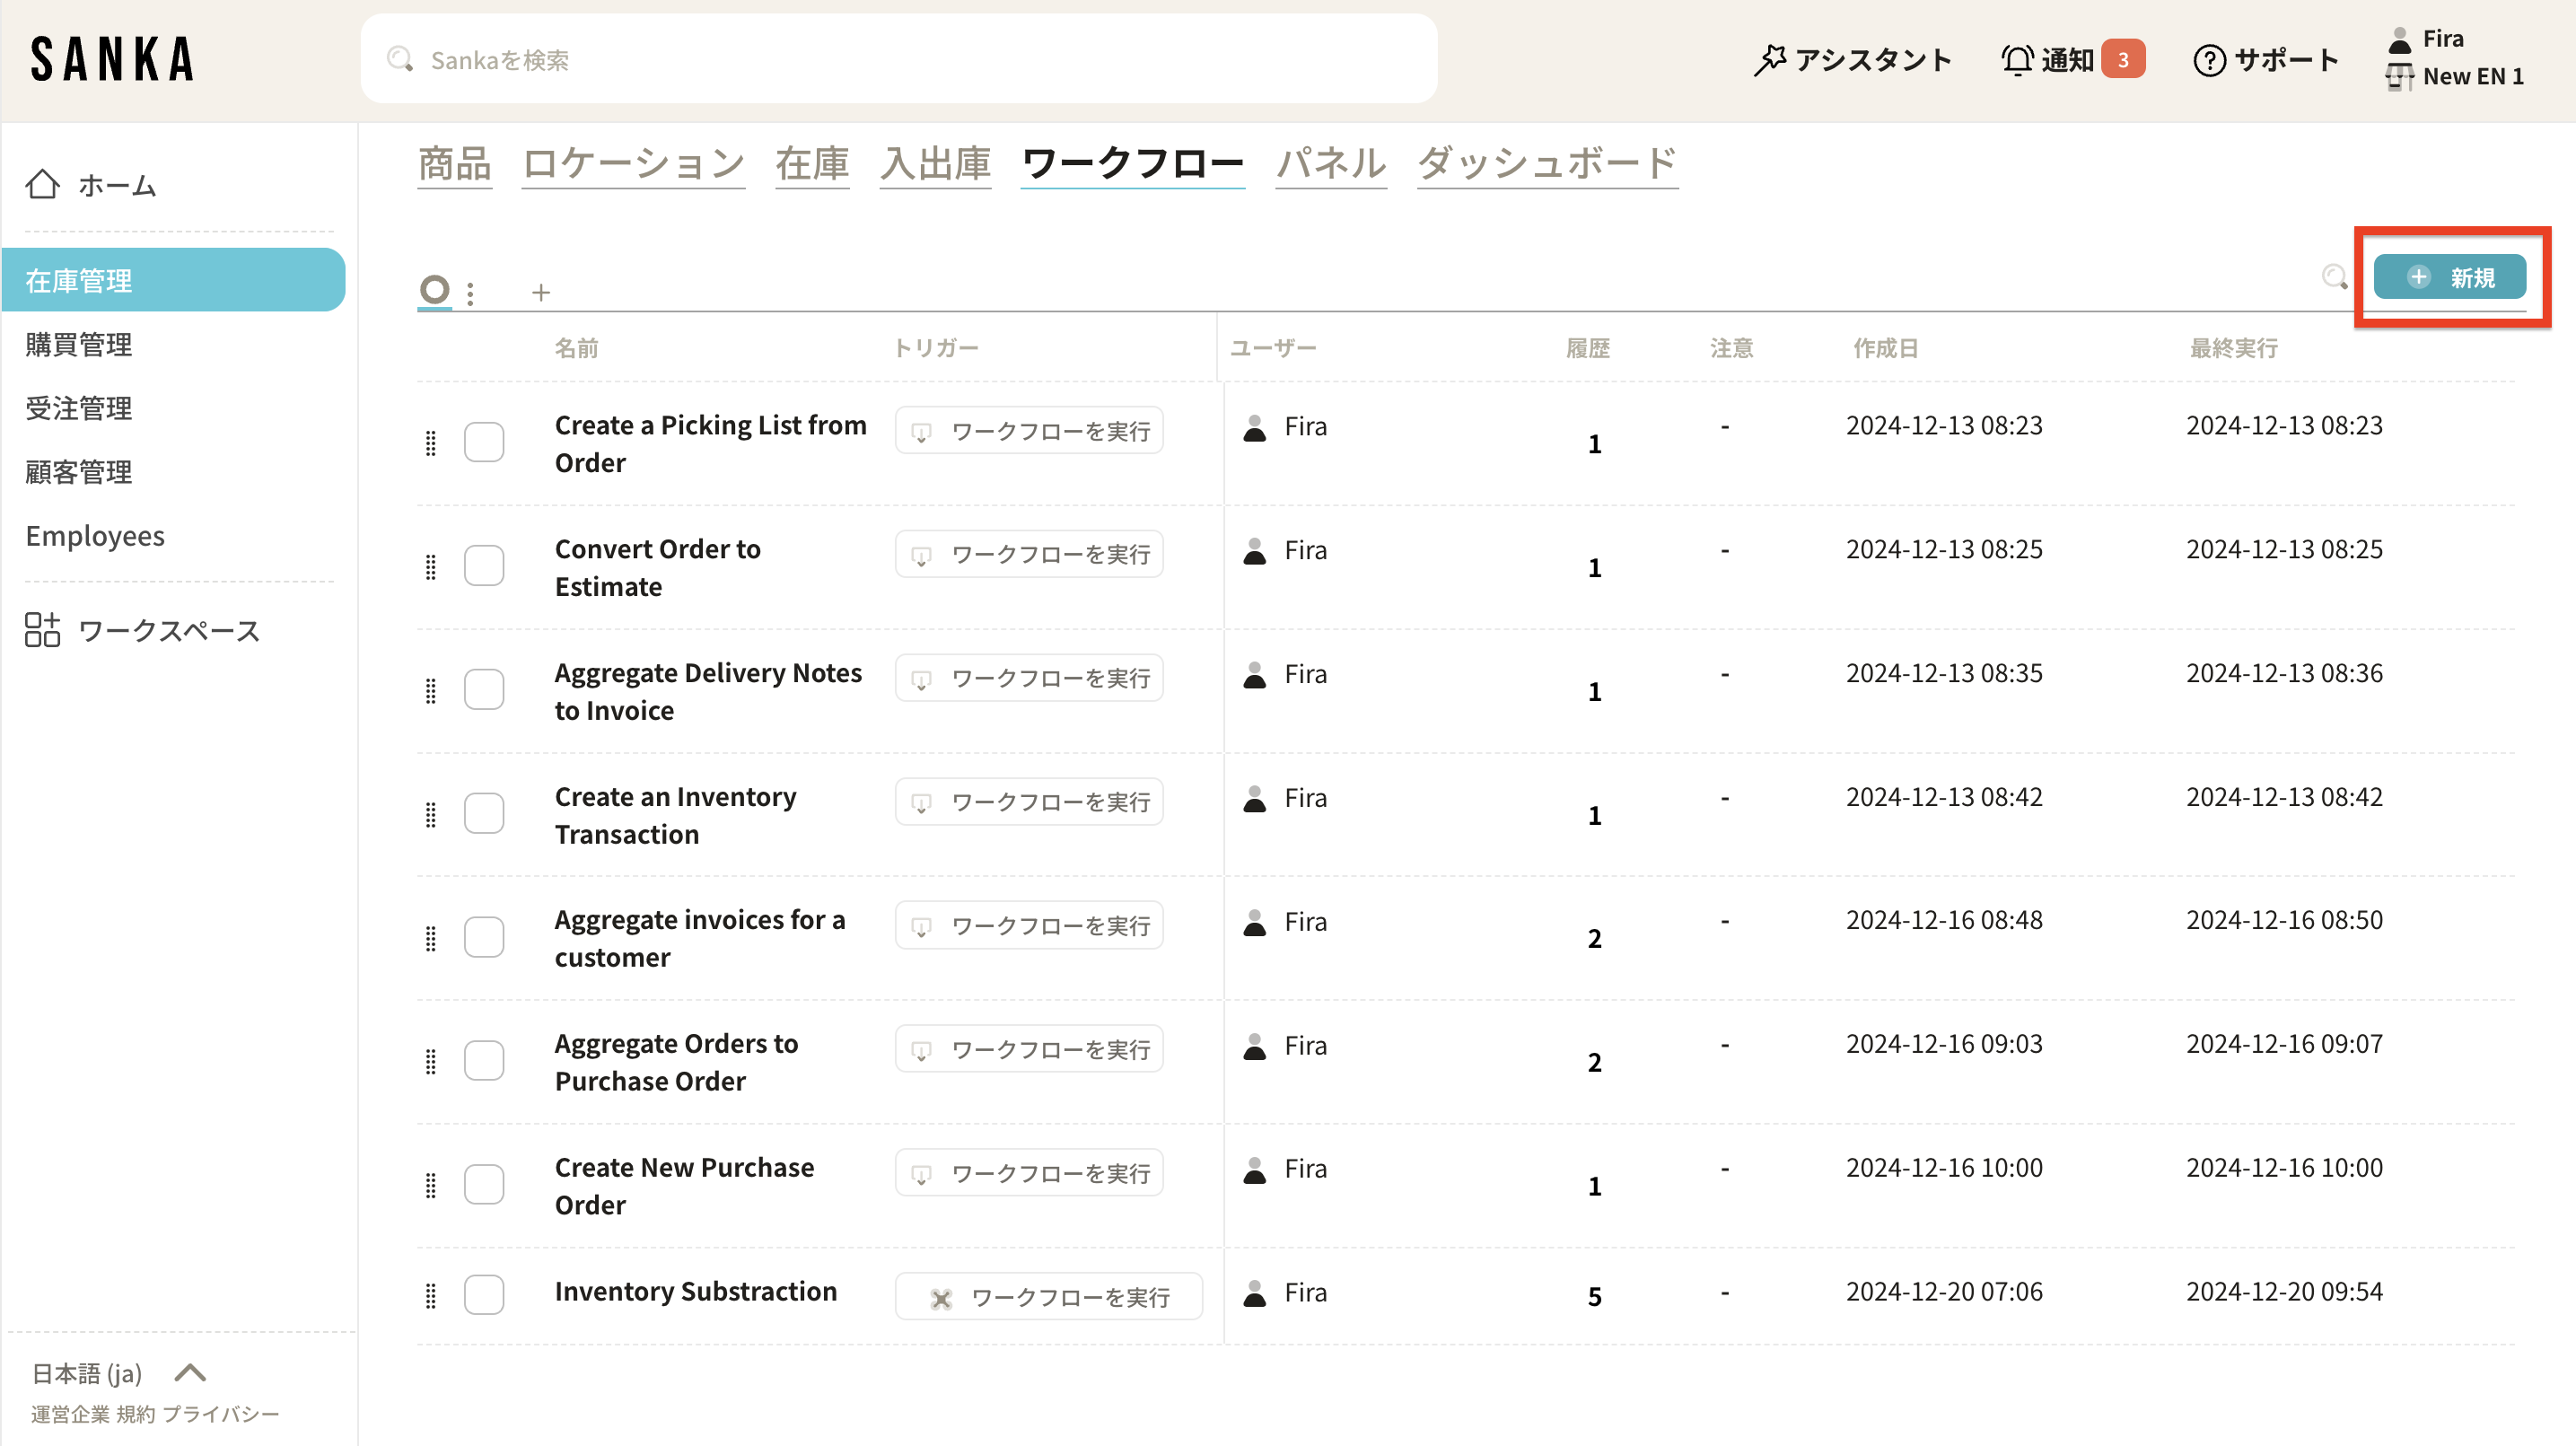
Navigate to the Workflow Object. You can create a workflow using the New button.
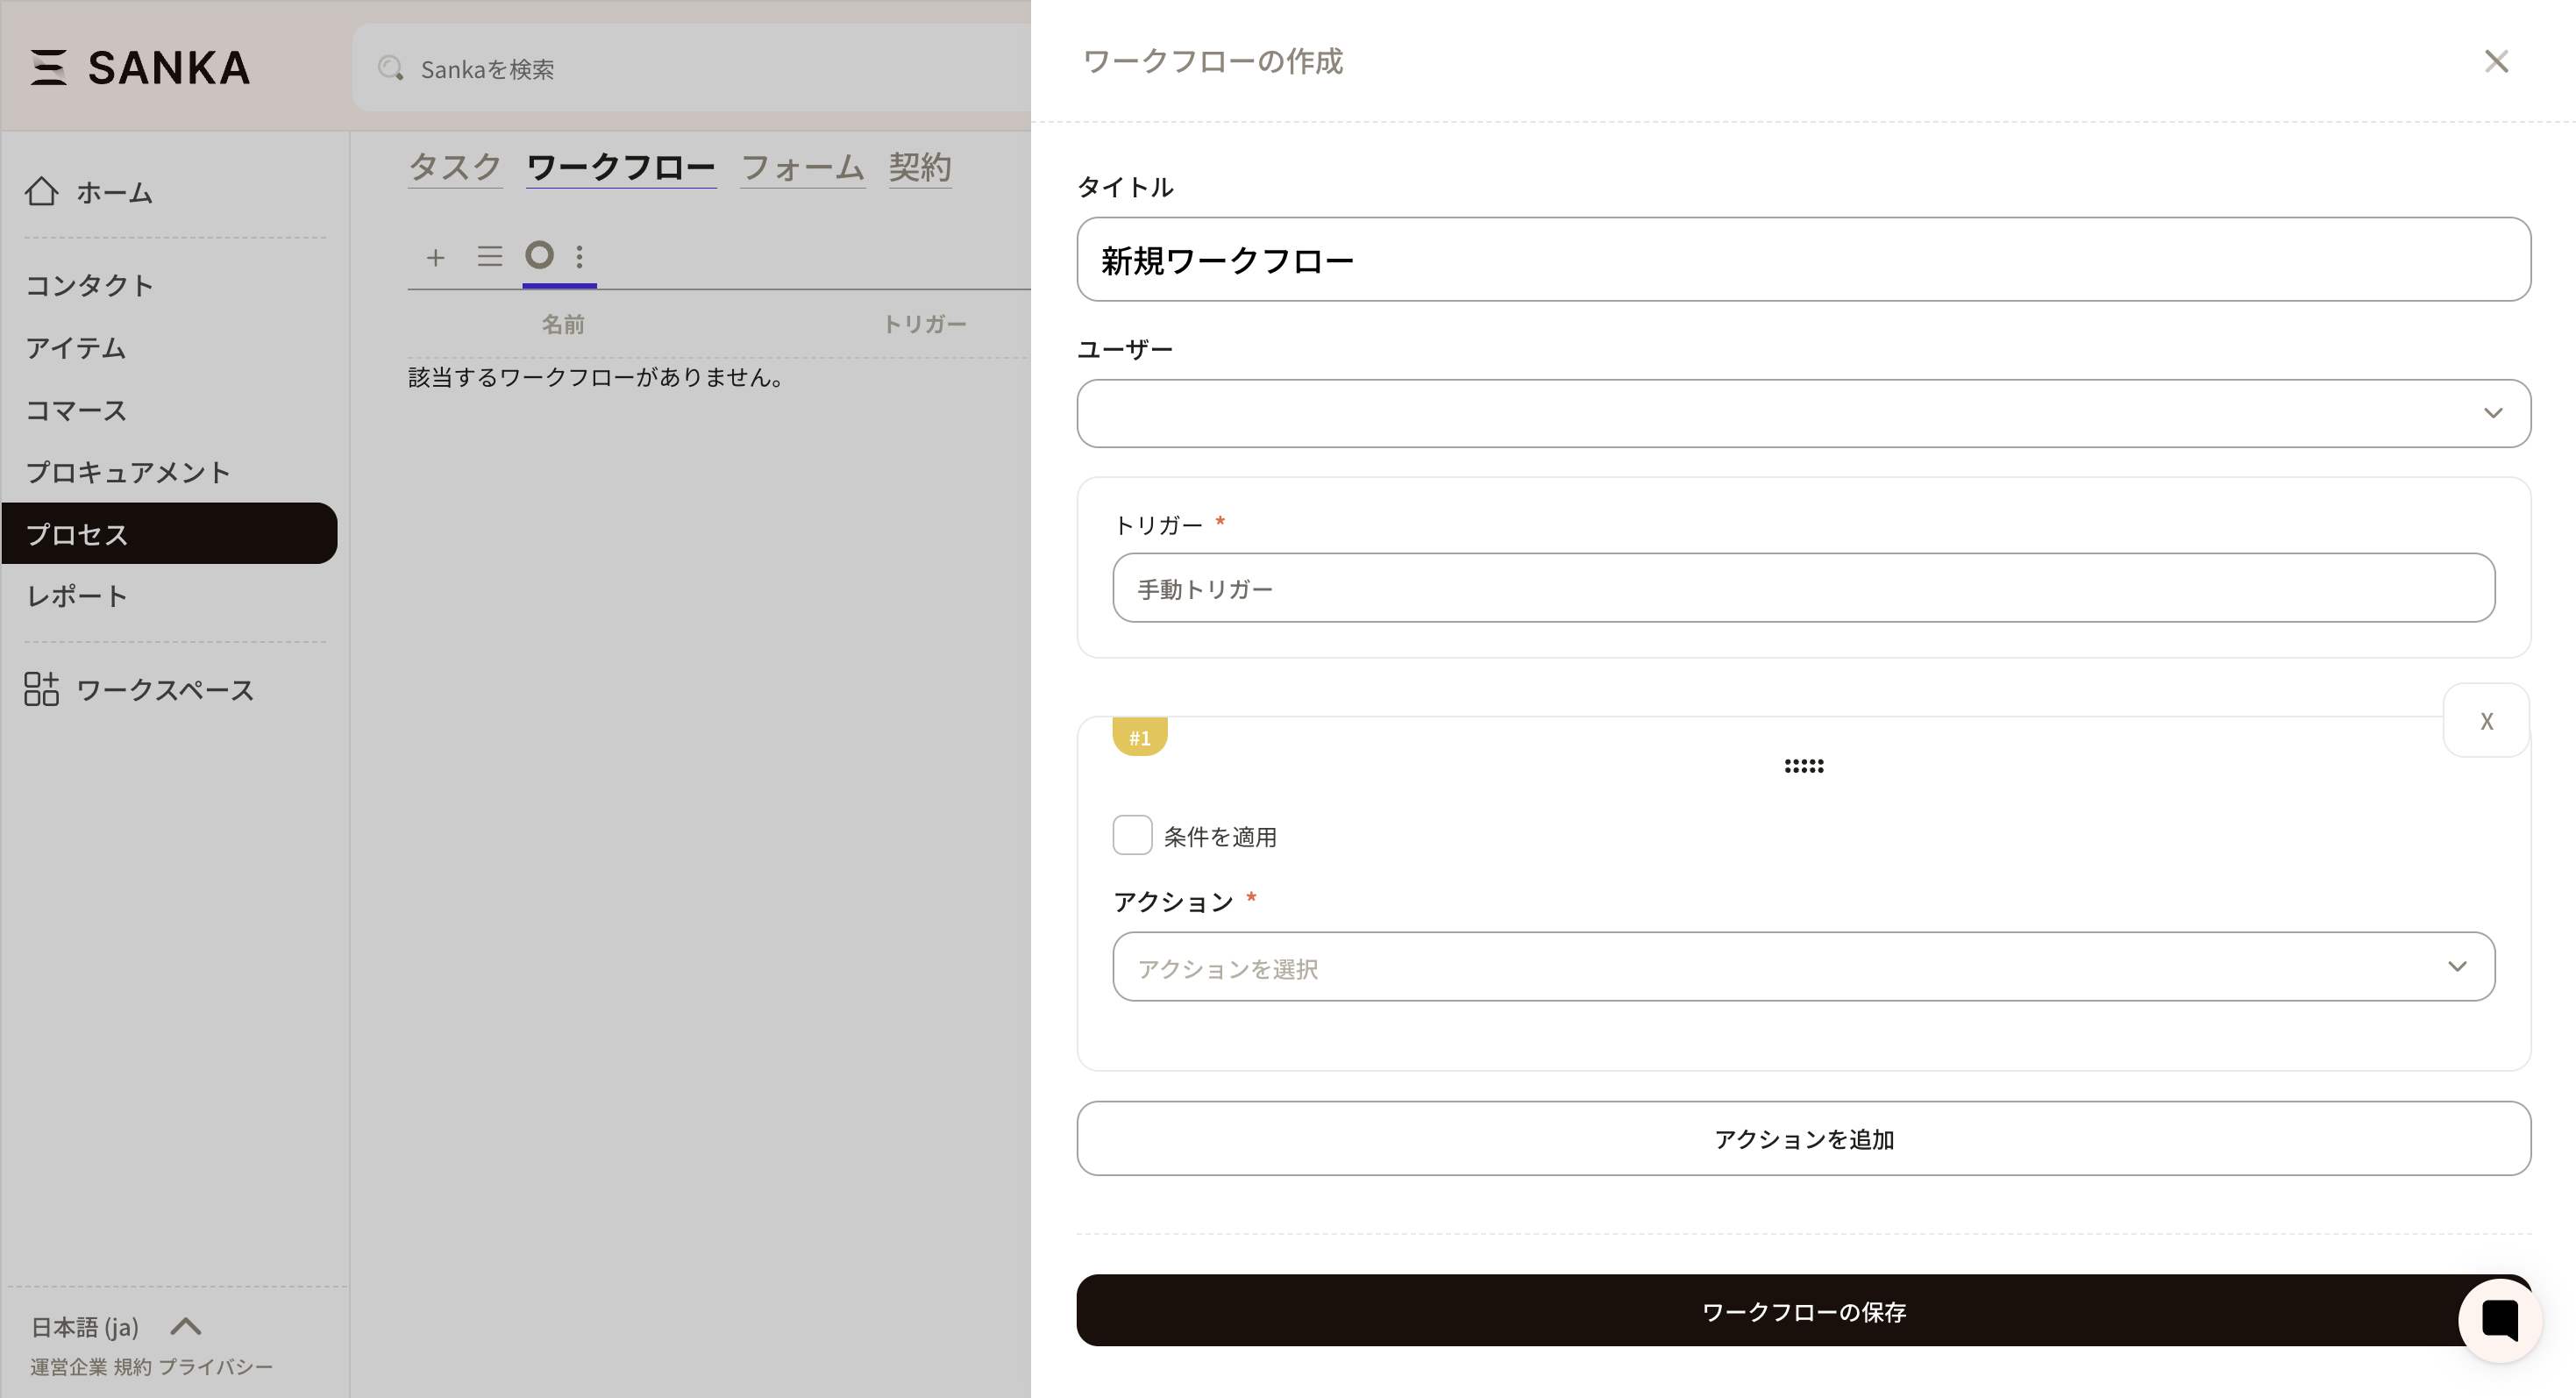
Workflow creation screen
Manual Trigger: Performed manually
Time Trigger: Performed at a set time
Event Trigger: Execute when an event occurs
Approval Action
Create Object Record
Update Object Record
Aggregate Object Record
Import data from integrated service
Export data to integrated service
Synchronize data with integrated service
AI Actions and Utilities
This process streamlines inventory management by automatically deducting inventory levels after updates to orders.
We have also prepared a more comprehensible video, so please refer to the information below.
To begin inventory deduction, you must set a trigger to start the workflow based on a specific event, such as an order, a new shipment, or a sales transaction.
In this case, the trigger will be set to update the order.
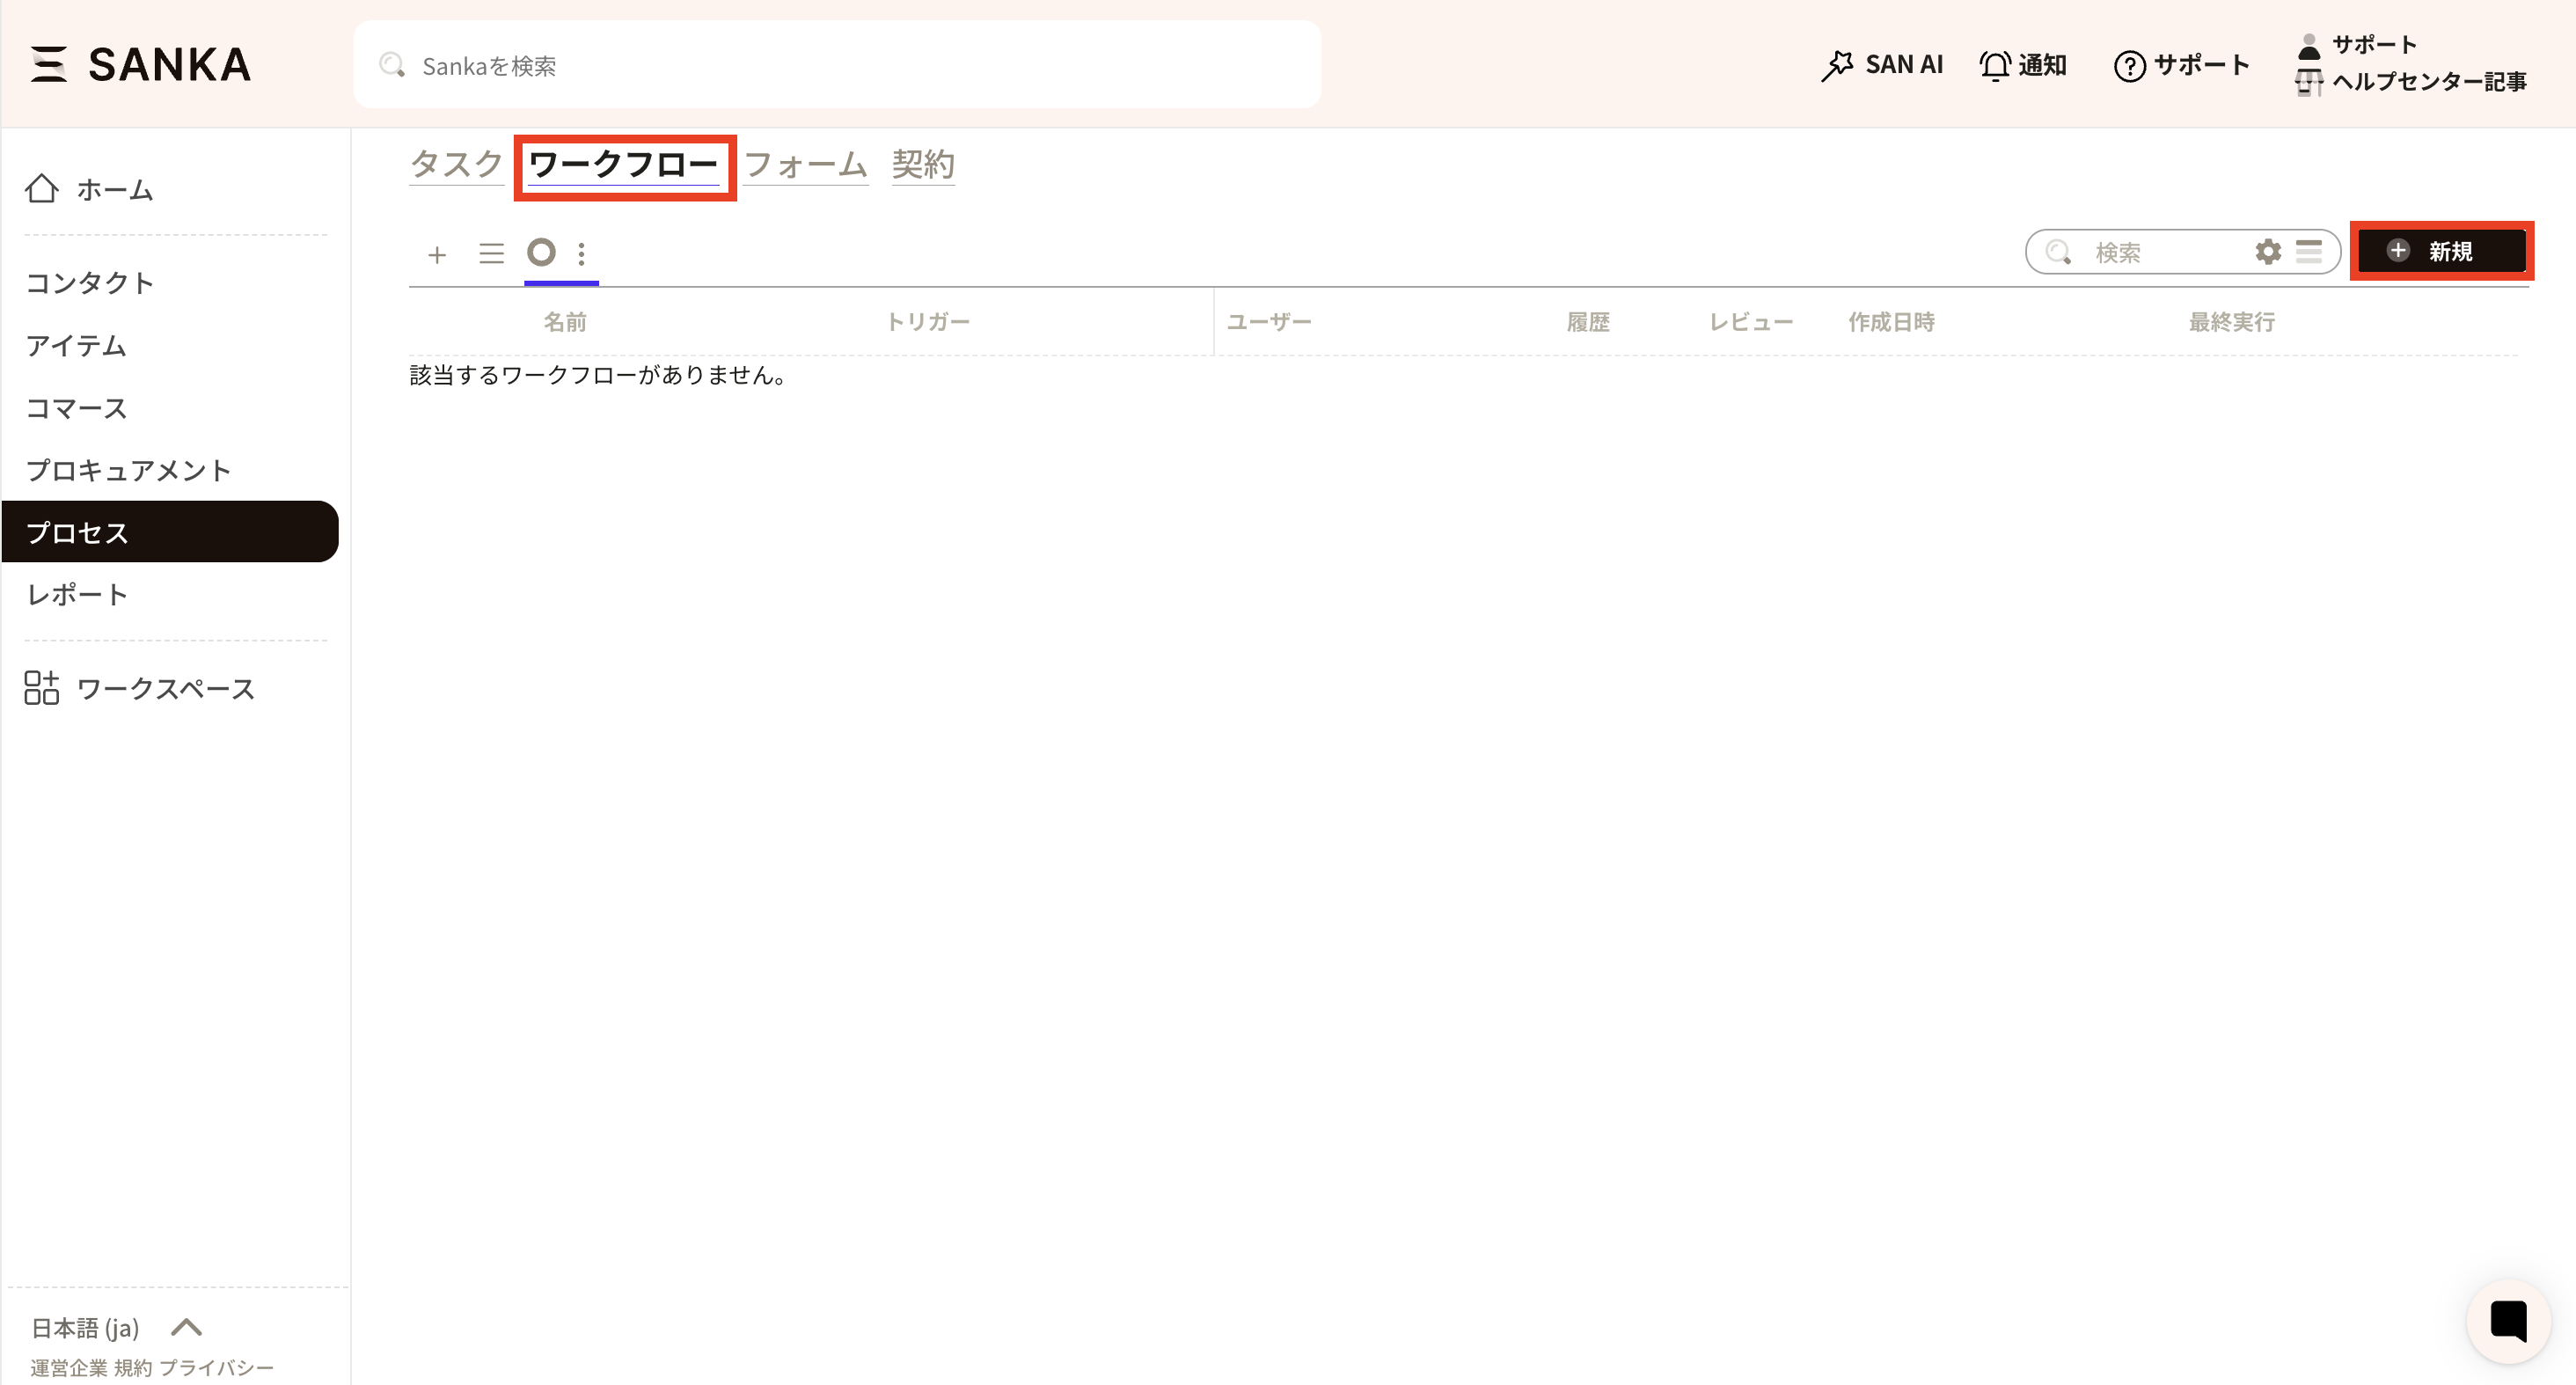
1: First, navigate to the workflow section.
2: Create a new workflow.
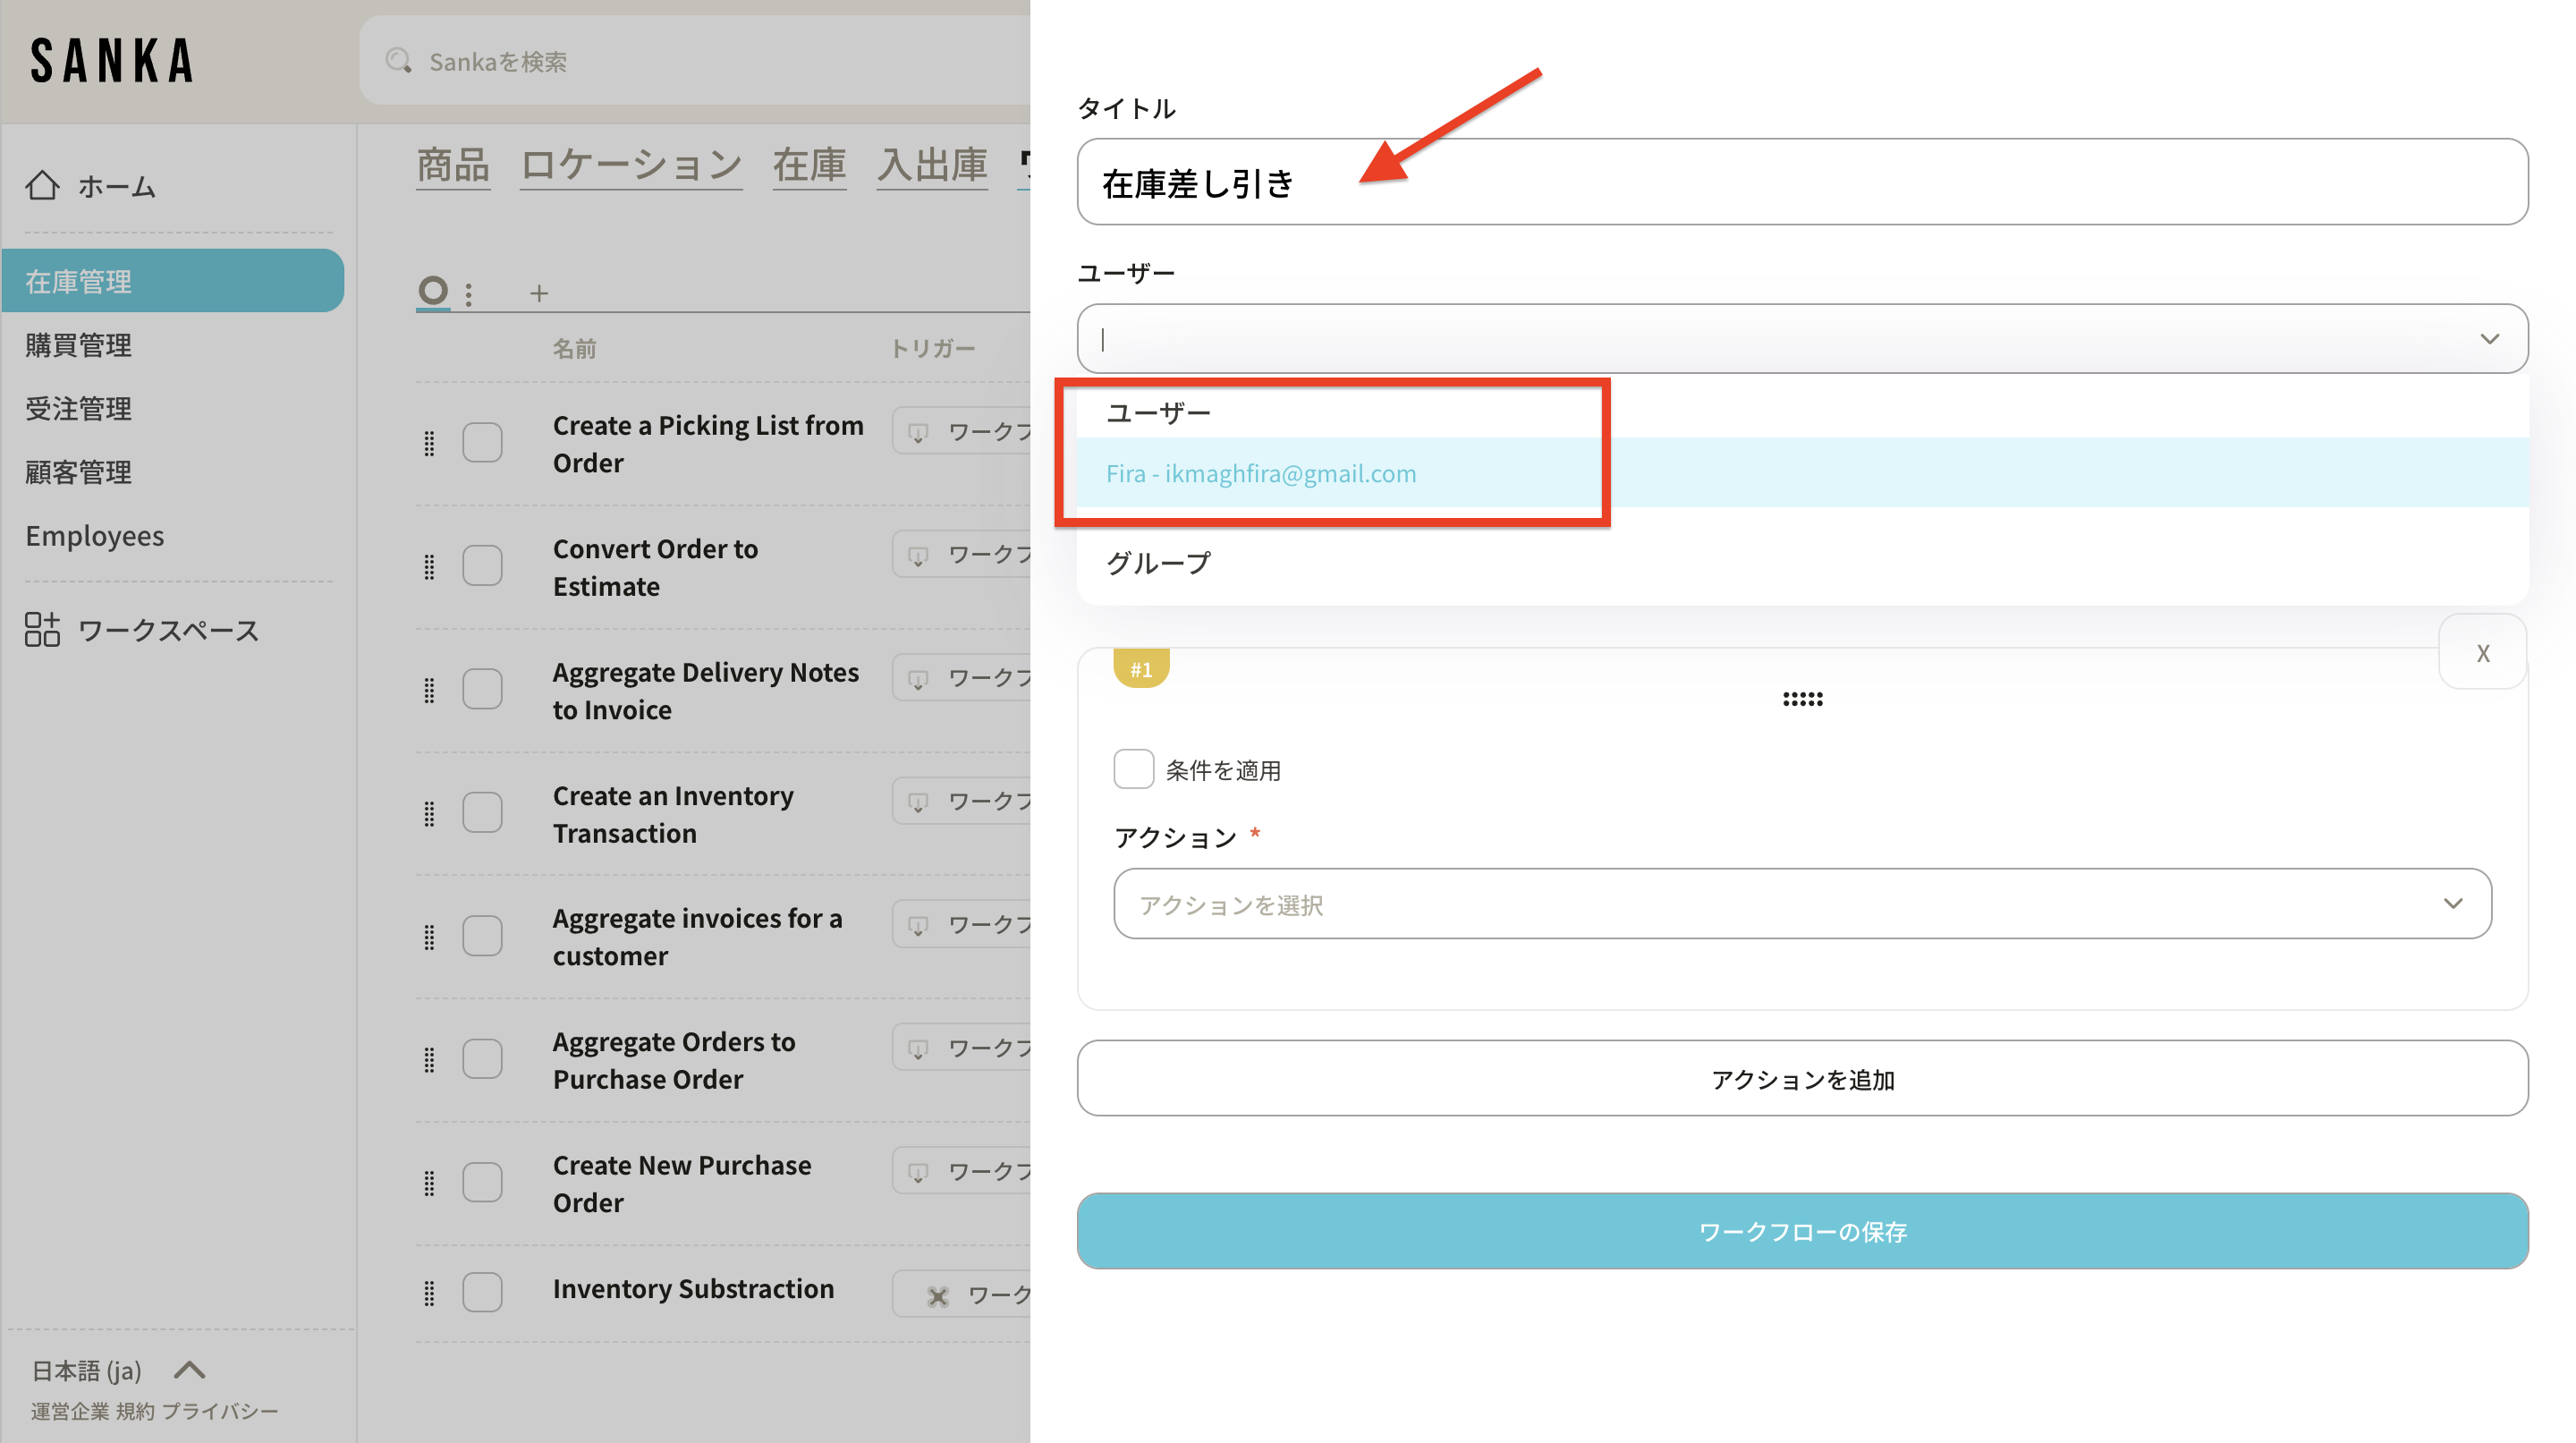
3: Enter the title and select the user.
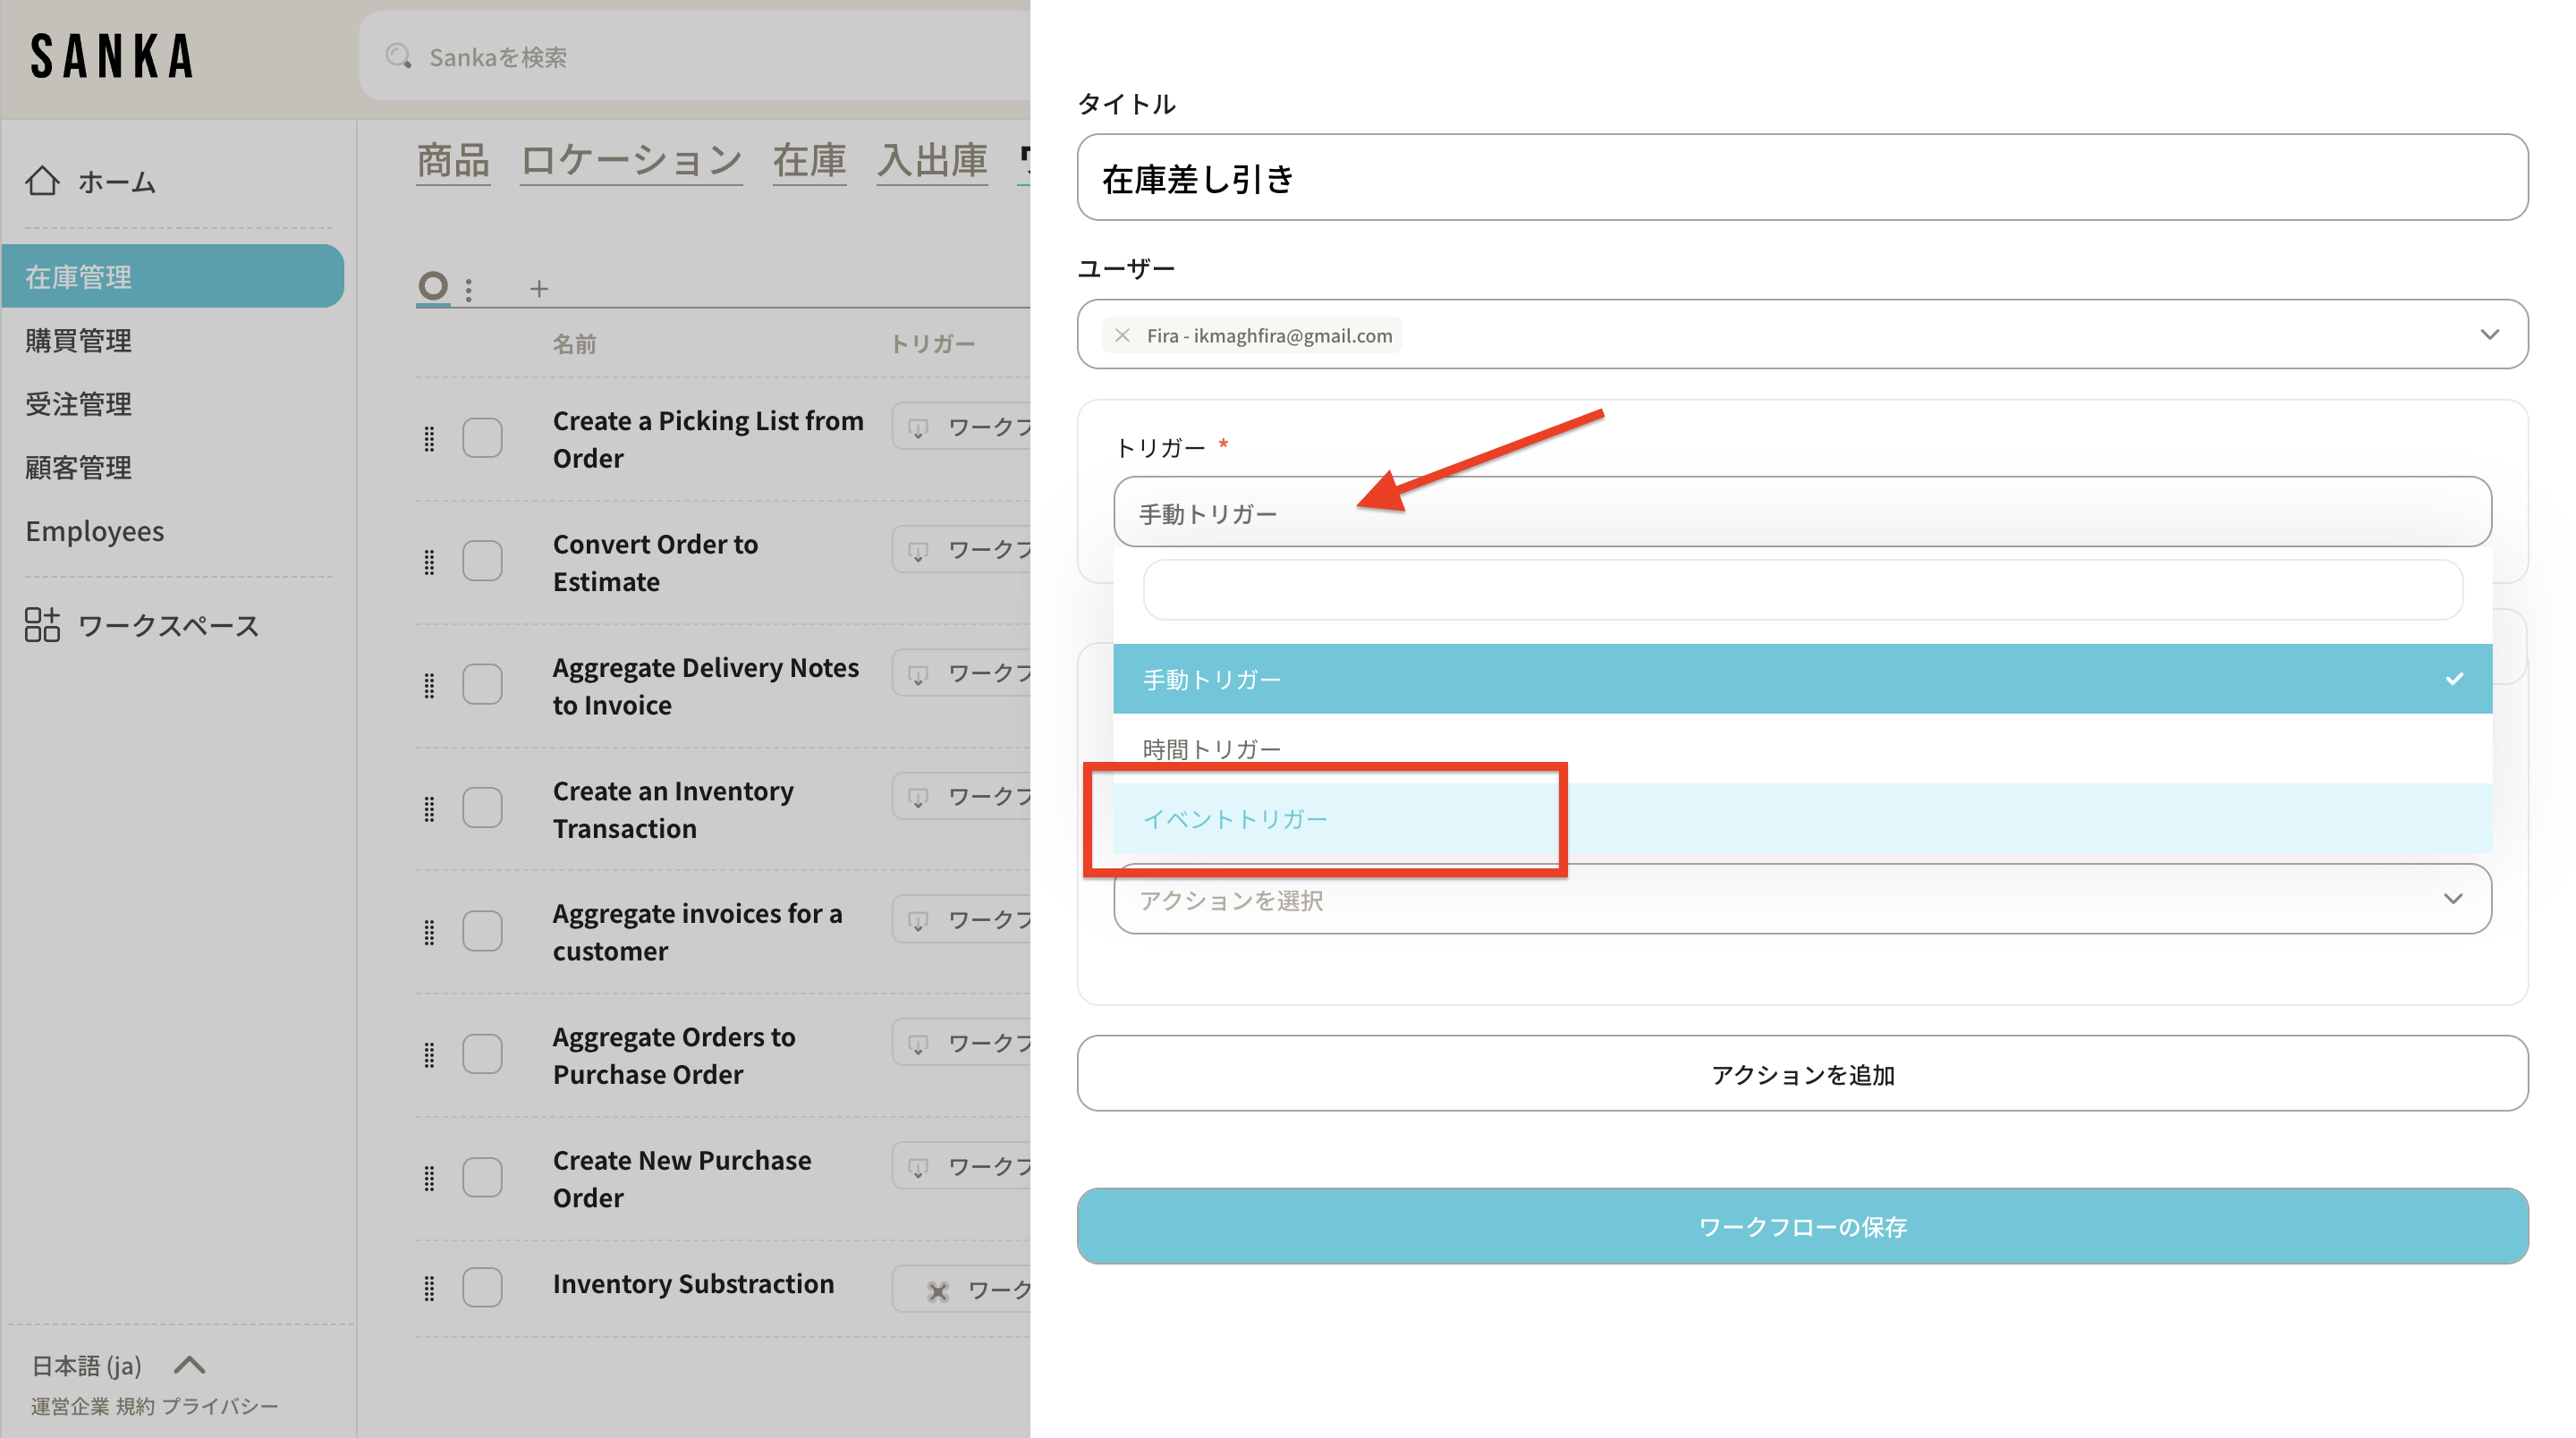
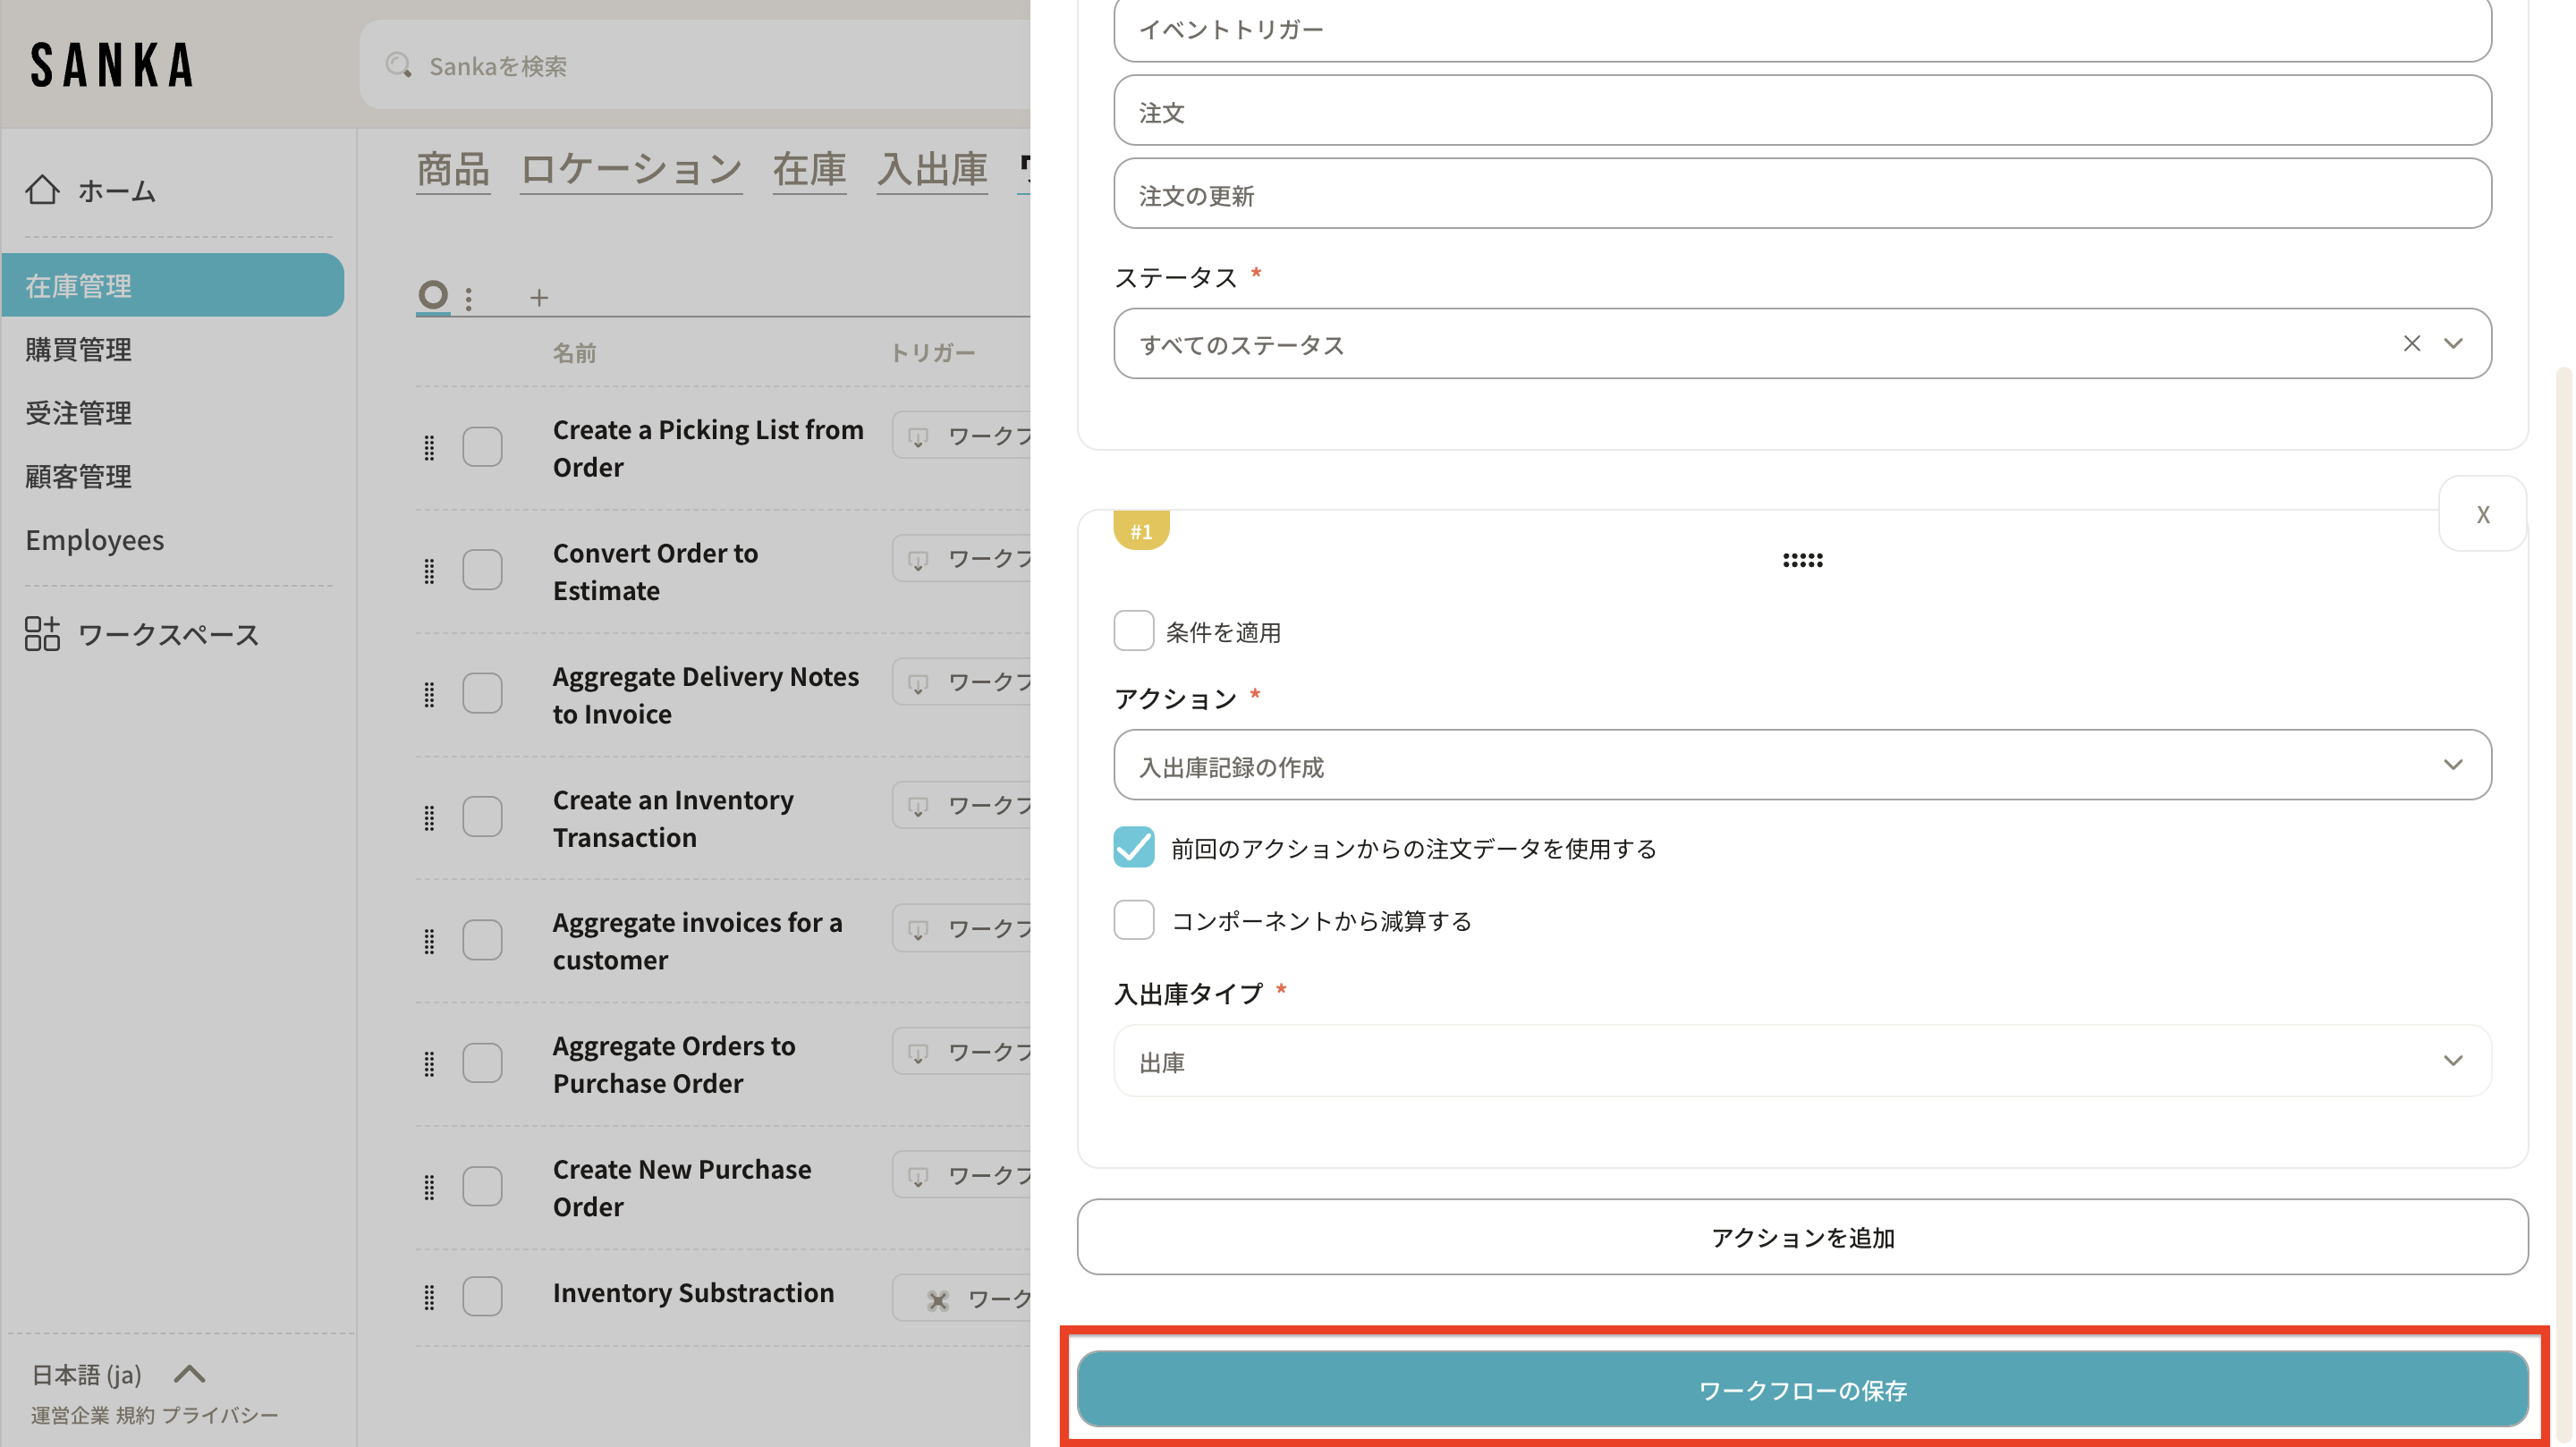
4: Select the event trigger.
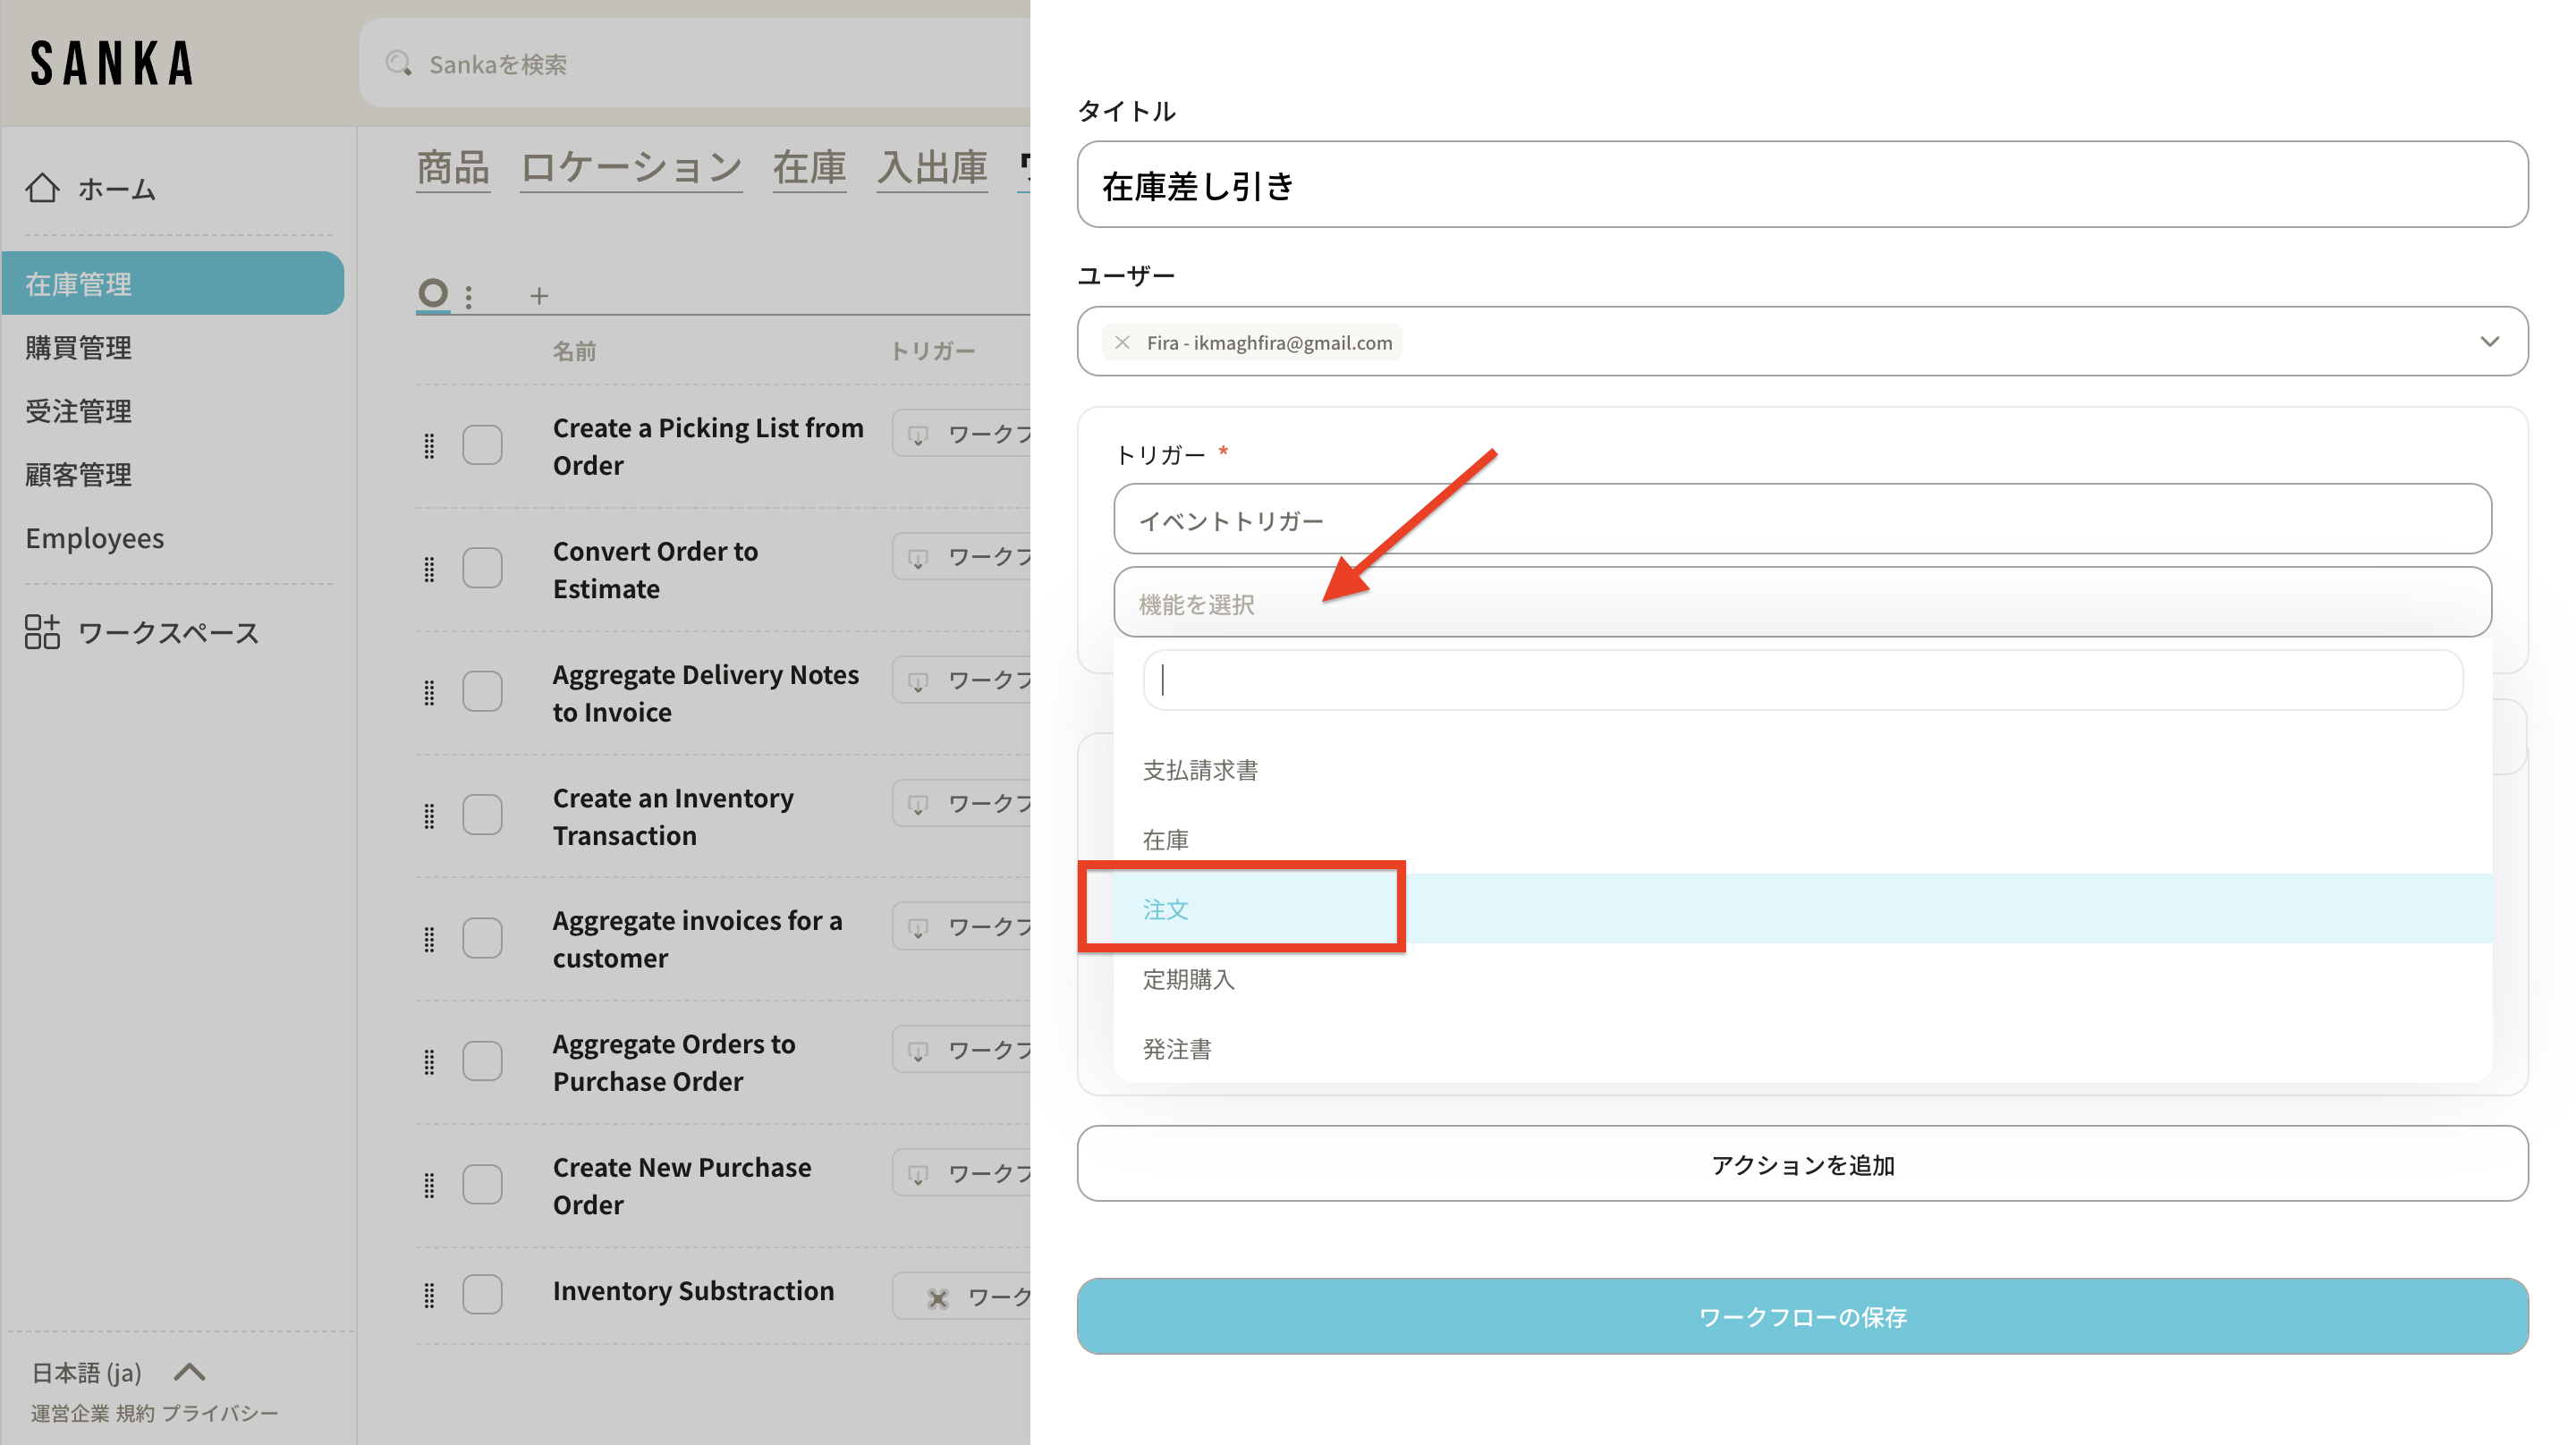
5: Select "Order" from Functions.
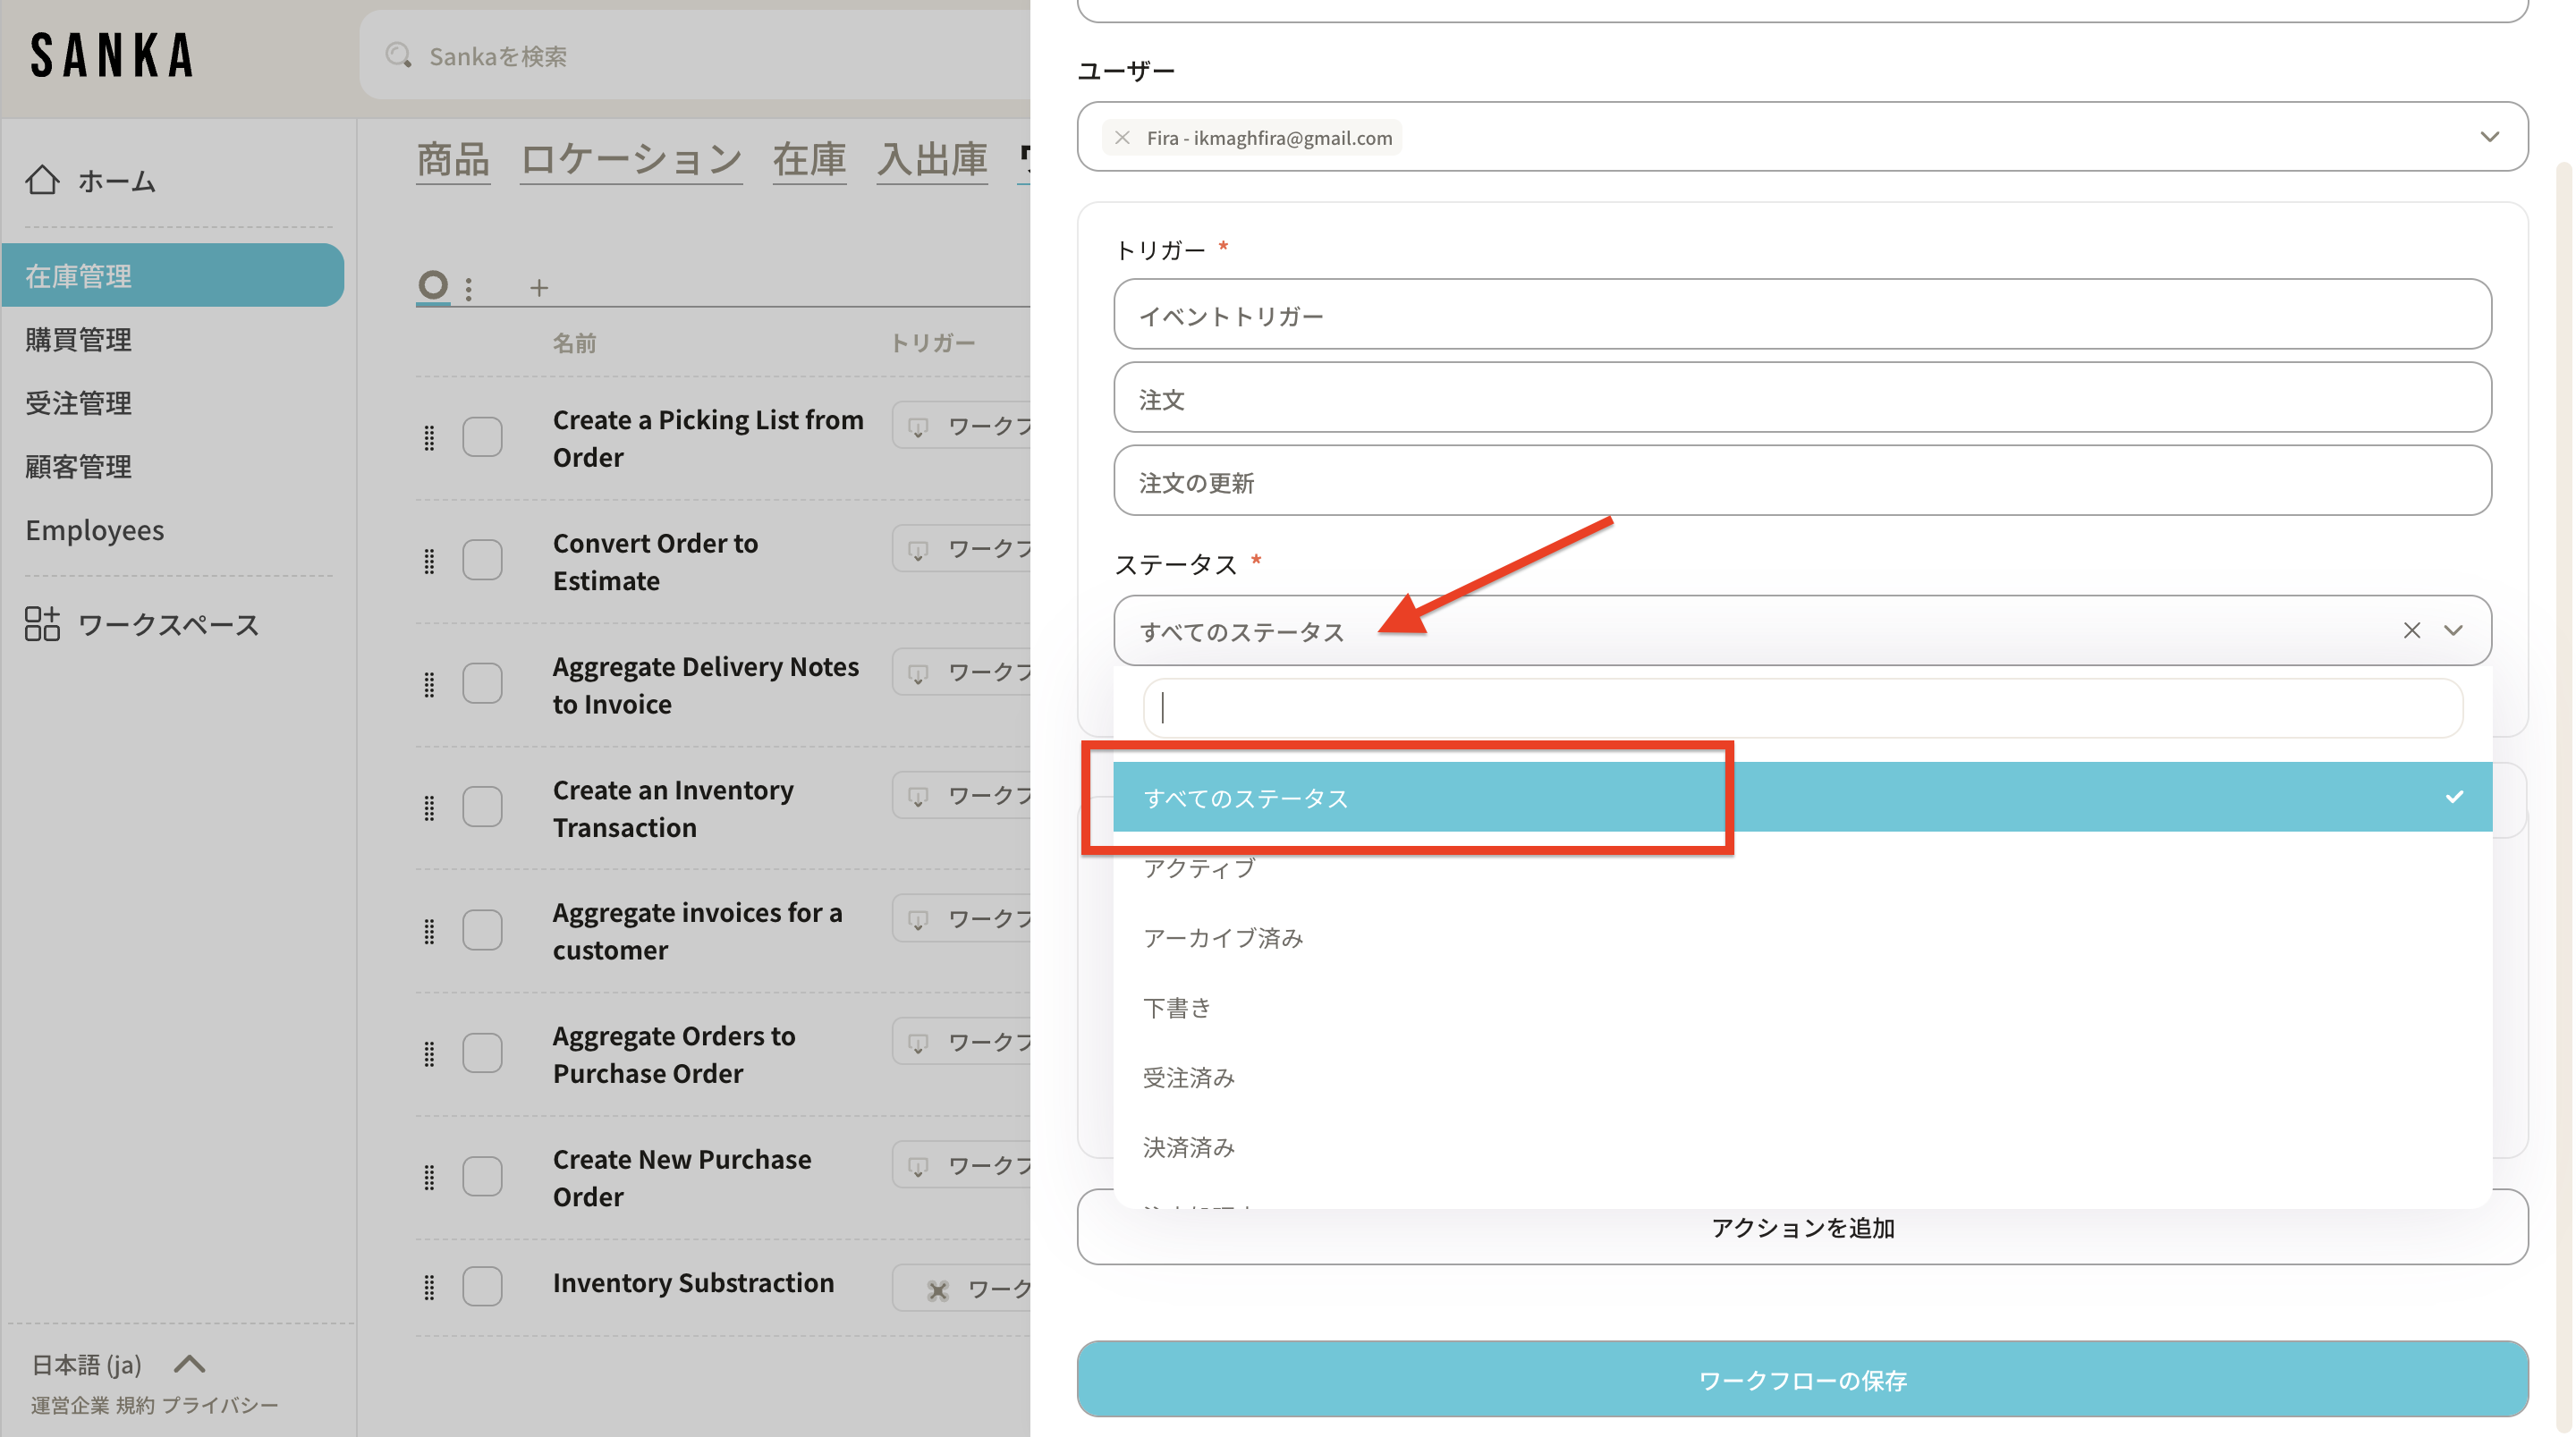
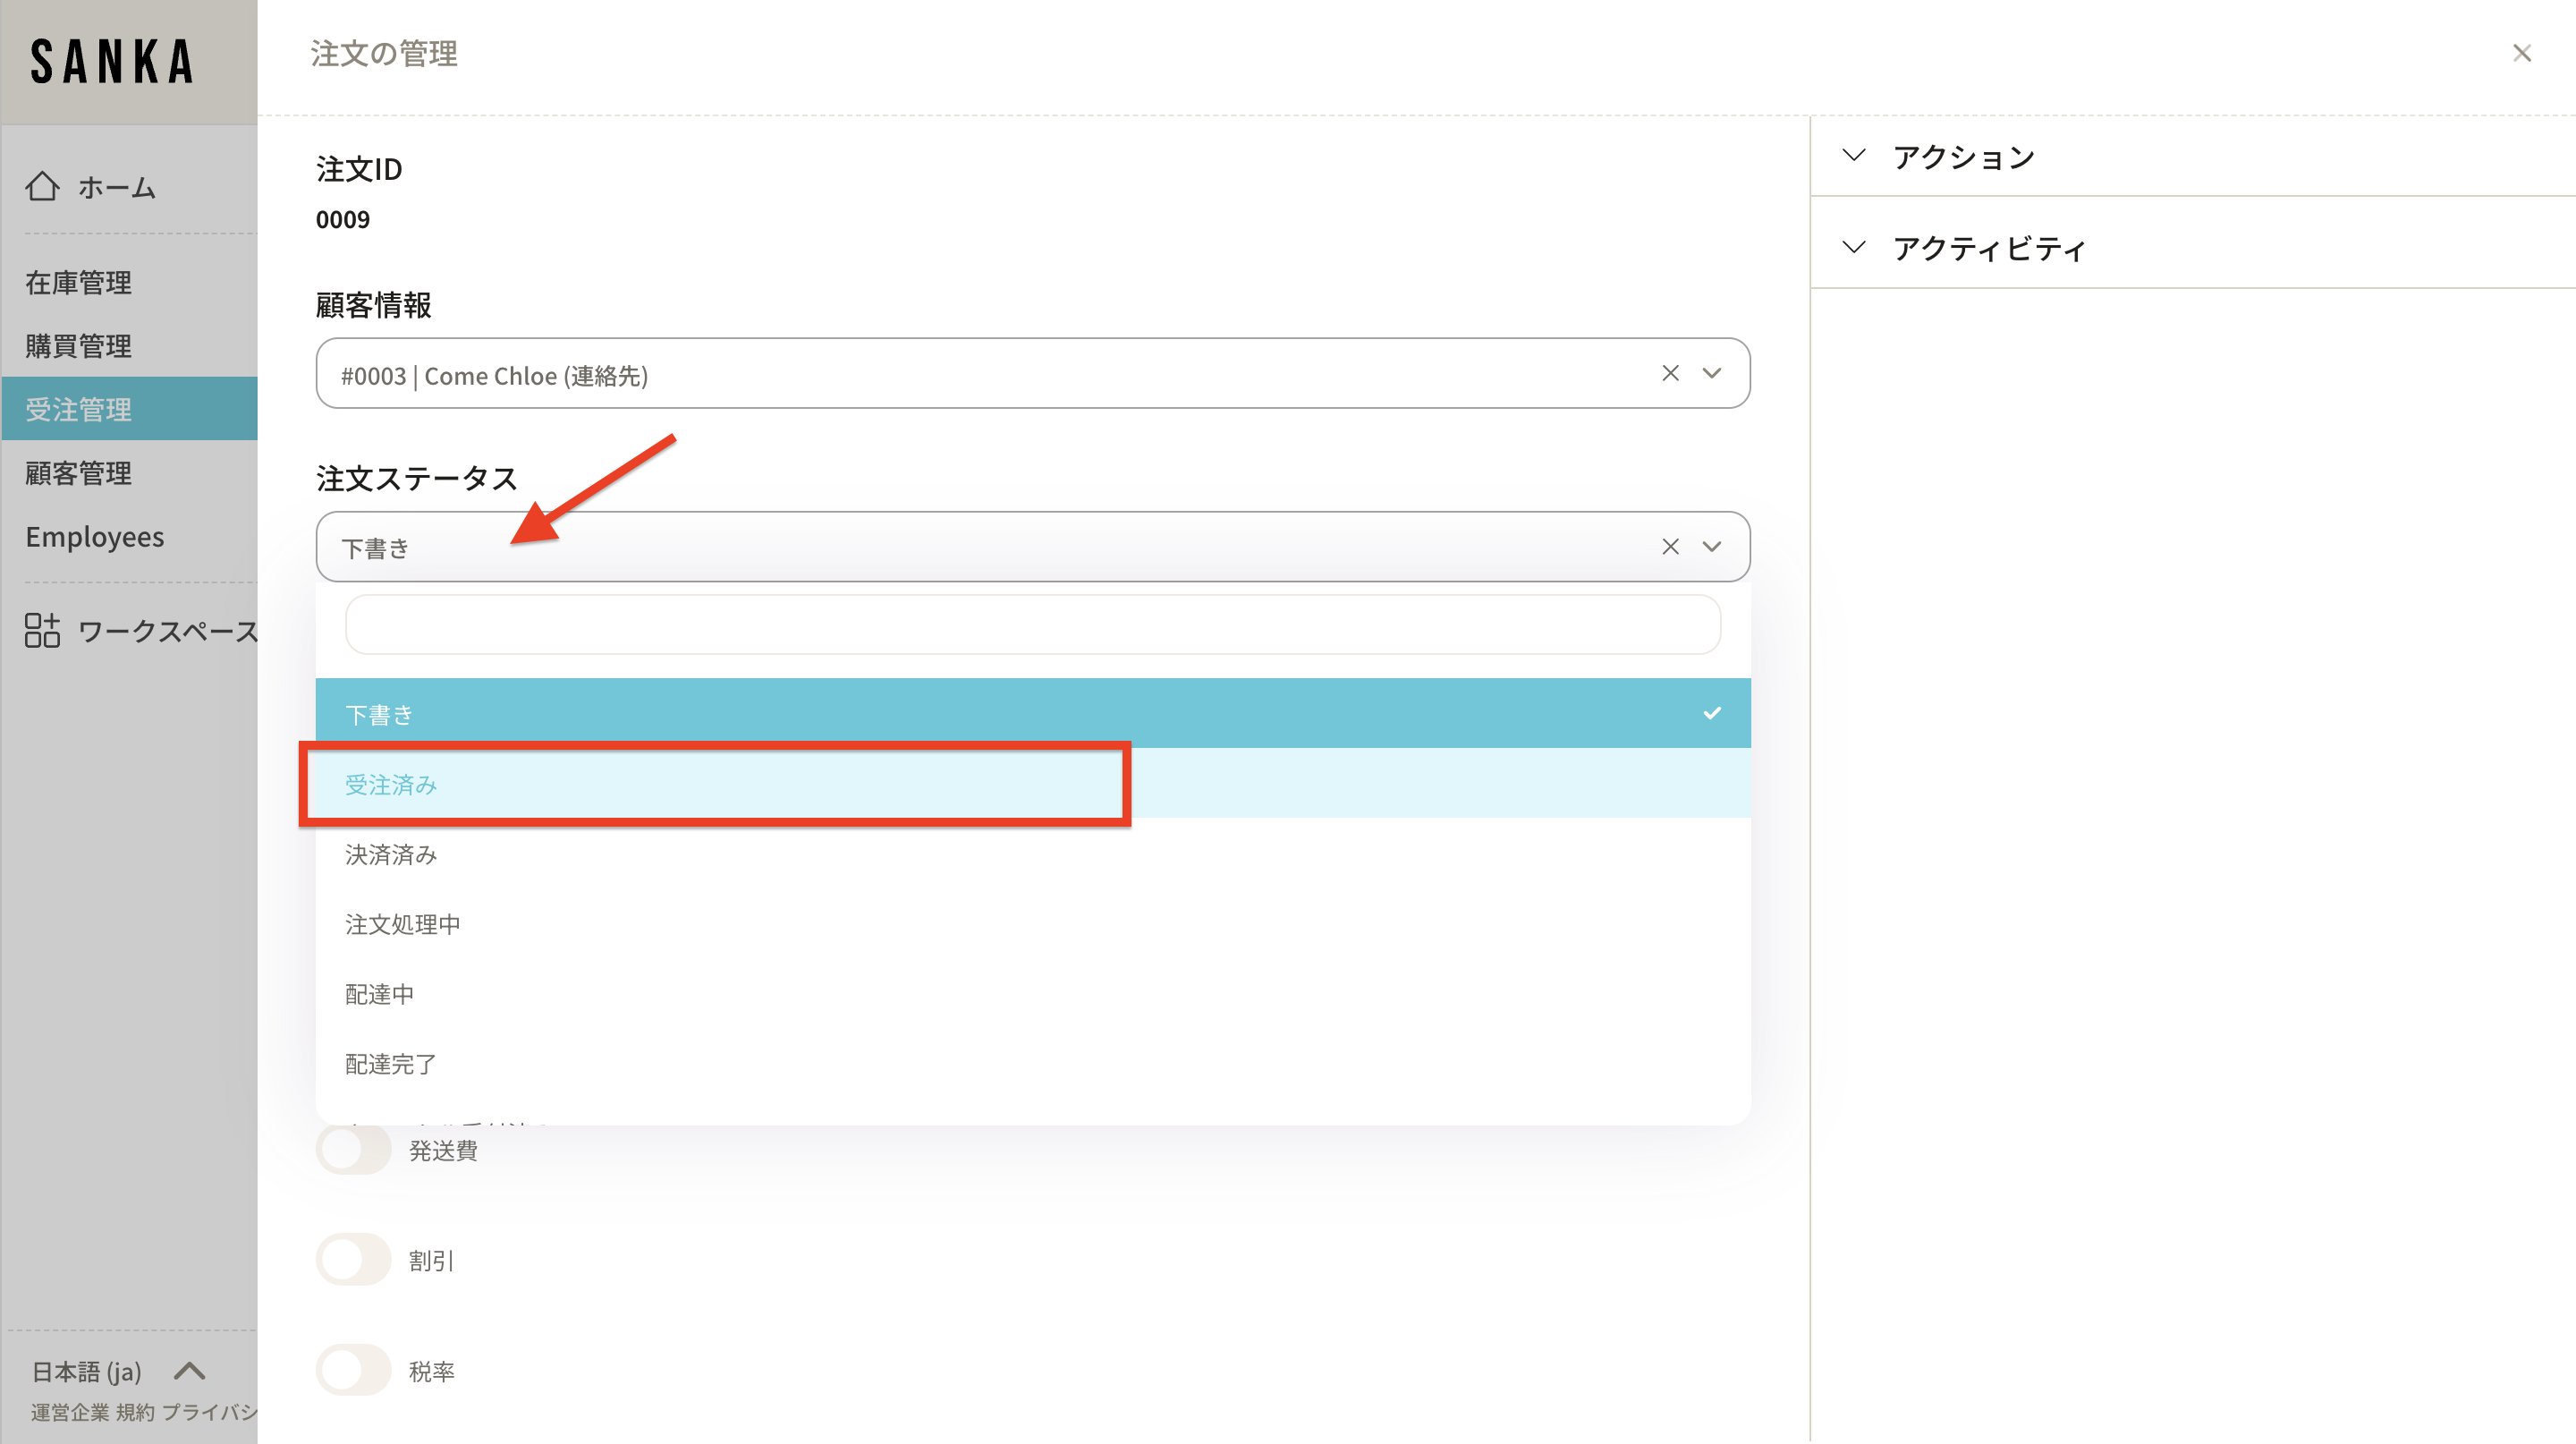
6: Select "Update Order" and "Status" as action triggers. In this case, select all statuses.
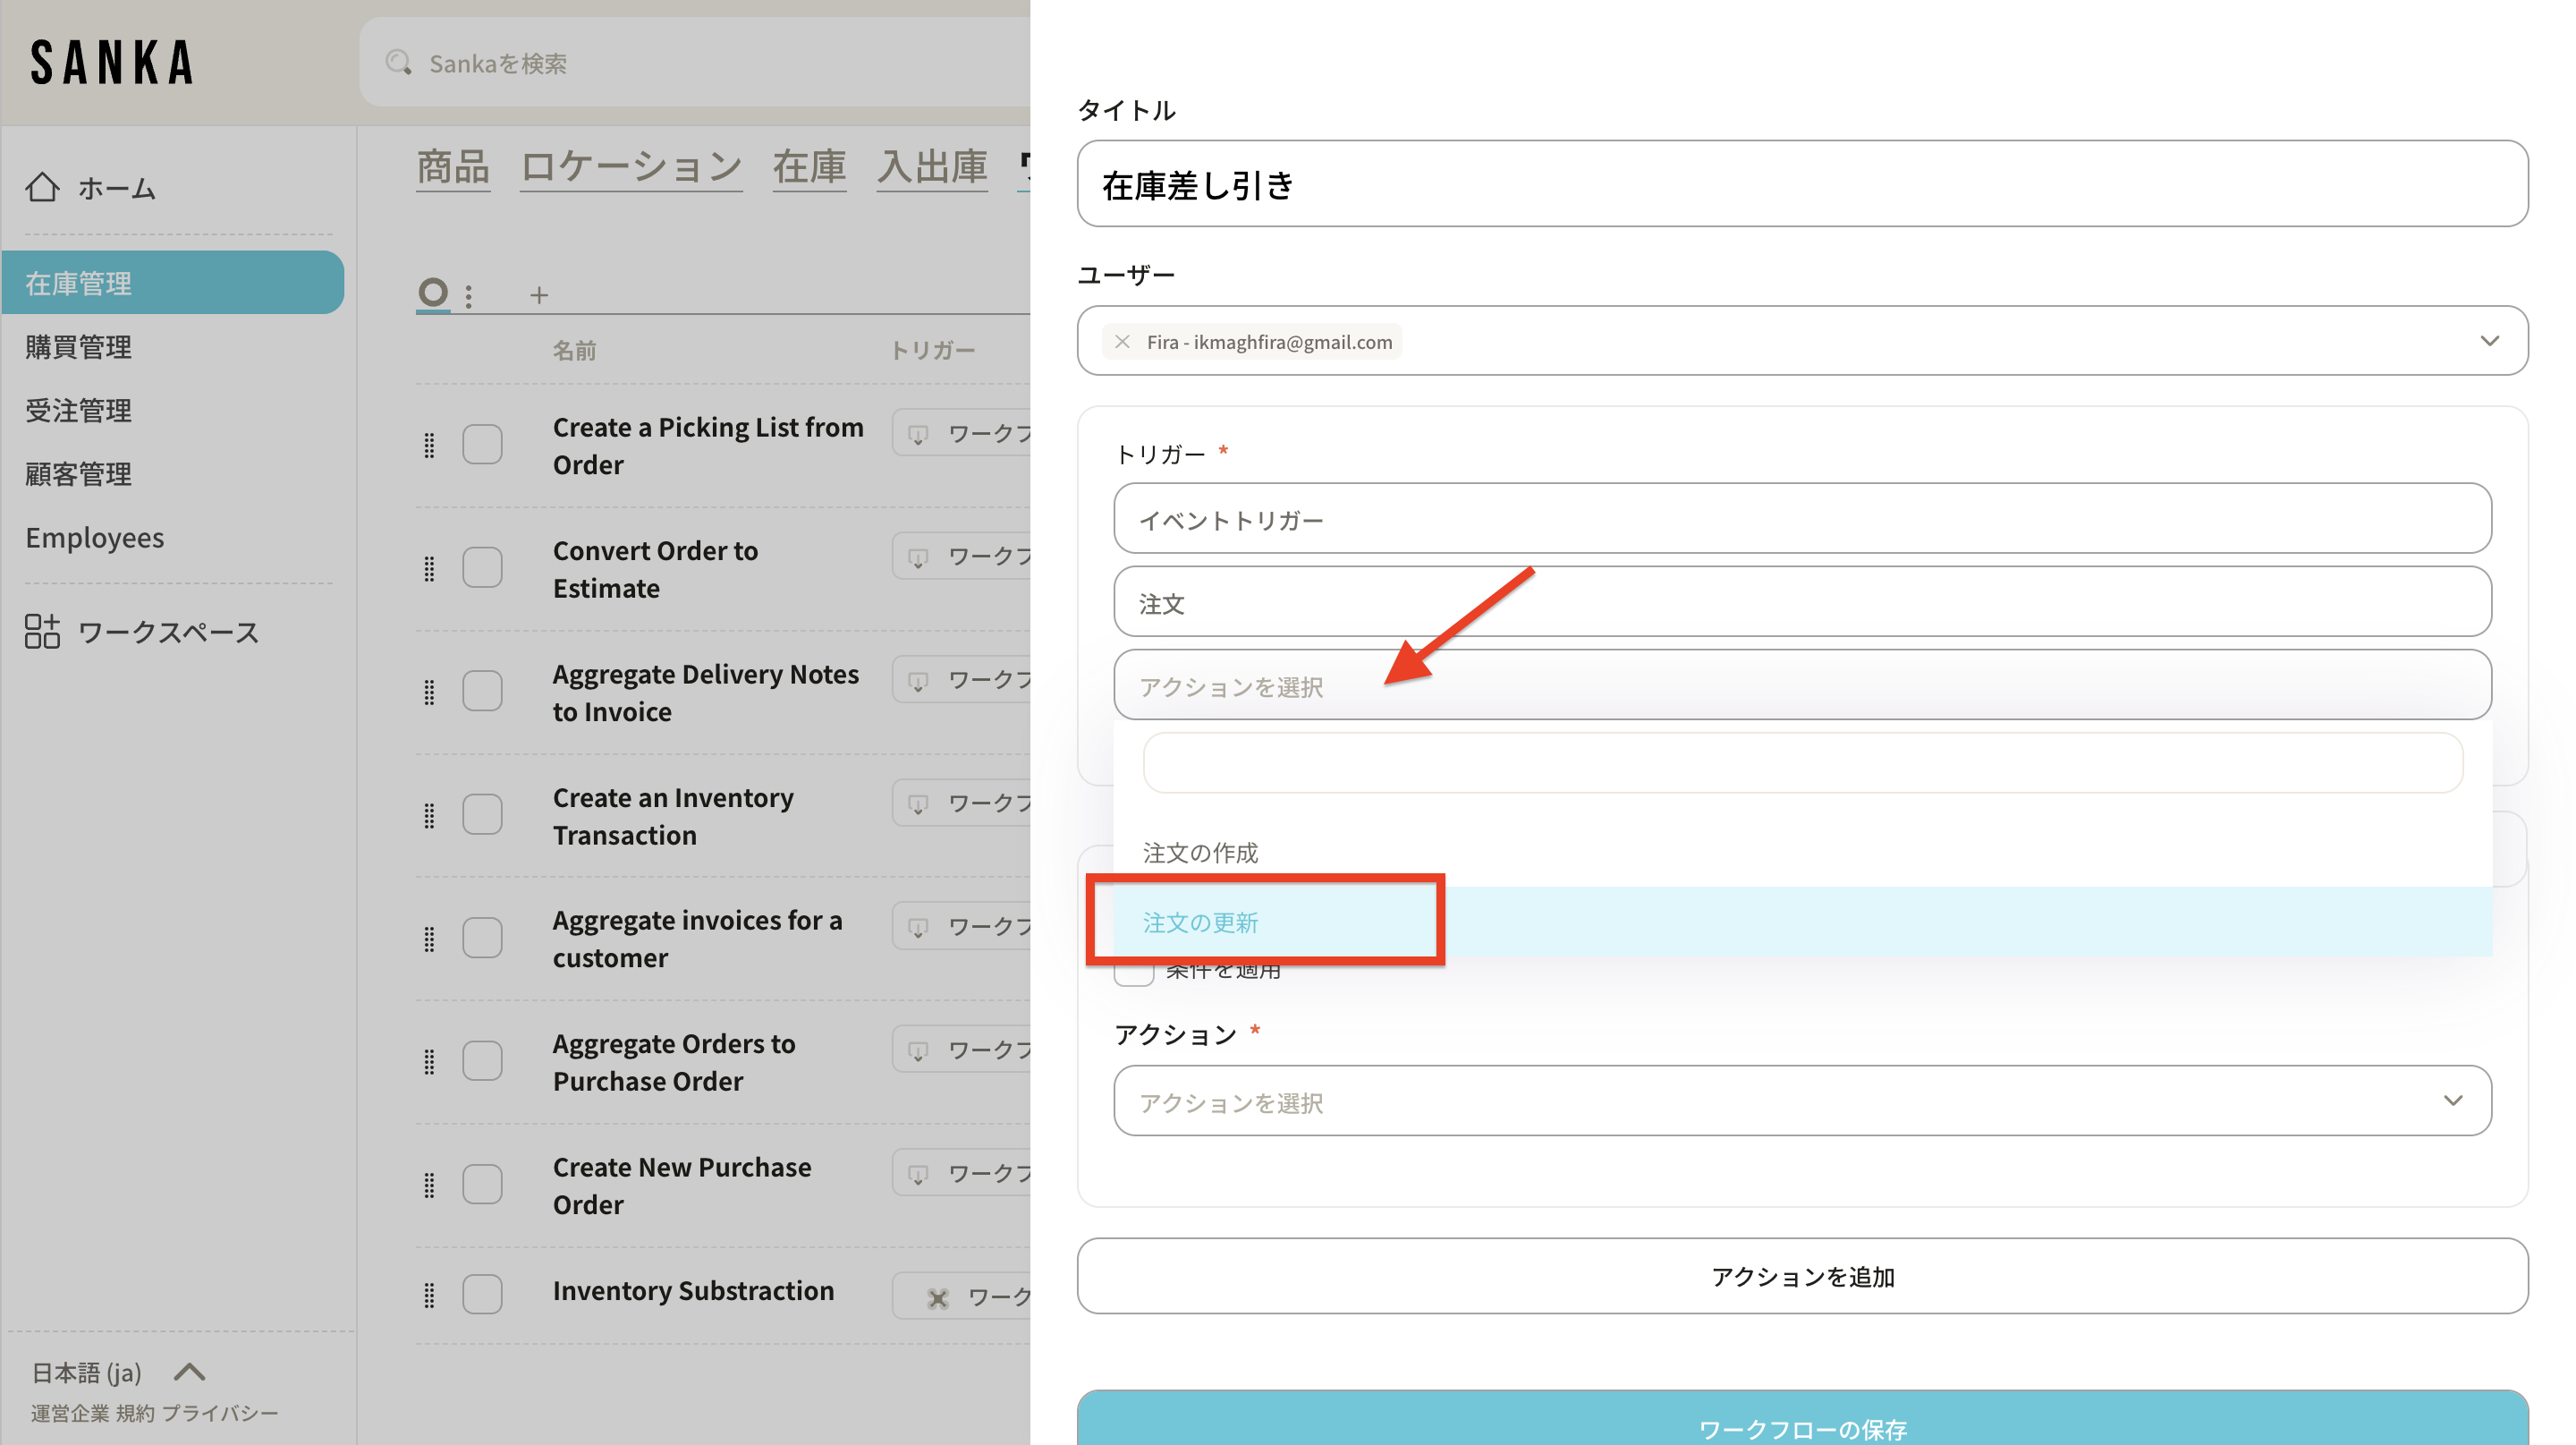
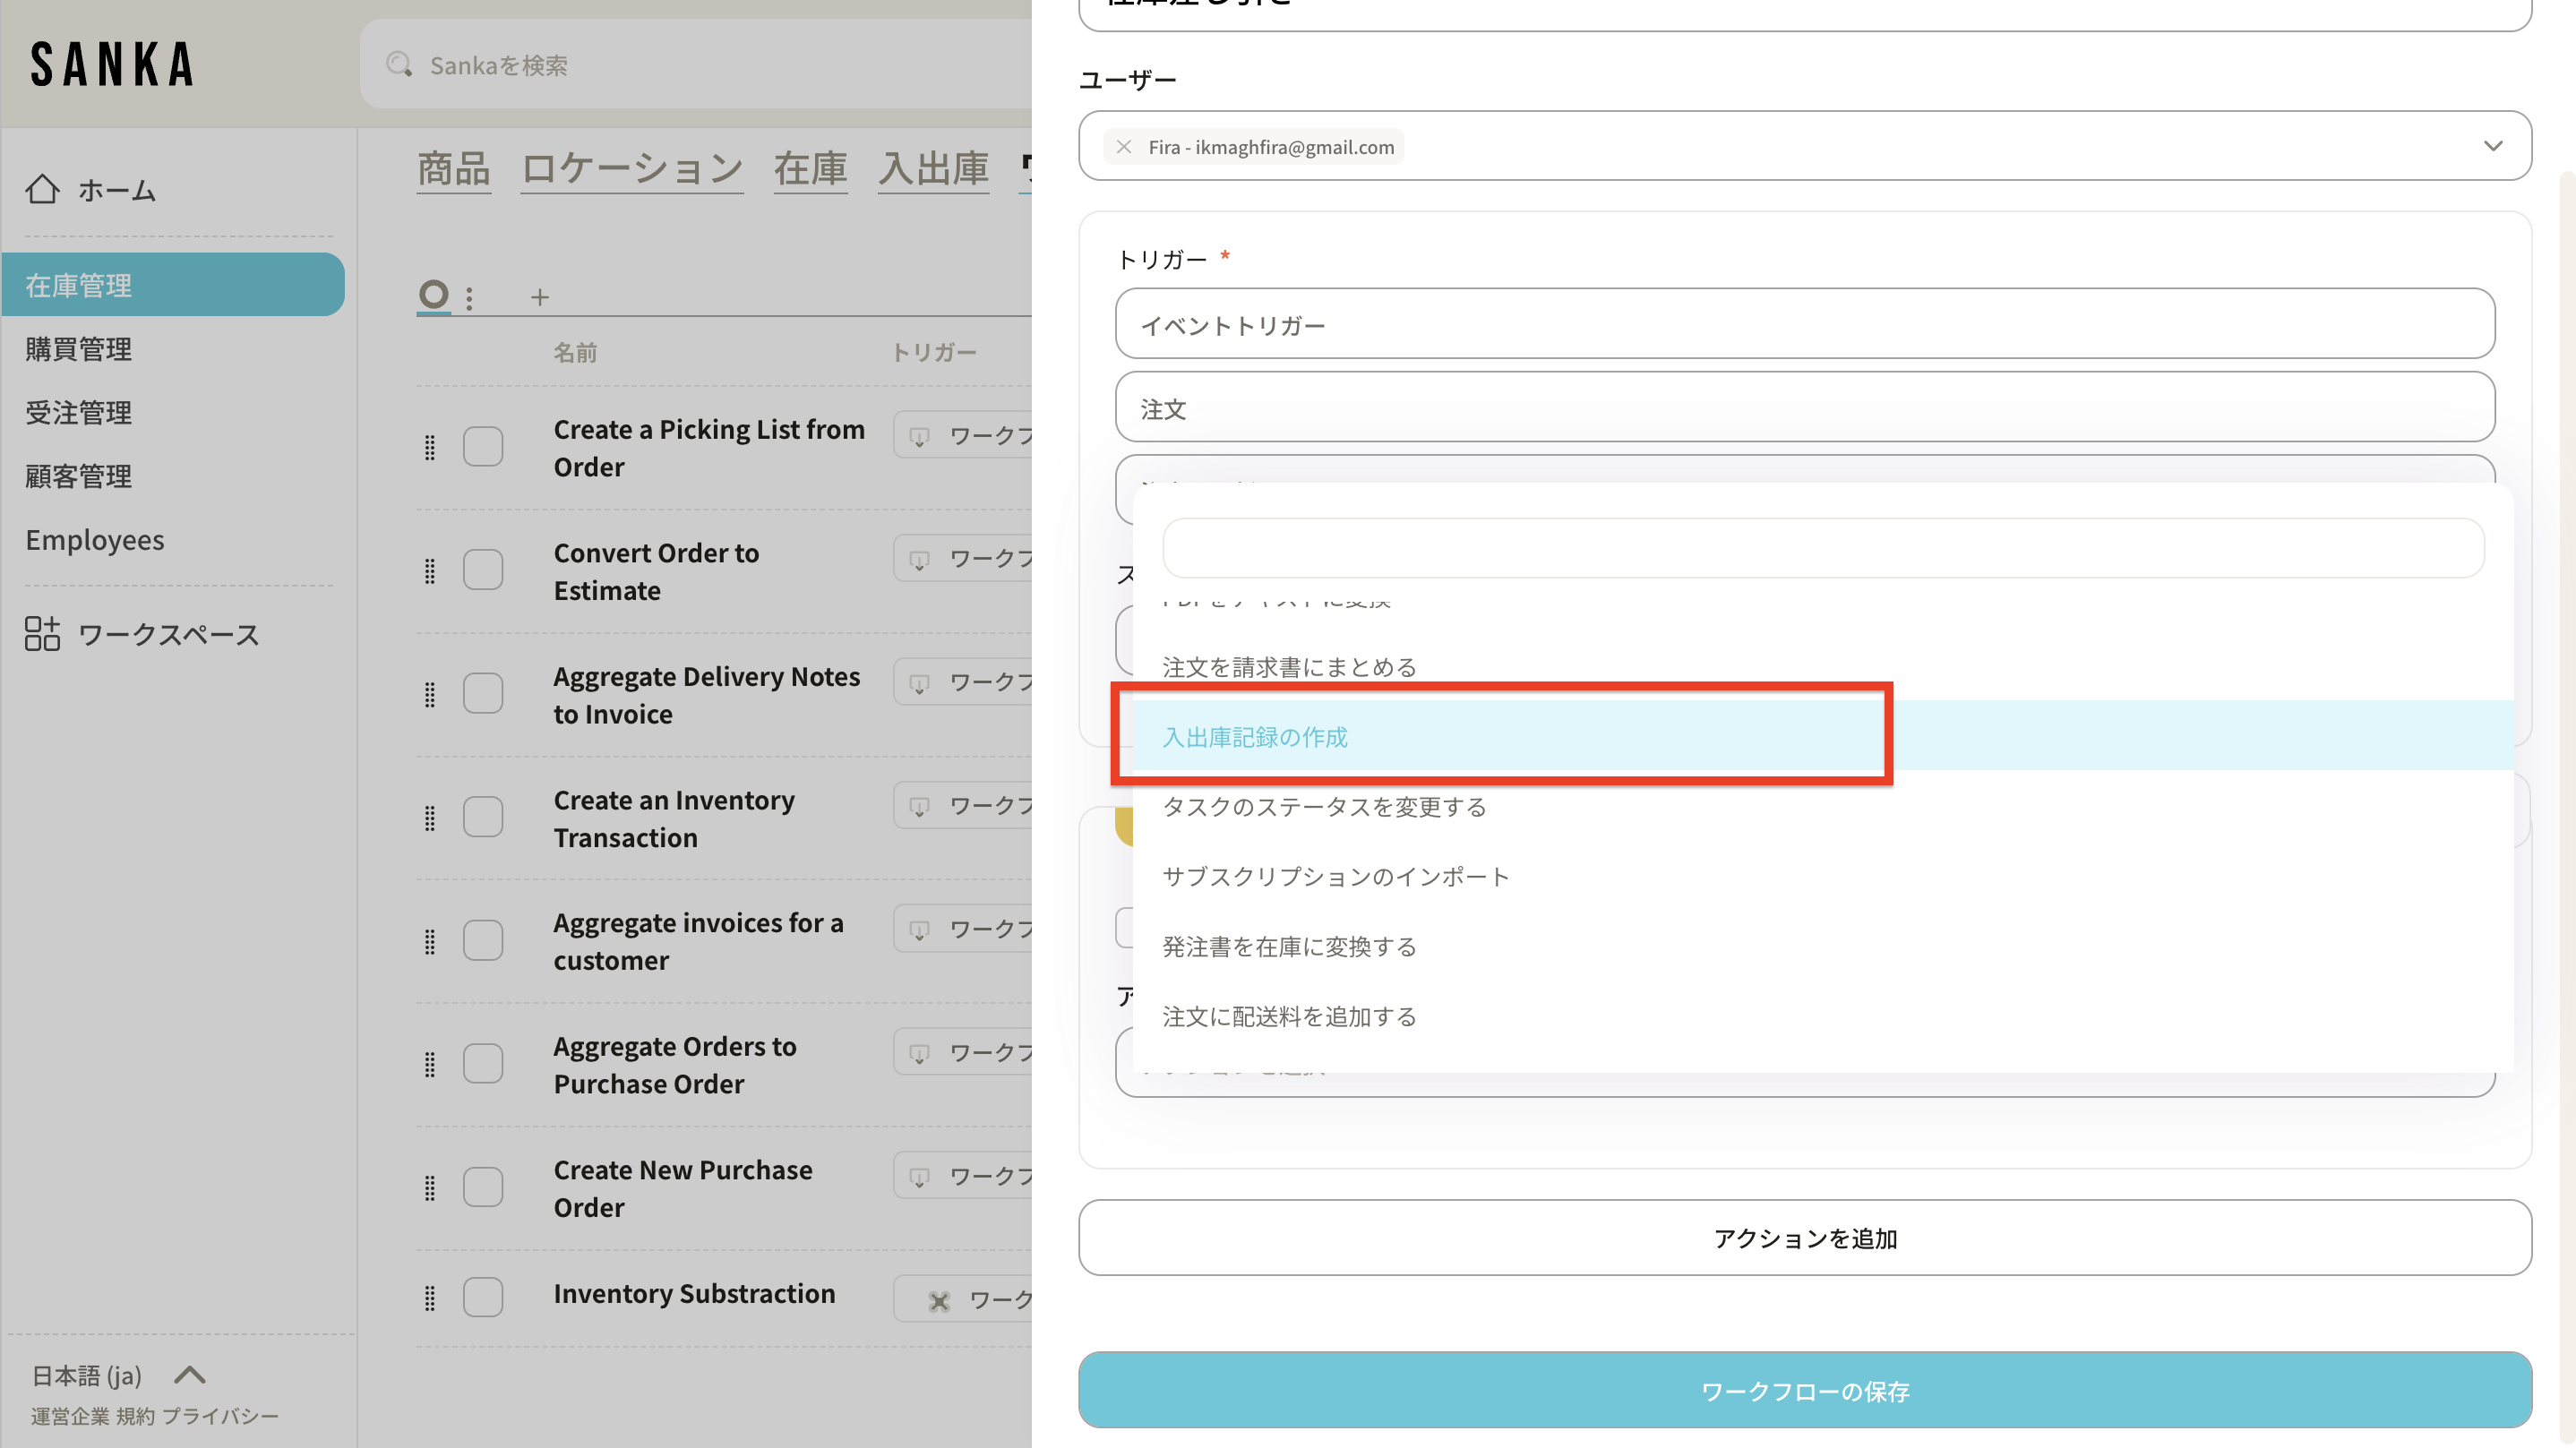
7: After setting the conditions, select the action to be performed based on the event. Choose "Create object record" and "Inbound/Outbound".
8: Enable the option to use data from the previous action.
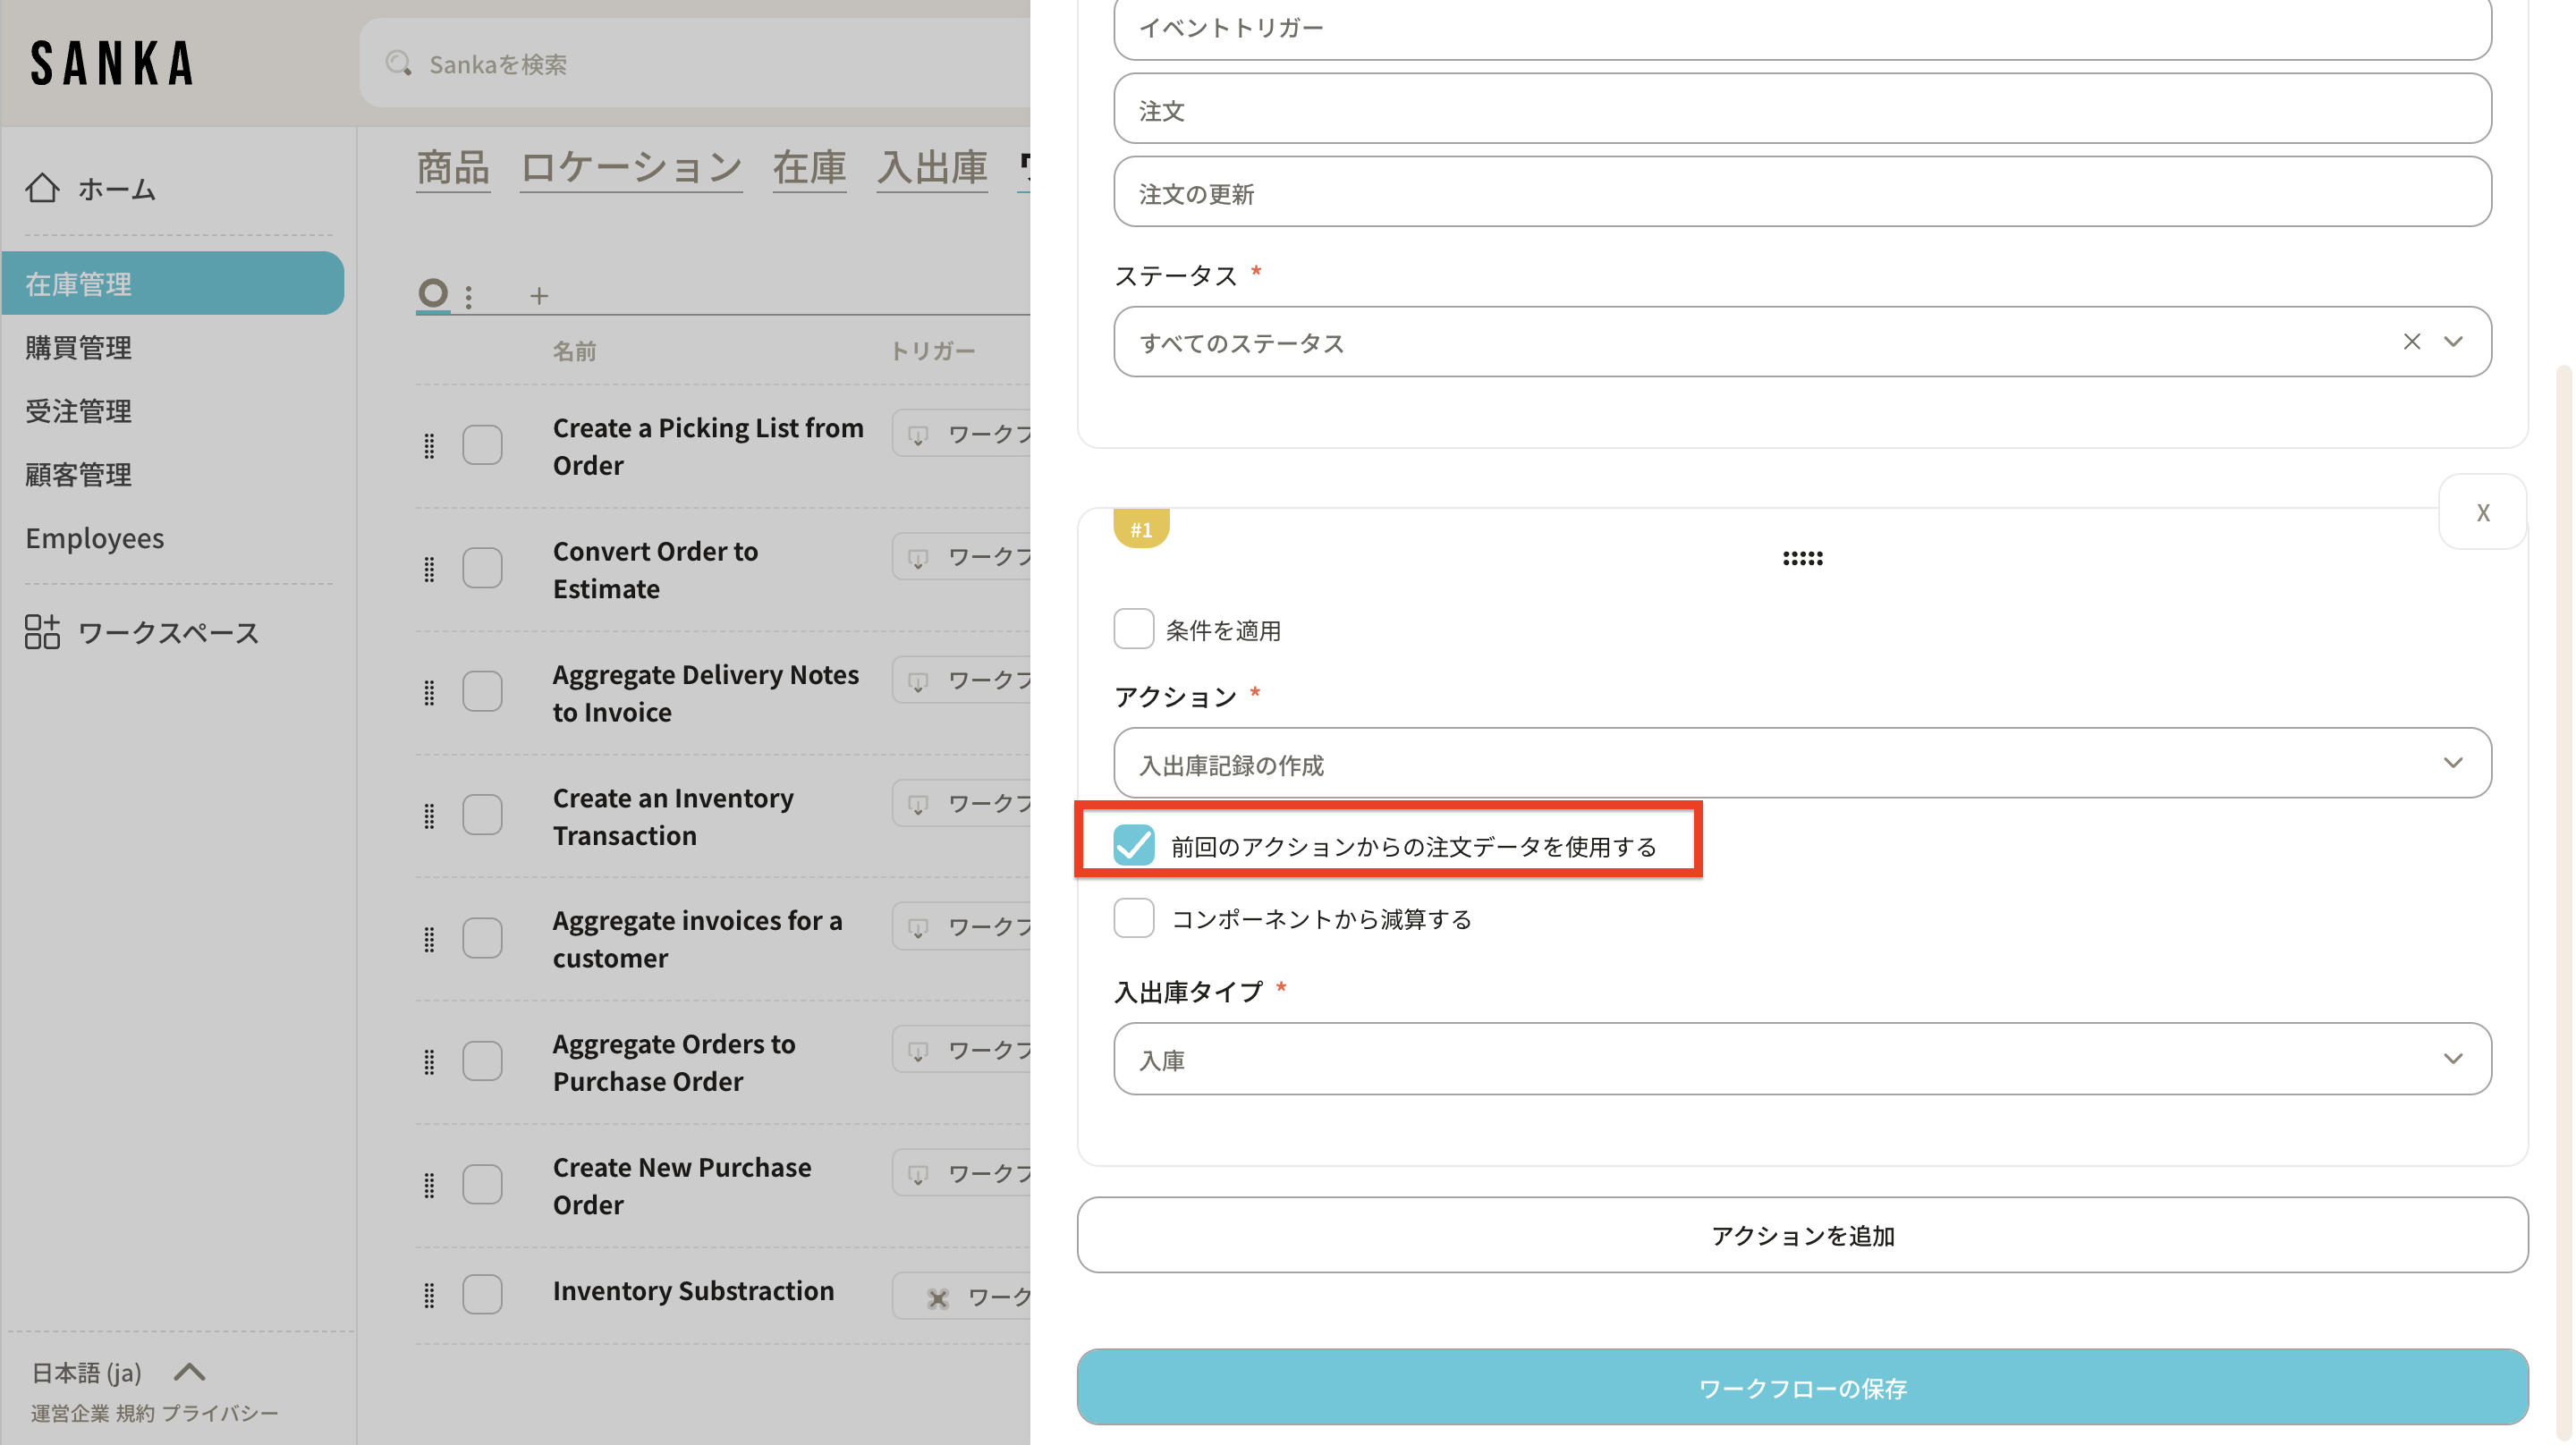
9: Select "Shipment" as the transaction type.

10: Save the workflow.
11: Navigate to the workflow you have created and click "Activate Workflow."
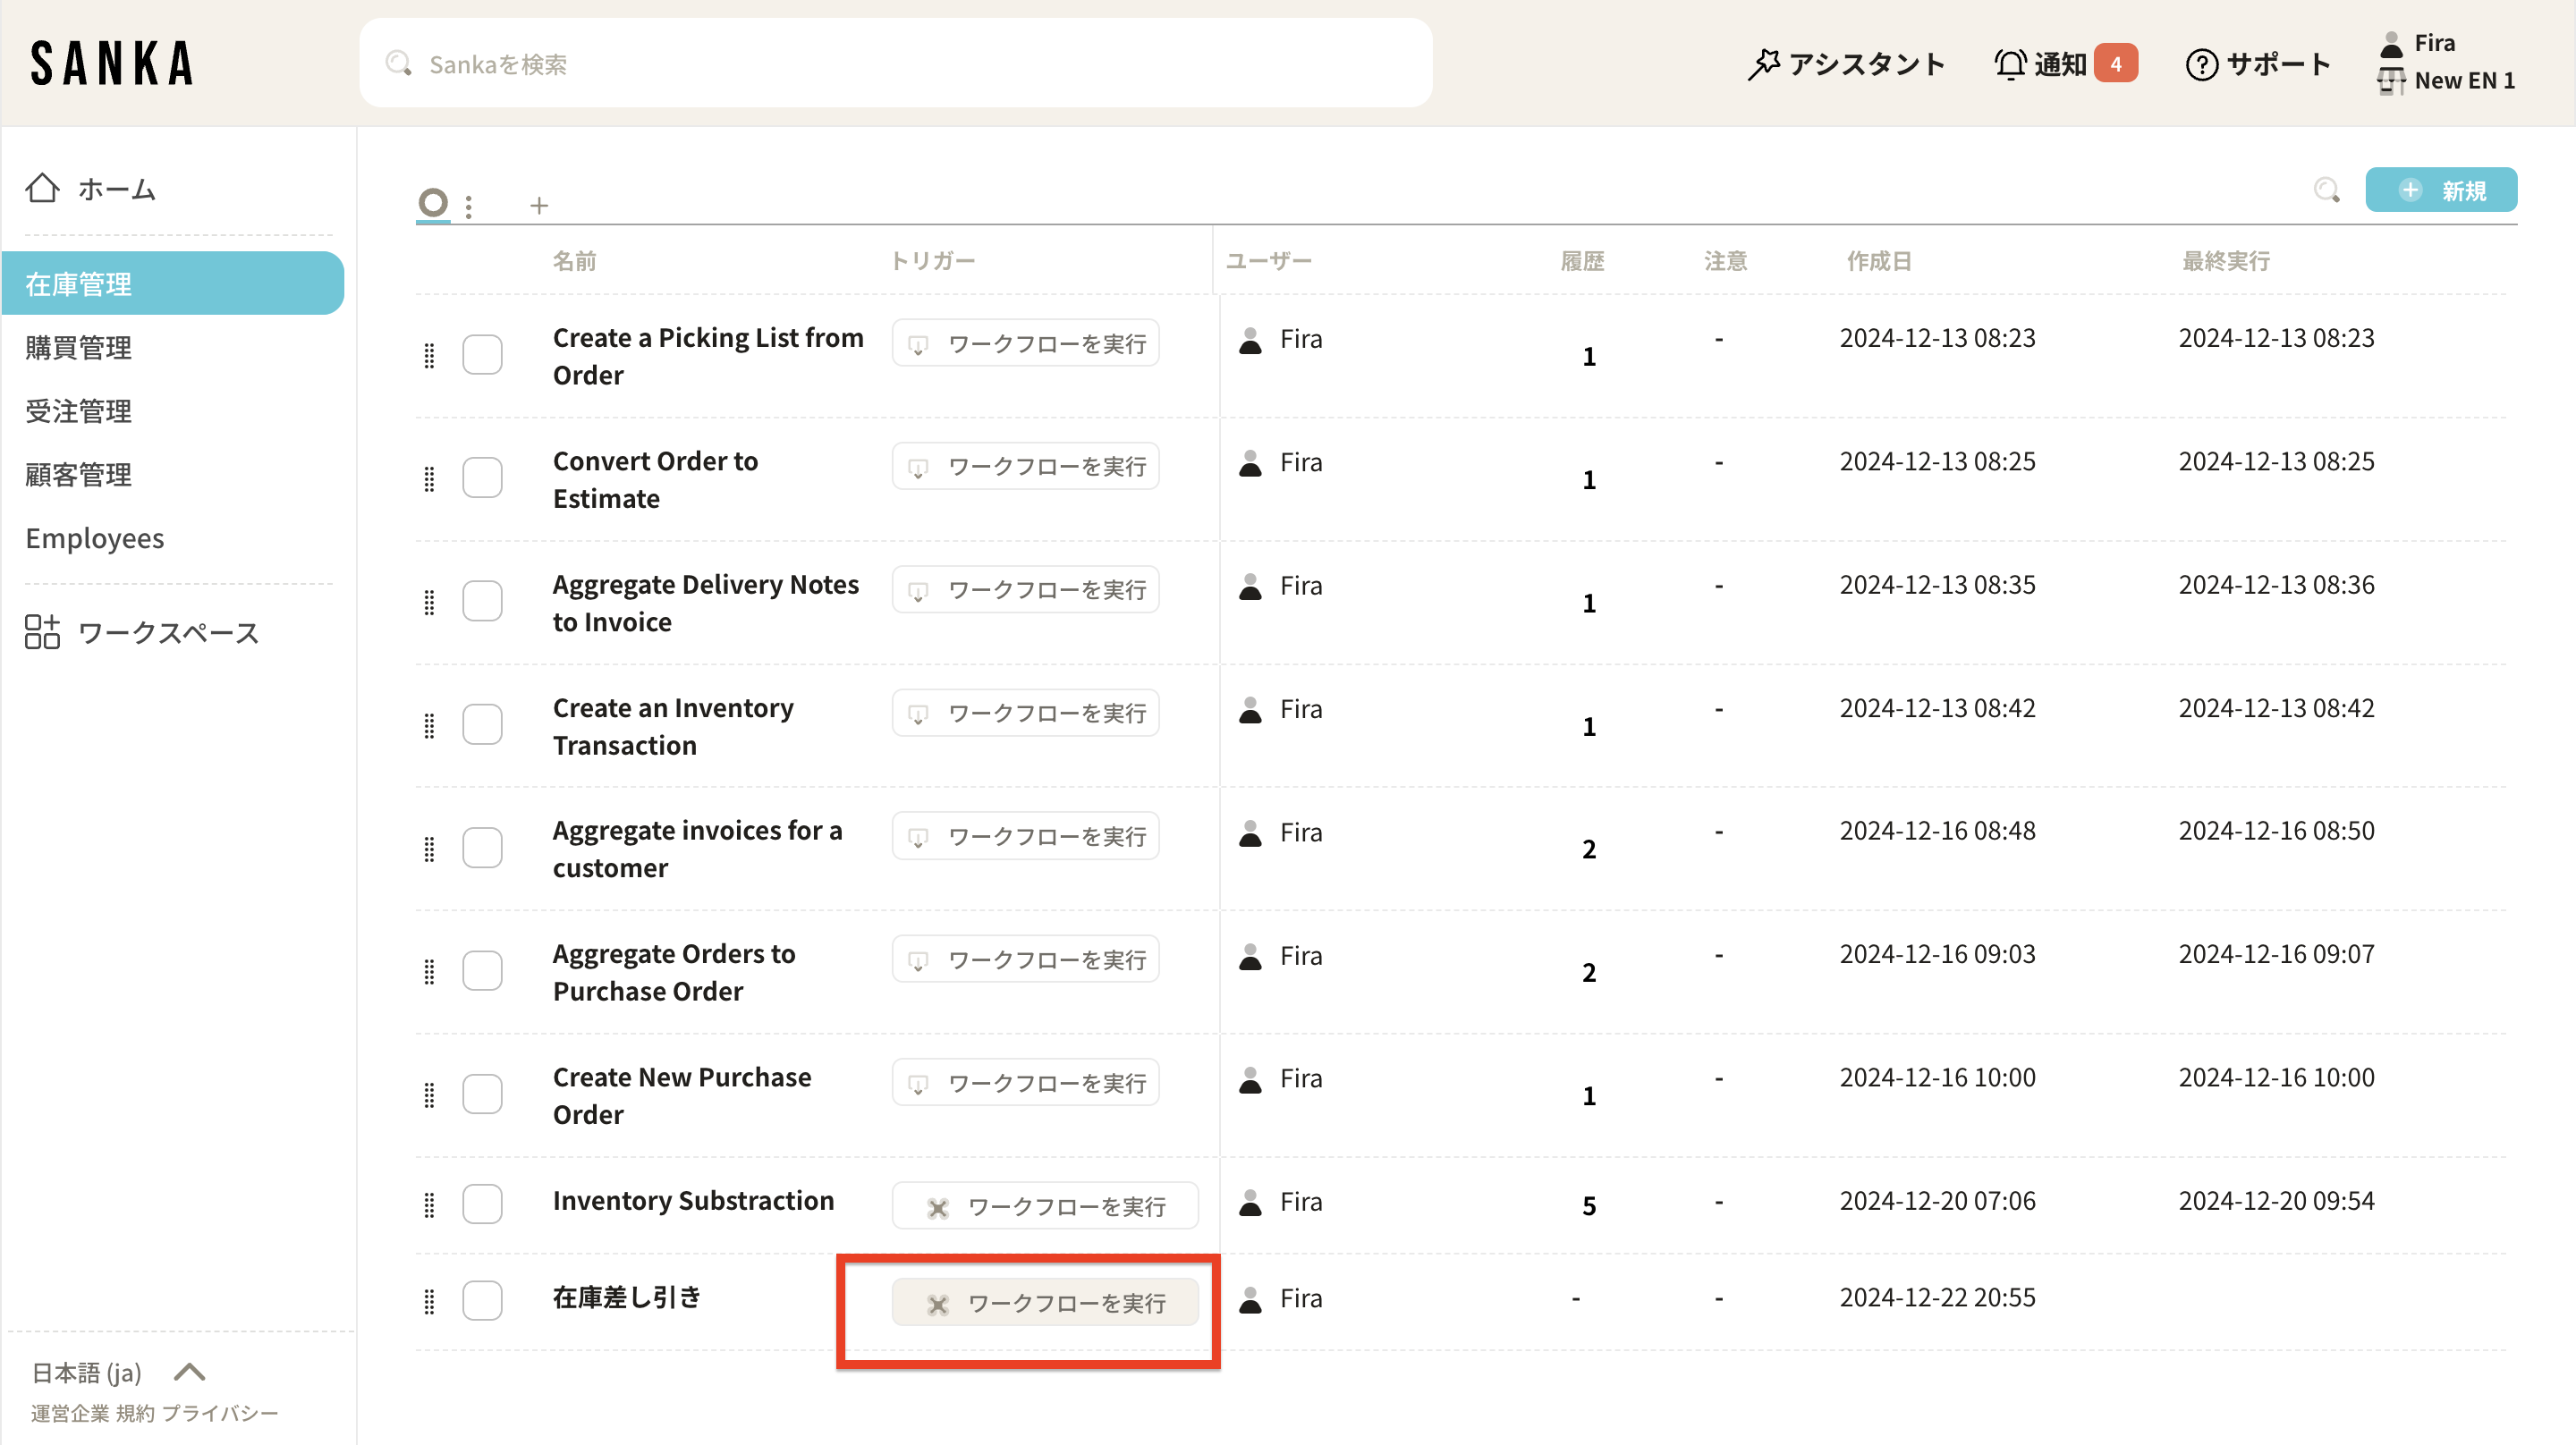
12: The workflow is now enabled.

After configuring the workflow, please follow the steps below to execute actions and track inventory transactions.
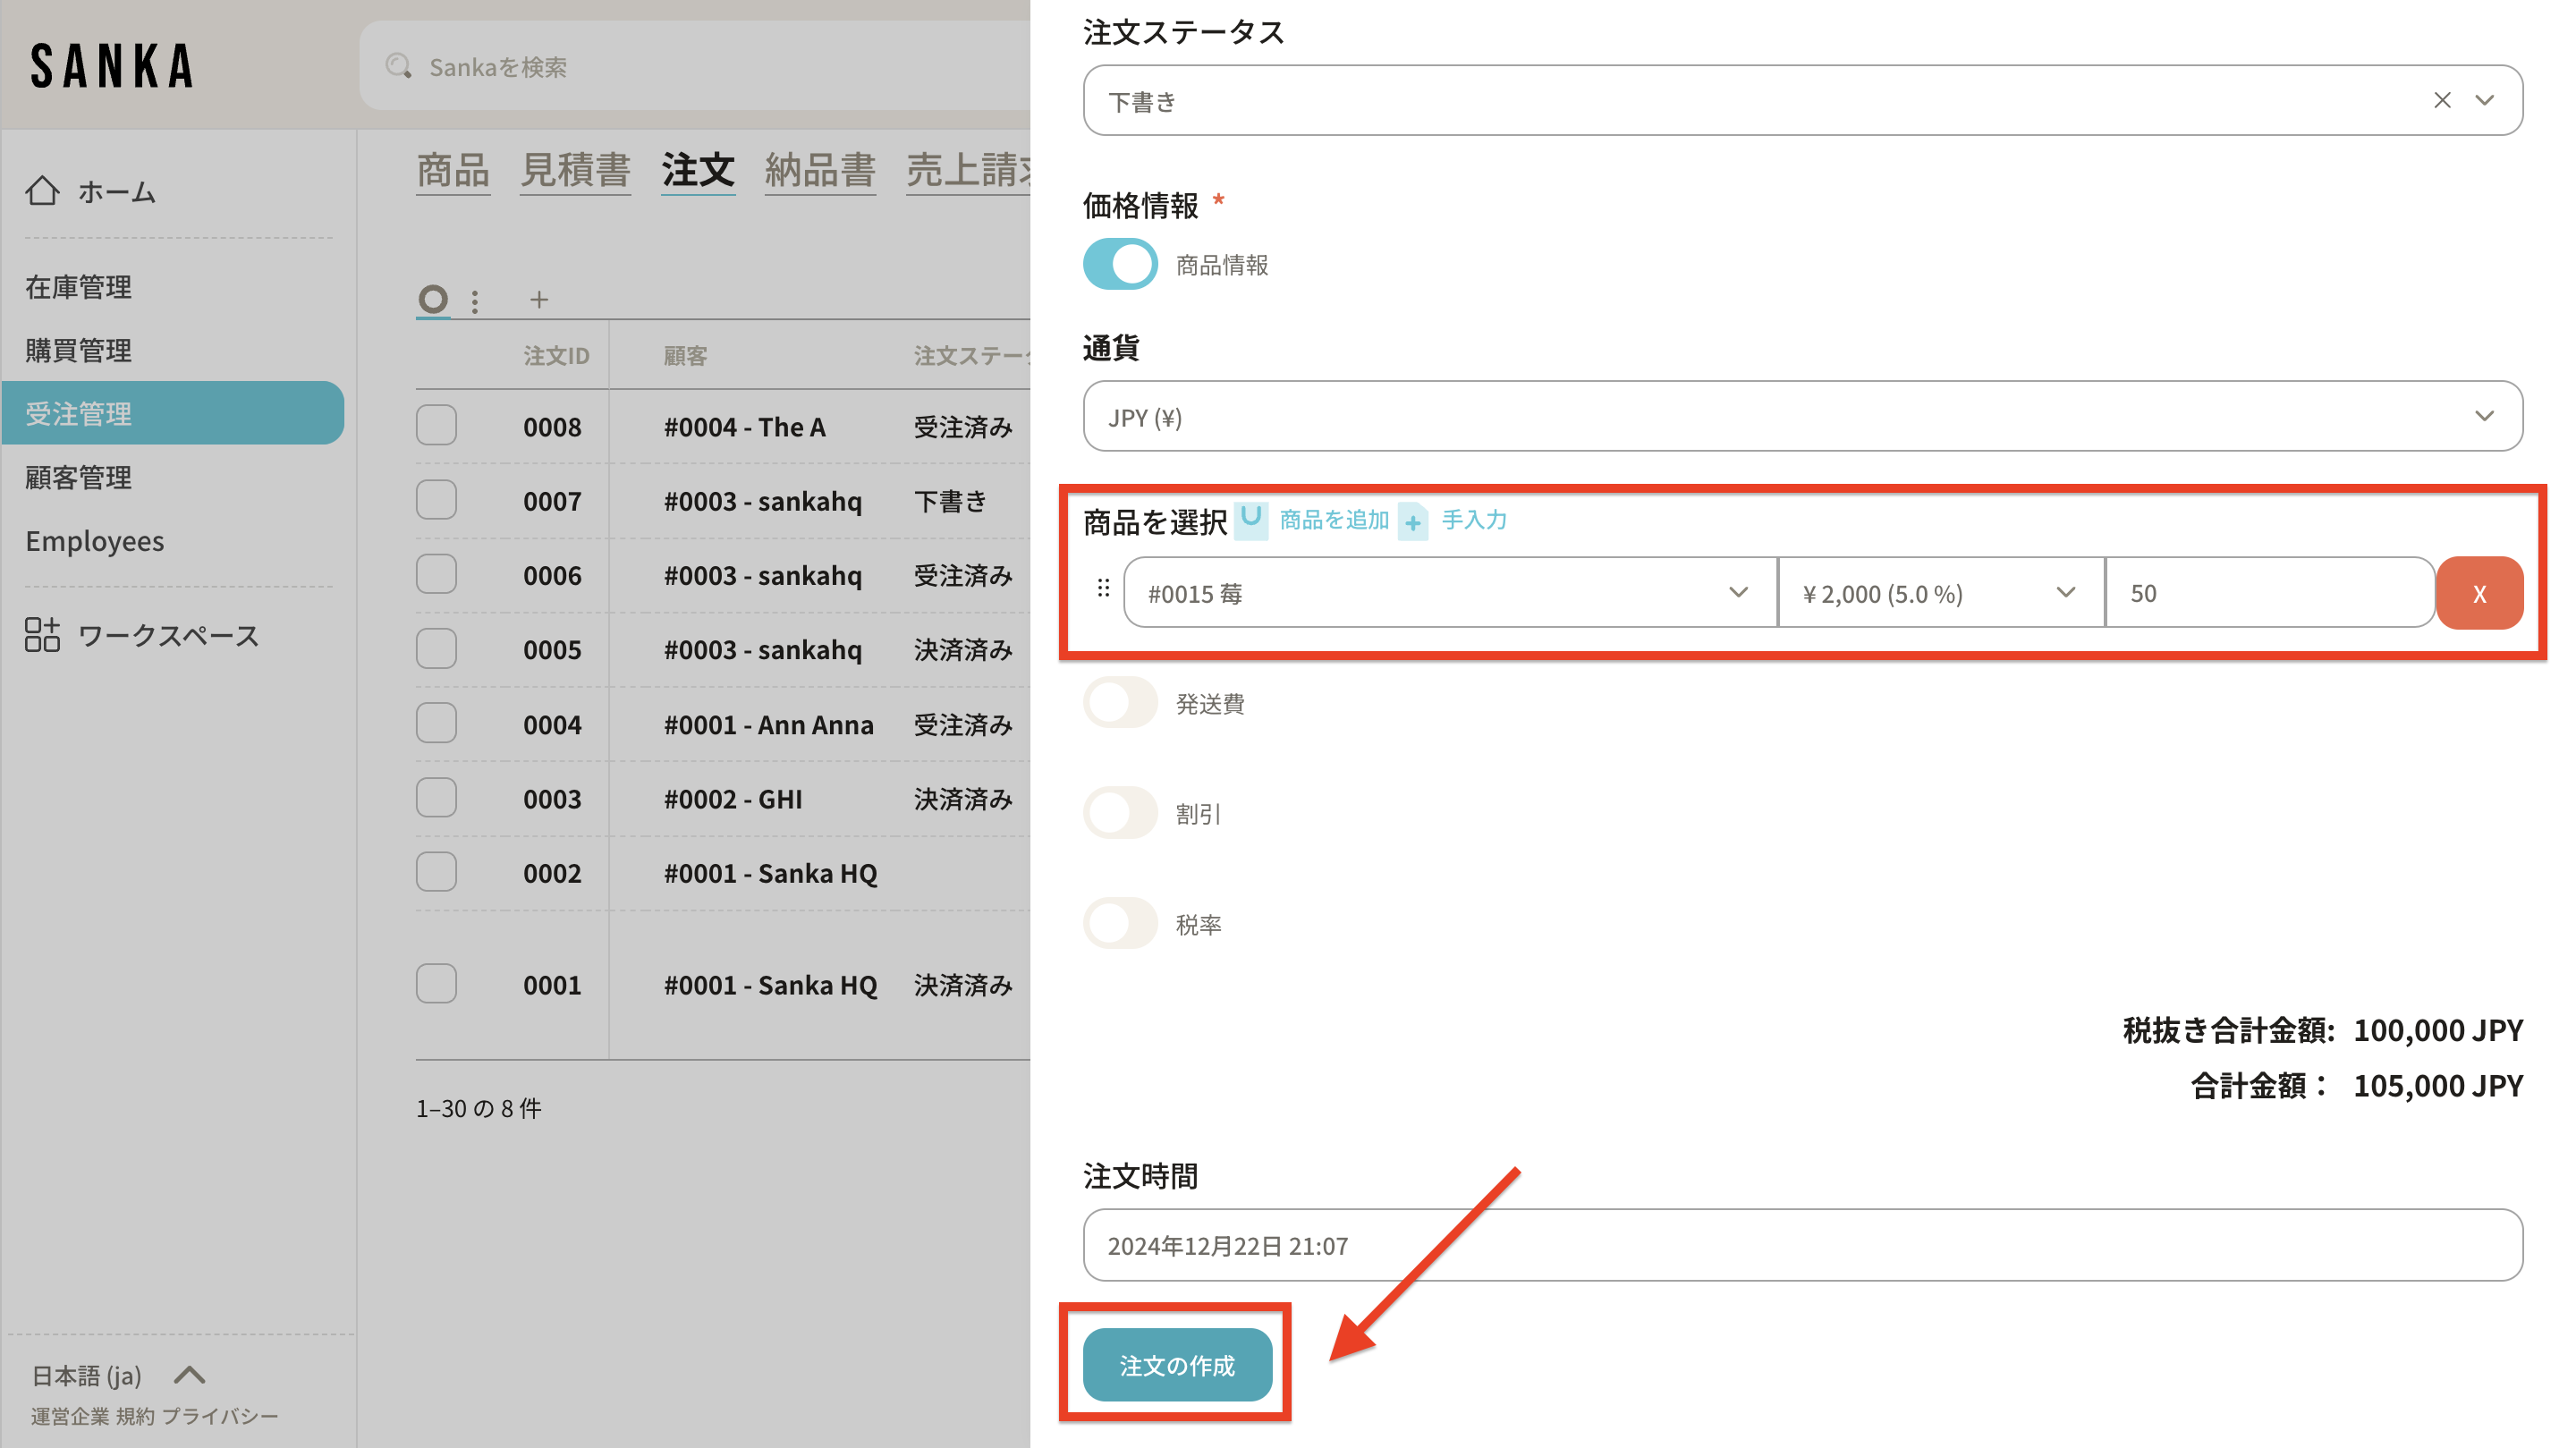
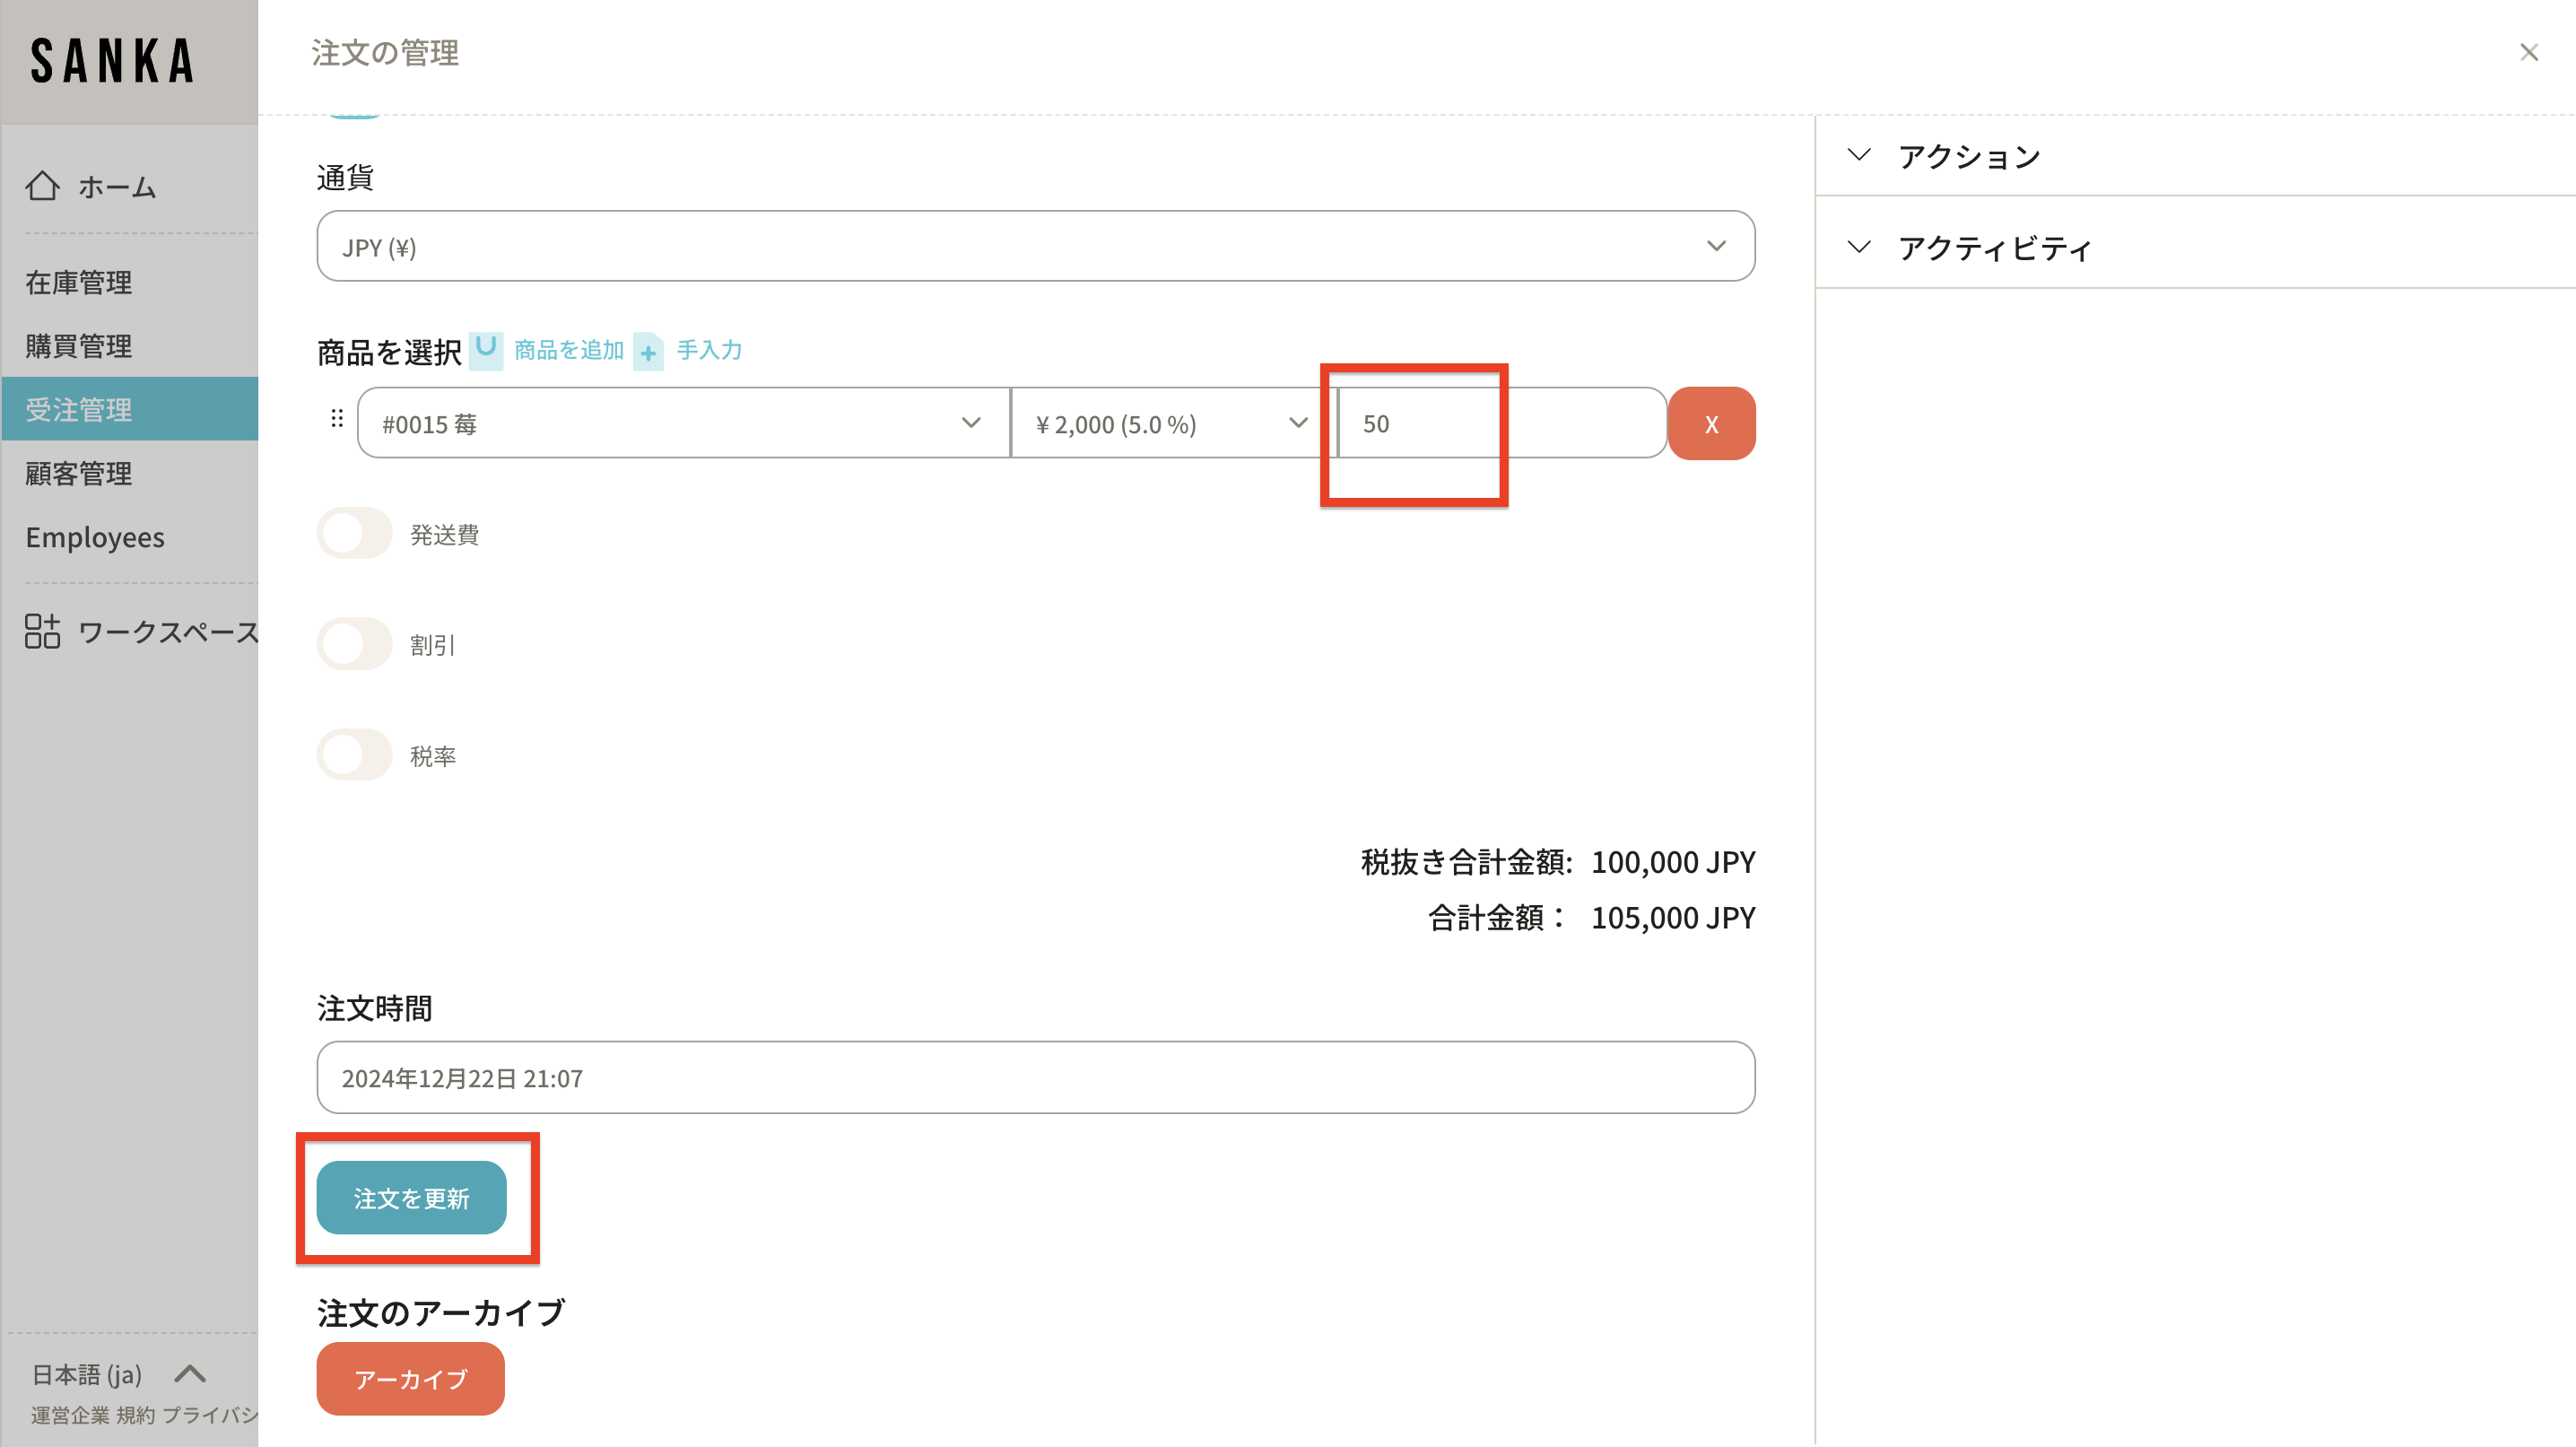
13: Navigate to "Orders" and create a new order.
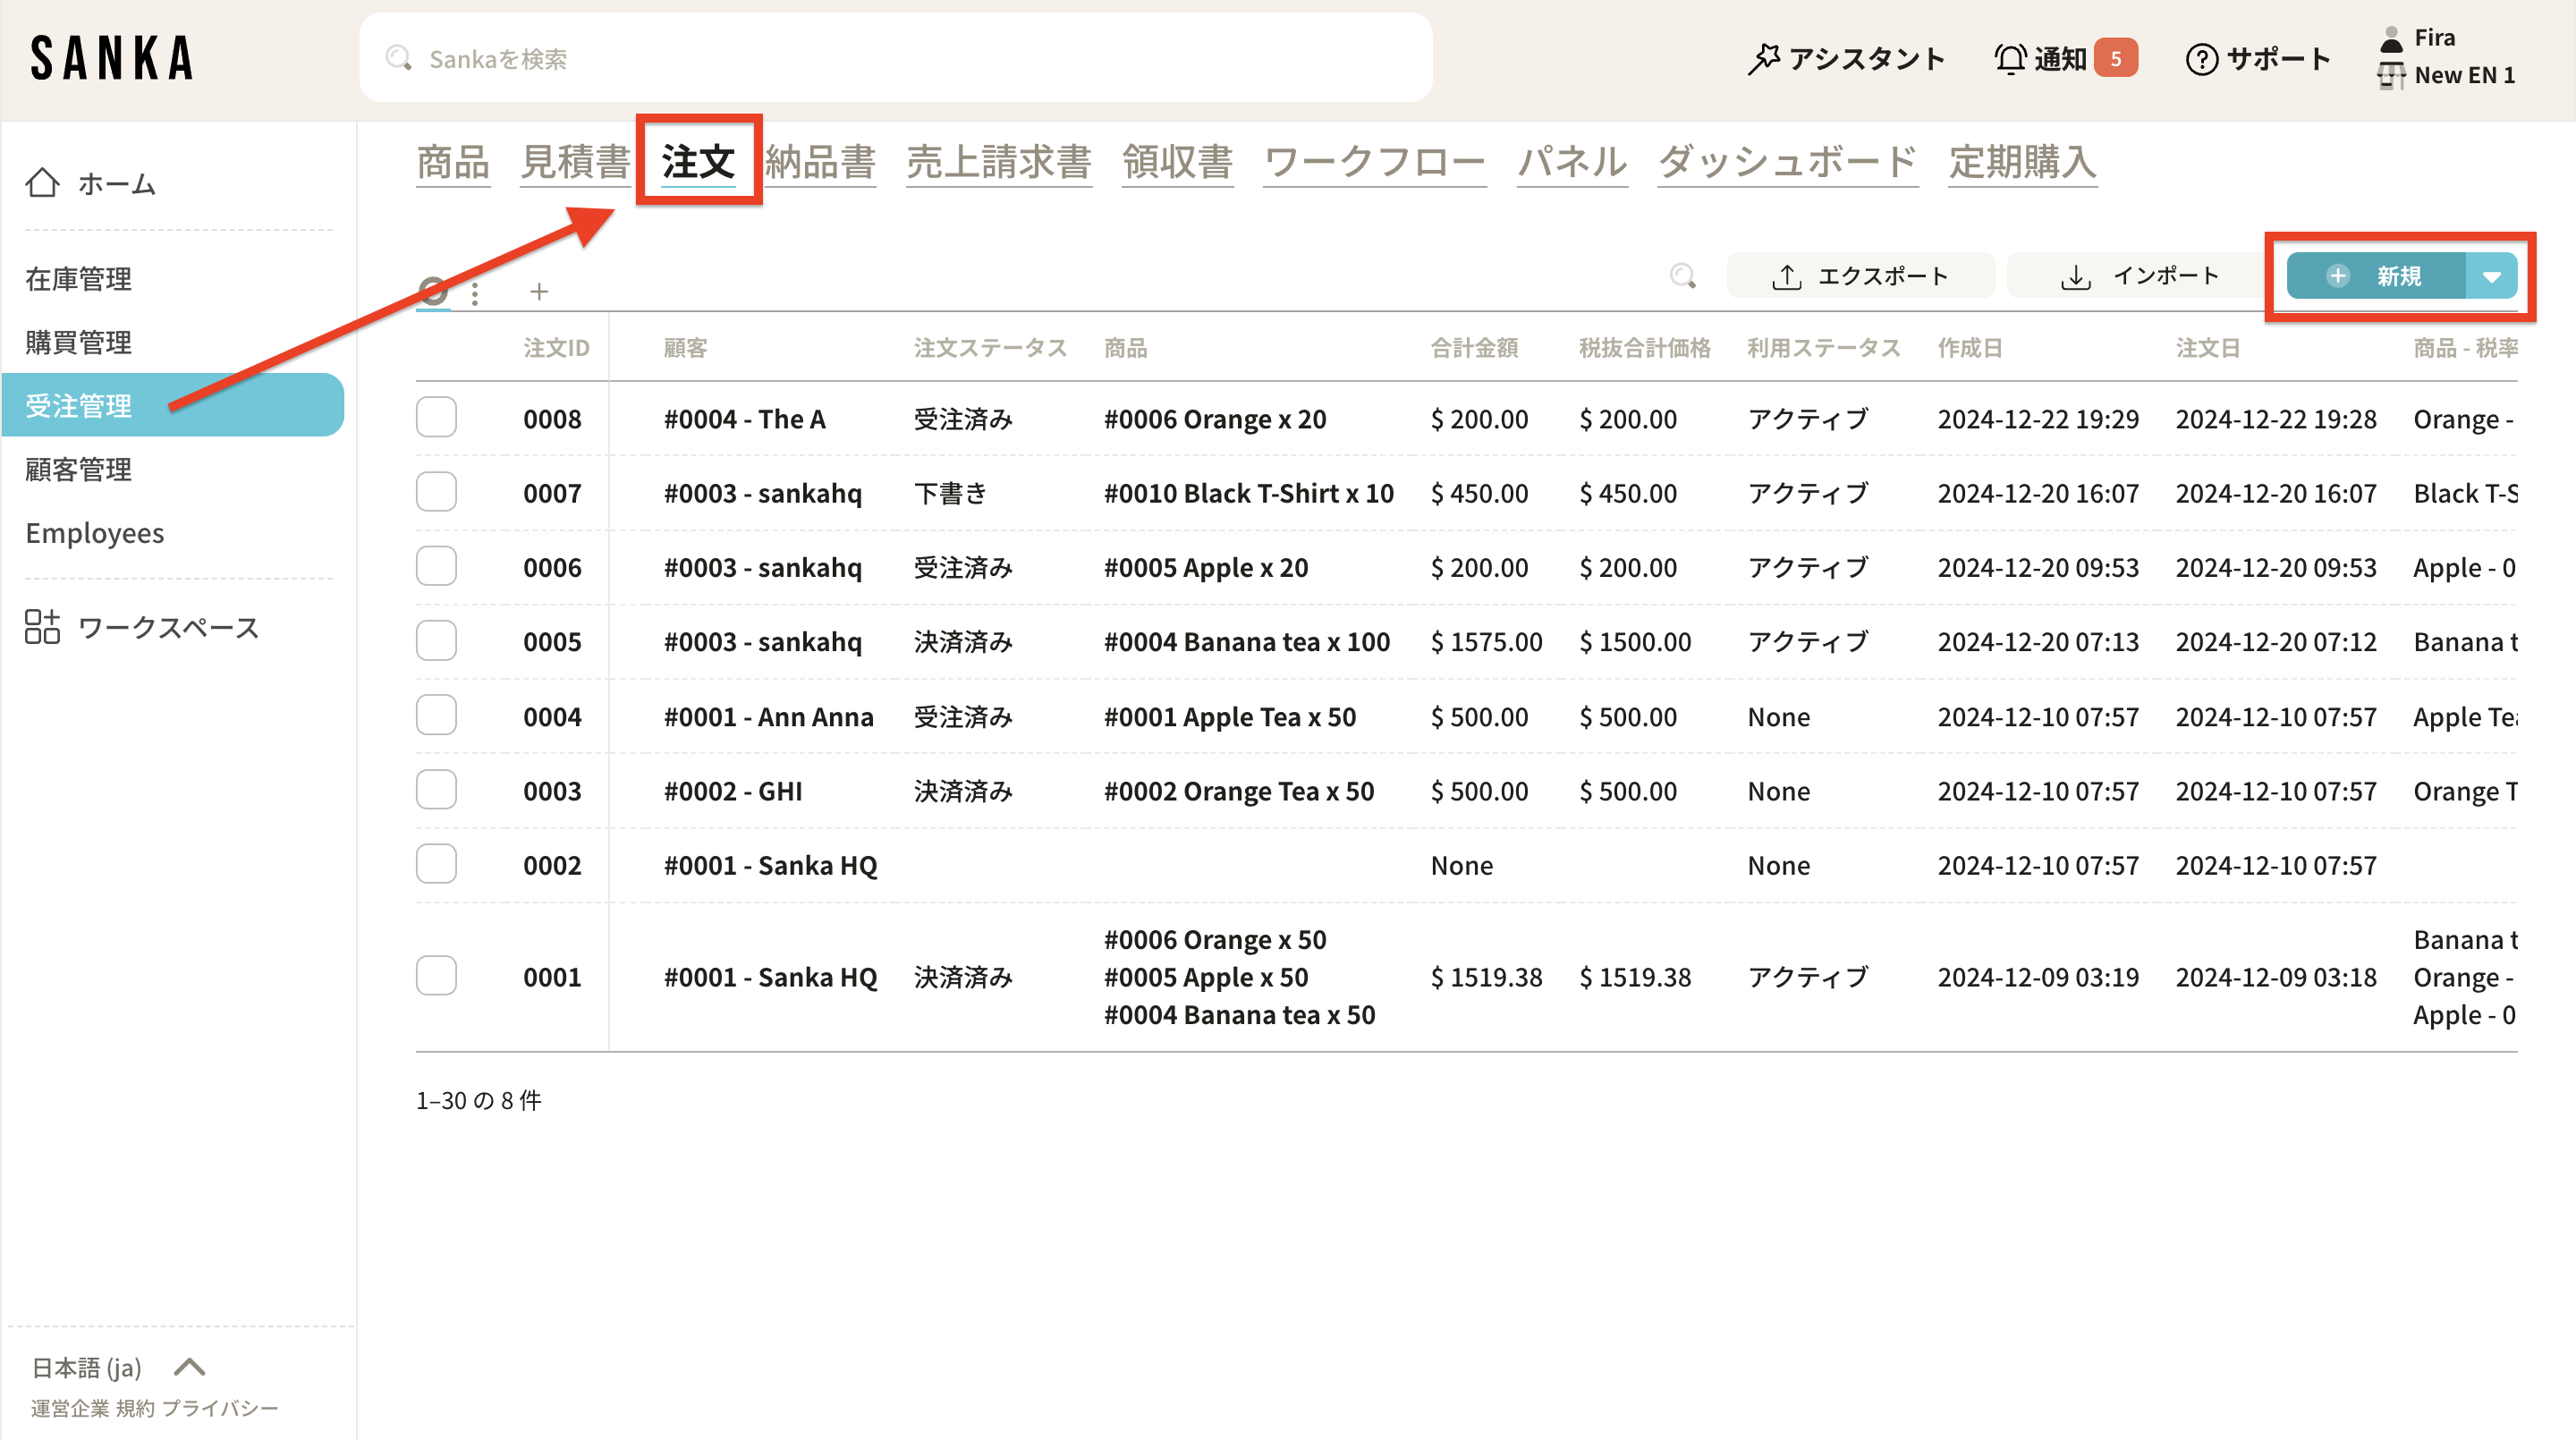
14: Select the product, enter the quantity, and click "Create Order".
15: After creating a new order, change the order status to trigger the action.
16: You may also change the quantity as required. Then, click "Update Order".
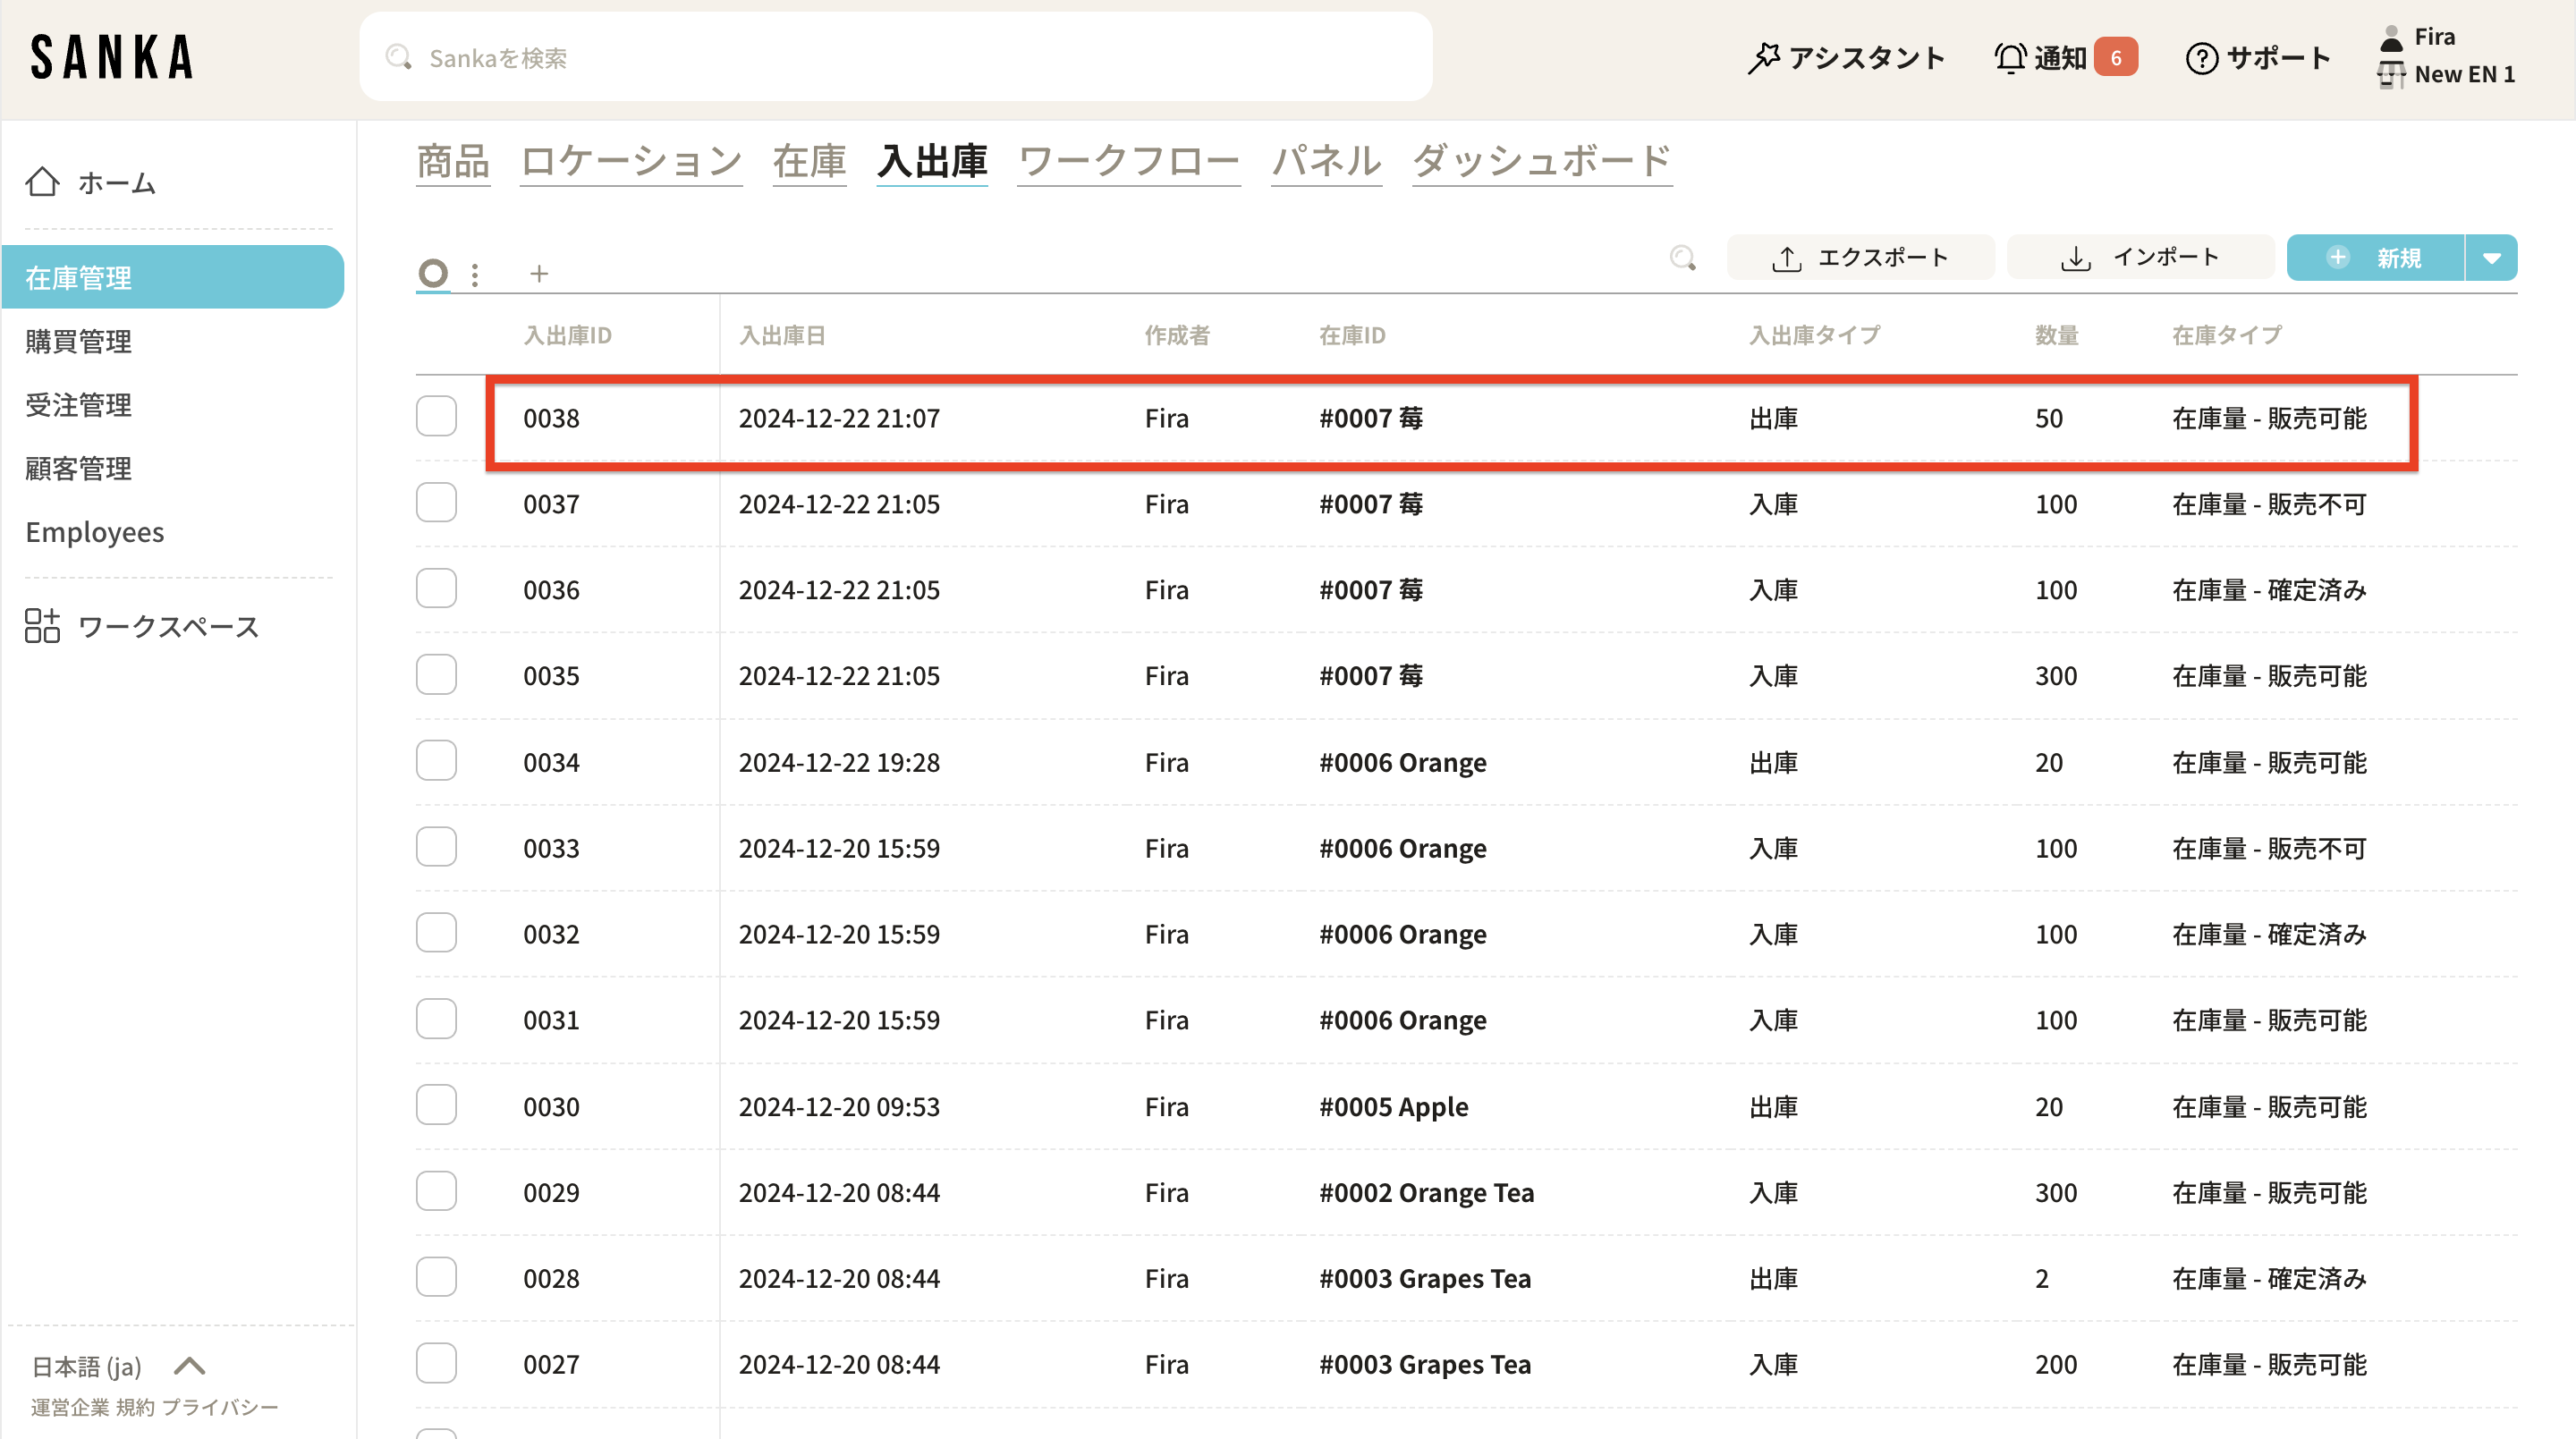
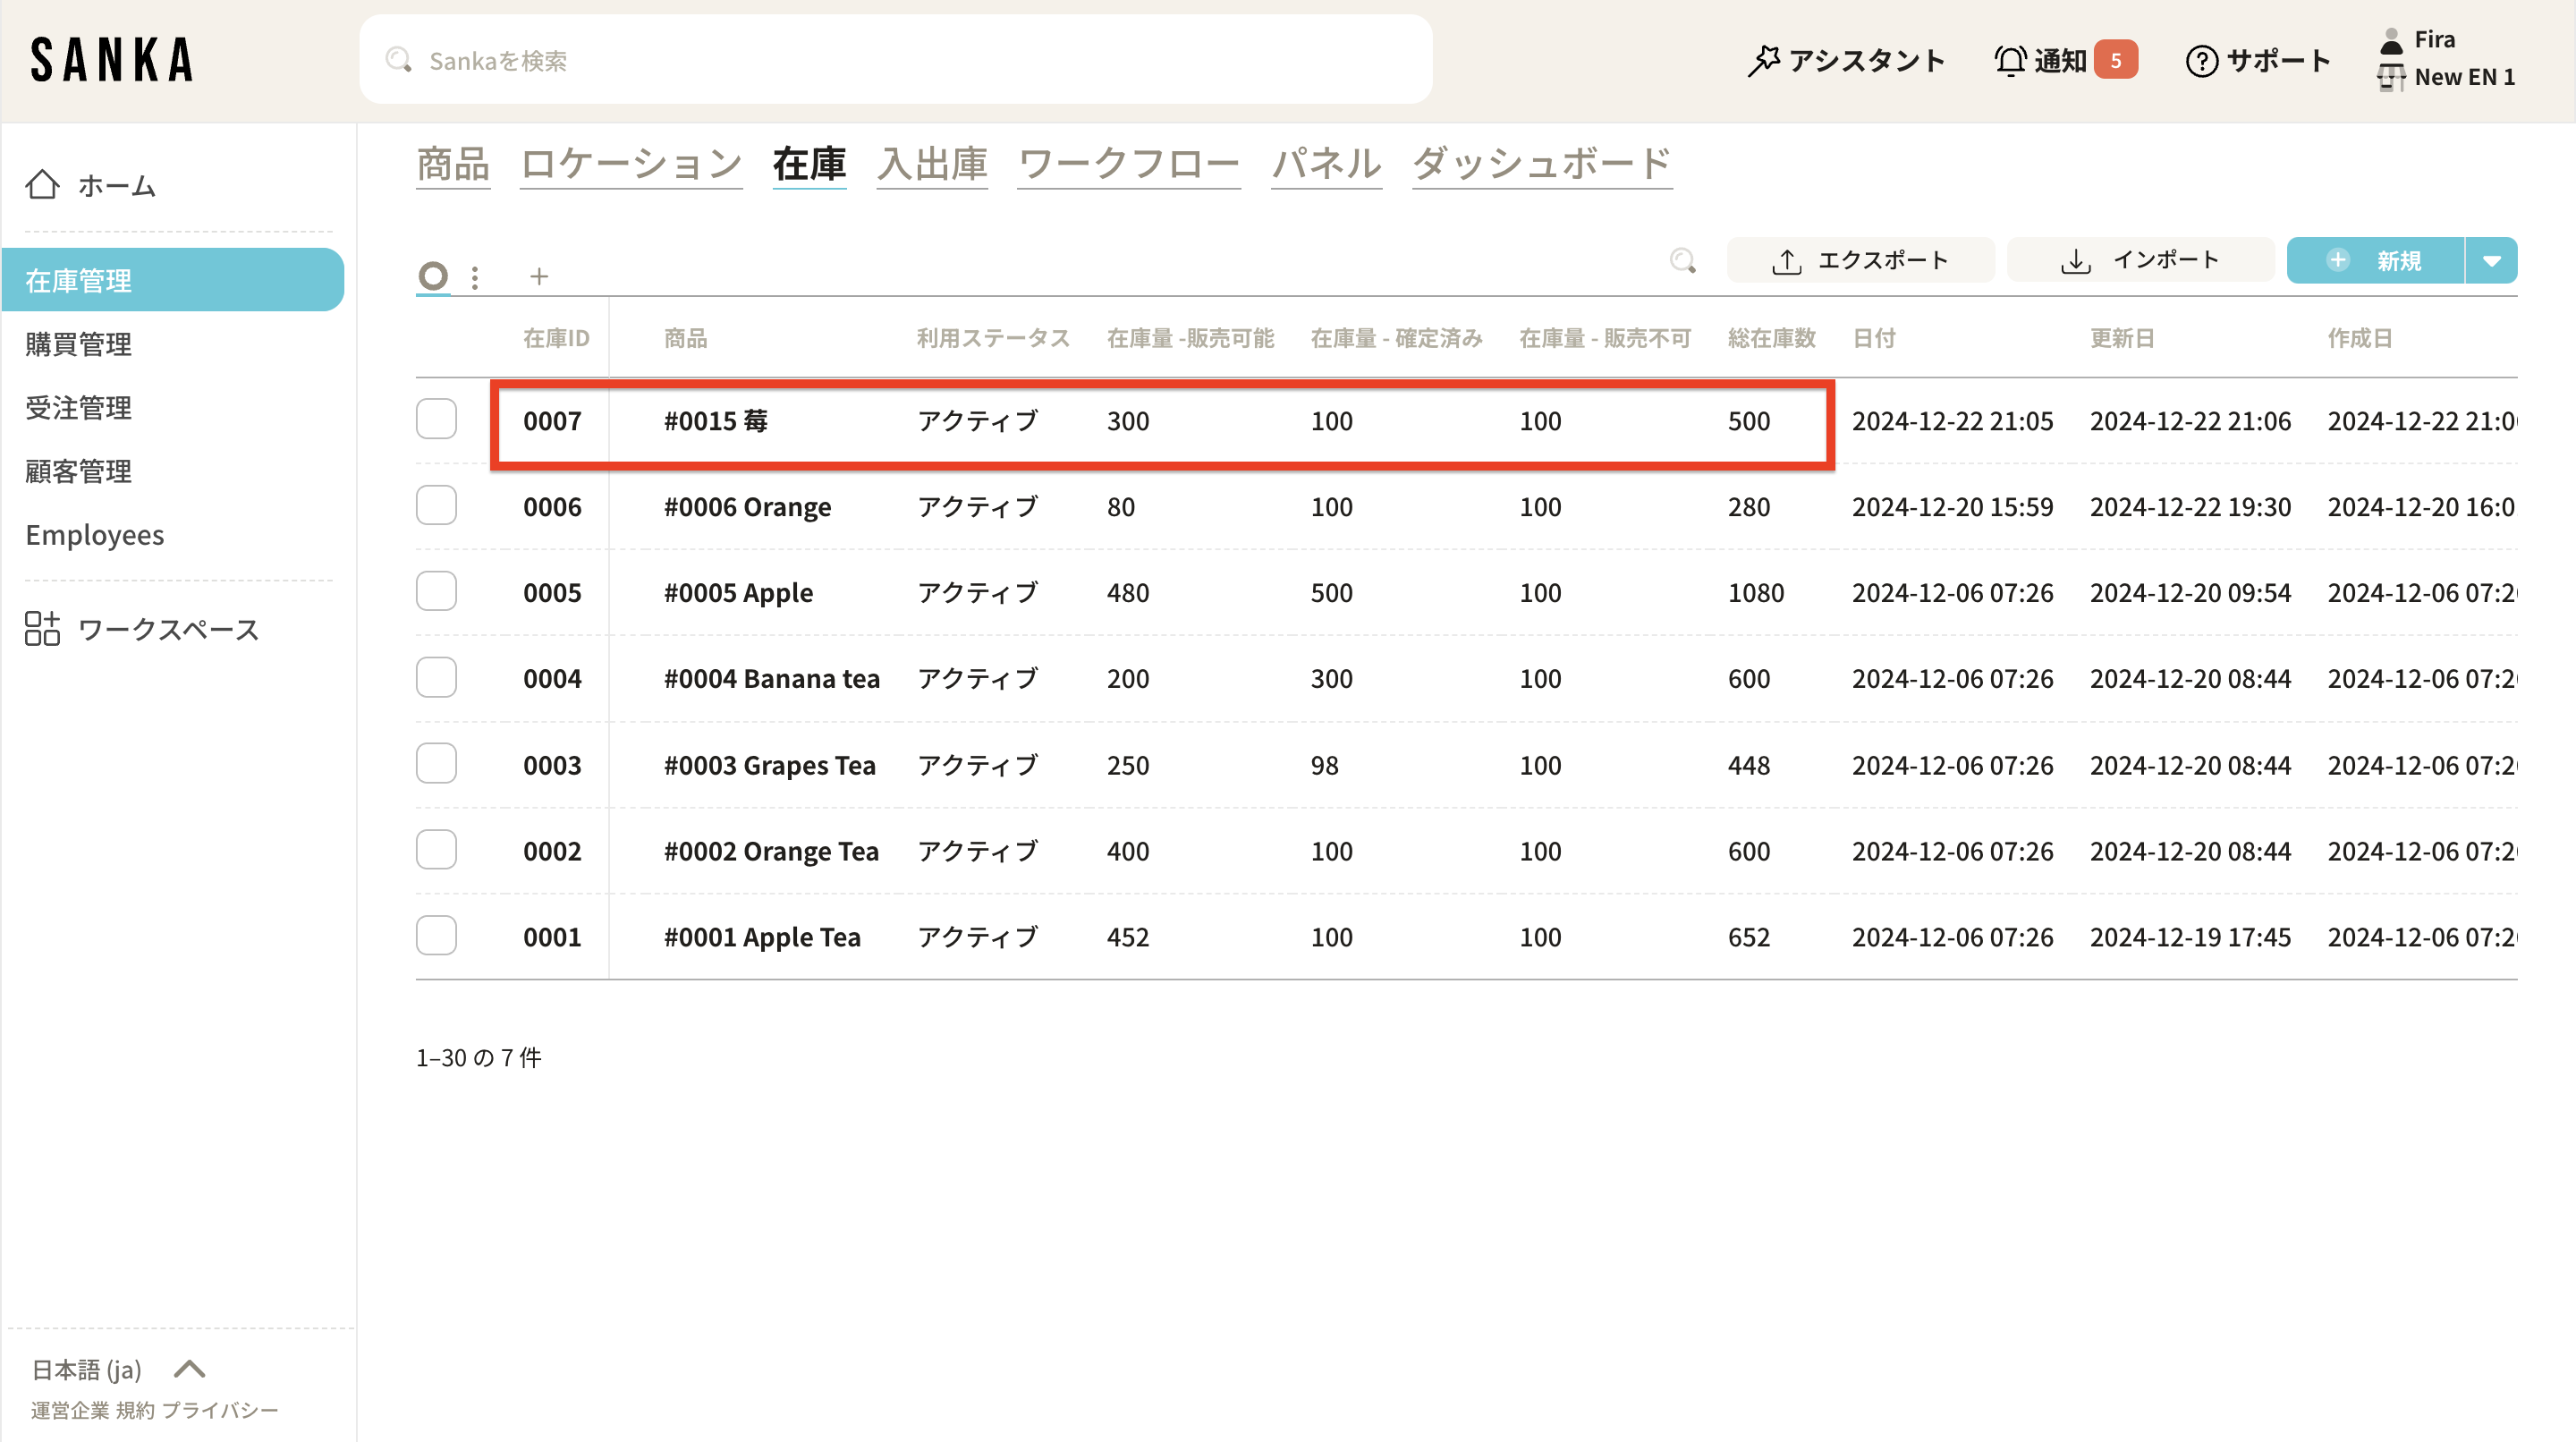
17: When you navigate to "Inventory", you can confirm that the inventory quantity has been updated.
Previously:
Afterwards:
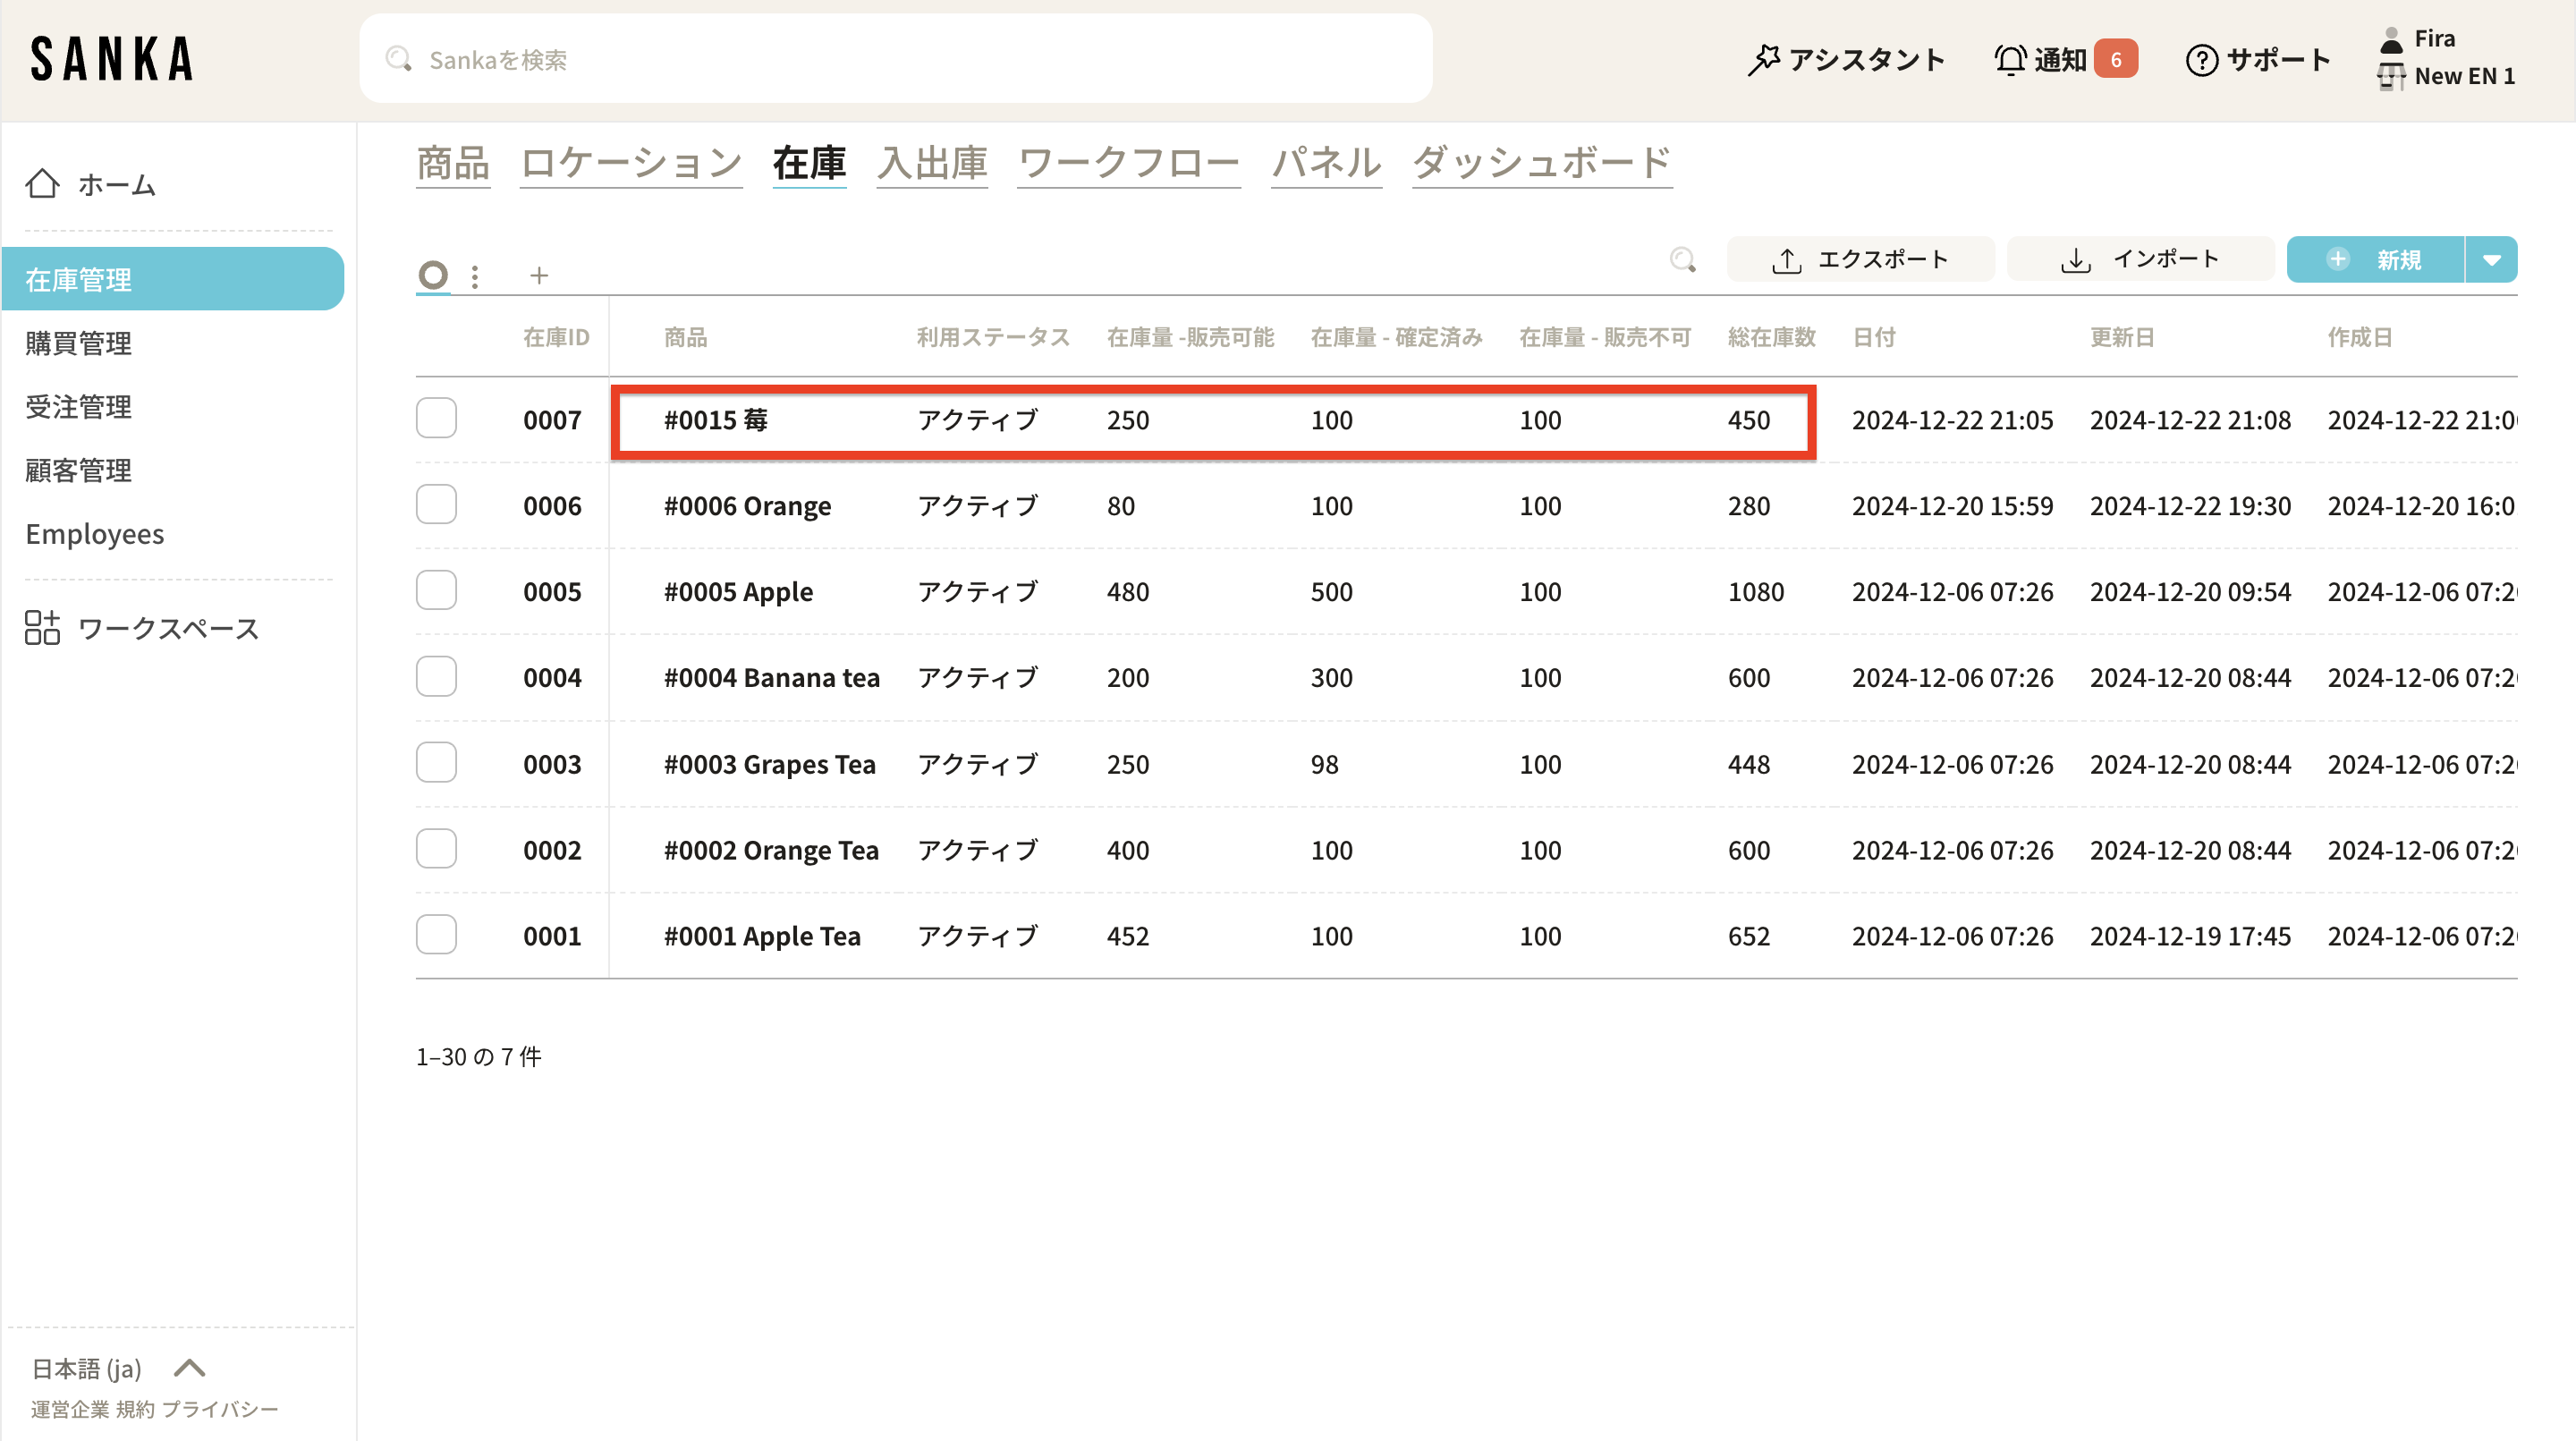
18: In addition, this change is also recorded in “Inventory Transactions” as an “Outbound Transaction,” and follows the updated order.