This article introduces methods for registering journal entry records as well as how to manage them, including modification and deletion.
How to register journal entry records
How to modify and manage registered records
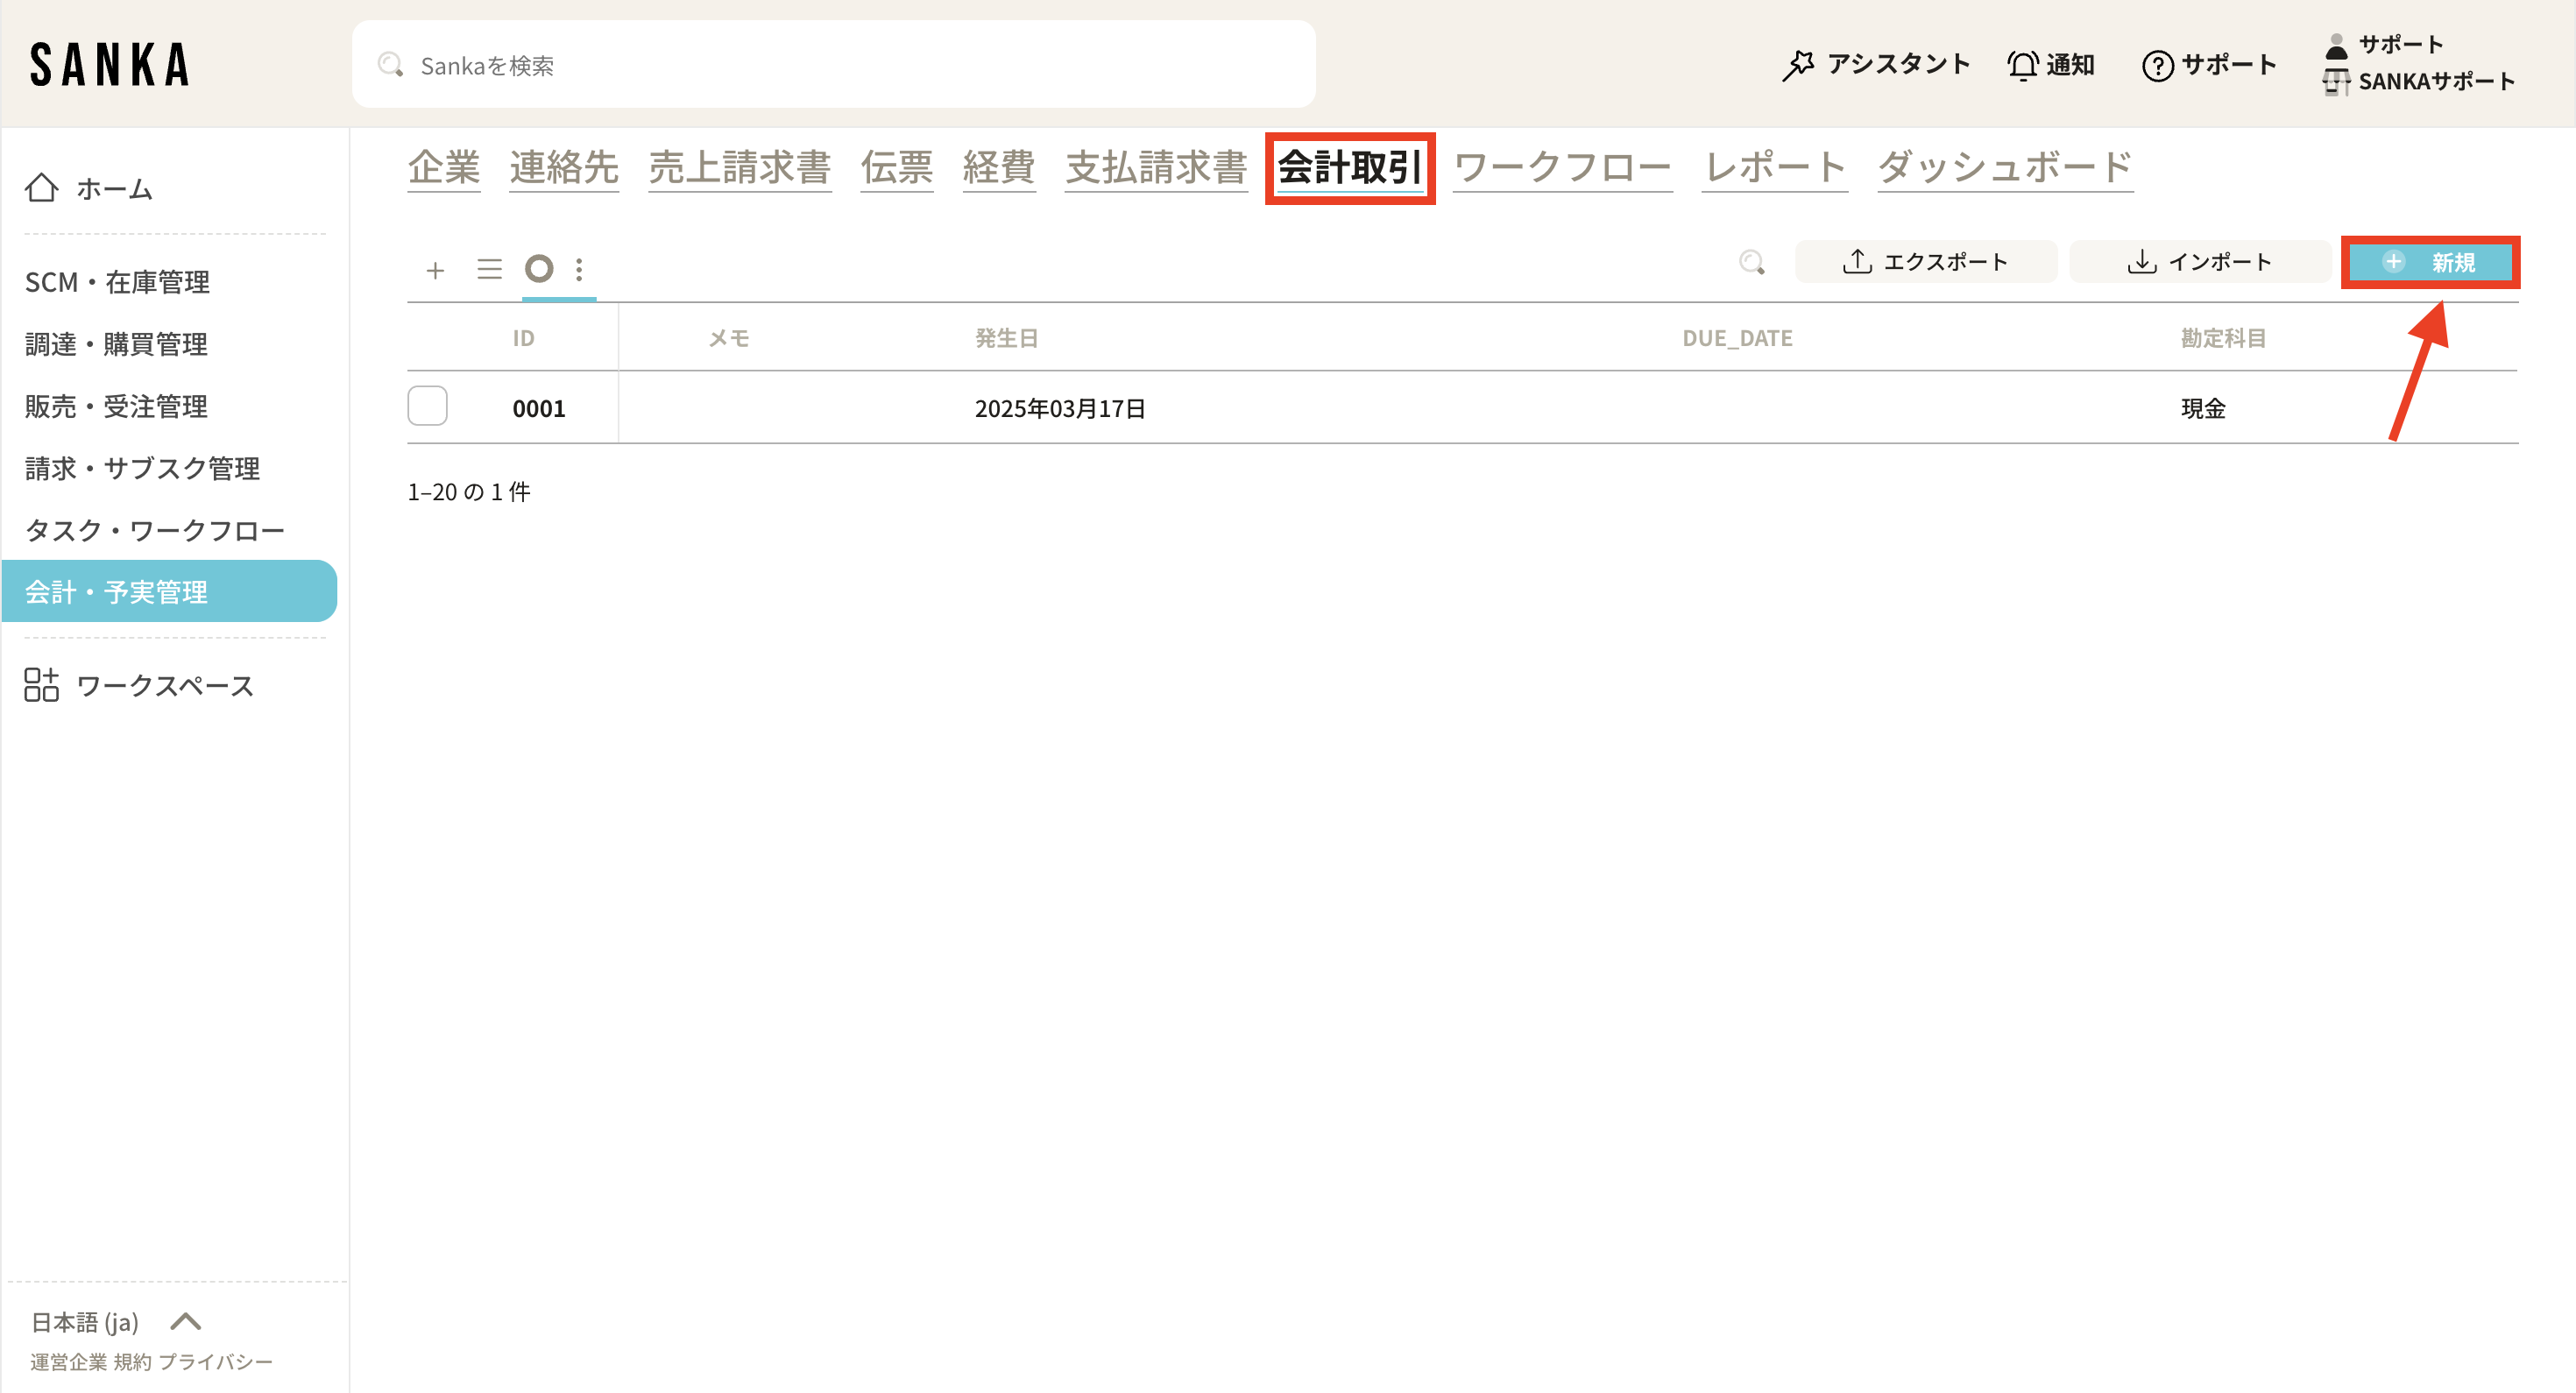
1. Select the "Journal Entry" object. Click the "New" button located at the top right of the screen.
2. The "Create Journal Entry Record" menu will be displayed. Please enter the required information.
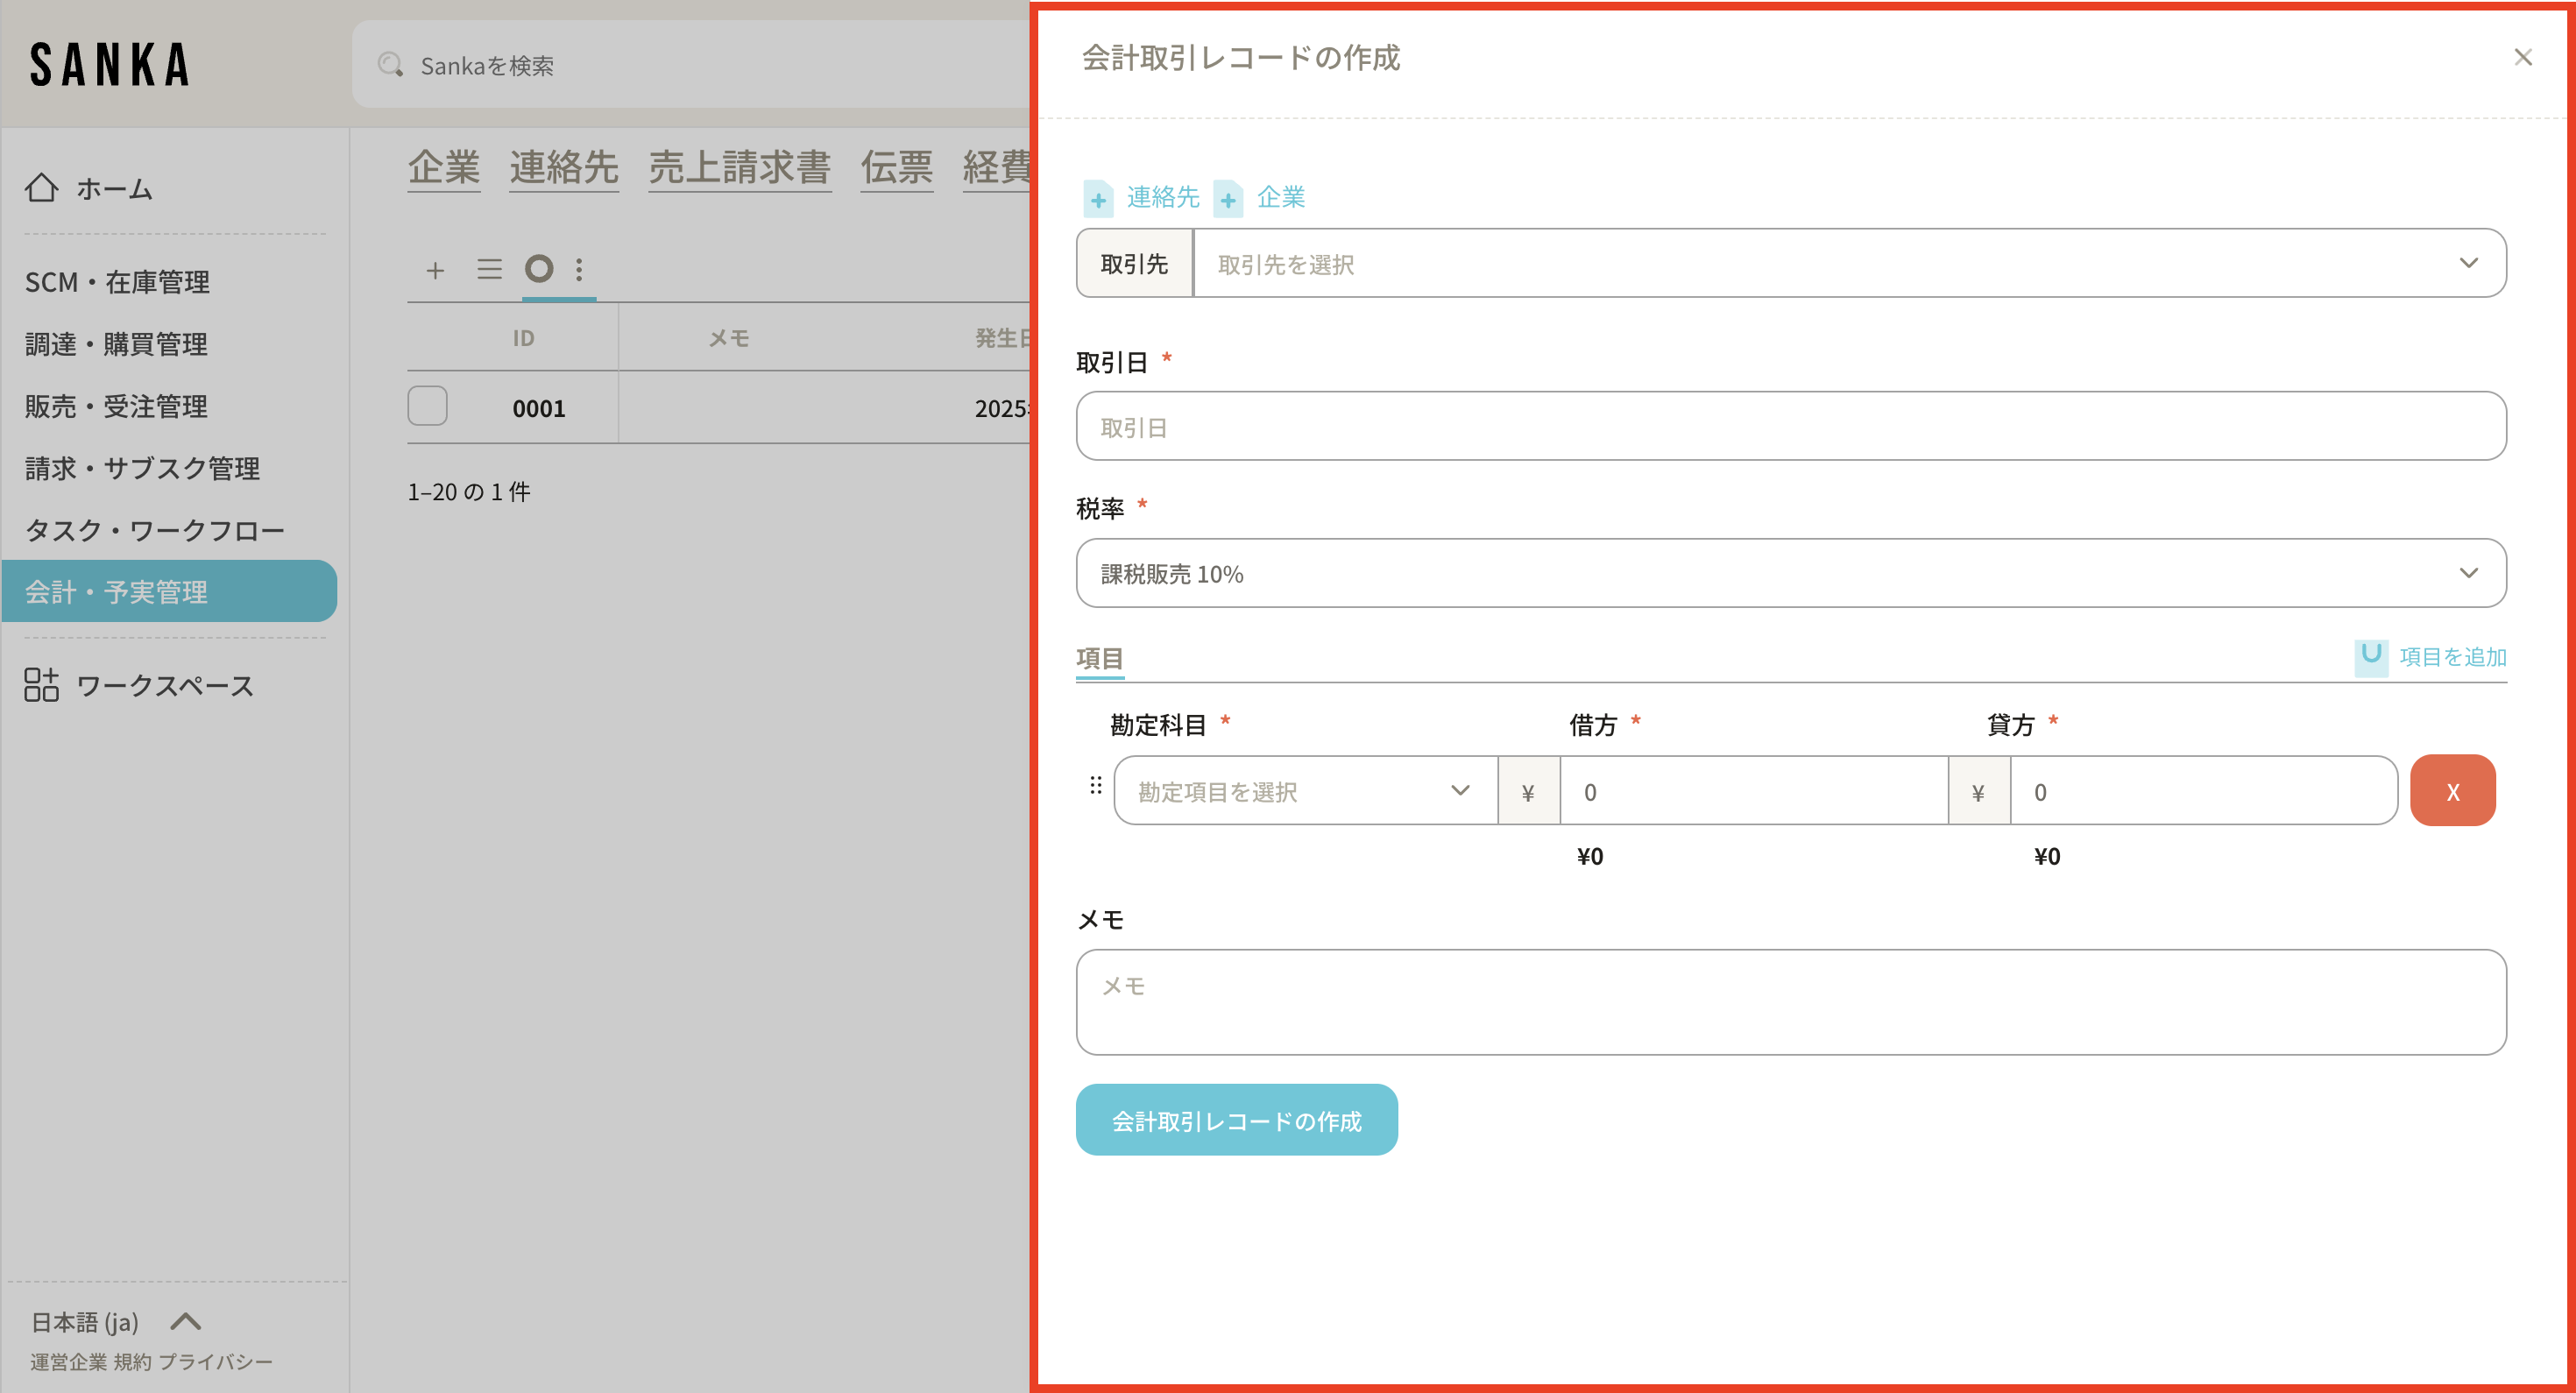
③ The details of the required items are as follows.
・"Business Partner": When clicking on the field, the registered business information will be displayed, allowing you to select the relevant one. By pressing the "+Contact" or "+Company" buttons, you can add new customer information.
・"Transaction Date": Click the field to display the calendar and select the date of the transaction.
・"Tax Rate": Choose from Taxable Sales 10%, Taxable Sales 8%, or Tax-Exempt Sales.
・"Item": Enter the account item. By pressing "Add Item" at the top right, you can add another field.
・“Memo”: Enter any notes related to the transaction.
④As an example, we will record the journal entry when 1,000,000 yen in sales proceeds is deposited into a bank account.
After entering the required information, create the entry by clicking the “Create Journal Entry” button.

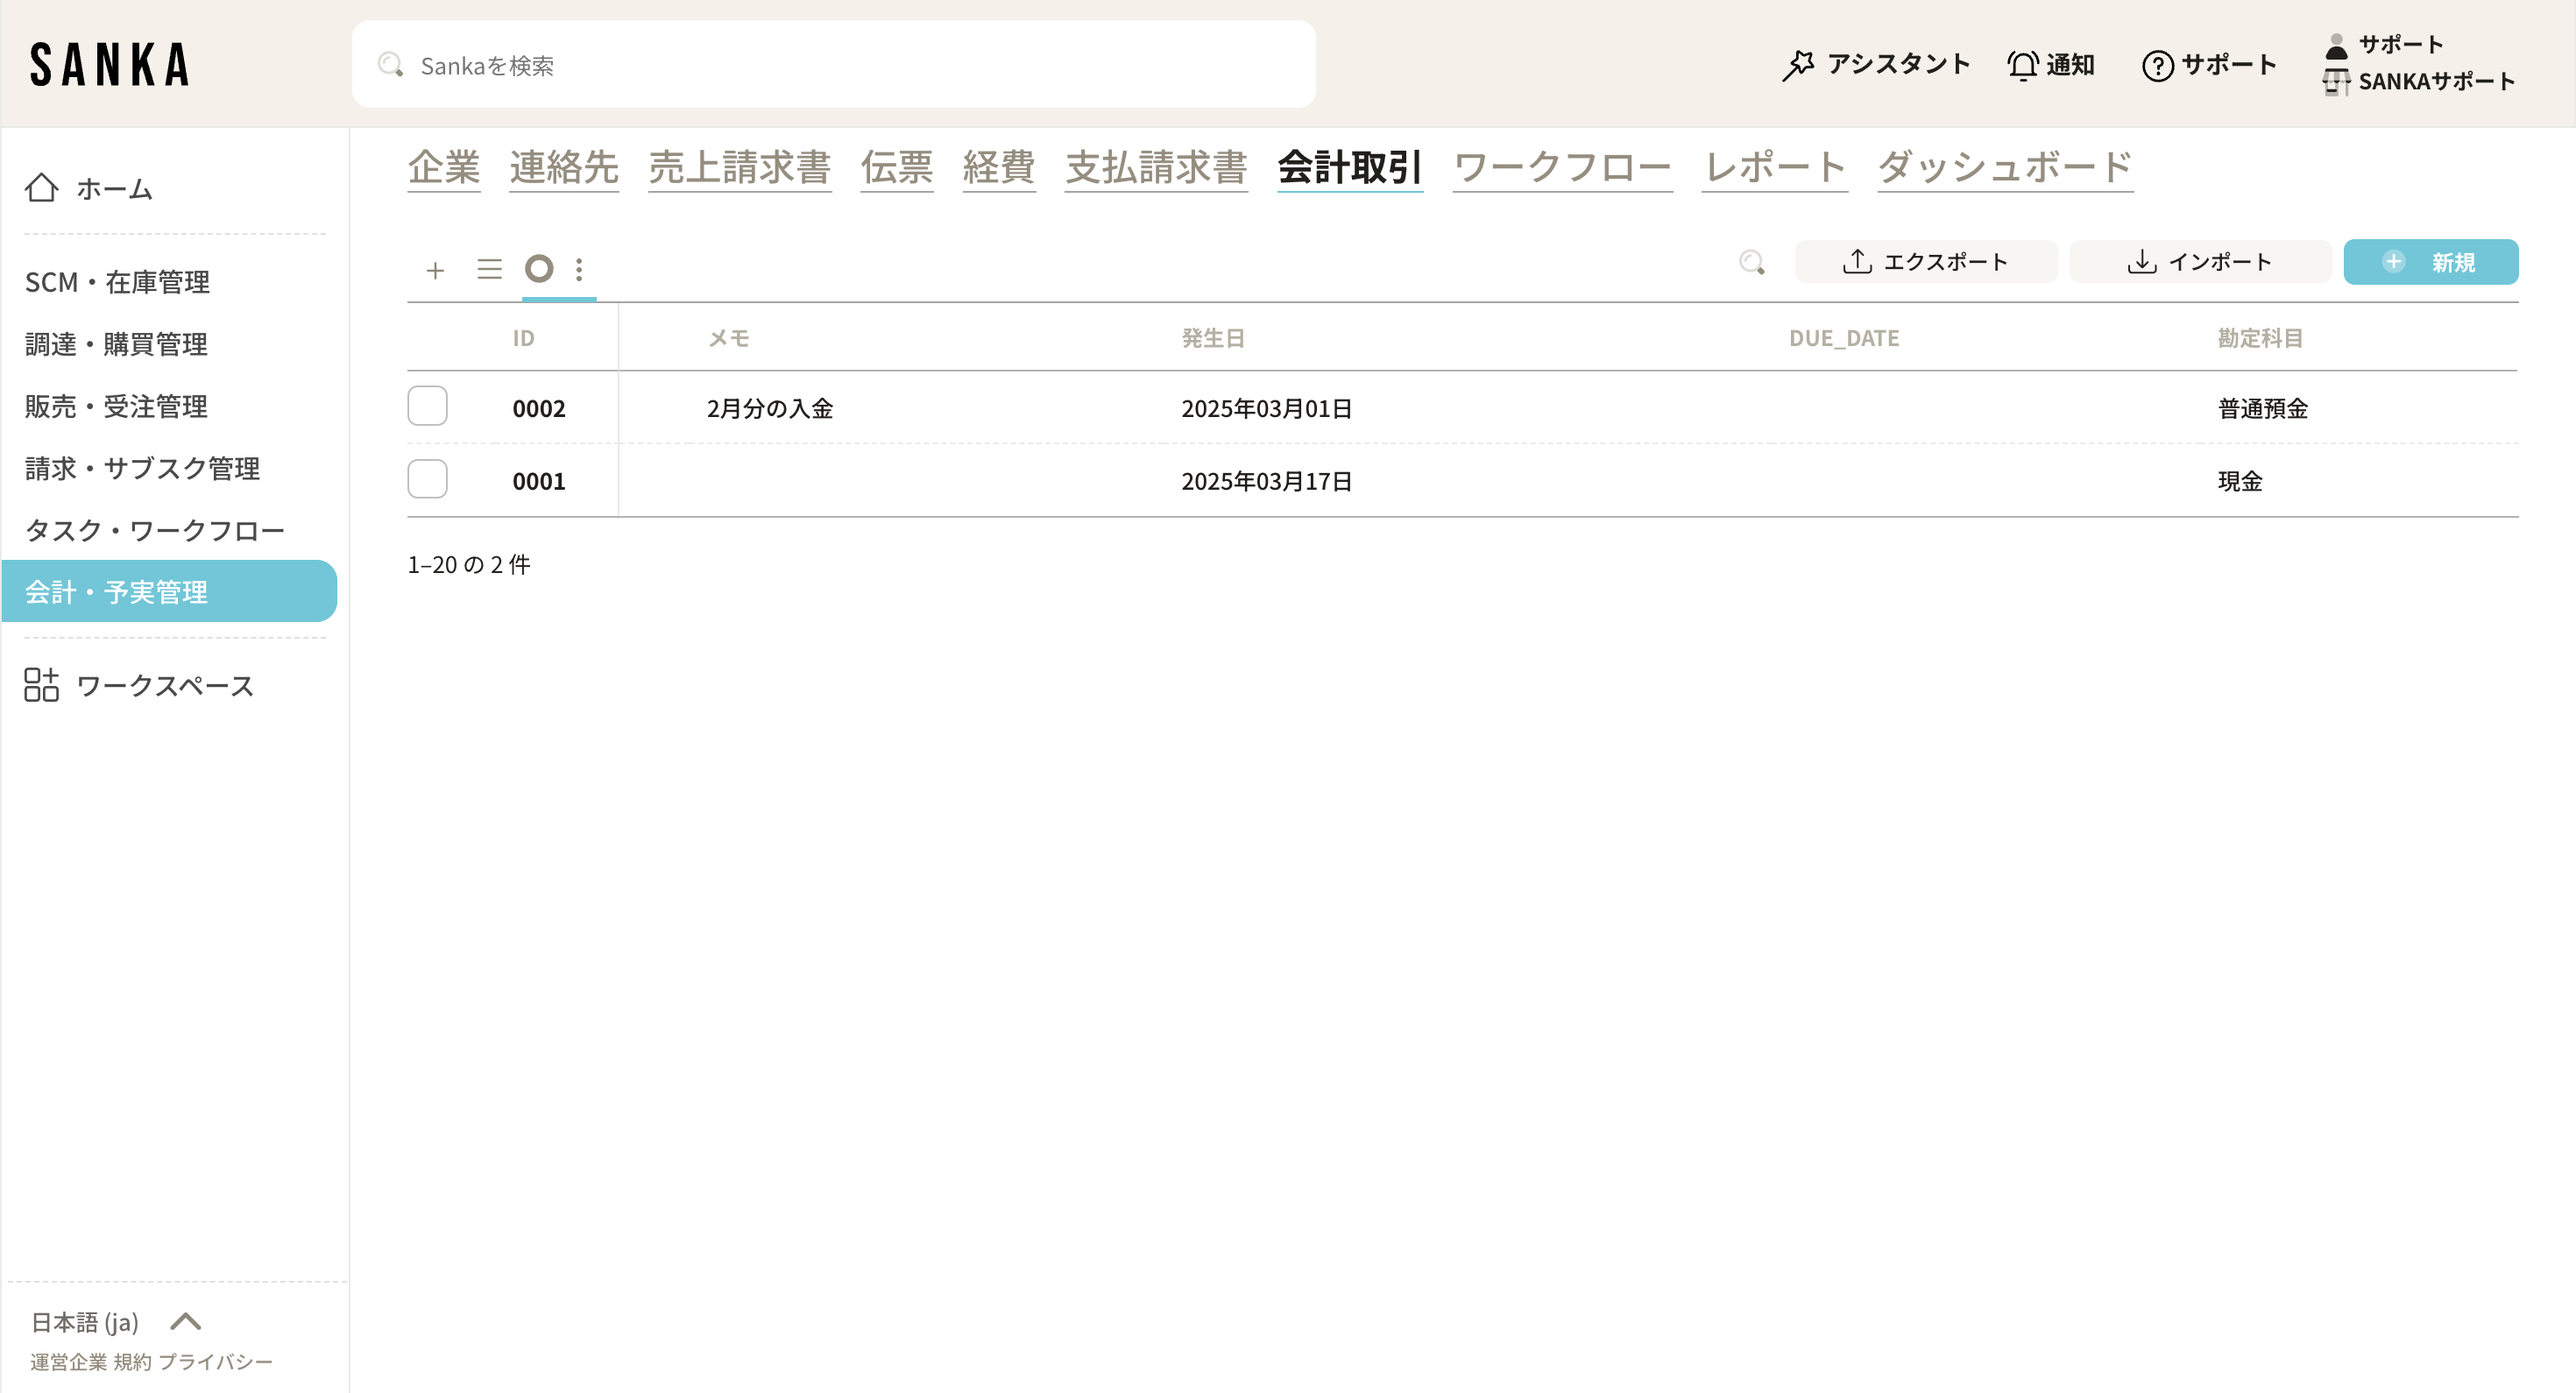
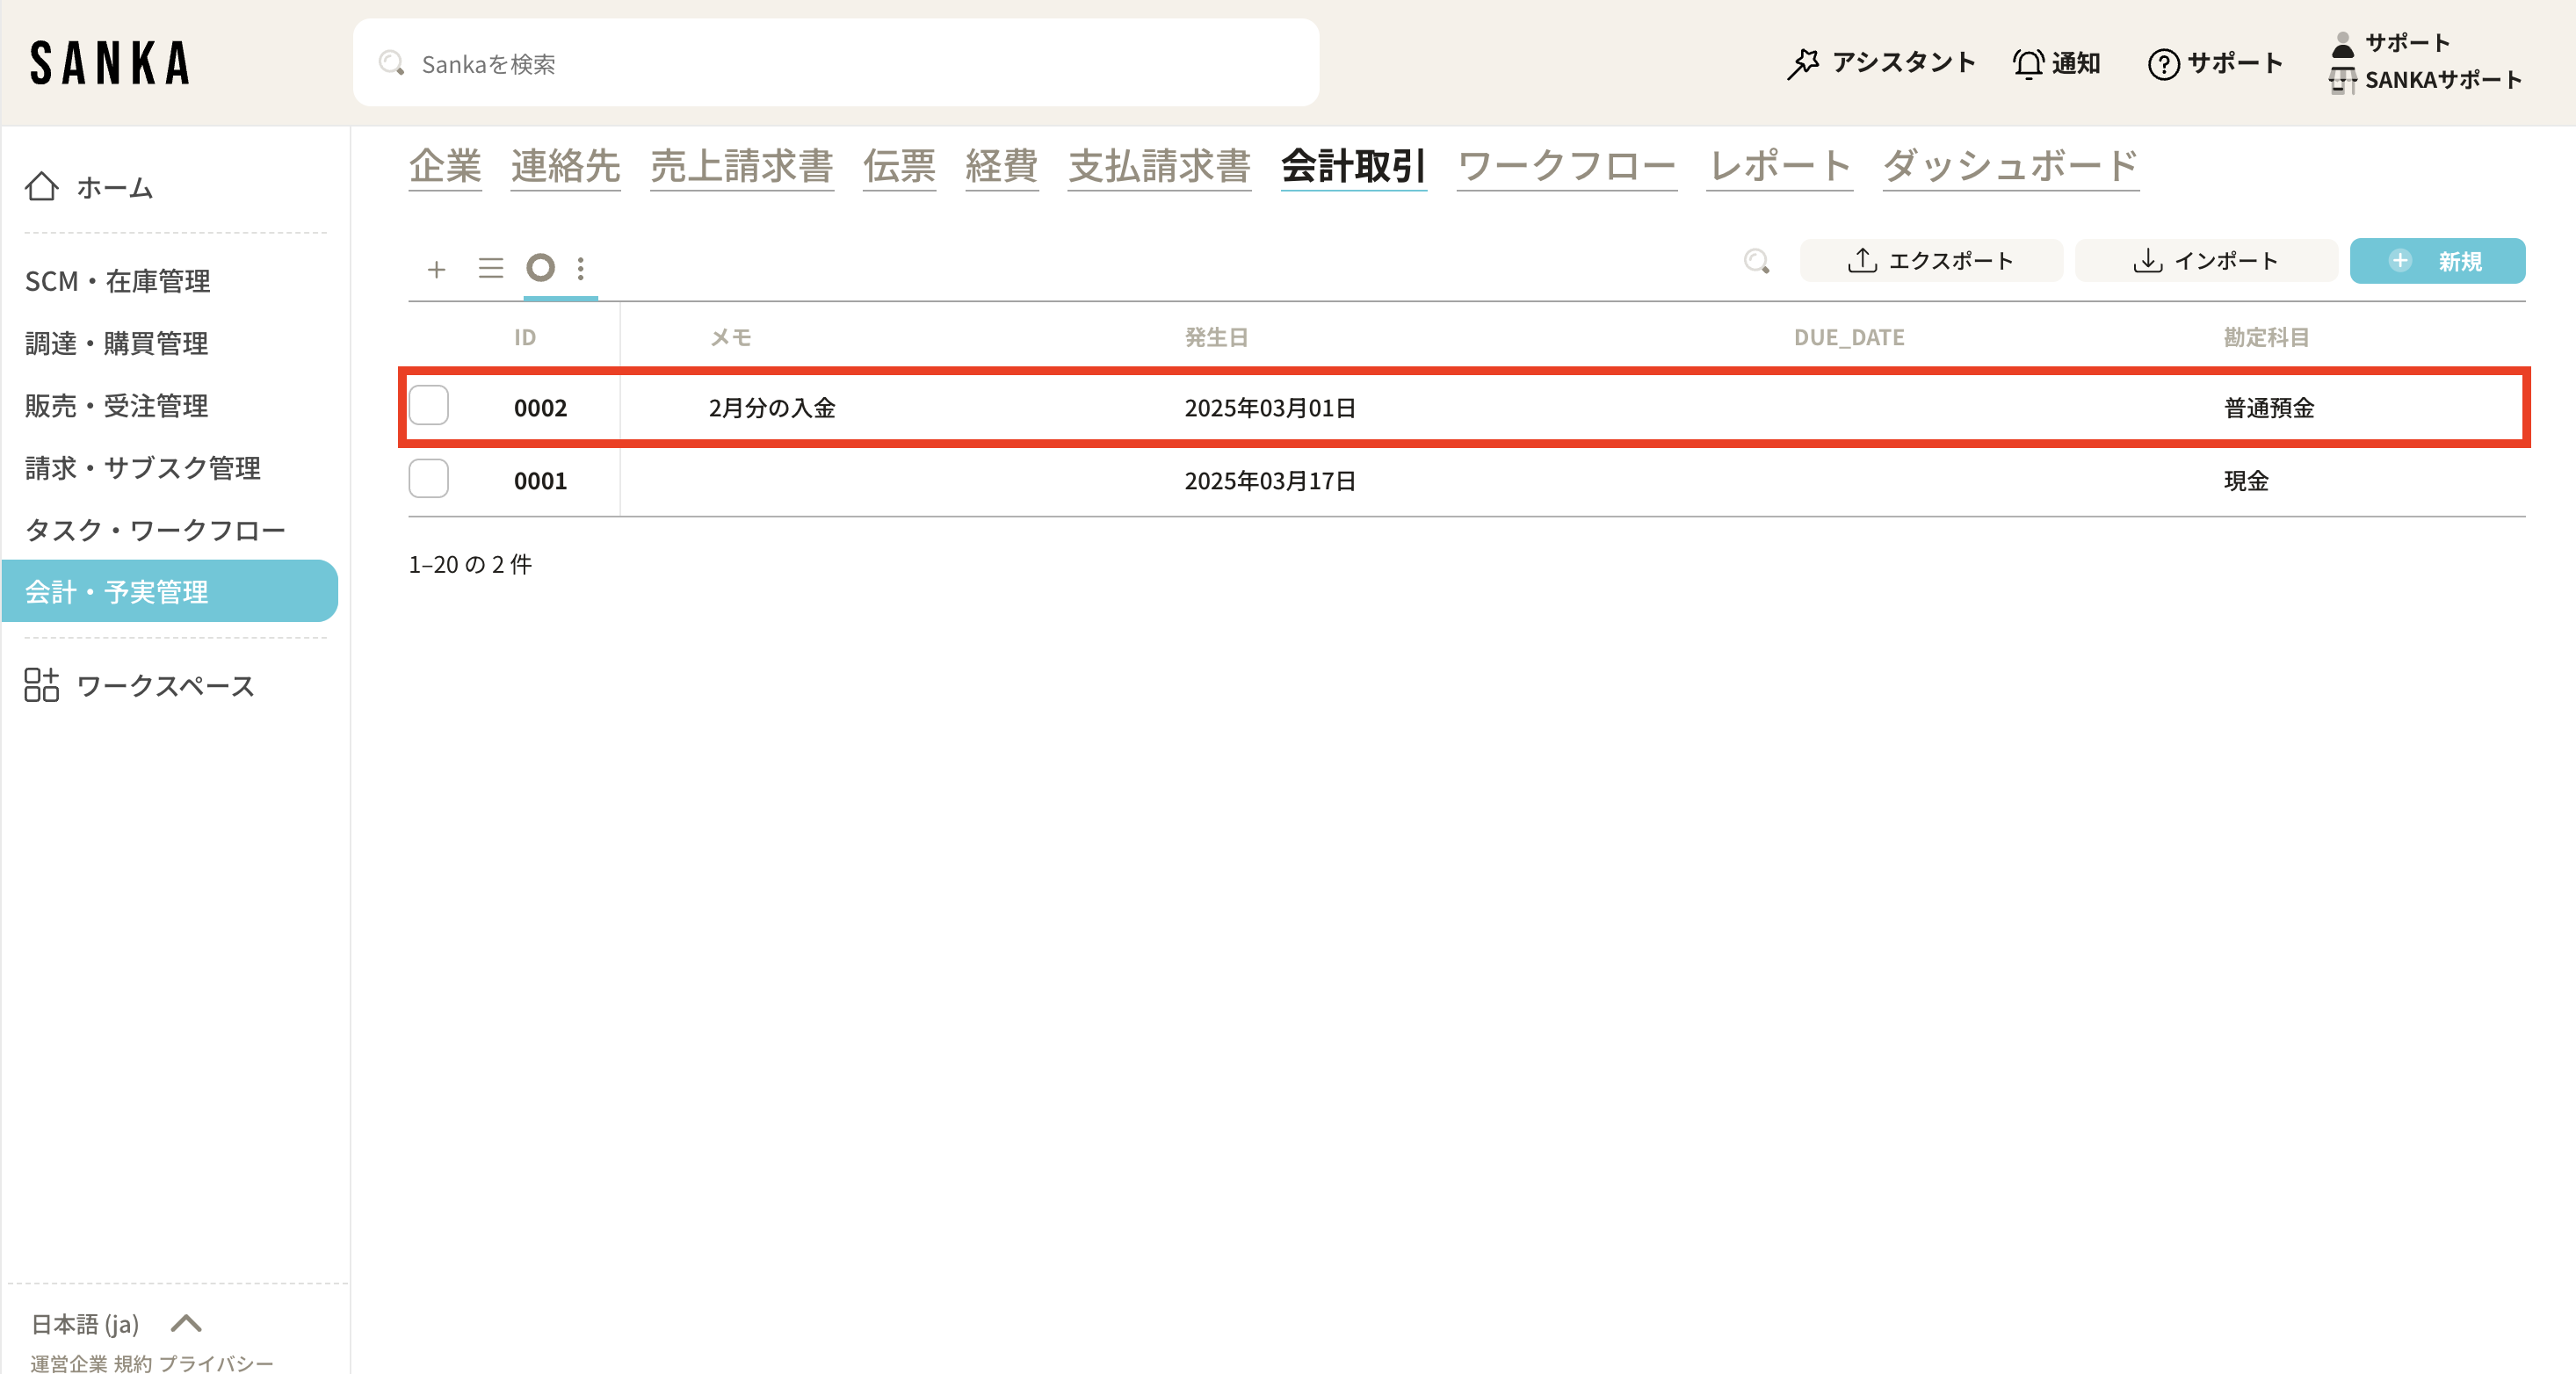
⑤You can confirm the record has been registered on the record list screen.
In Sanka, to prevent accidental deletion of information, once information is registered, it cannot be deleted. Therefore, please master the methods to edit information as well as to use the archive feature to hide unnecessary information.
 How to Edit a Registered Record
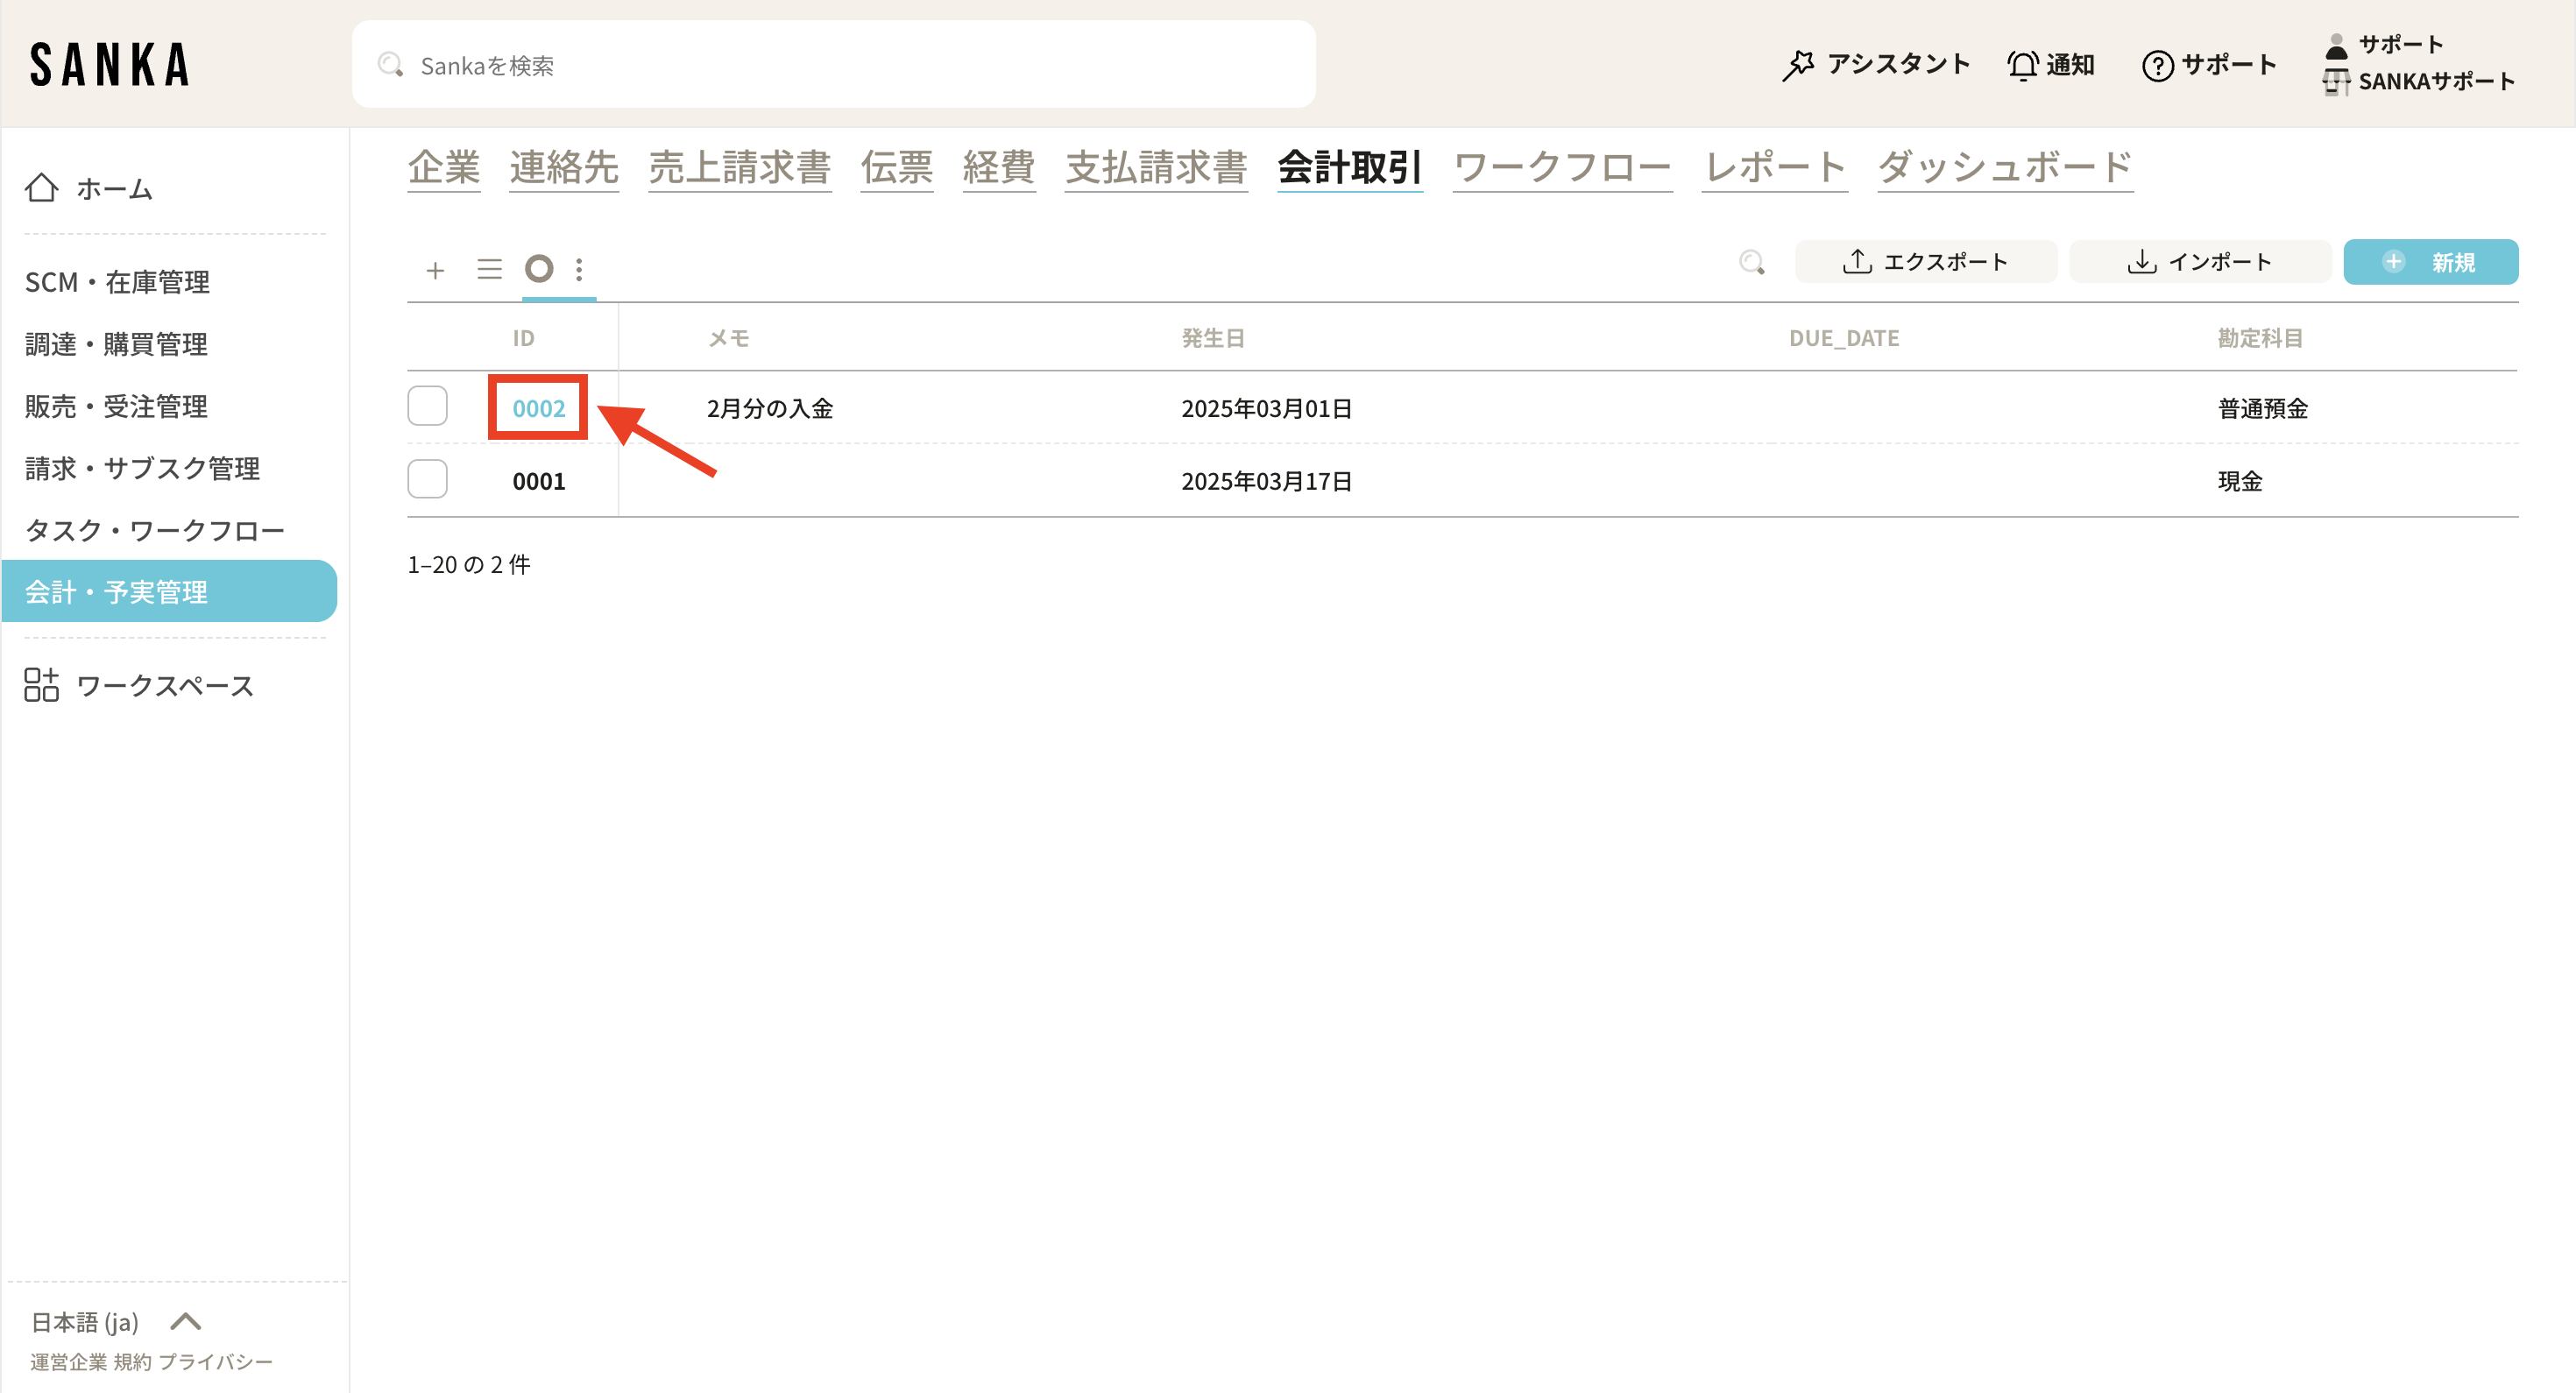
① On the record list screen of the "Journal Entry" object, click on the subscription ID of the record to be edited.
② The "Manage Journal Entry Records" menu will be displayed, and modifications to the information are possible. Finally, click "Update".
 How to Archive a Record
In Sanka, once information is registered, it cannot be deleted. Therefore, you can use the archive function to hide registered records from the list table.
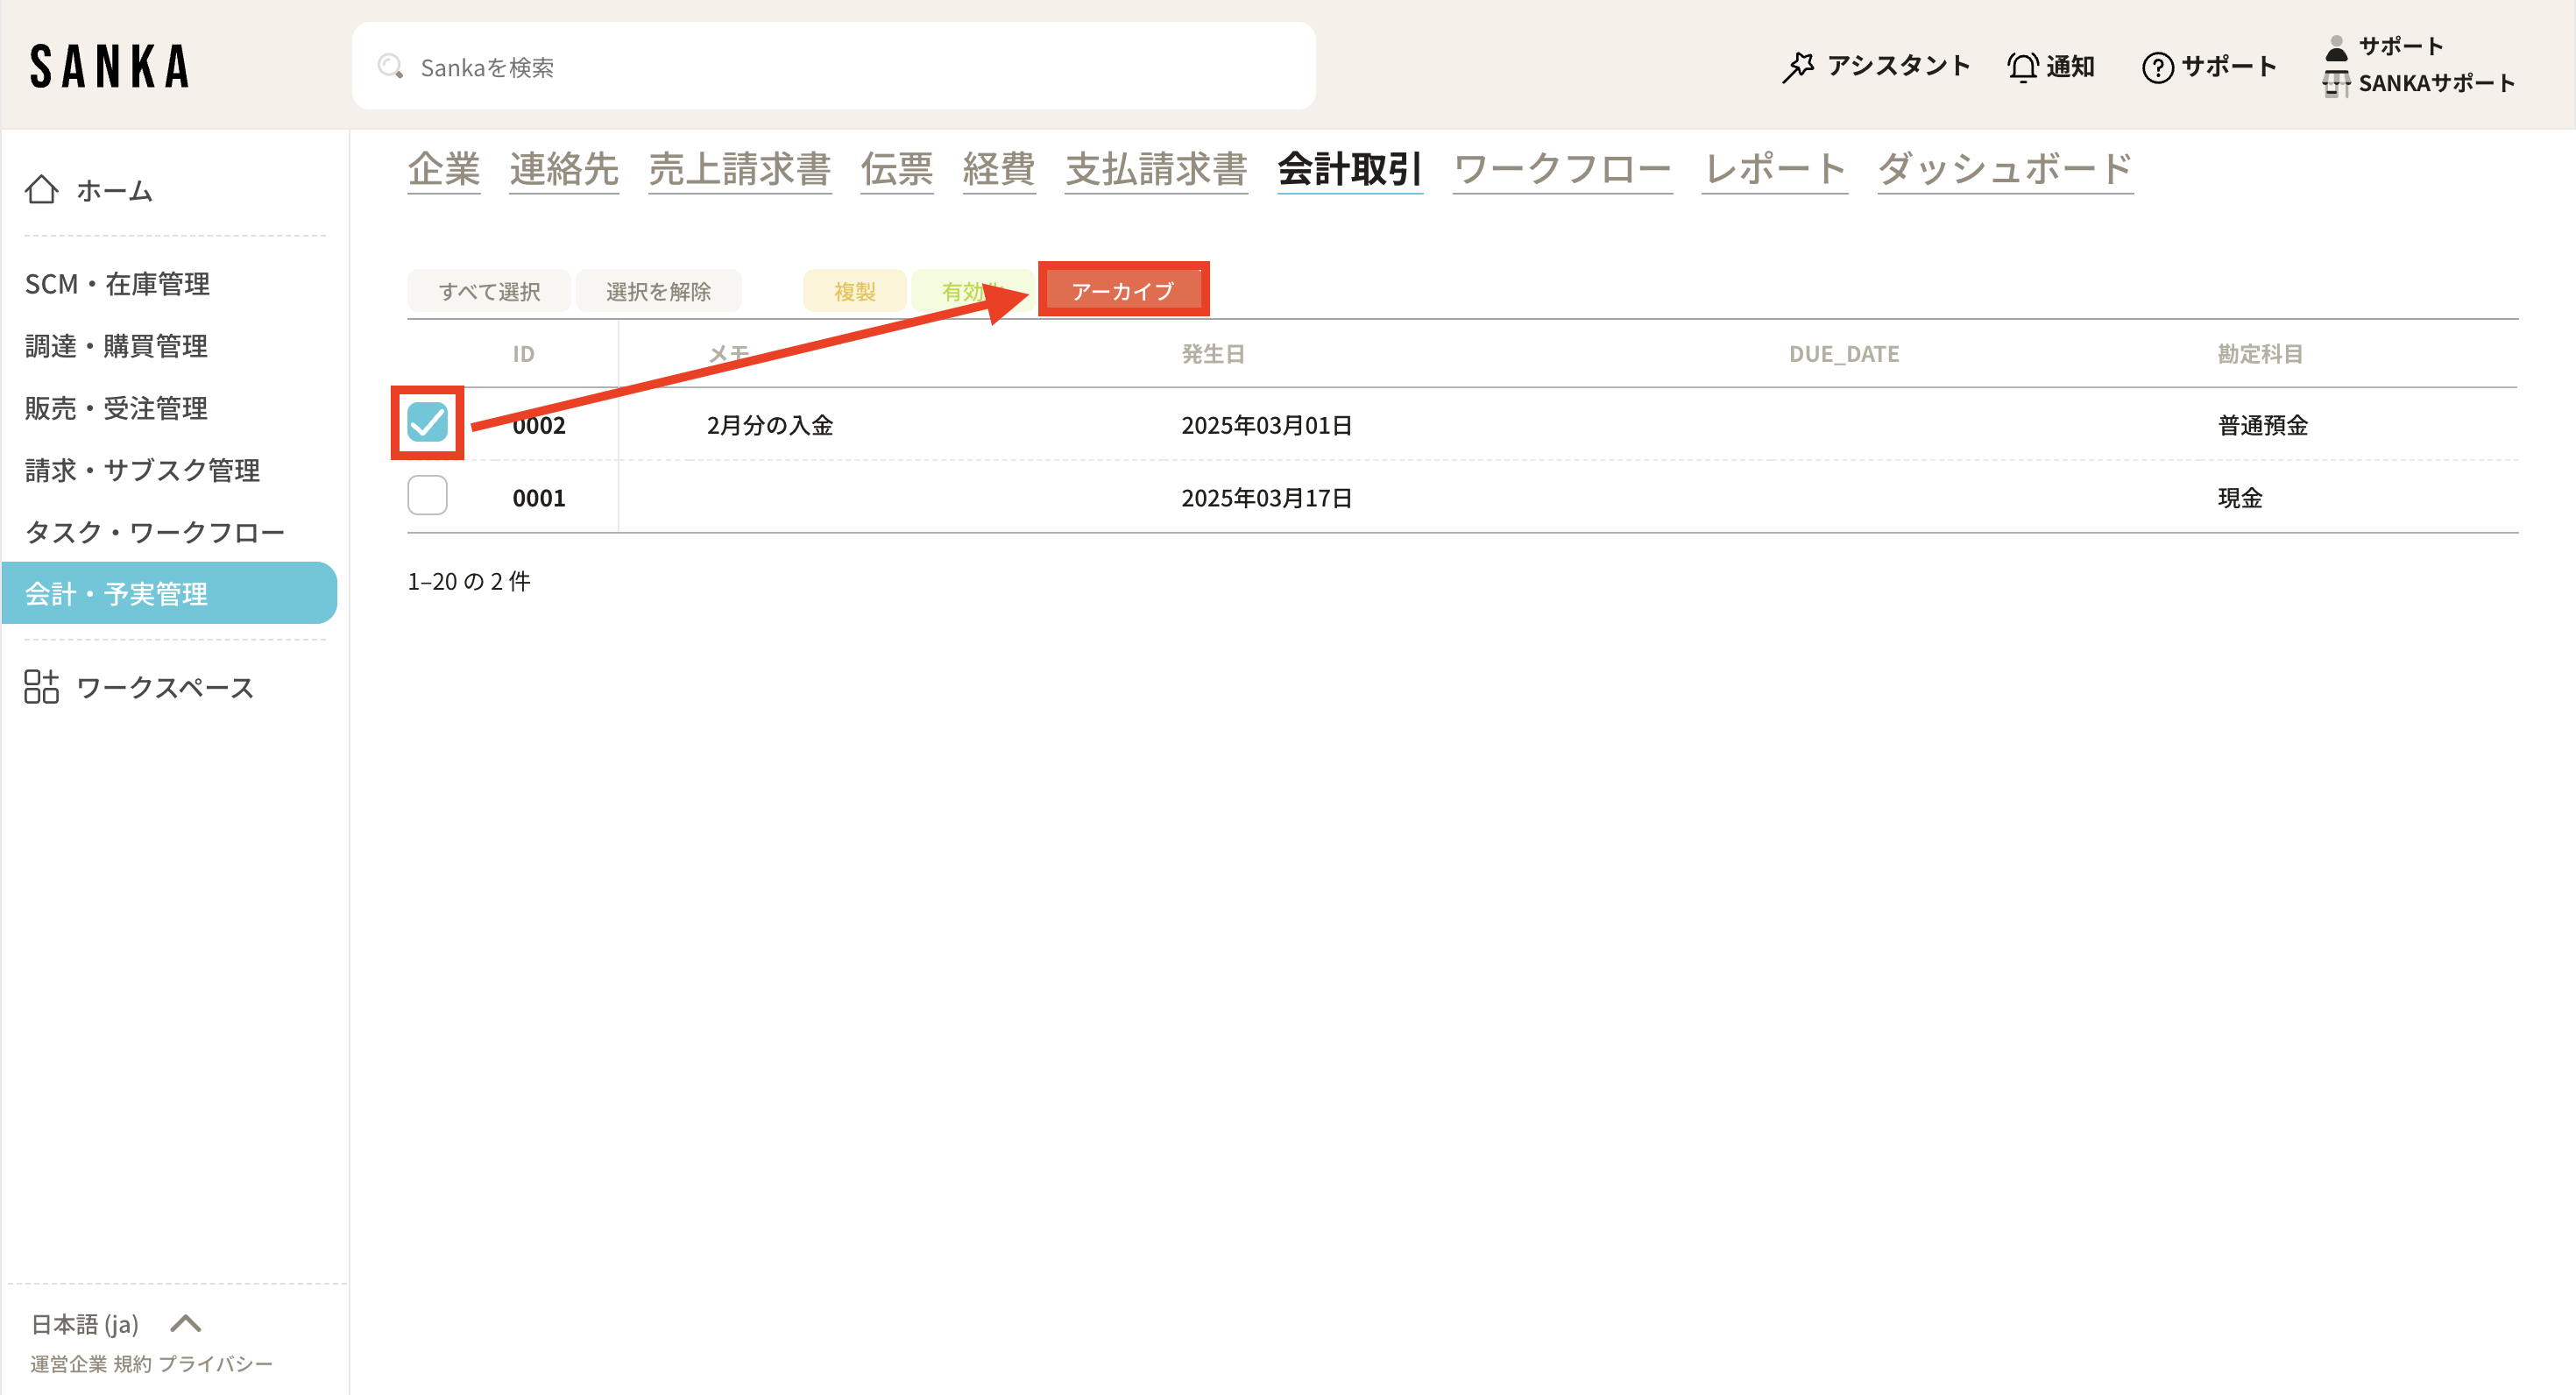
① On the list screen of the Journal Entry object, click the box of the case you wish to archive and select "Archive."
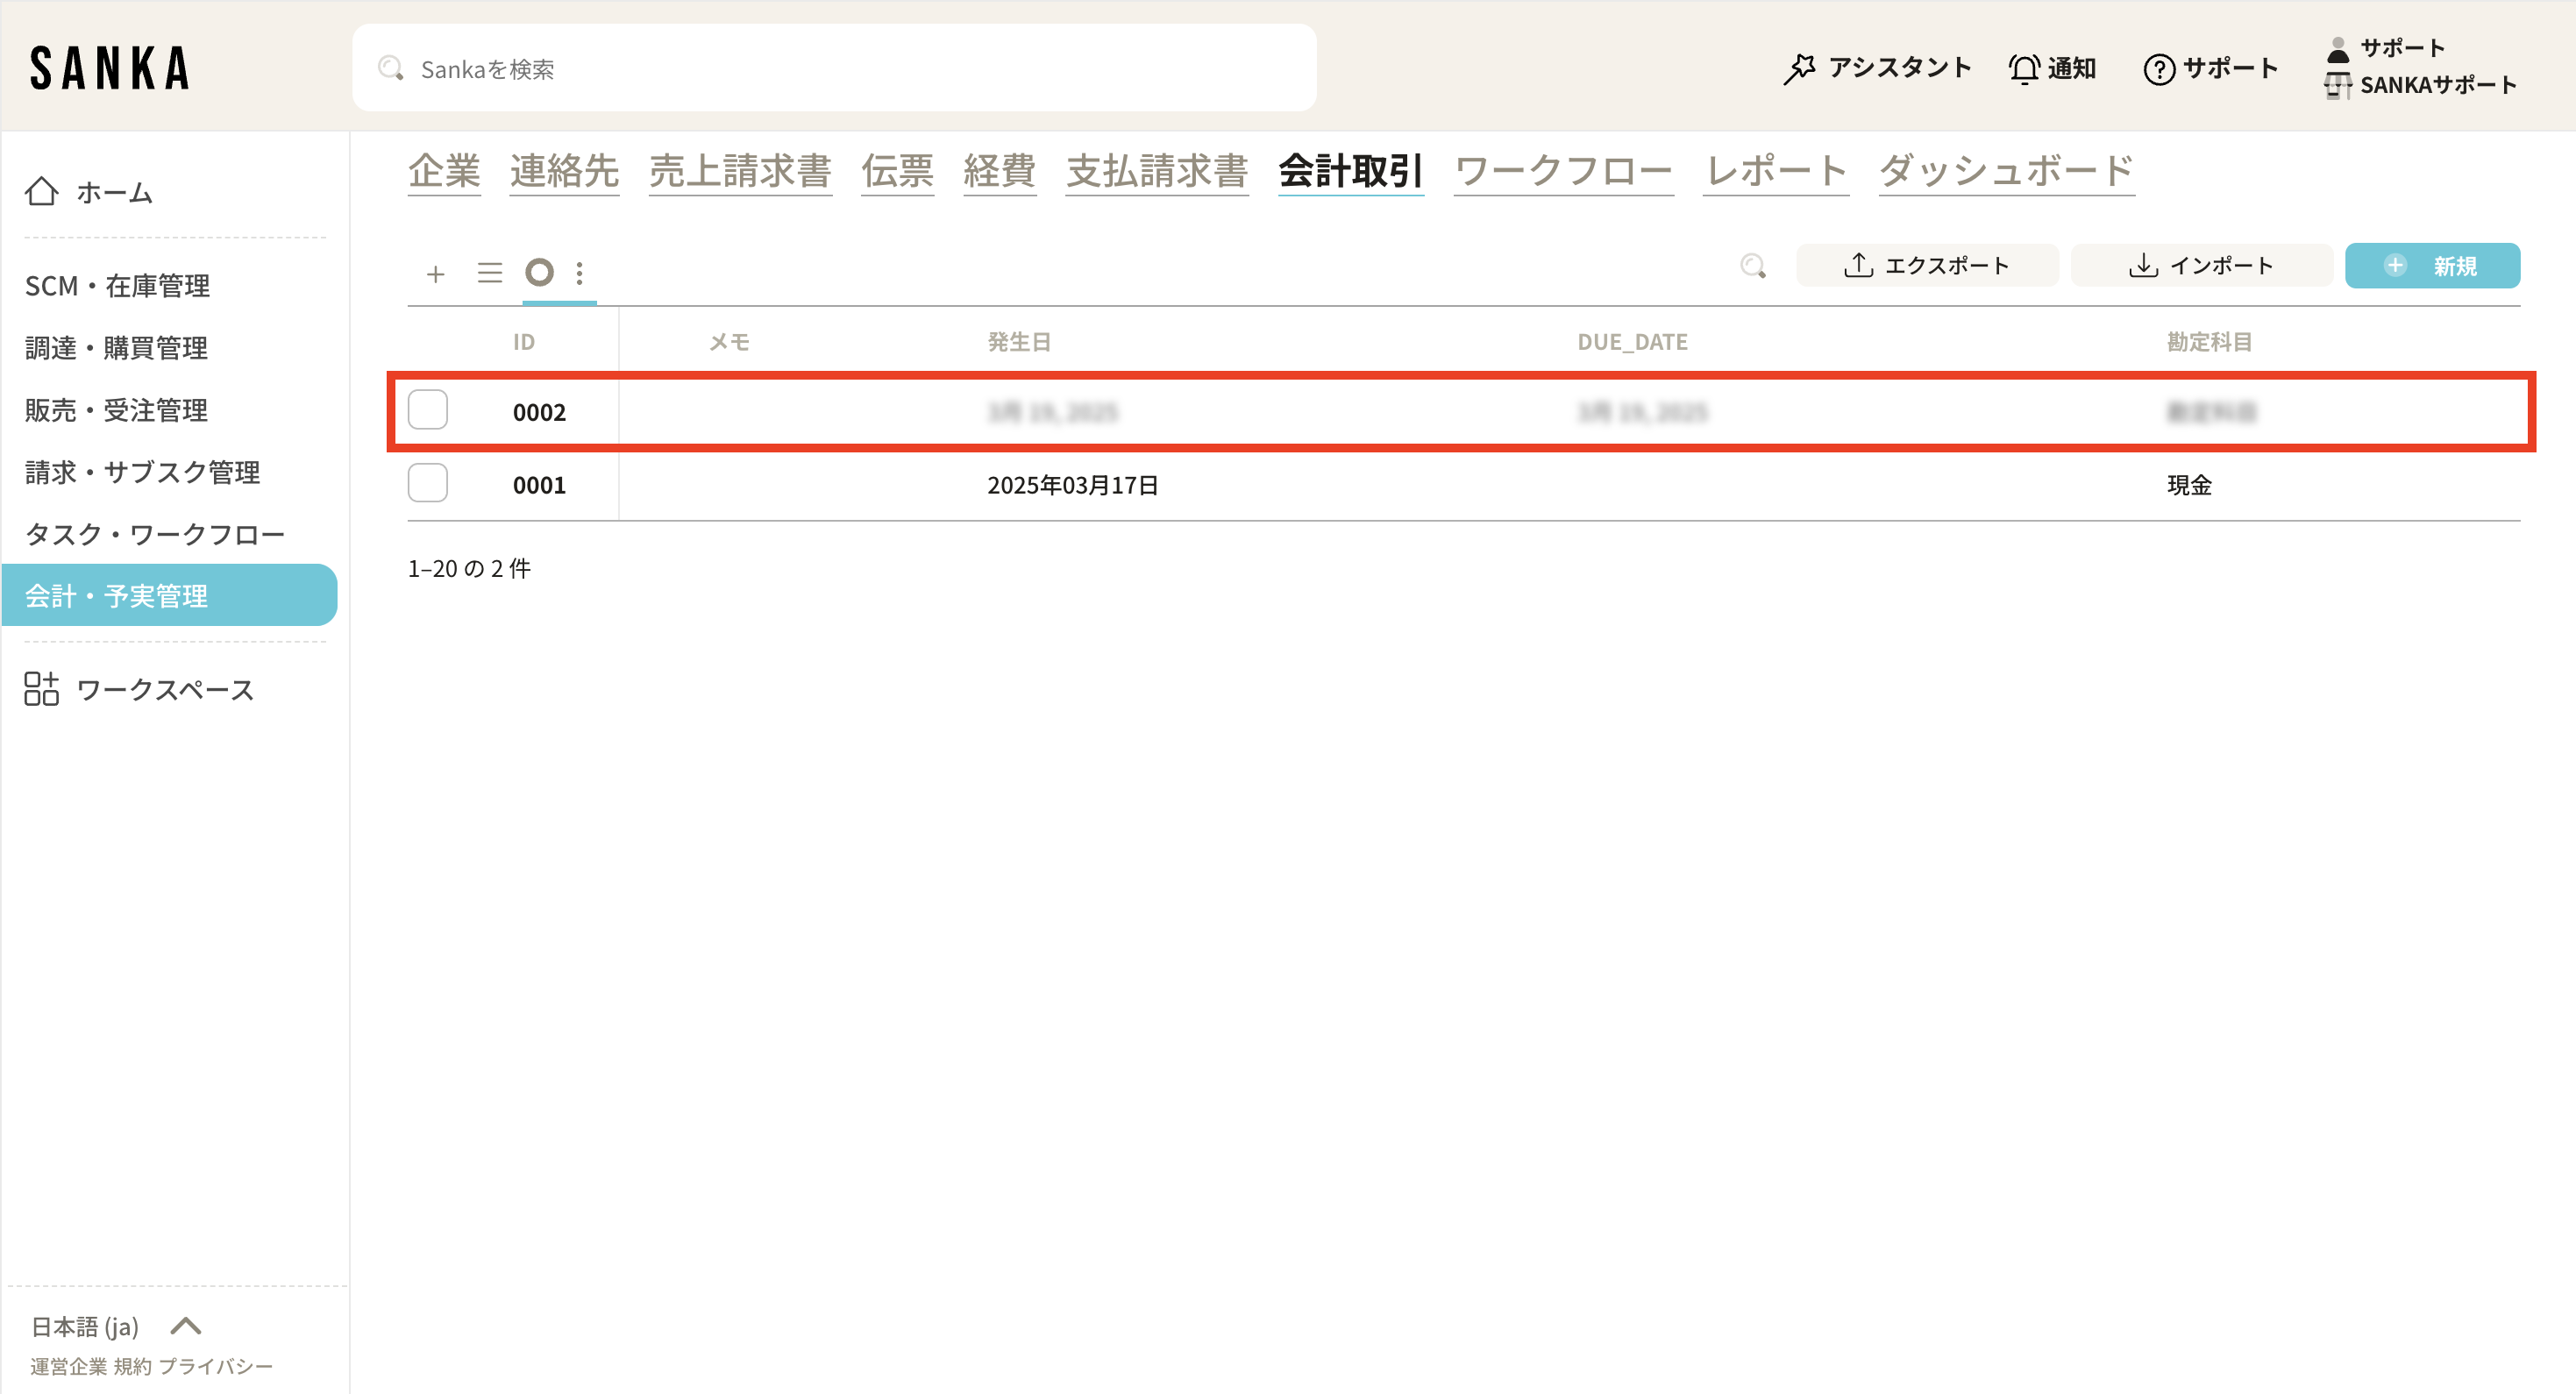
② Archived cases will be displayed grayed out.
③ If you wish to unarchive, click the box of the relevant case and select "Activate."
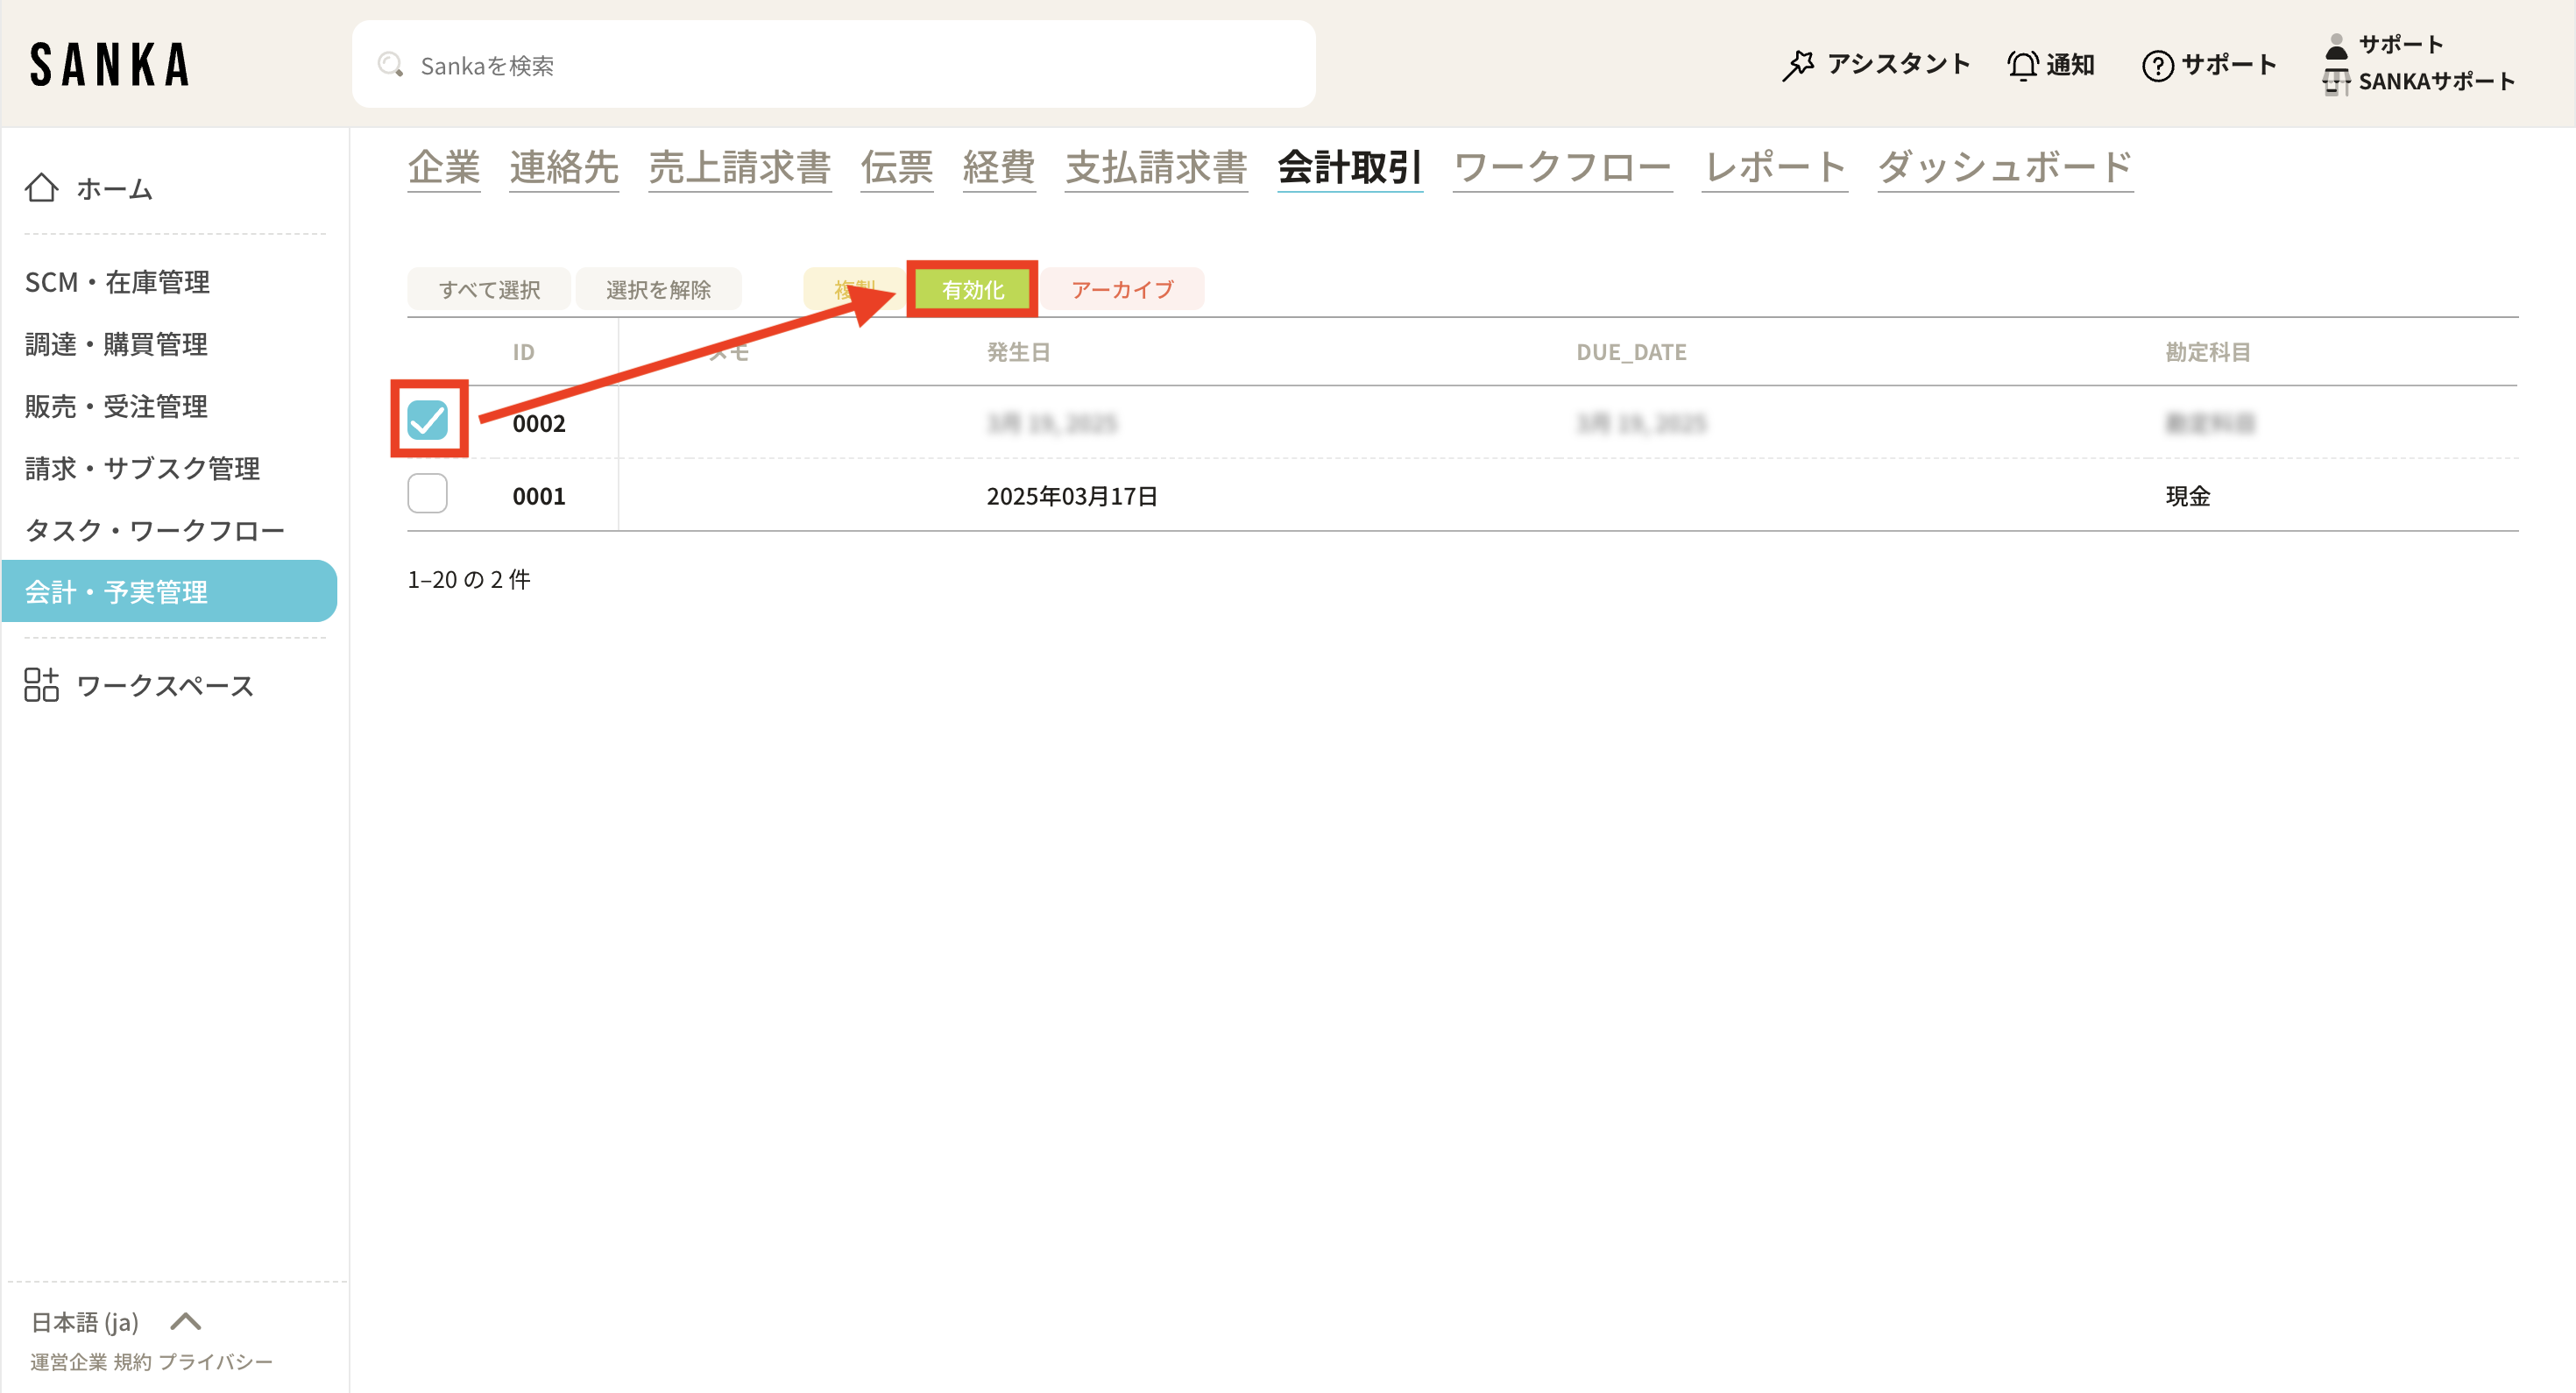
④Once activated, the case will no longer be grayed out and will return to its normal display.