This guide explains how to connect Rakuten Ichiba and Sanka.
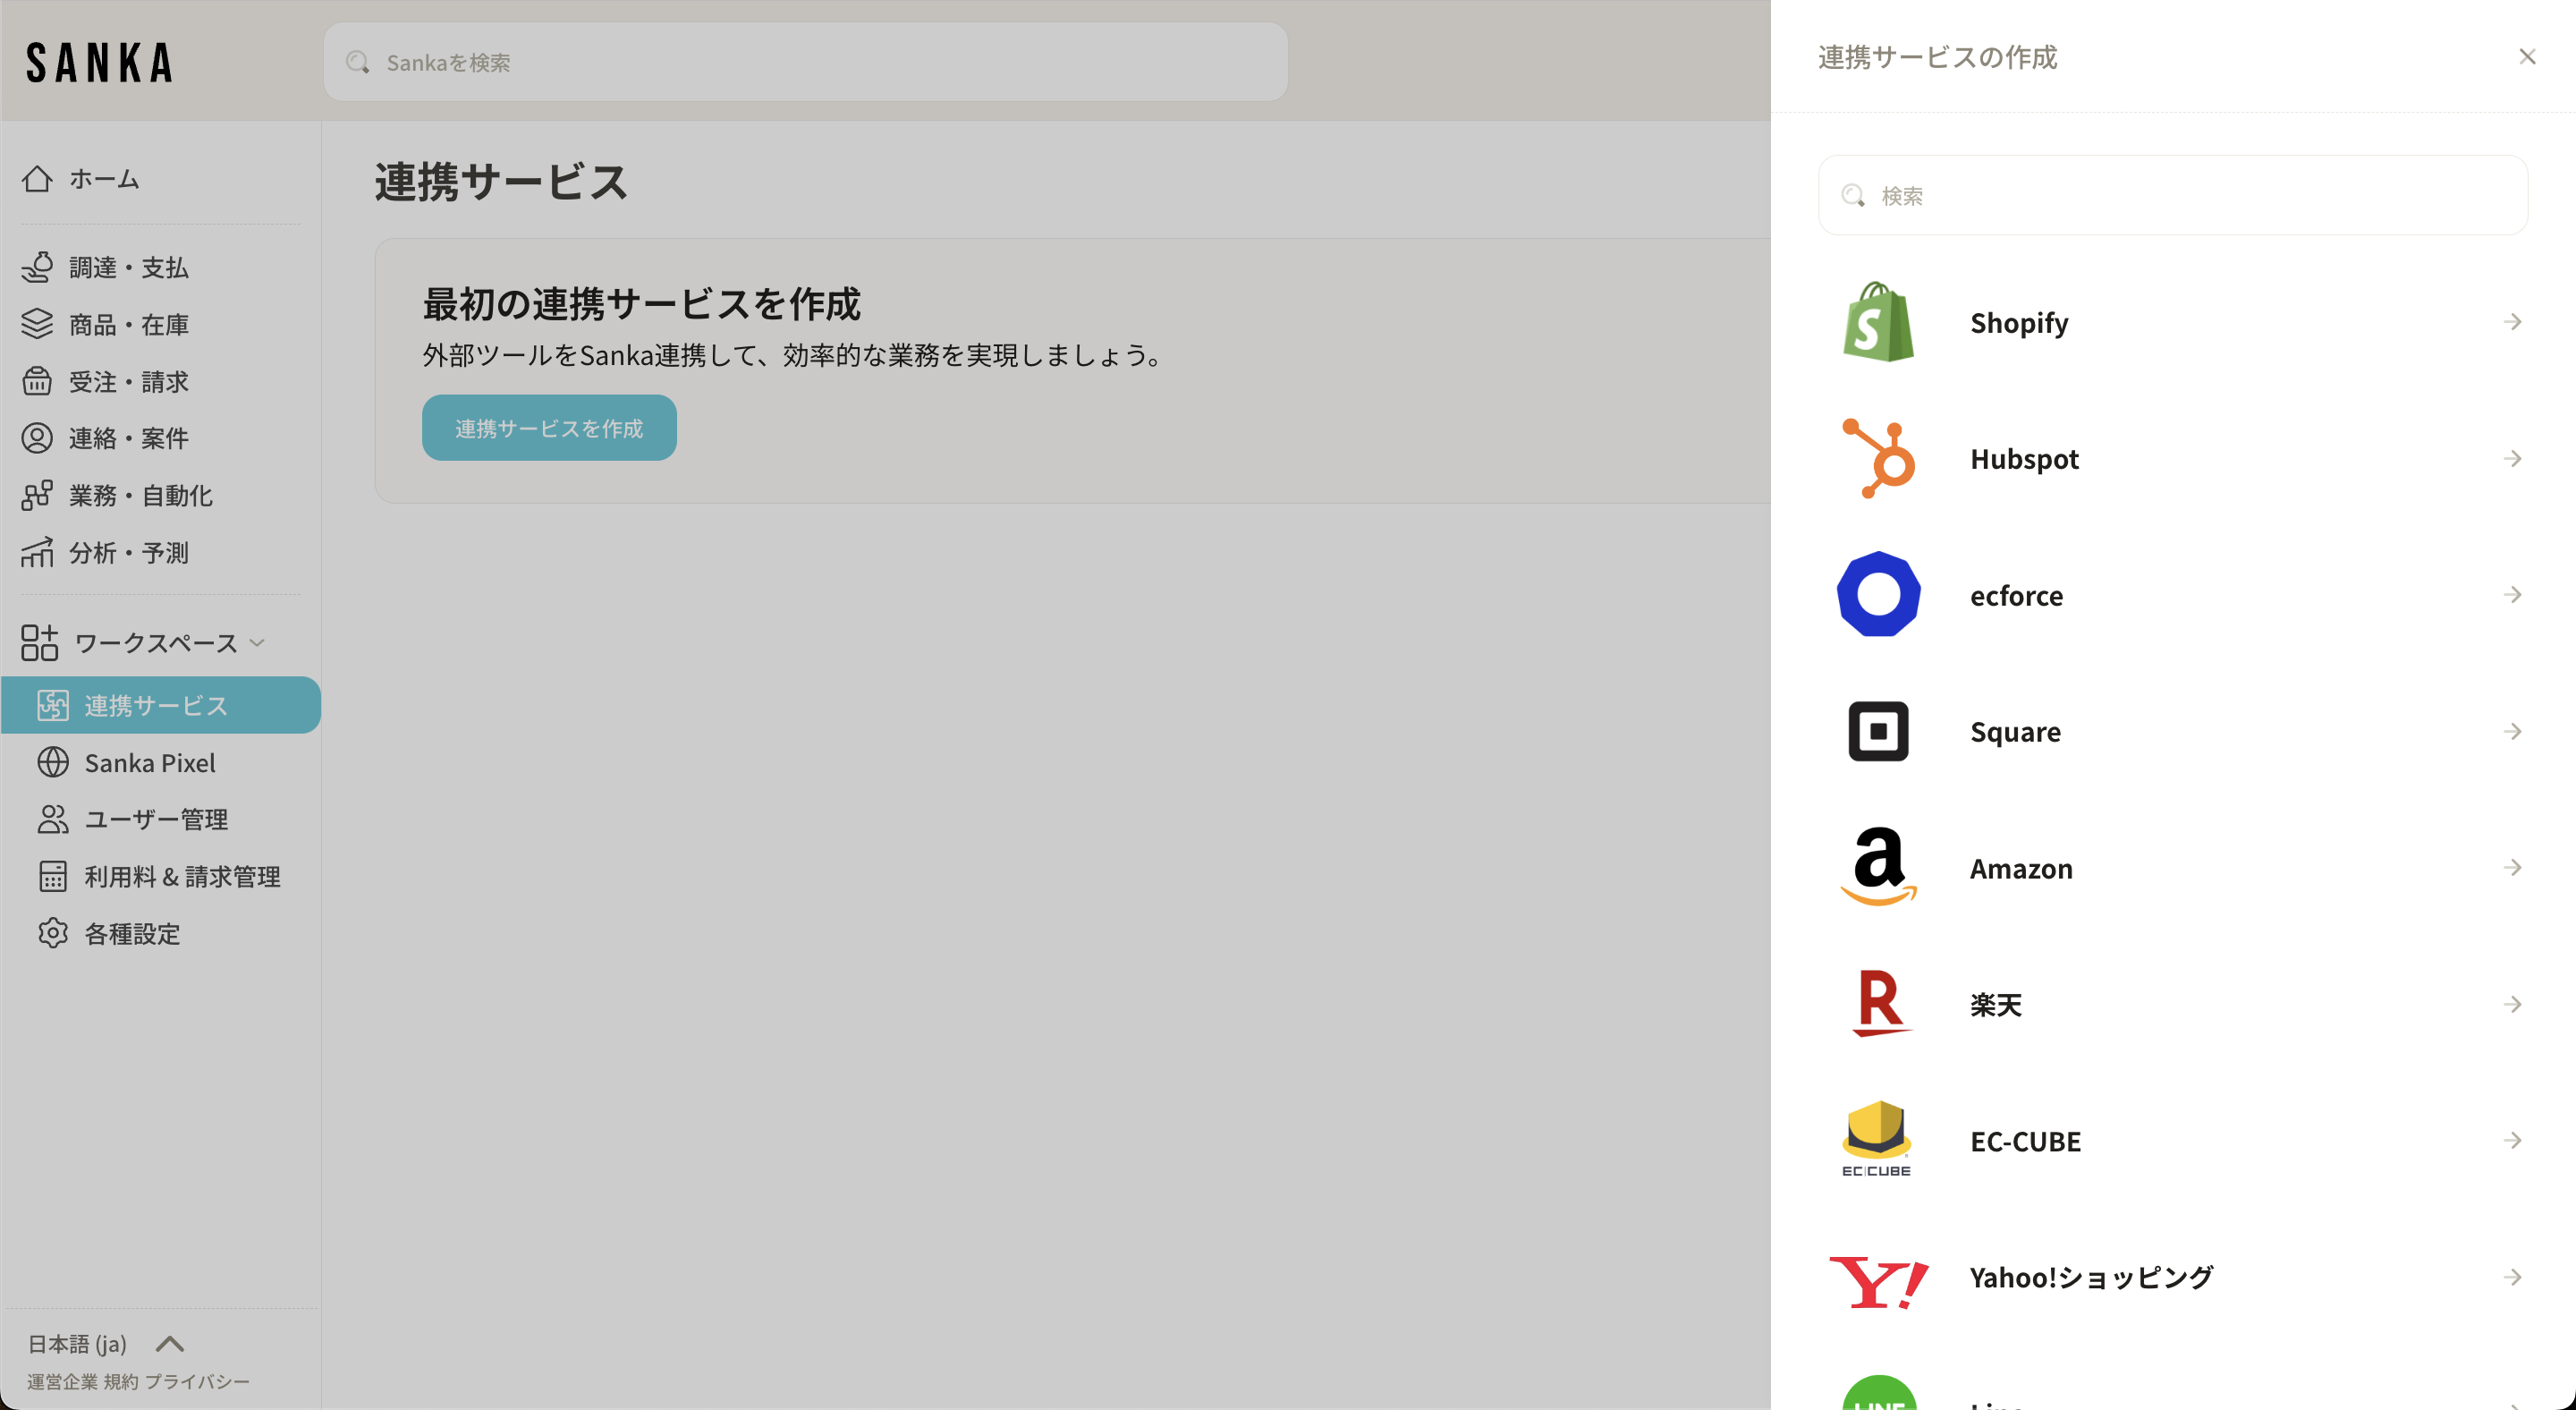
First, please log in to Sanka and create an integration service from Workspace > Integration Services.
Please select Rakuten from the integration services.
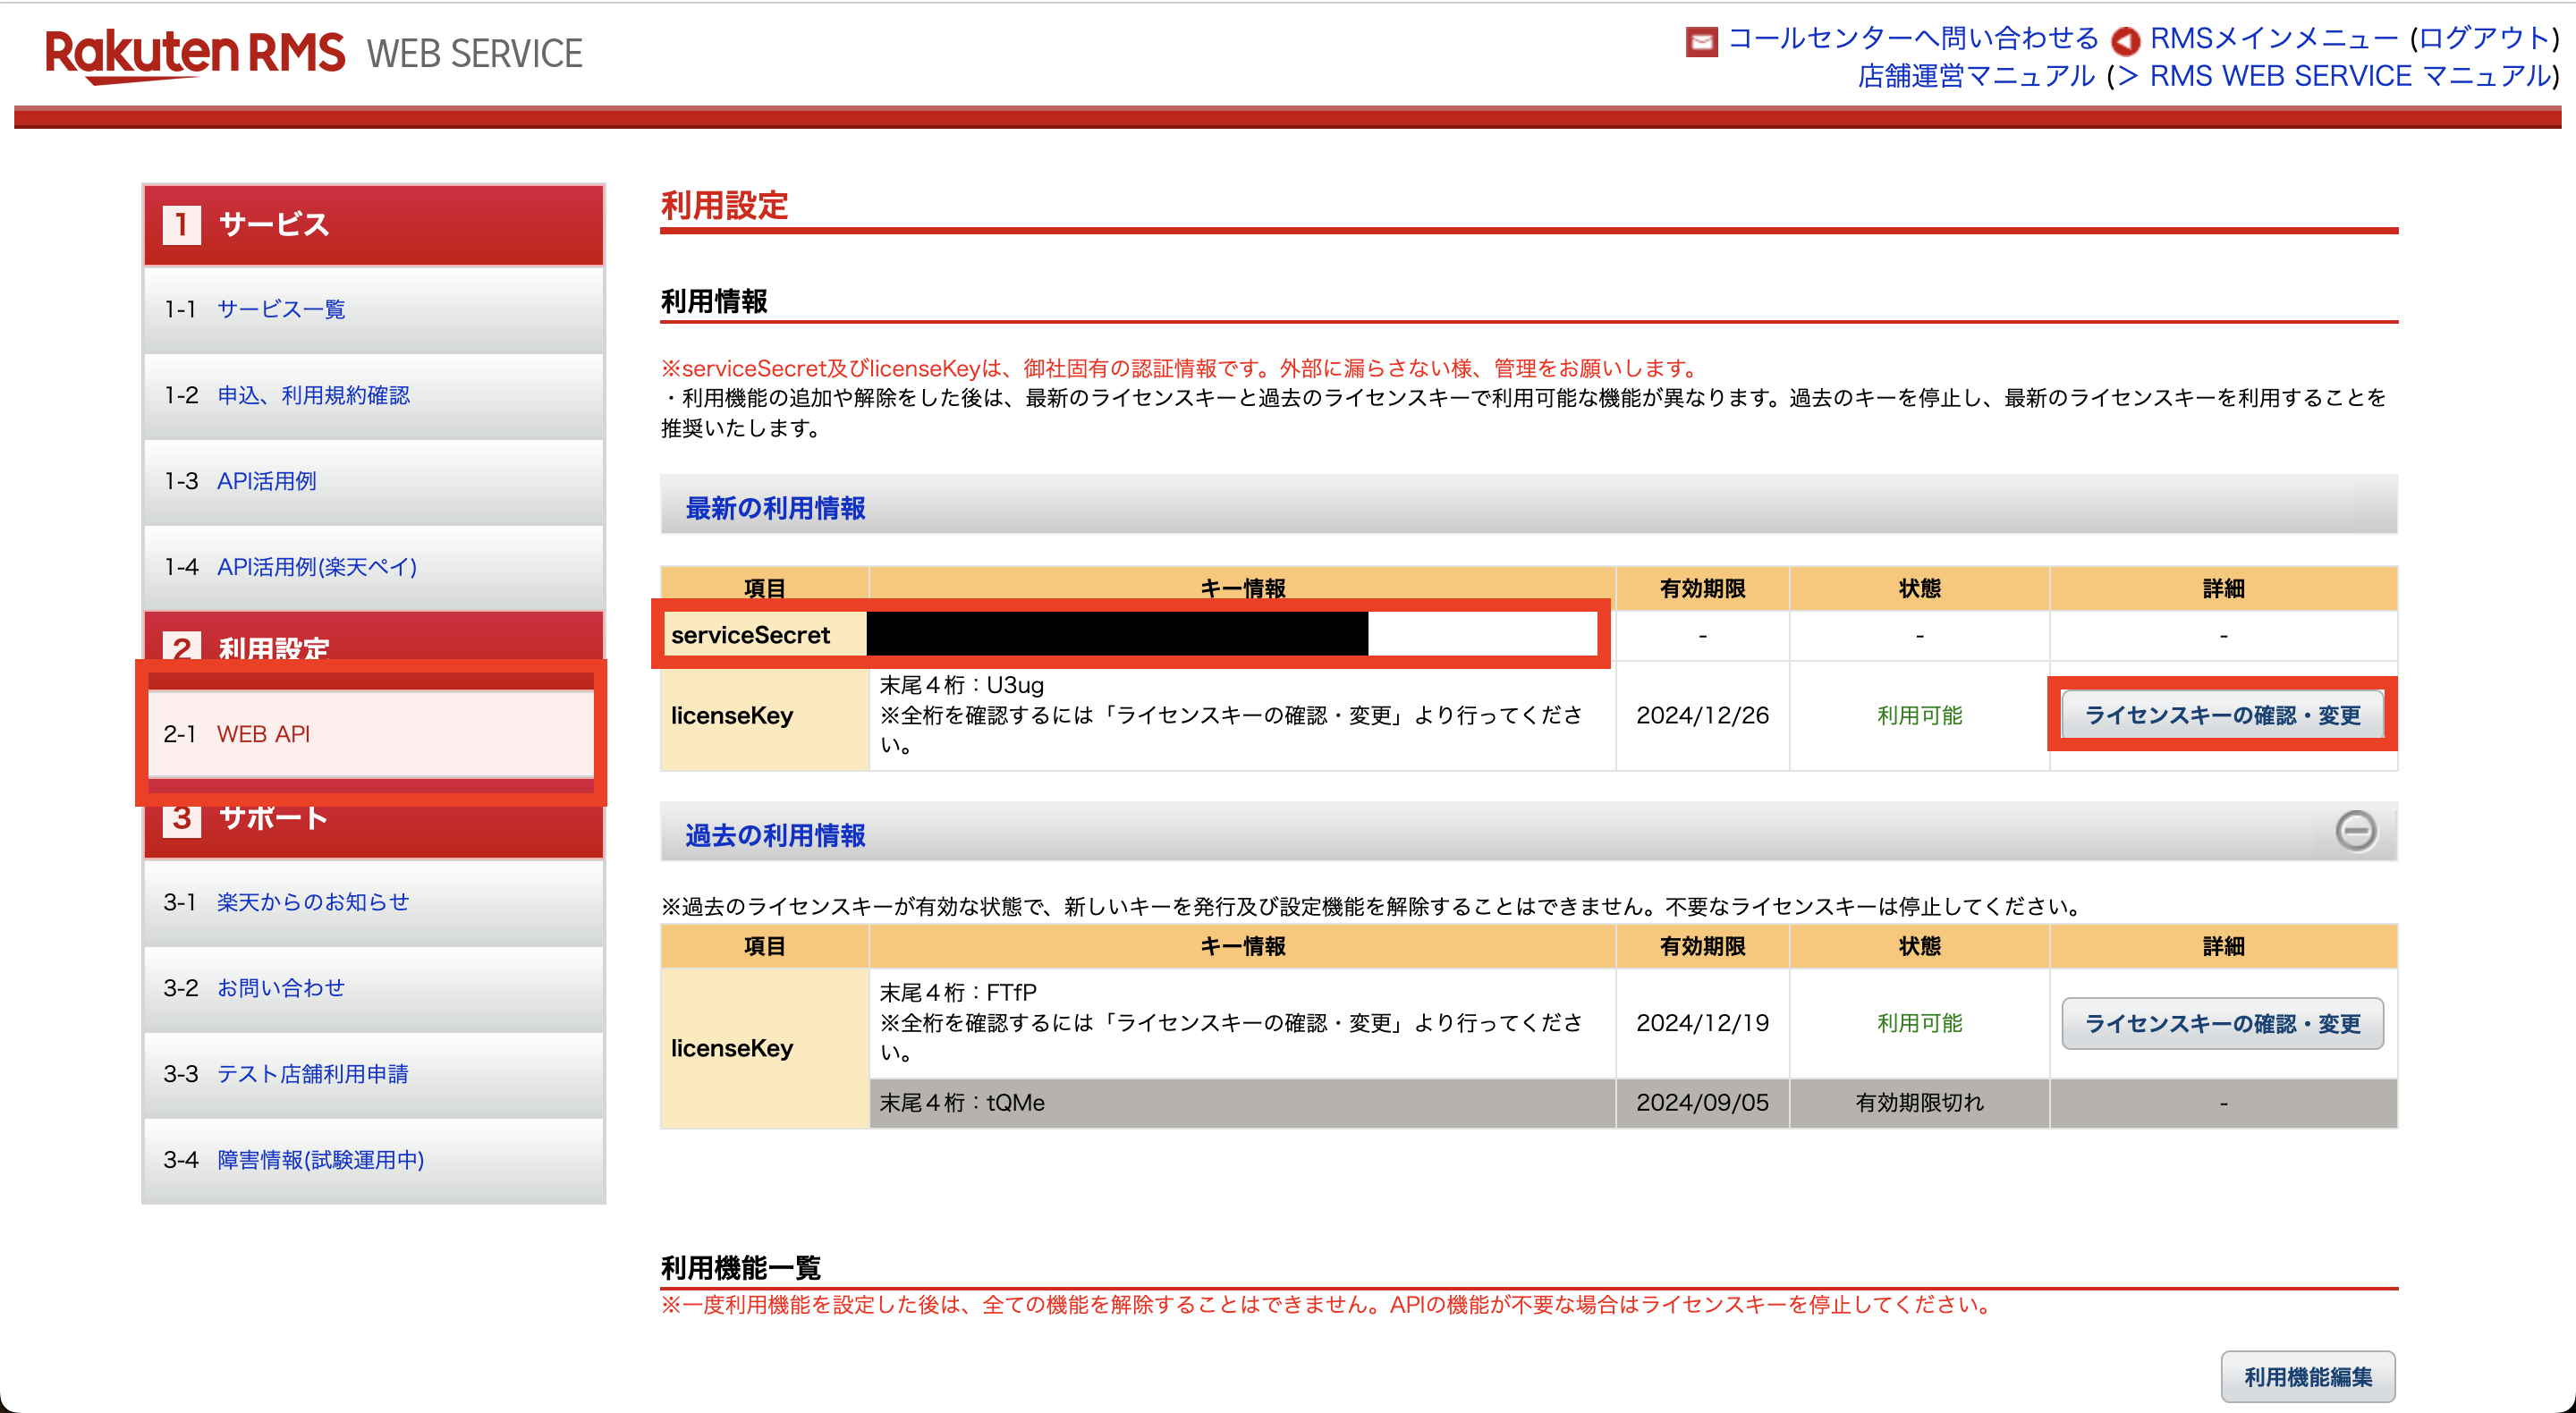
There are fields for "Service Secret" and "License Key" there.
These two pieces of information can be obtained from RMS, which is the management screen of Rakuten Ichiba.
Open another window and log in to RMS.

From the left menu, select 'Information and Services for Stores' > 'Web API Service'.
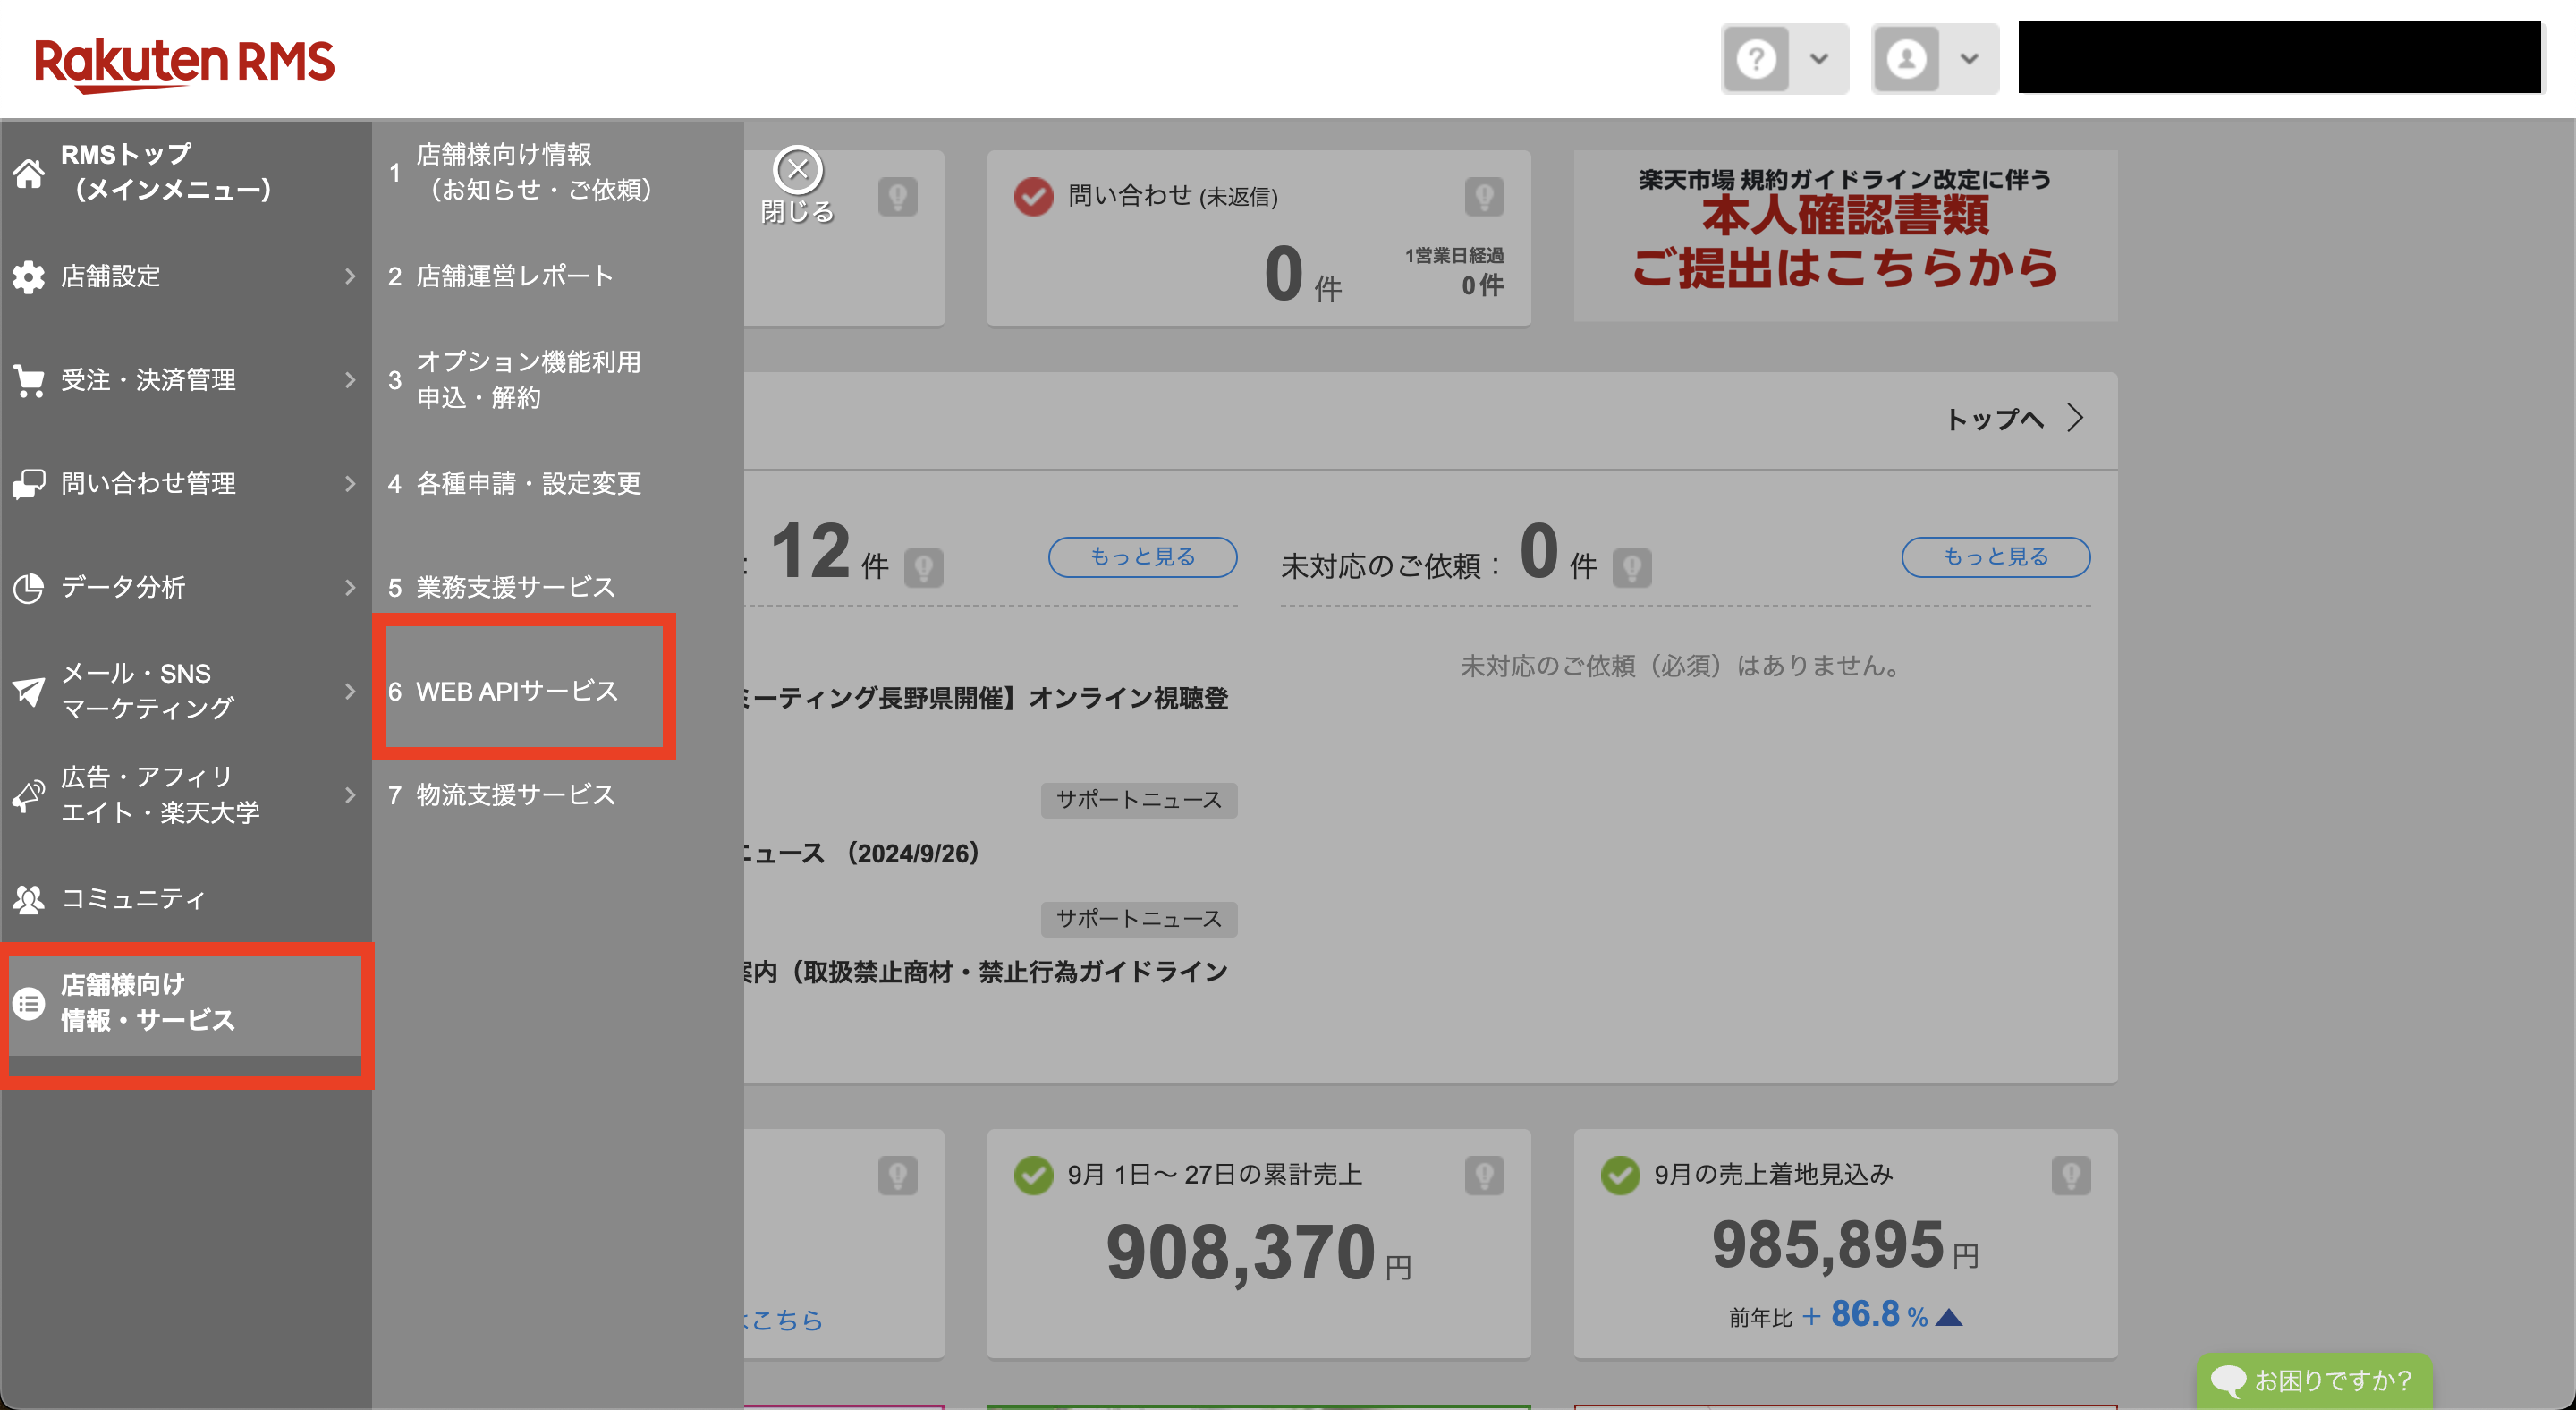
Next, proceed to the API page from the WEB API menu on the left side menu.
On the WEB API > Edit Usage Functions page, enable all usage functions (select the checkboxes).
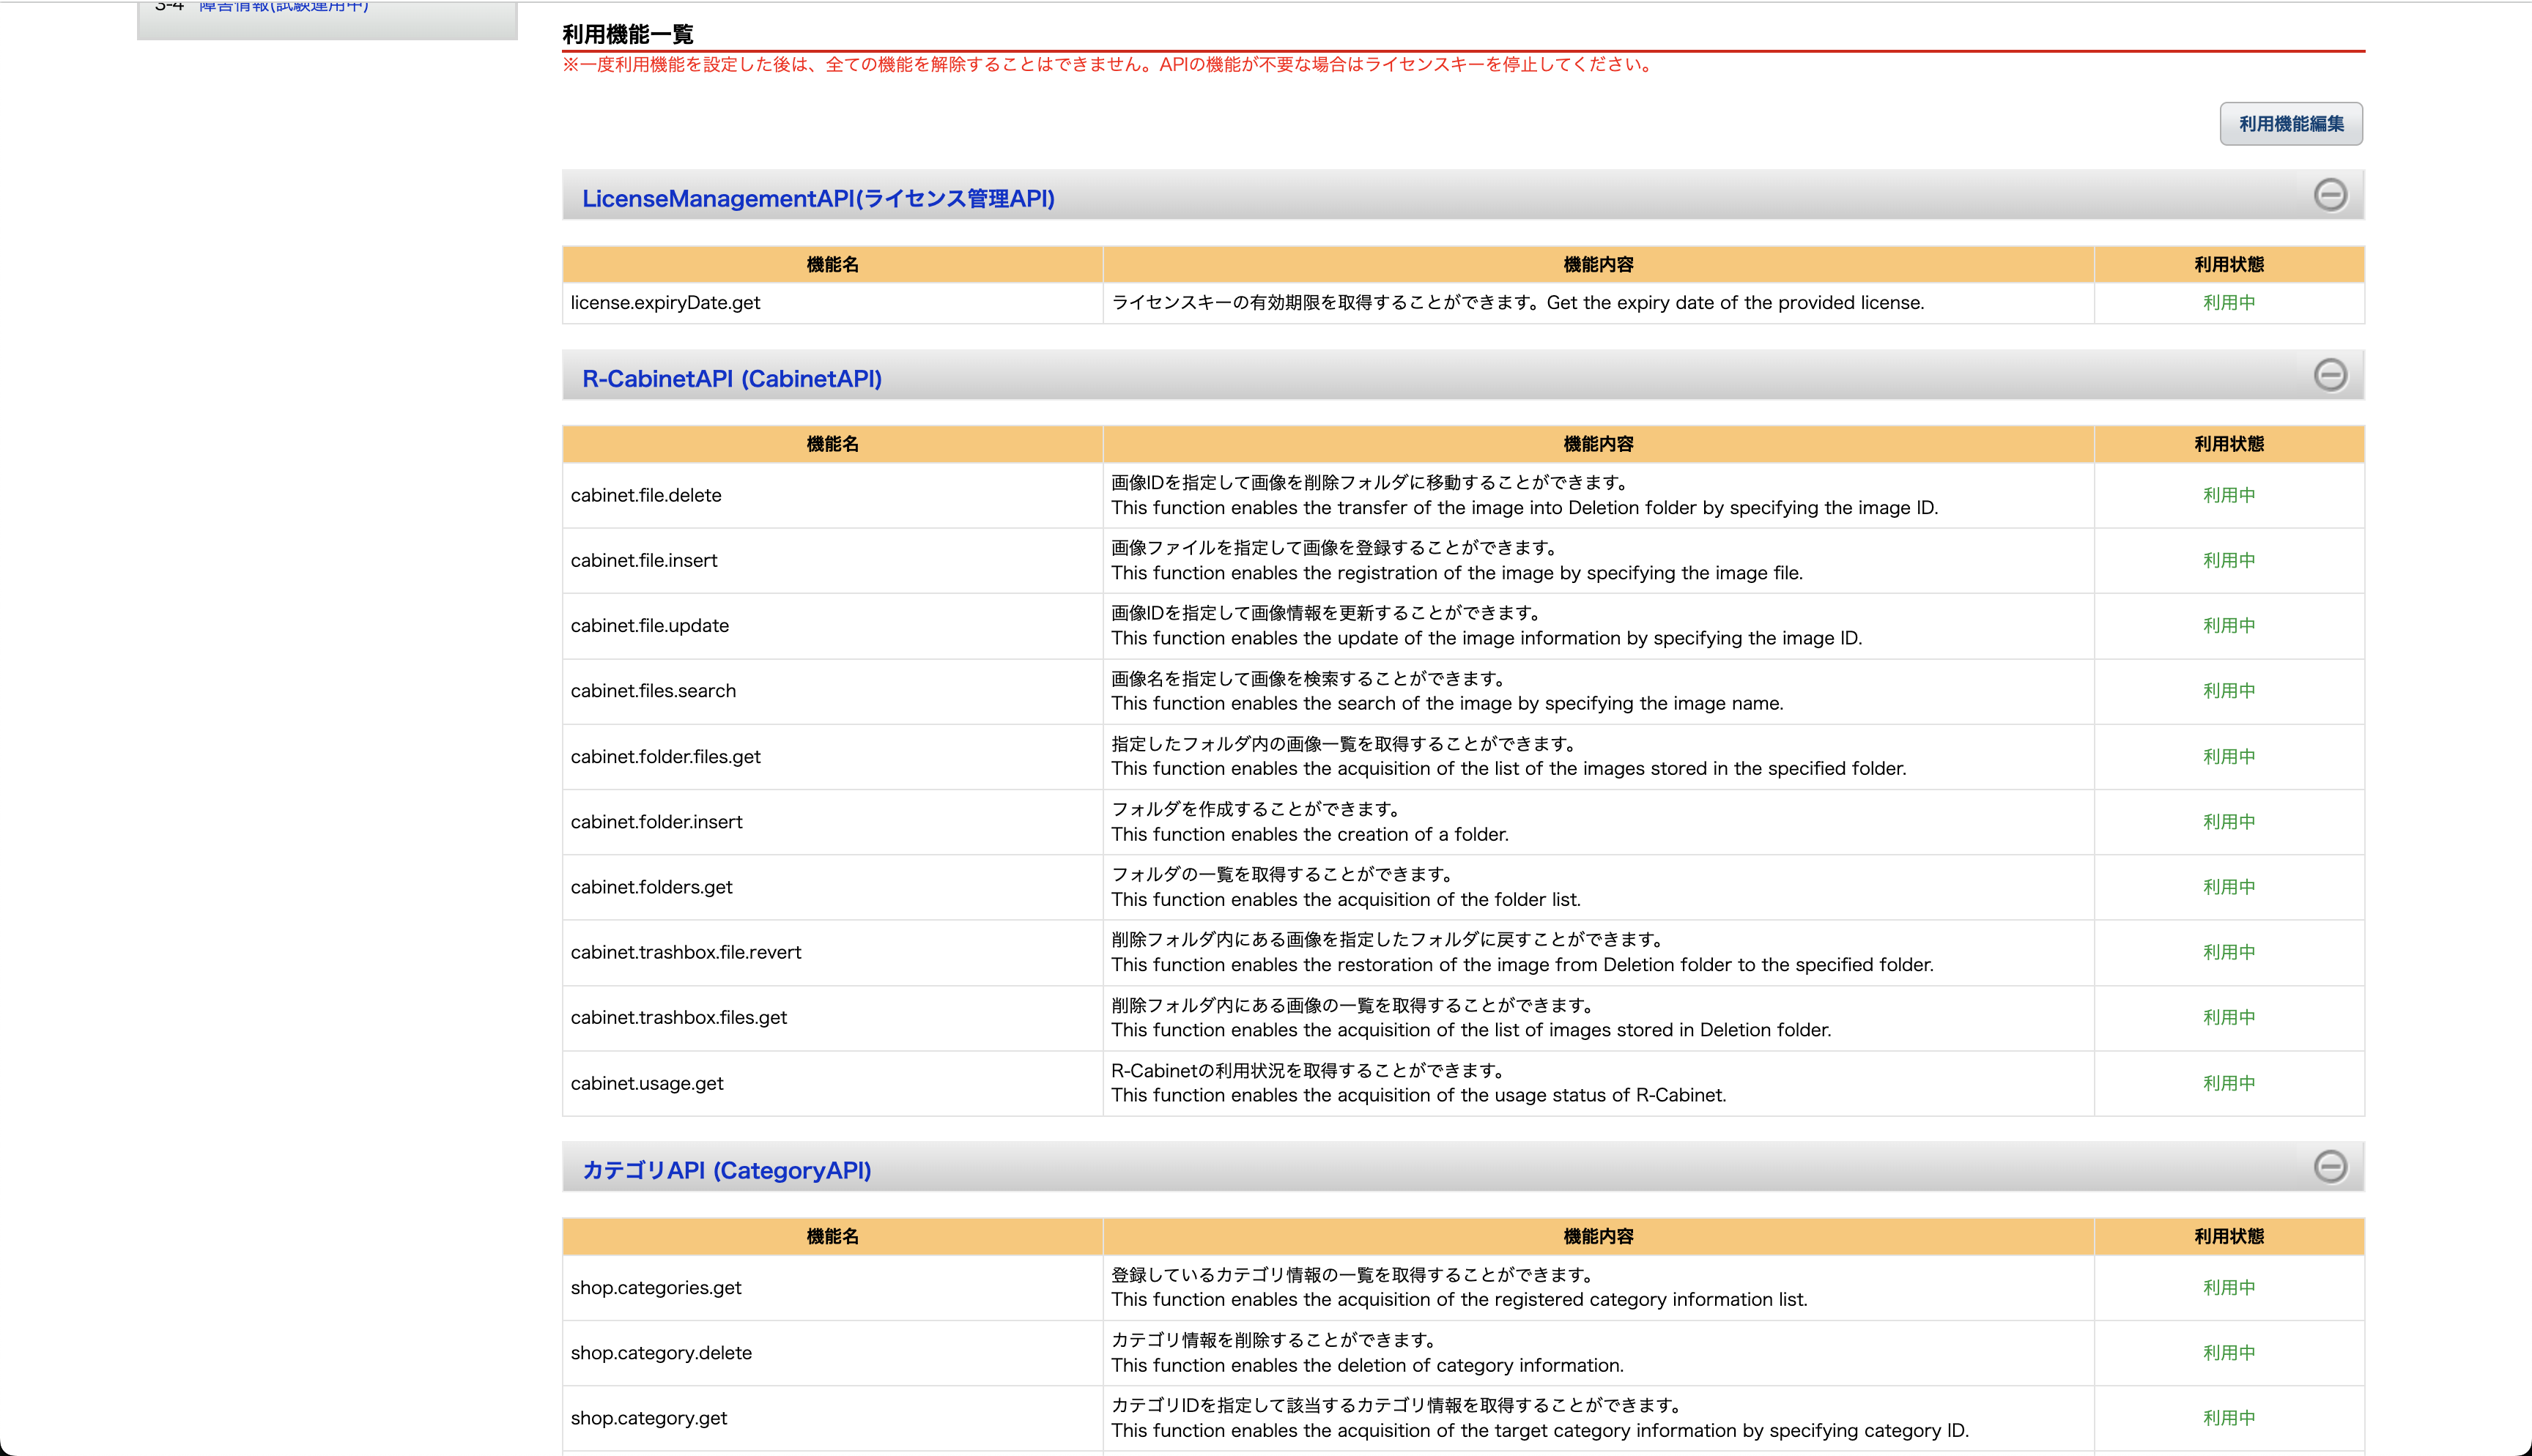
After enabling all usage functions, acquire the license key.
Paste the “Service Secret” and “License Key” obtained from the above screen into the respective input fields in Sanka, then click the “Create Linked Service” button to complete the integration.
** The maximum integration period between Sanka and the Rakuten integration service is 63 days. Please issue a new license key and update the integration details before the expiration date.
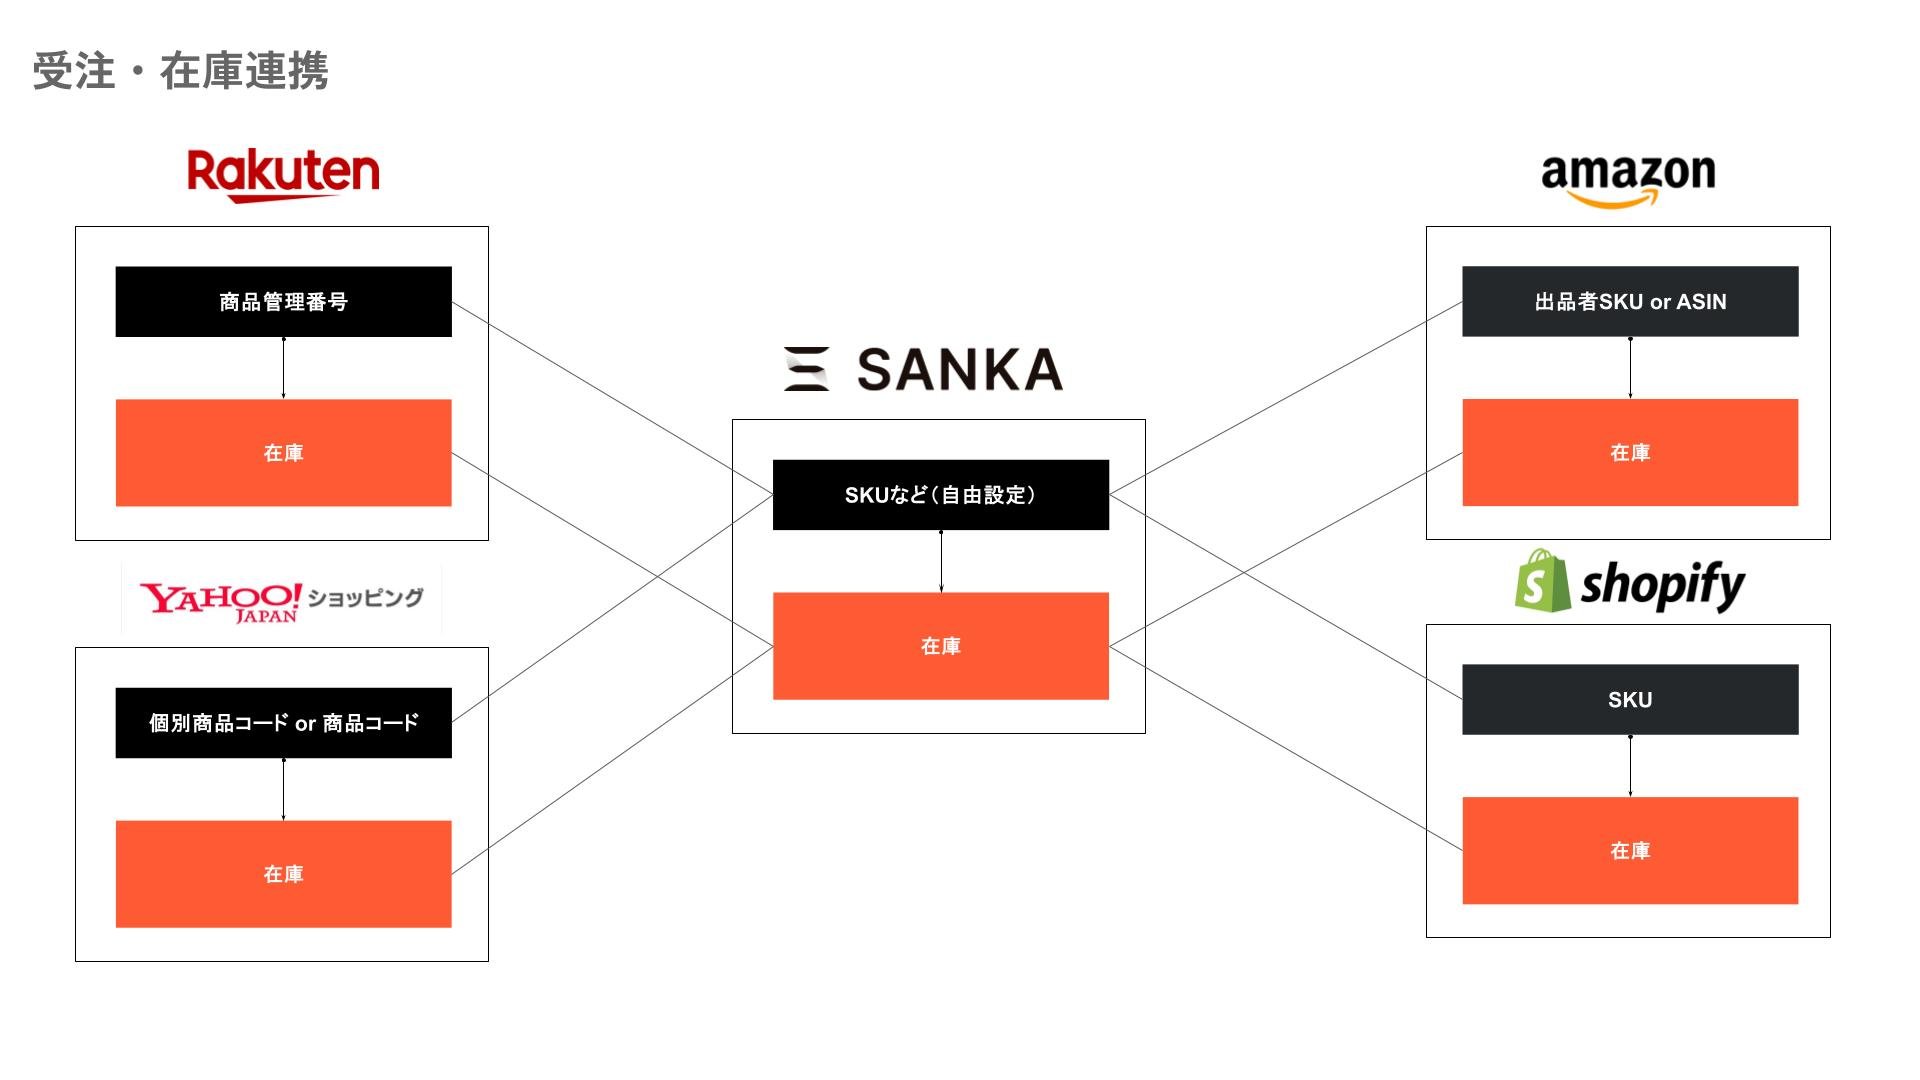
When selling the same products or inventory on multiple EC sites or stores, it is necessary to add Rakuten’s product management number as a property in Sanka (the property must have a unique constraint).
If a unique property already exists in Sanka, please add that information to the product management number on the Rakuten side.
The following explains how to import Rakuten's order information into Sanka.
Please note that this guide assumes that Rakuten (RMS) is already integrated with Sanka.
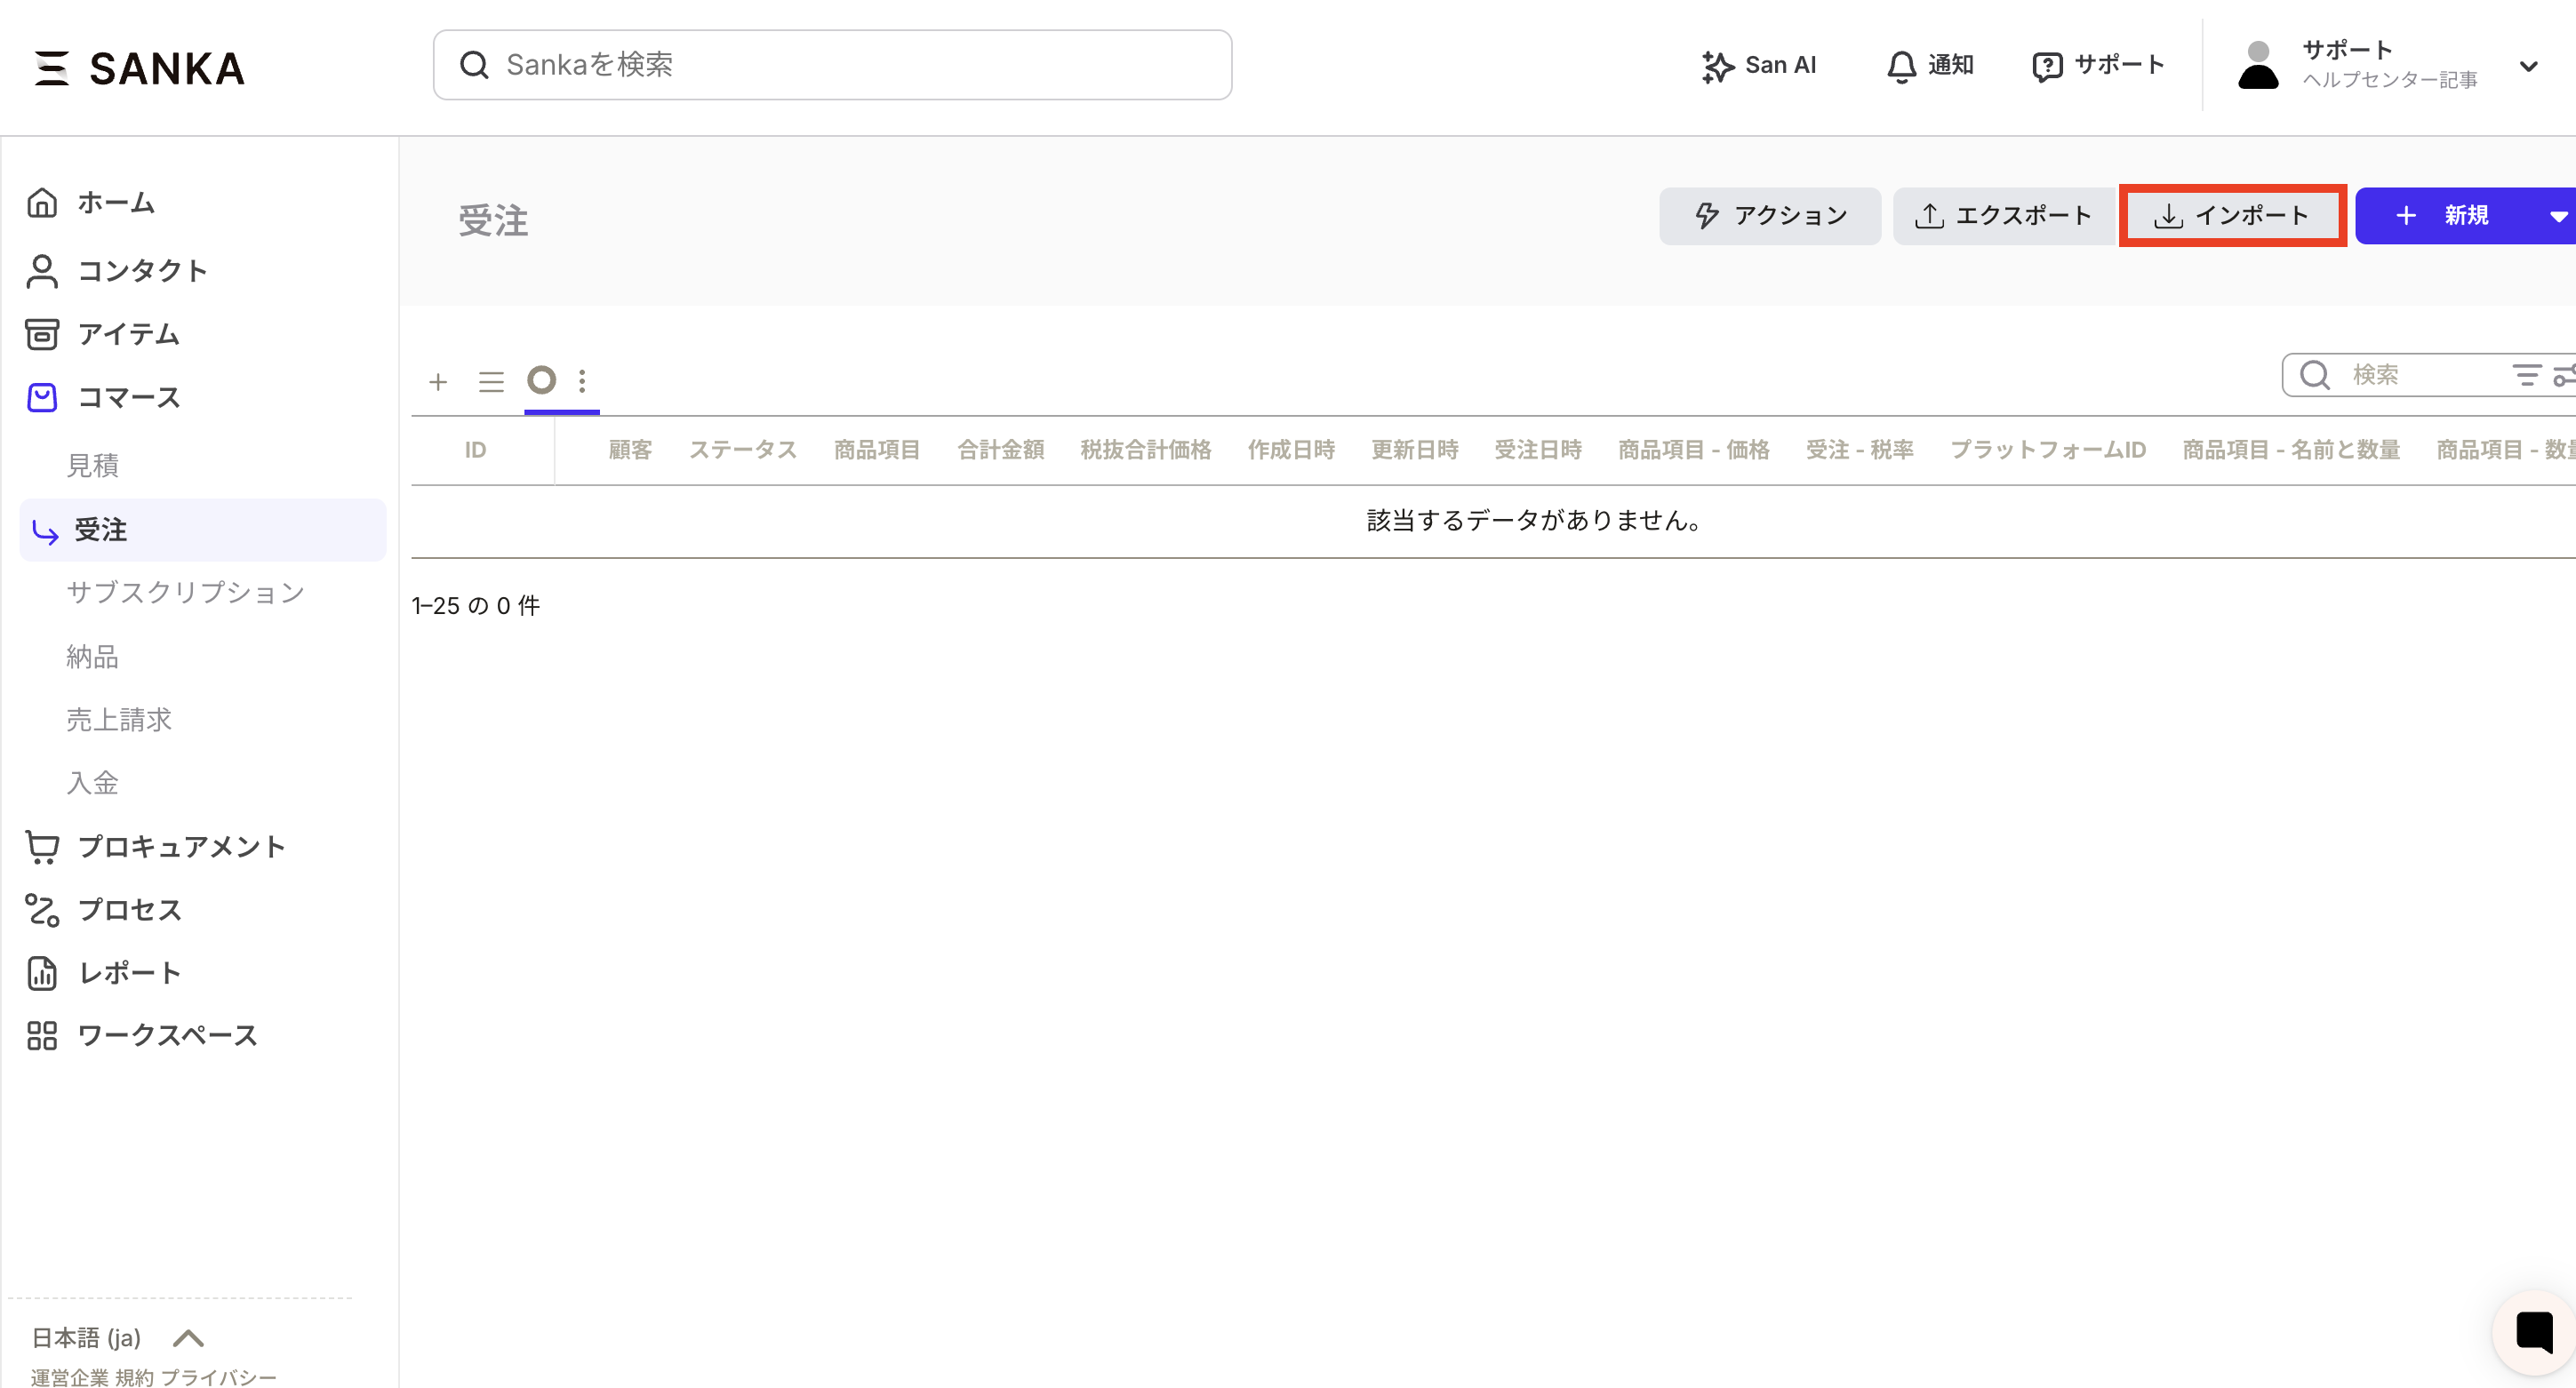
Open the Sanka order object and click Import.
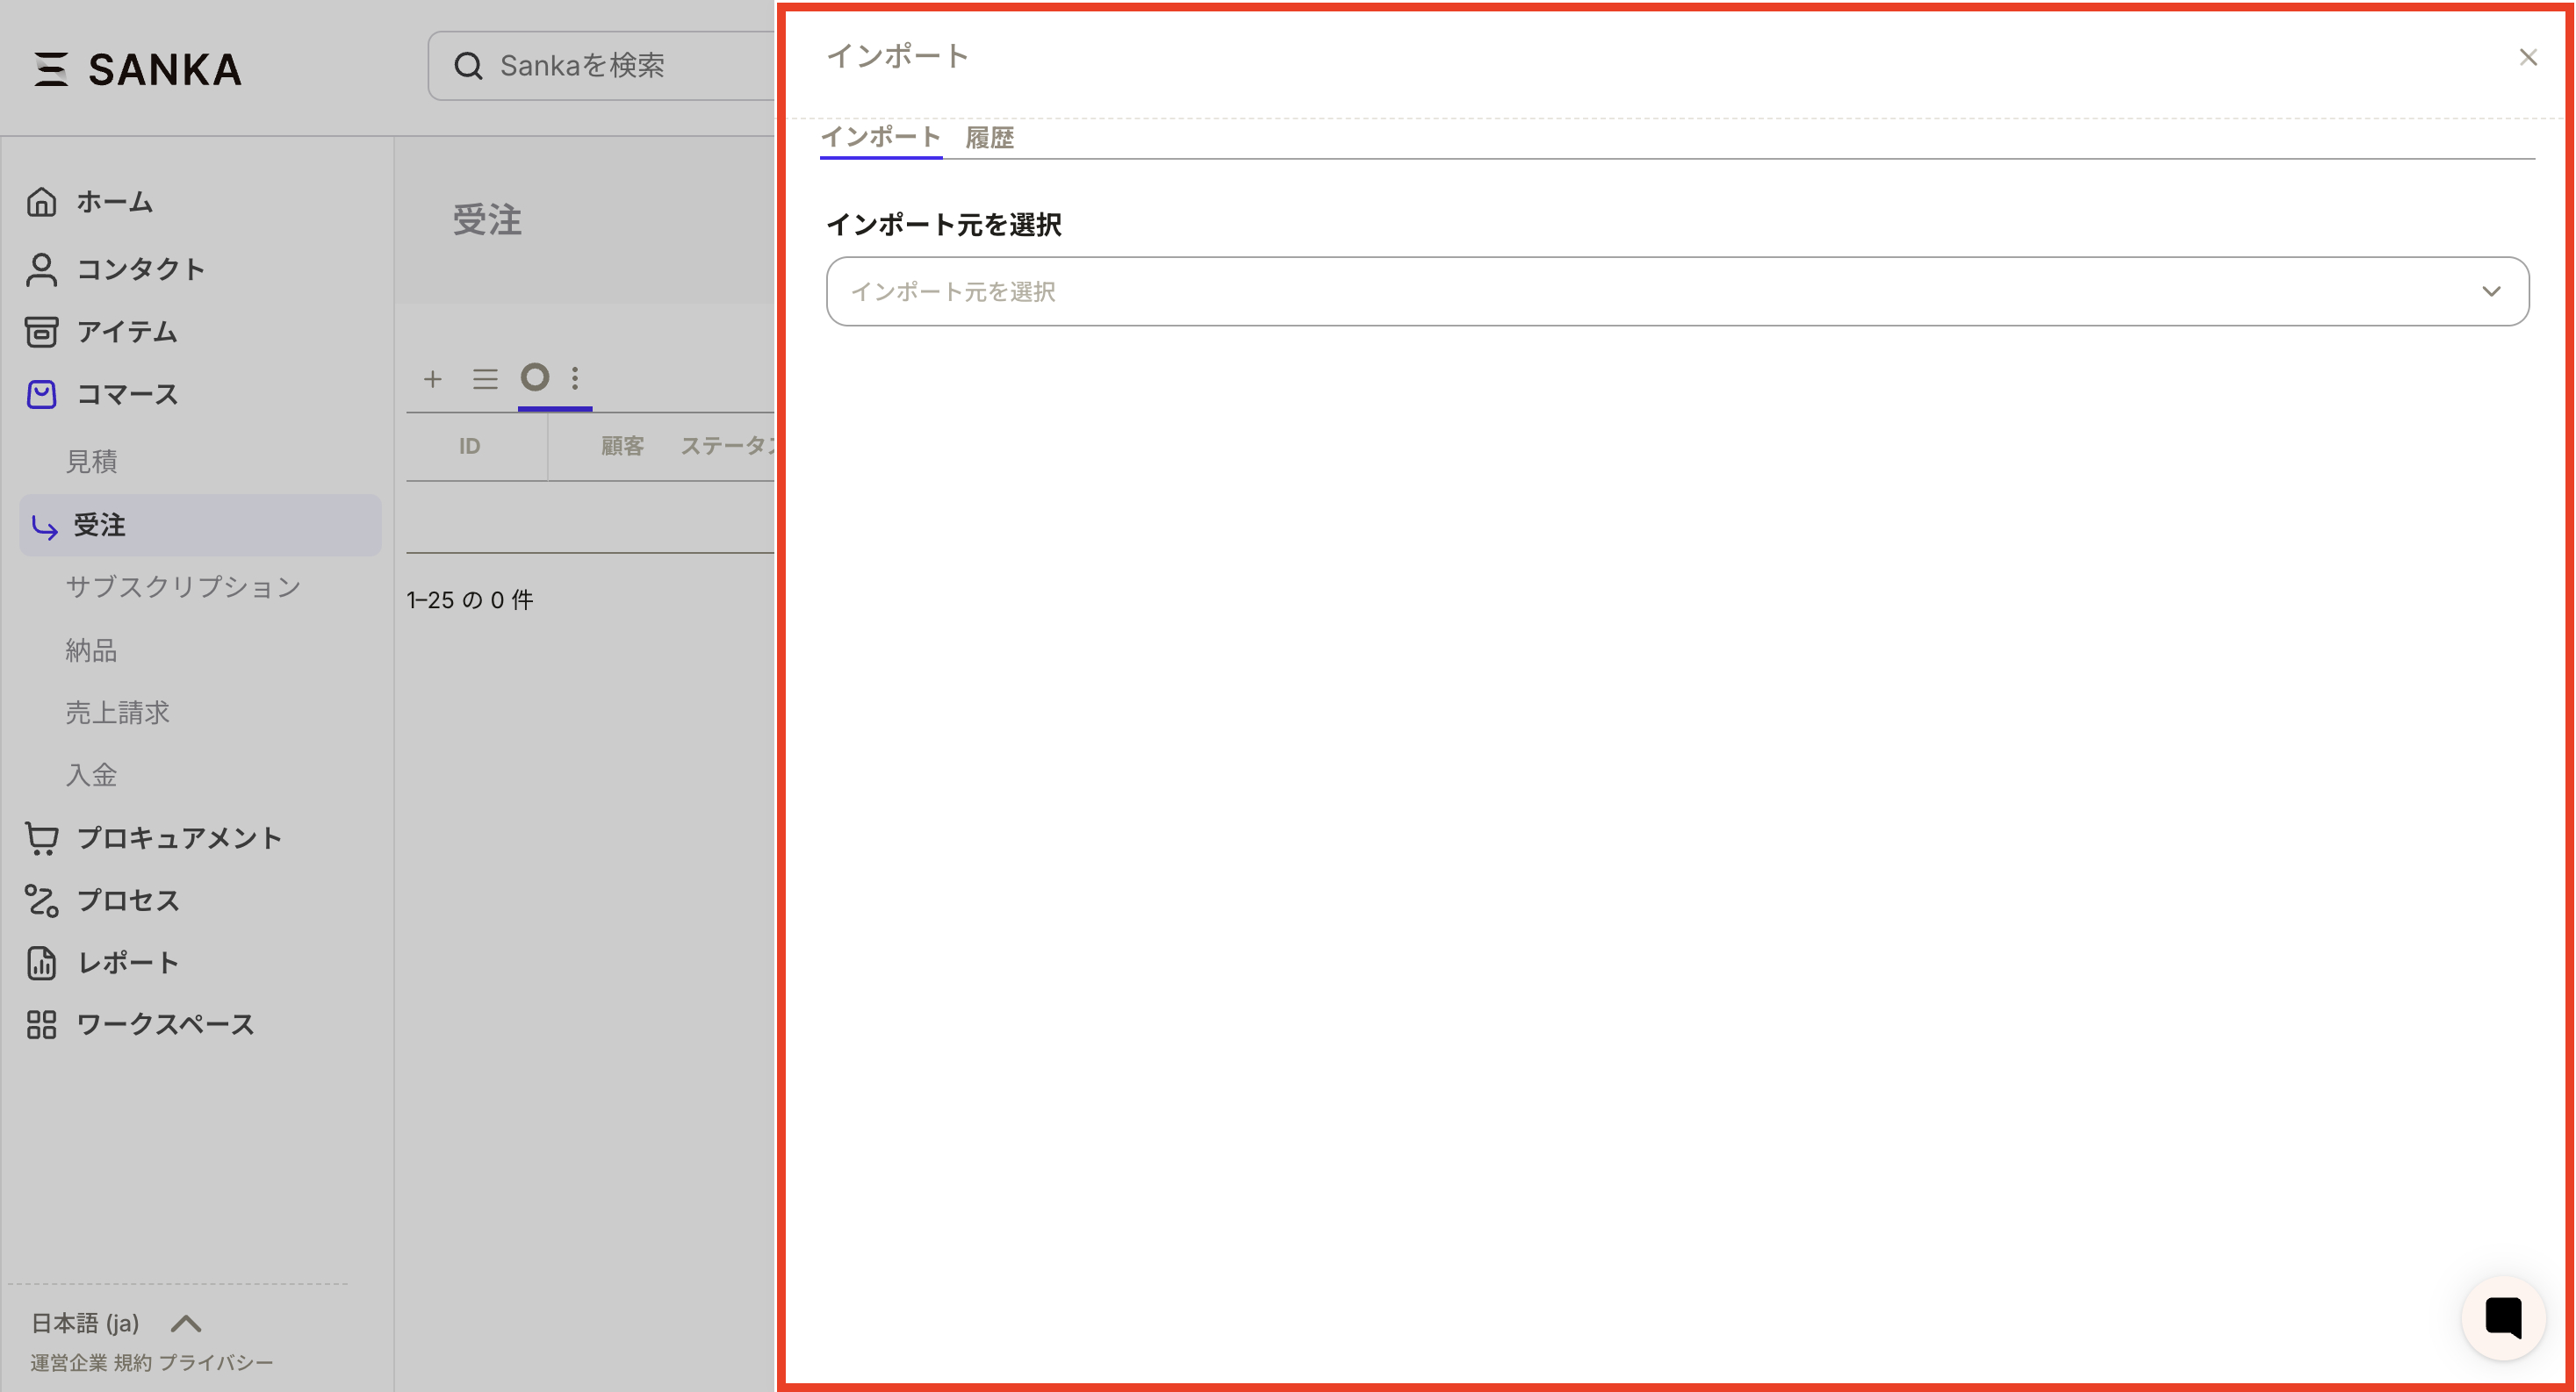
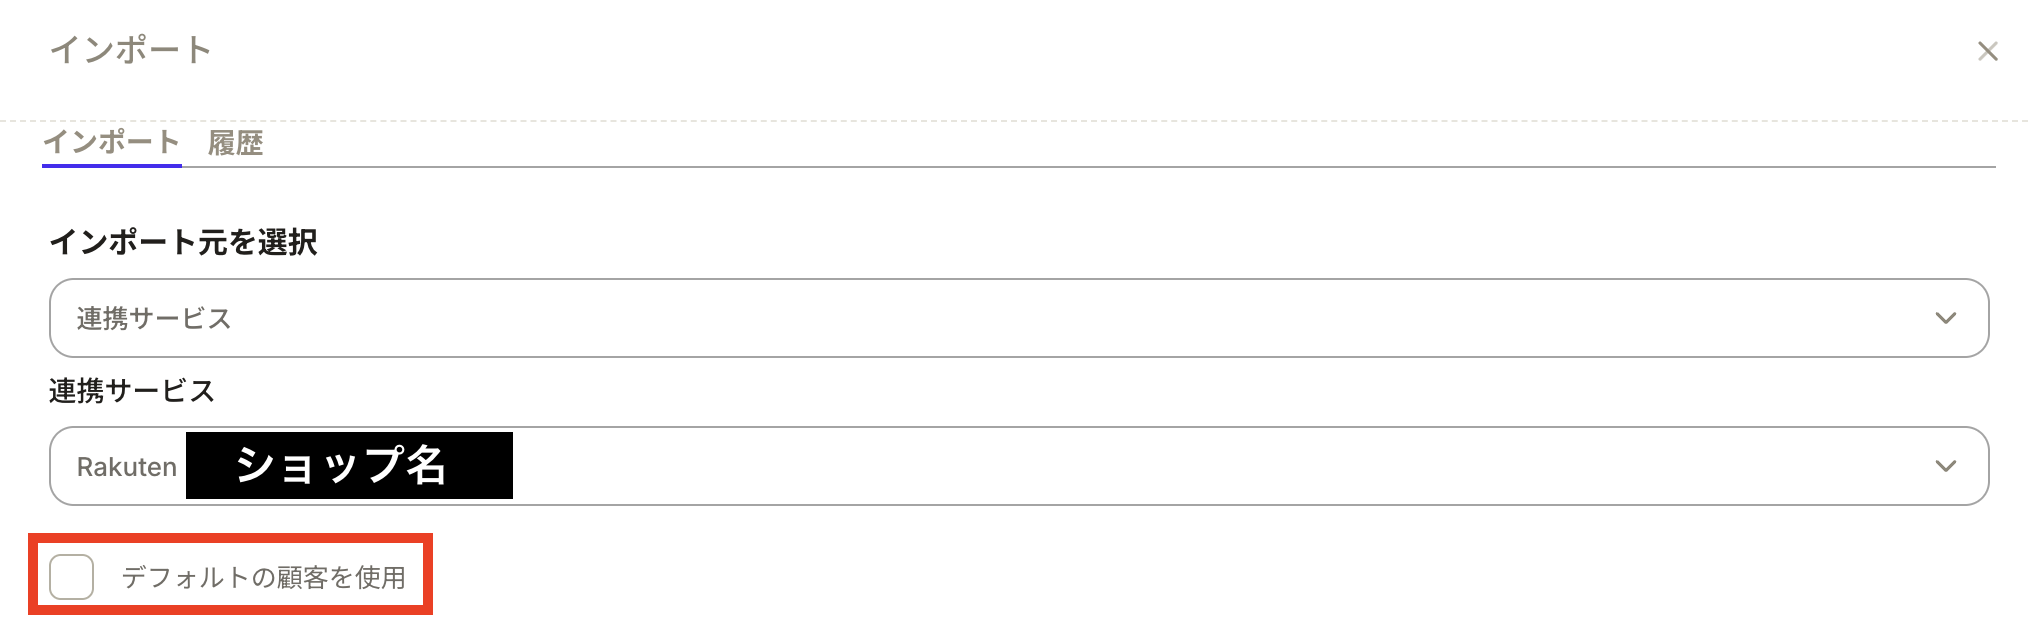
The import screen will be displayed. Next, select the integration service from the import source.
A section for linked services will be displayed; please select the relevant Rakuten account.
※ “Use default customer” means that, if checked,the person selected here will be registered as the customer.
When you select an integration service, the mapping table will be displayed.
Next, proceed to map the Rakuten item information to Sanka properties.(For example, the “XX” field in Rakuten order information corresponds to the “XX” property in Sanka, etc.)
In the black-framed section of the image below, platform headers and Rakuten-side fields are actually displayed, as well as the Sanka properties. You can select Sanka properties from those created in advance.
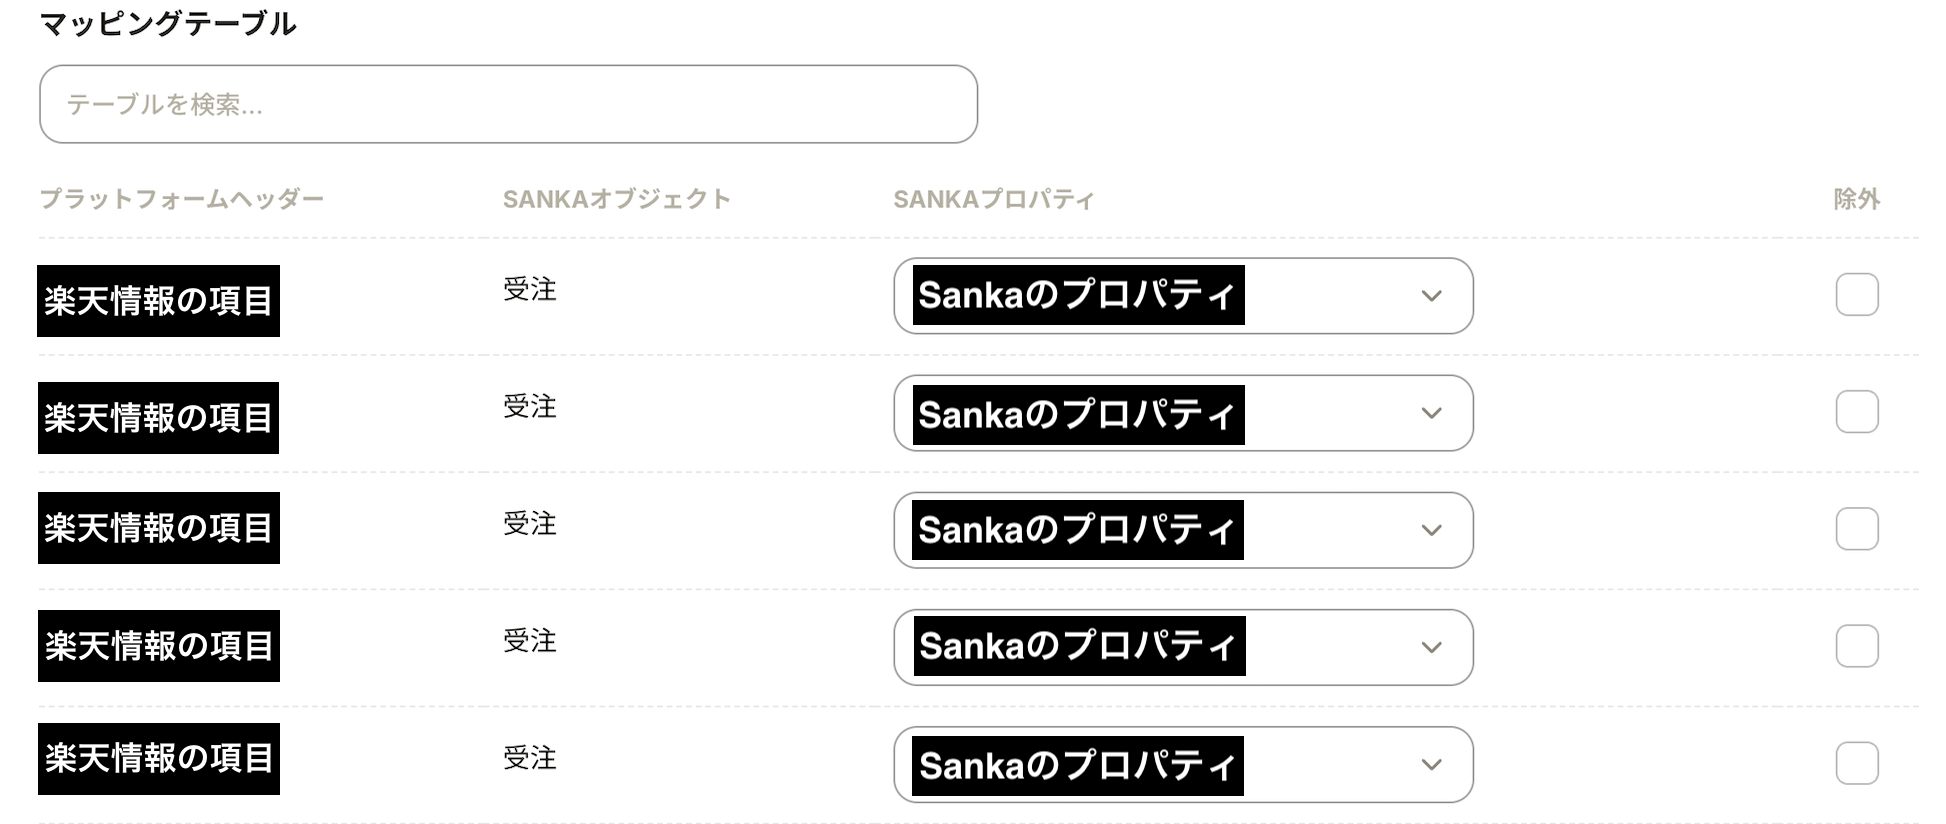
If there is no property in Sanka, a new one can be created on the spot. Please select the option to create a new Sanka property.

By checking the exclusion column for items or unnecessary information you do not wish to include in Sanka, you can prevent them from being synchronized. Items that are checked as excluded will not be imported.

※It is recommended to include only the necessary information for properties to be linked according to your business workflow.
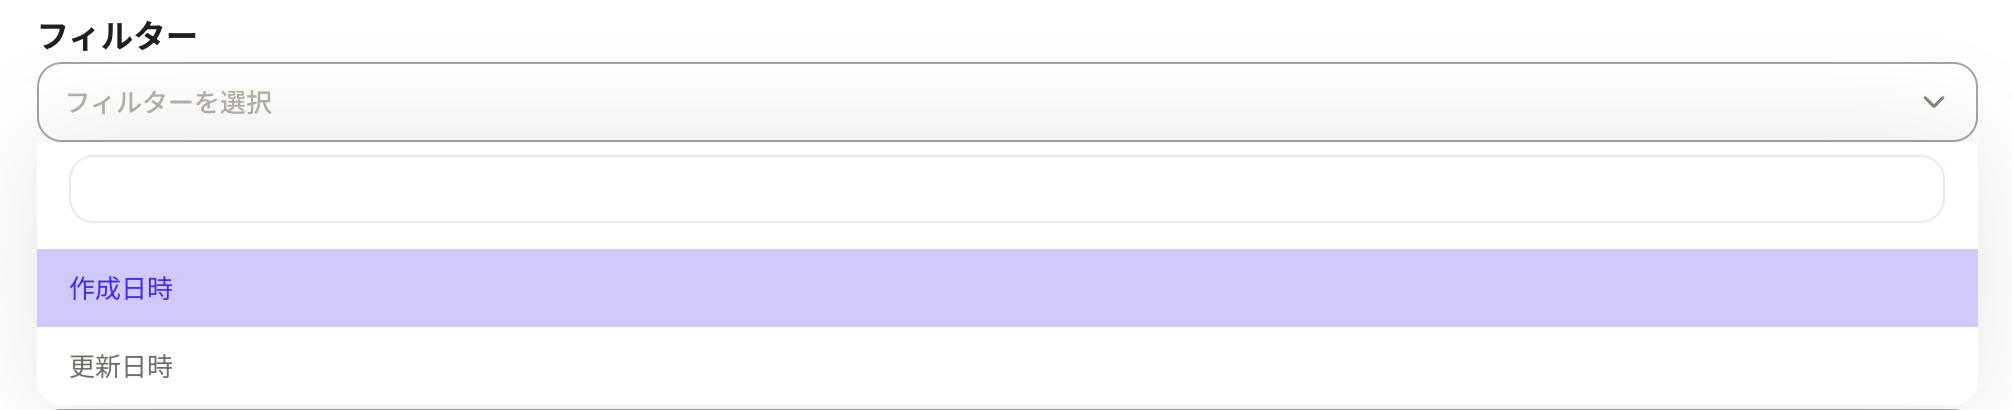
After completing mapping, proceed to configure various settings before importing.
"Filter": You can apply filters to the information you wish to import based on creation or update dates. For instance, if you only wish to import order information received after a certain date and time, please configure the settings here.
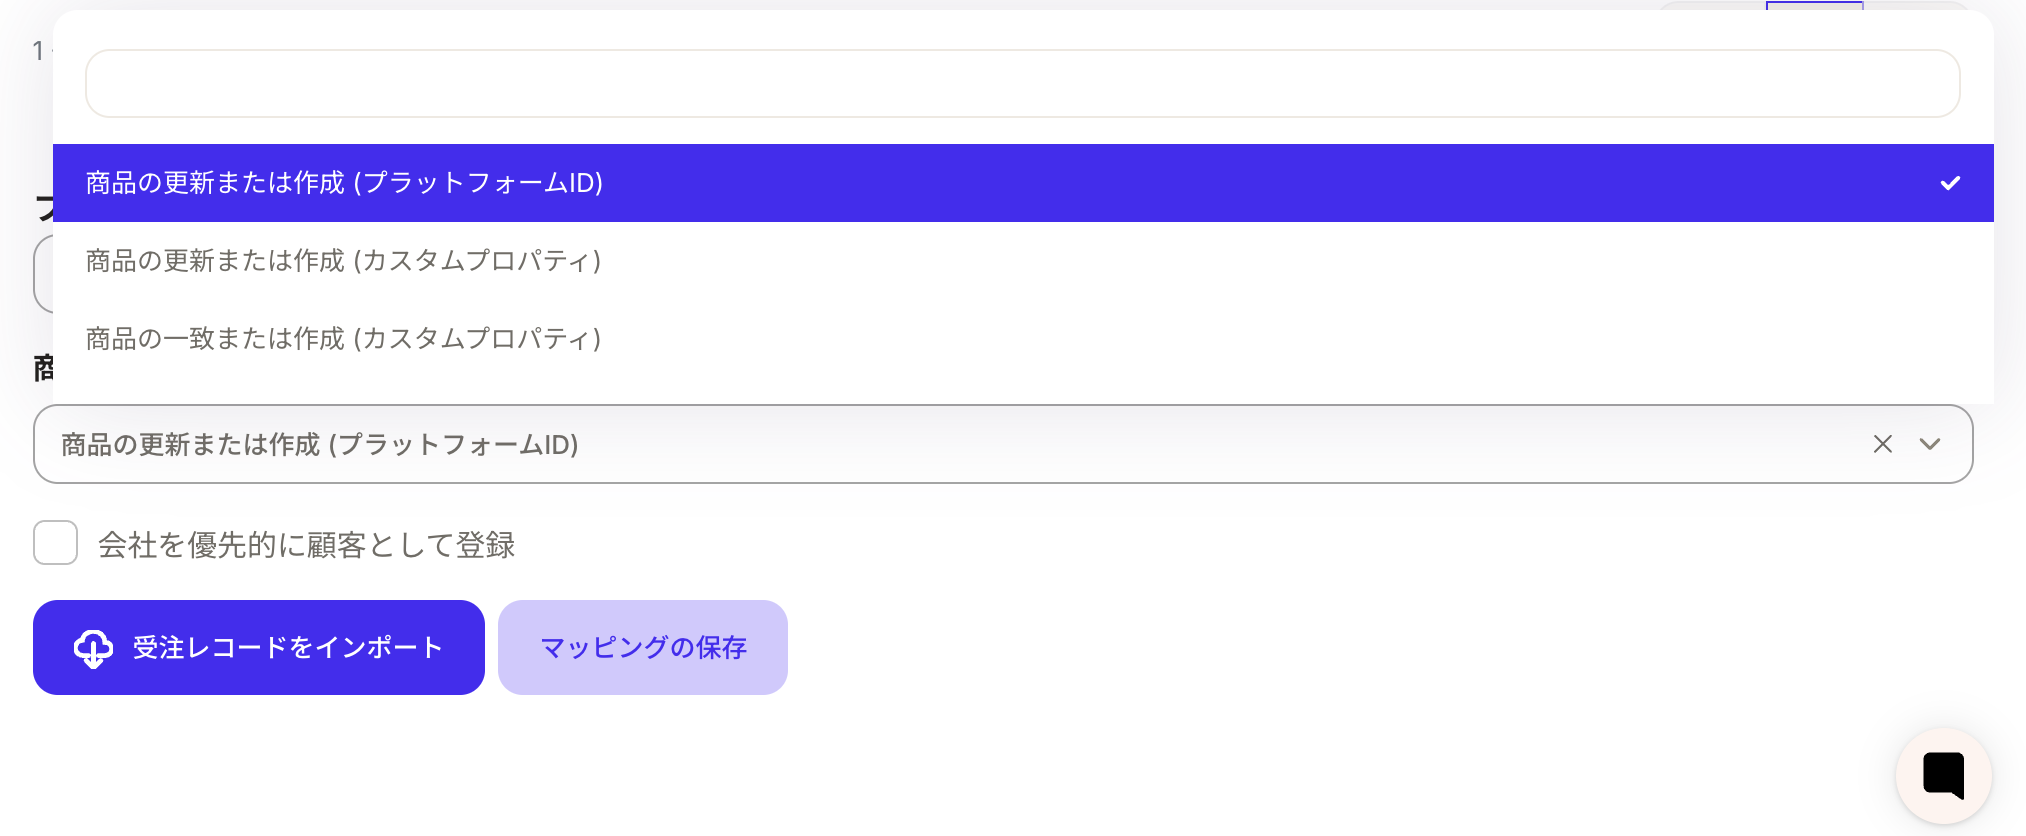
“Select how to import products”: Choose from “Update or Create Products (Platform ID),” “Update or Create Products (Custom Property),” or “Match or Create Products (Custom Property).” Here, you are selecting the ID to be used as the key when importing, updating, or creating products.

・“Update or Create Products (Platform ID)” uses Rakuten’s platform ID as the reference.
・“Update or Create Products (Custom Property)” uses a custom property as the reference. This refers to a unique ID configured separately, rather than Rakuten’s platform ID.
・“Match or Create Products (Custom Property)” is a function that allows you to prevent creating duplicate products in Sanka by matching product records based on any custom property. For example, this is useful when you are integrating with multiple EC platforms and wish to manage a single product and its inventory using Sanka.
If you wish to save the mapping, it is convenient to press the Save Mapping button.
Click 'Create Import Order Record'. The order information will be imported.