In Sanka, when creating records for objects such as sales invoices, purchase orders, quotations, delivery notes, and purchase orders, the forms can be downloaded as PDFs. Here, we will introduce how to edit the template for these PDFs.
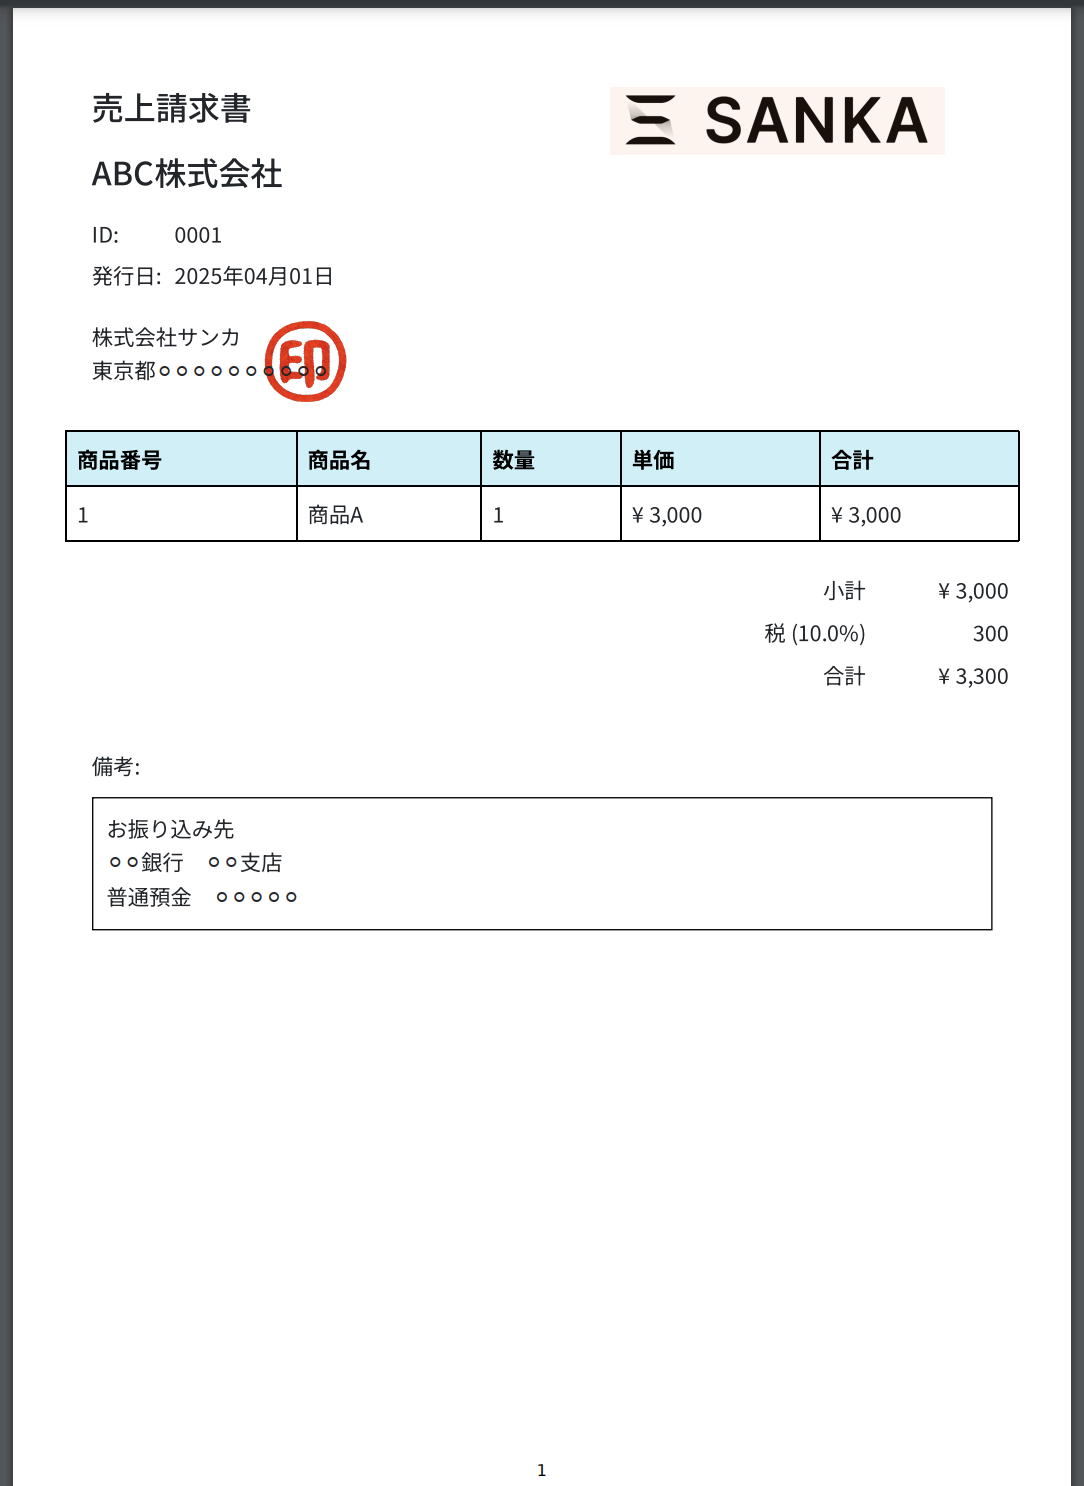
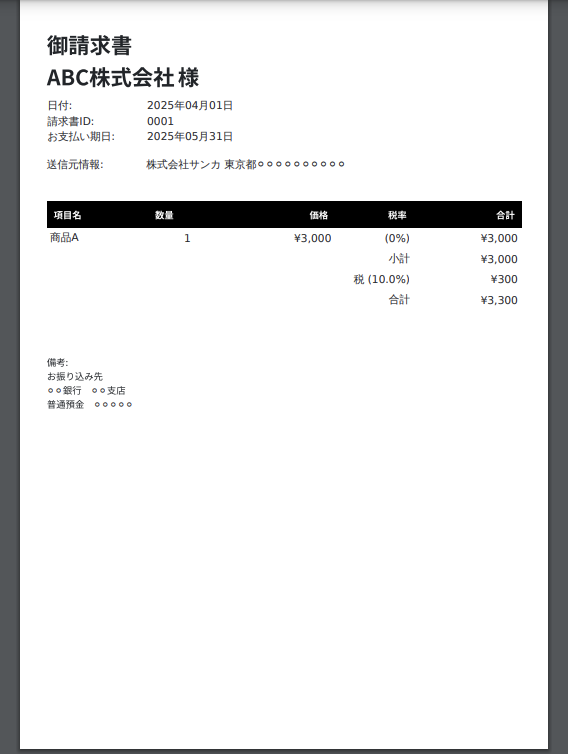
By default, a simple design like the one below is set as the template.
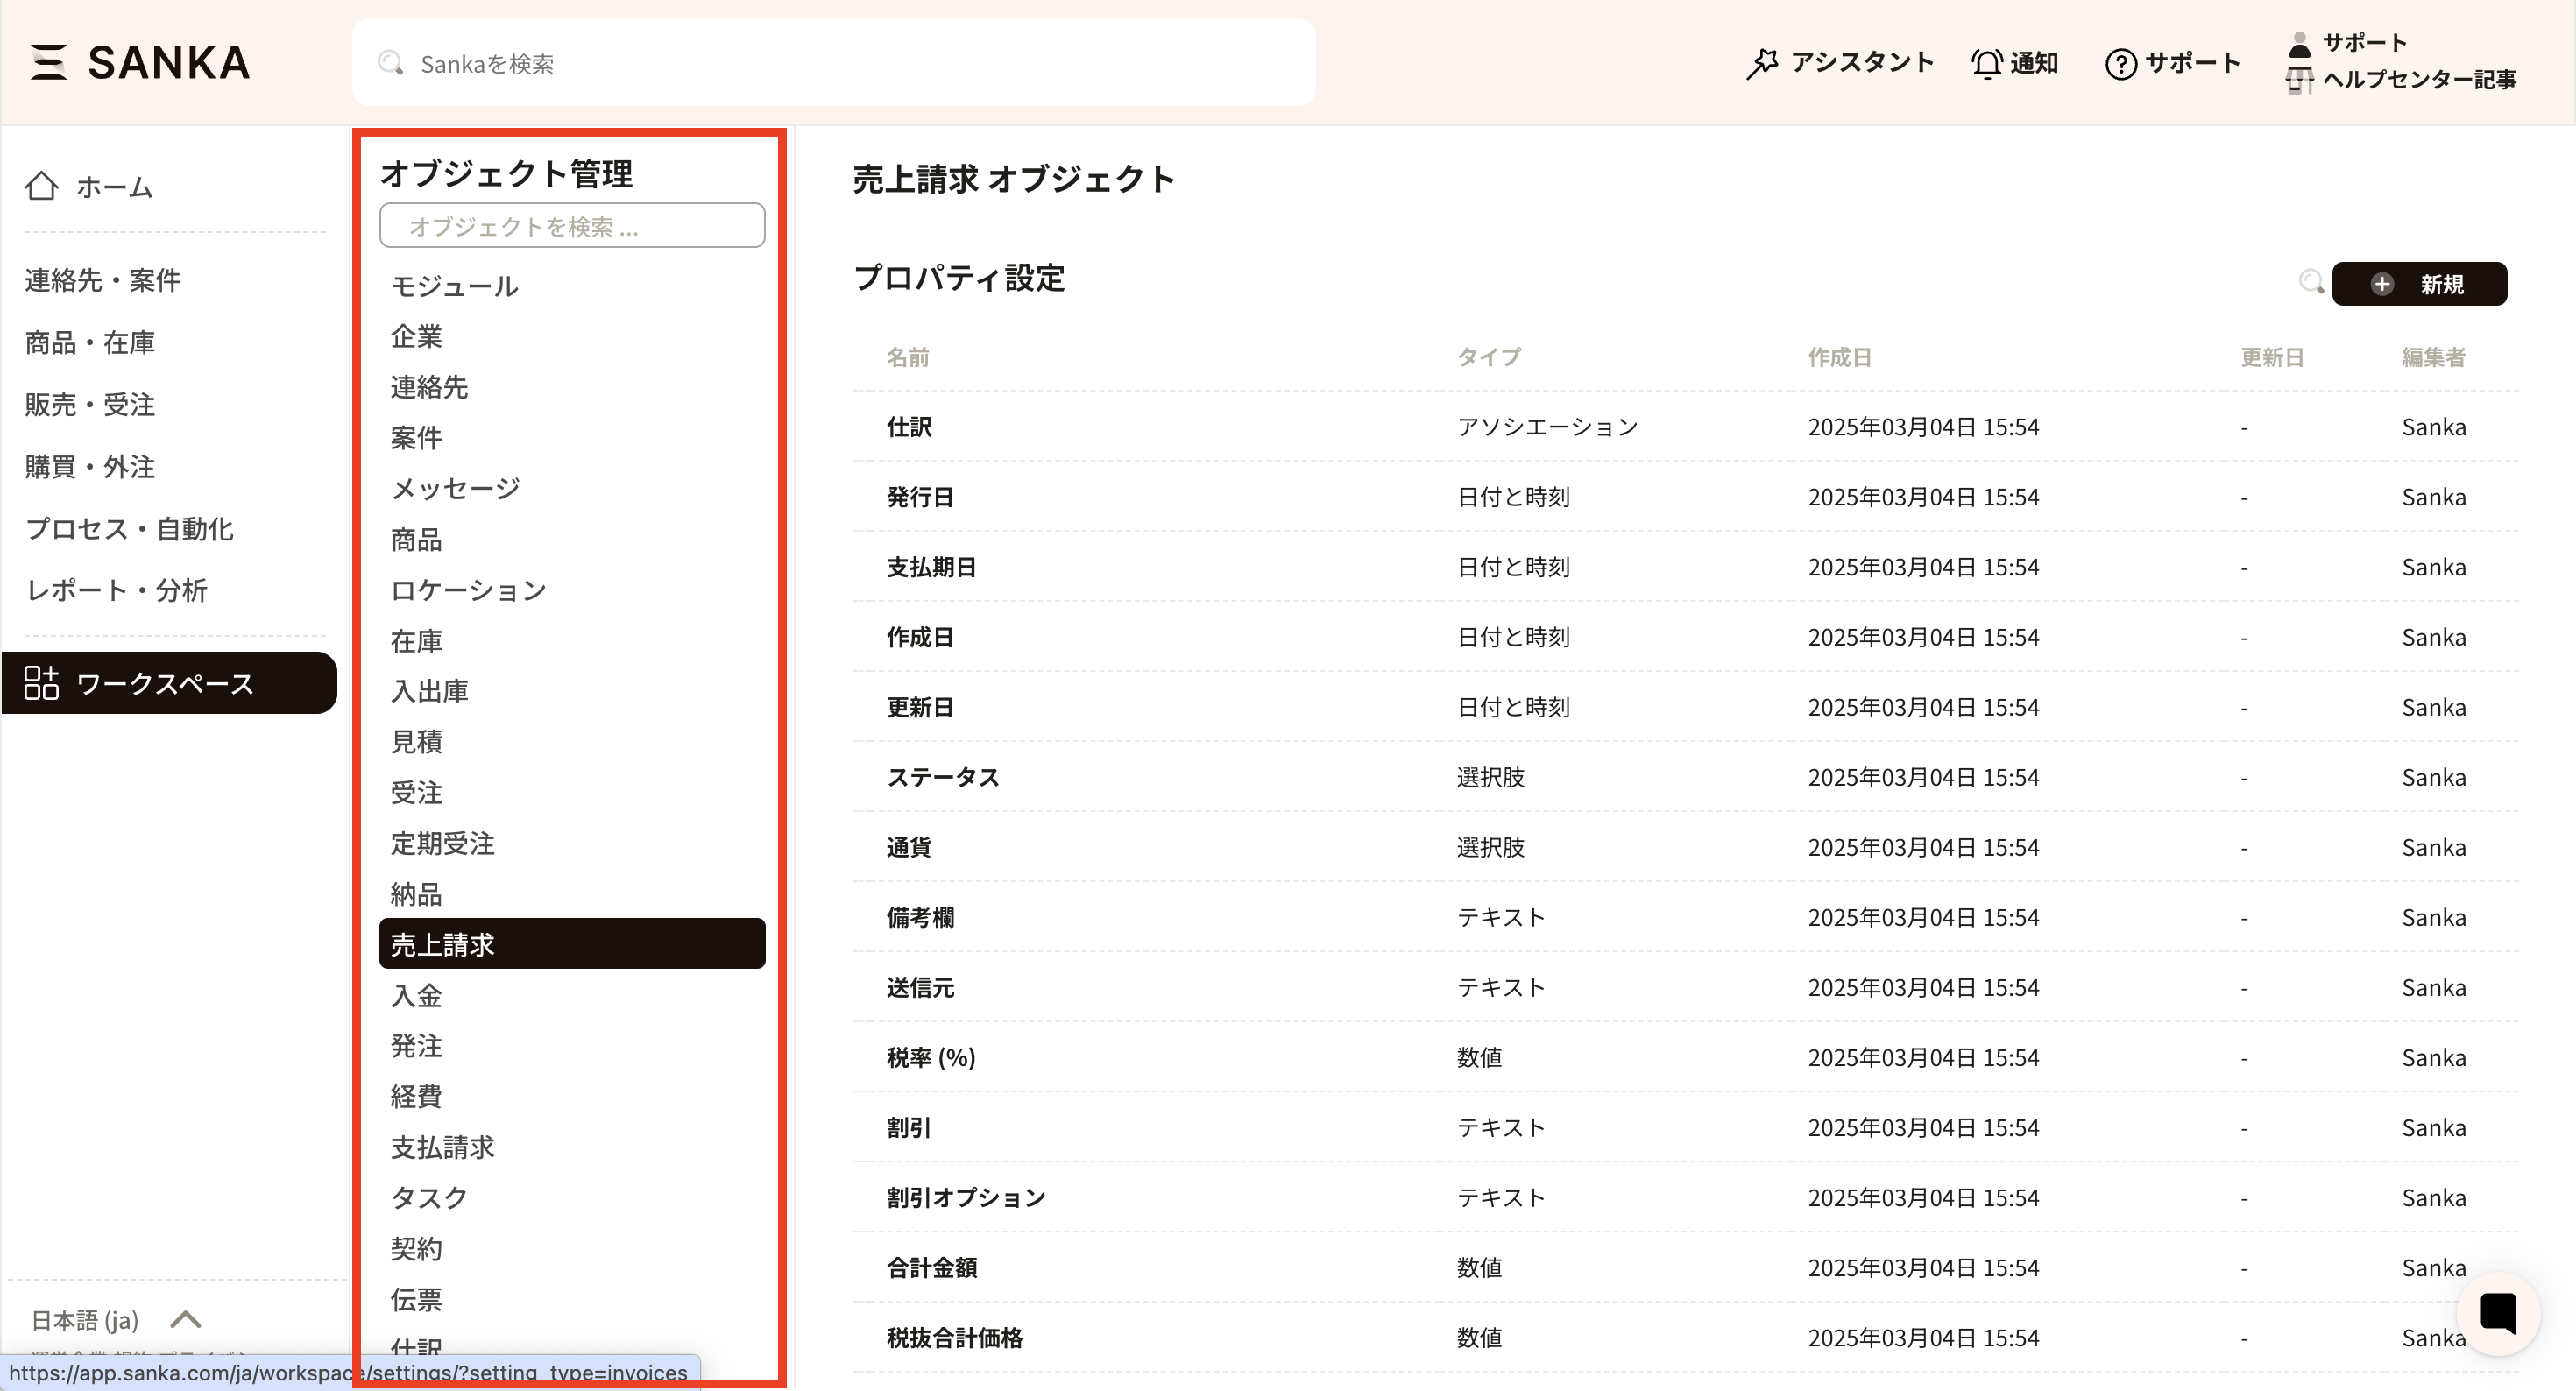
① First, go to the workspace.
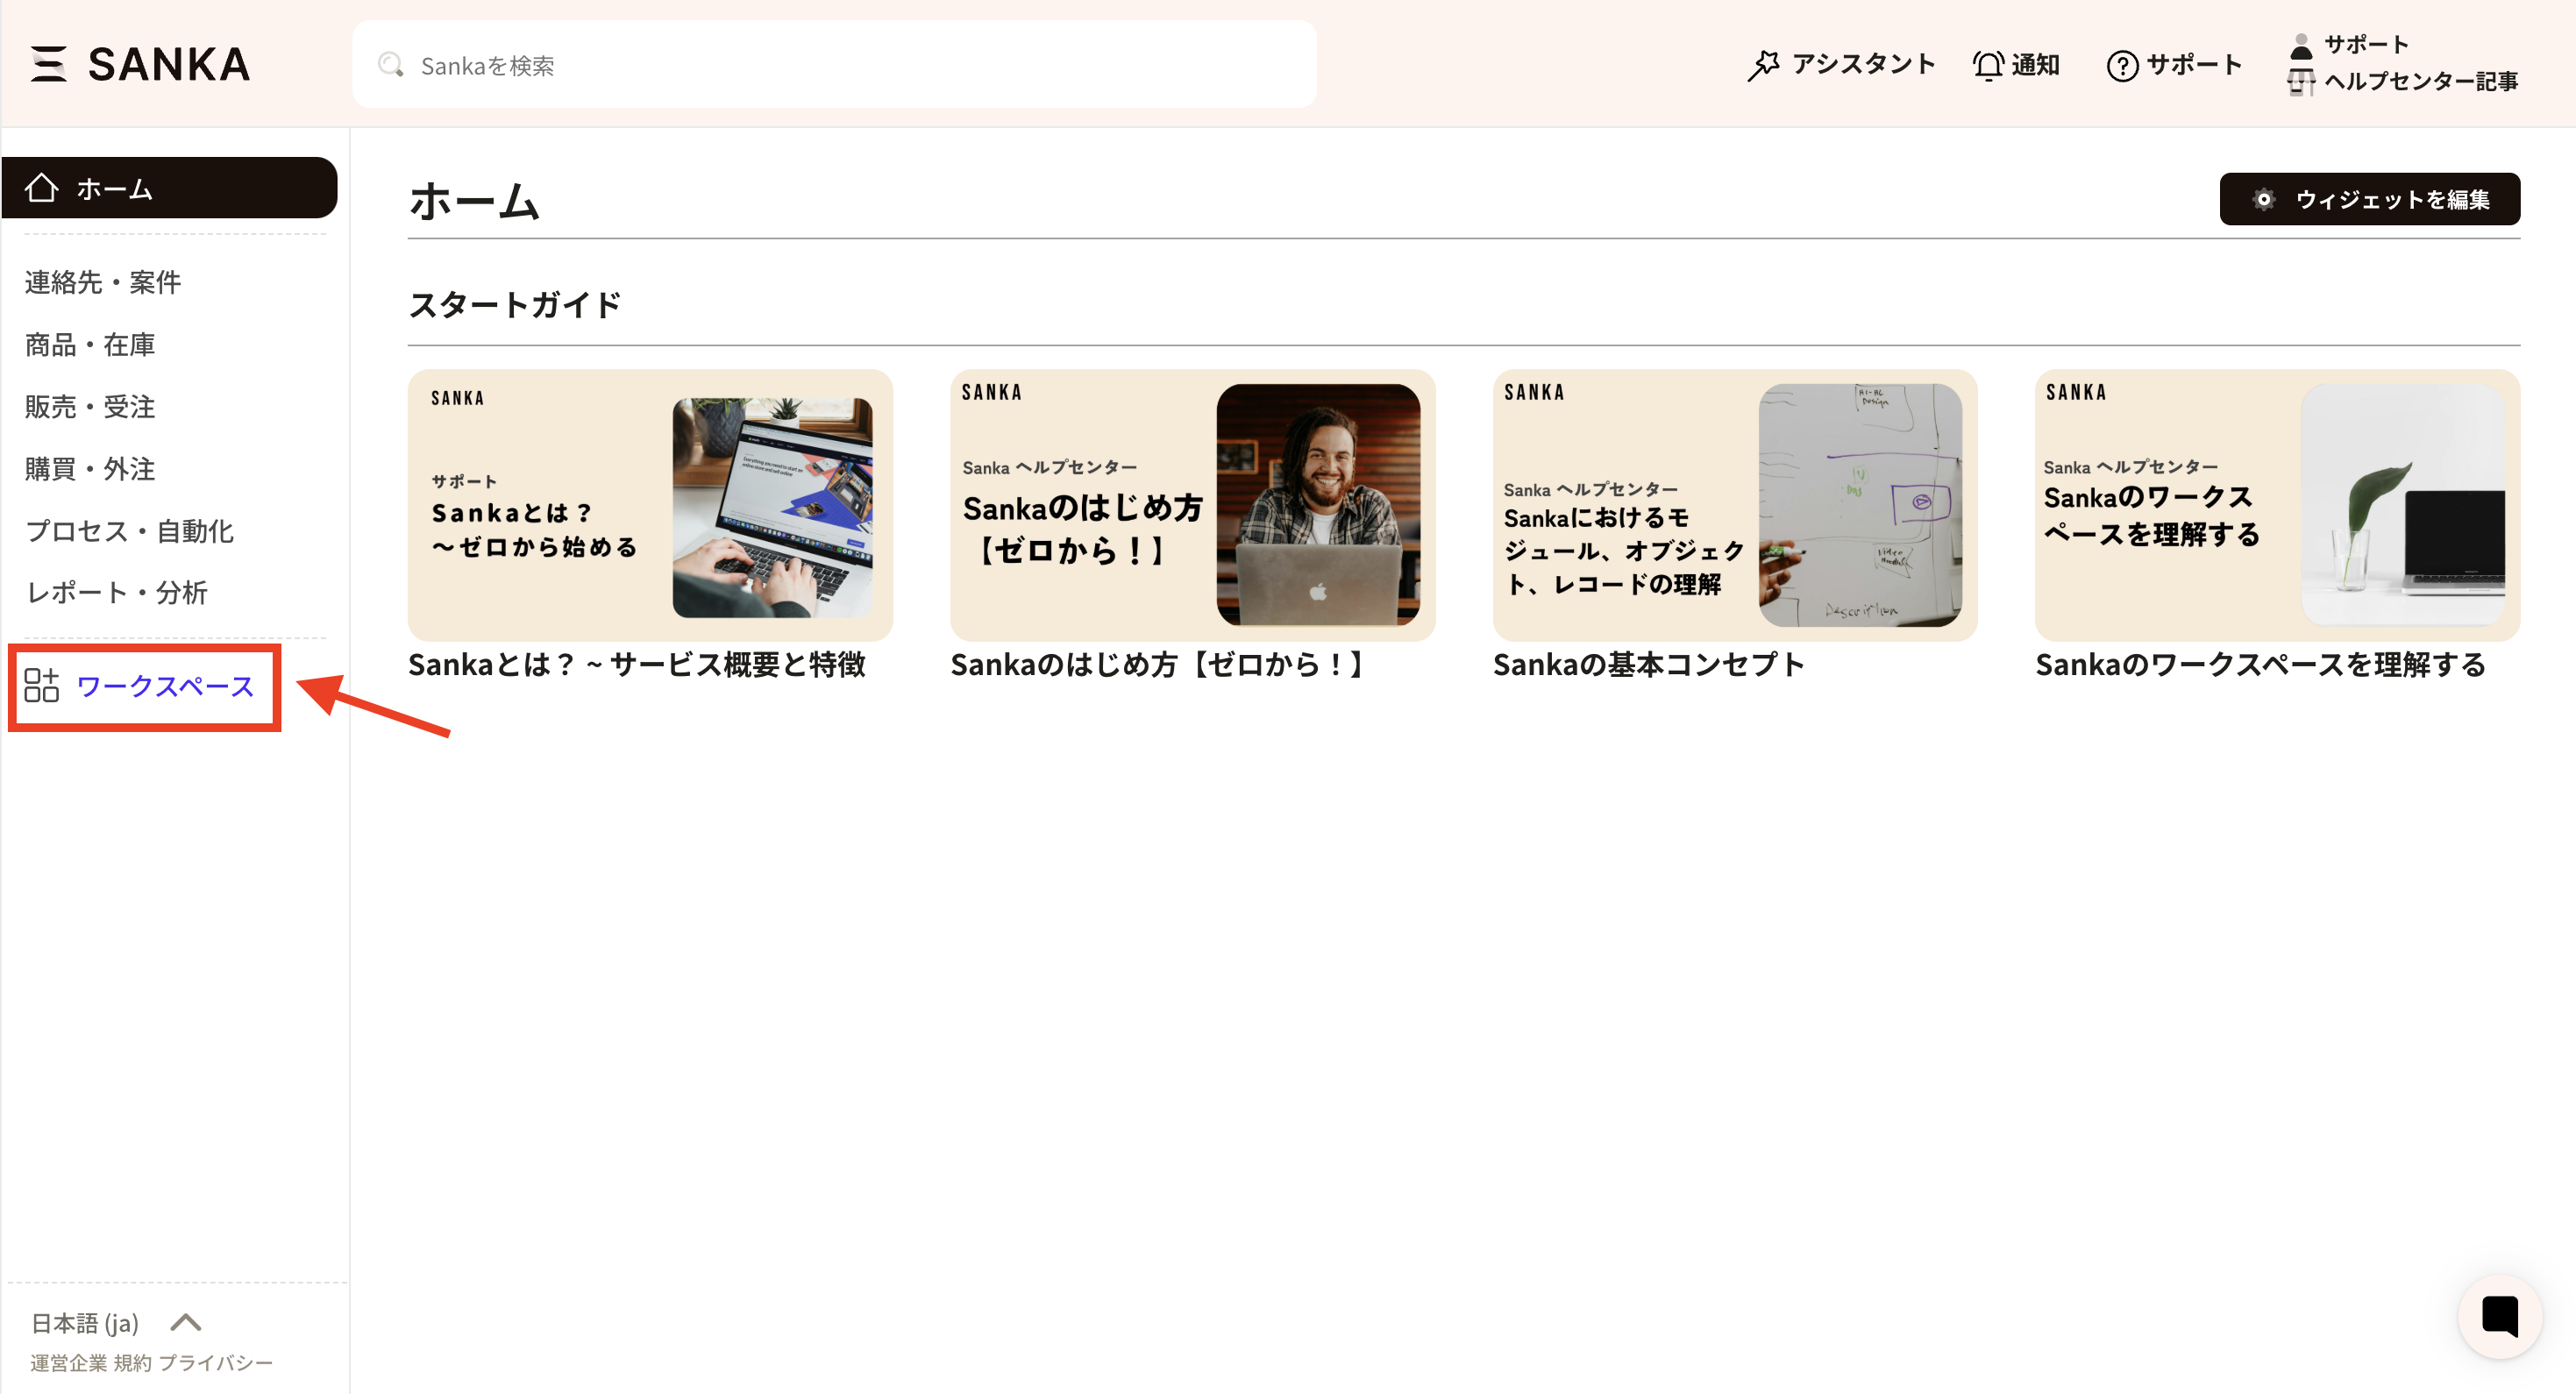
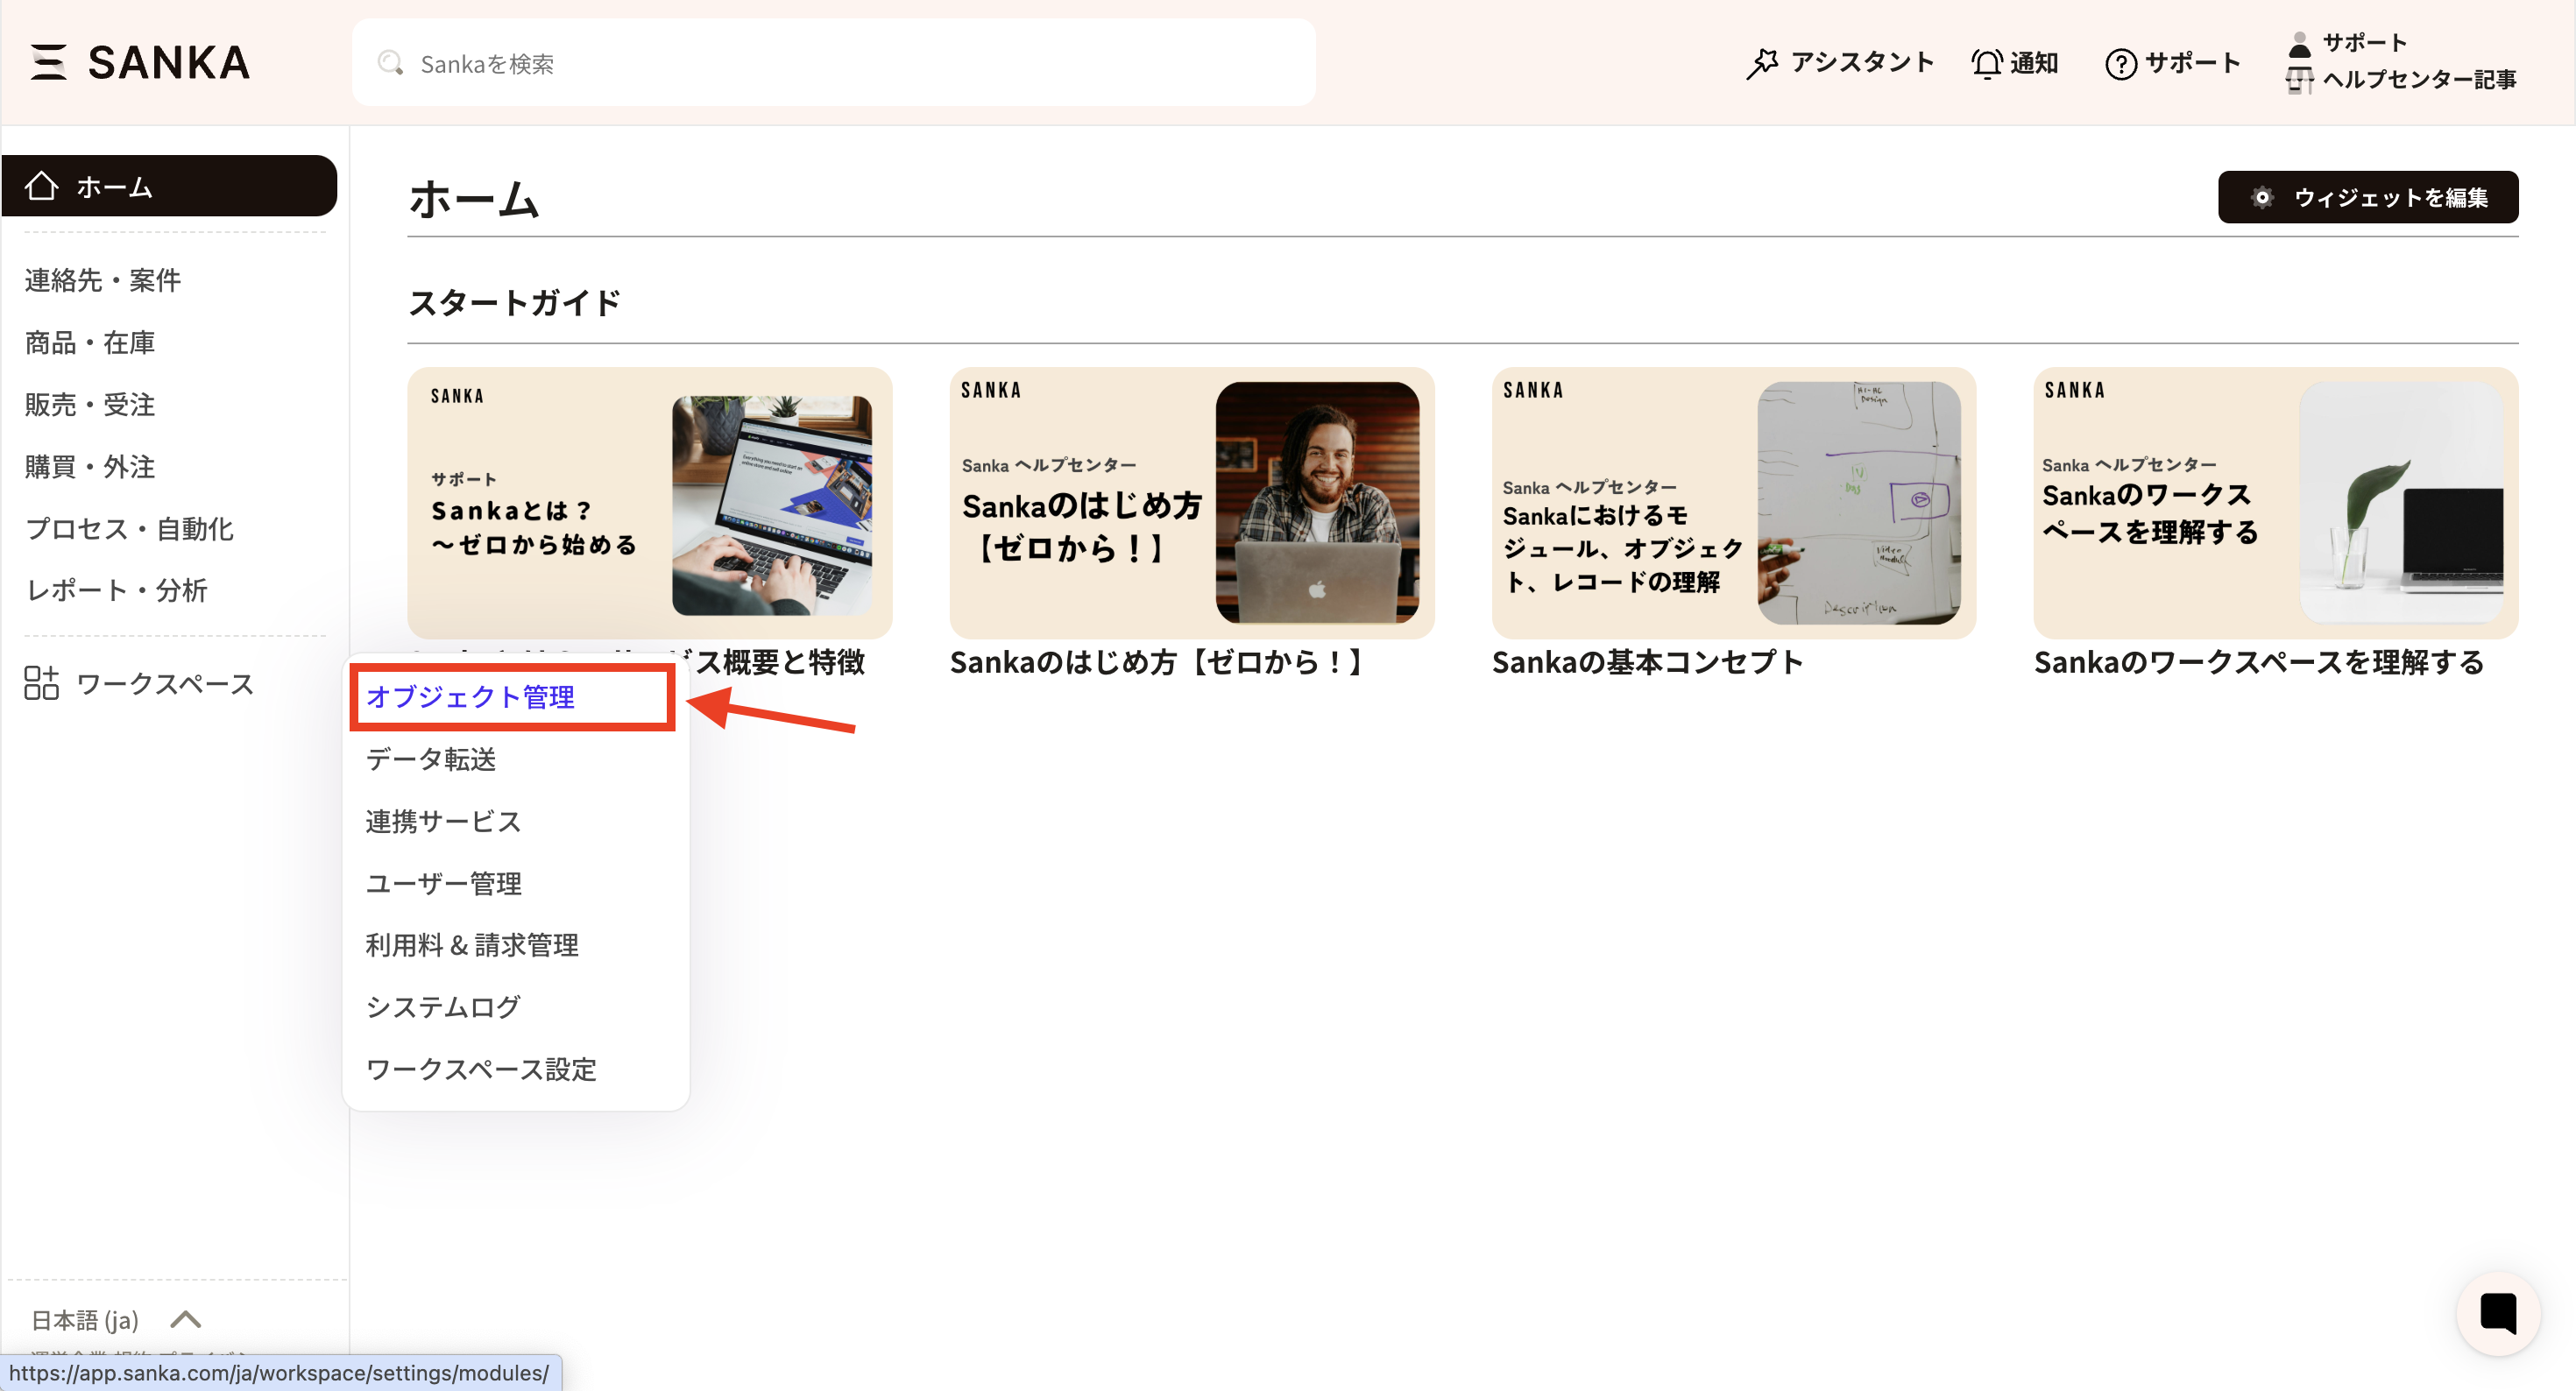
② Open the Object Management.
③ Select the object you wish to edit the template for. Here, the Sales Invoice Object is selected as an example.
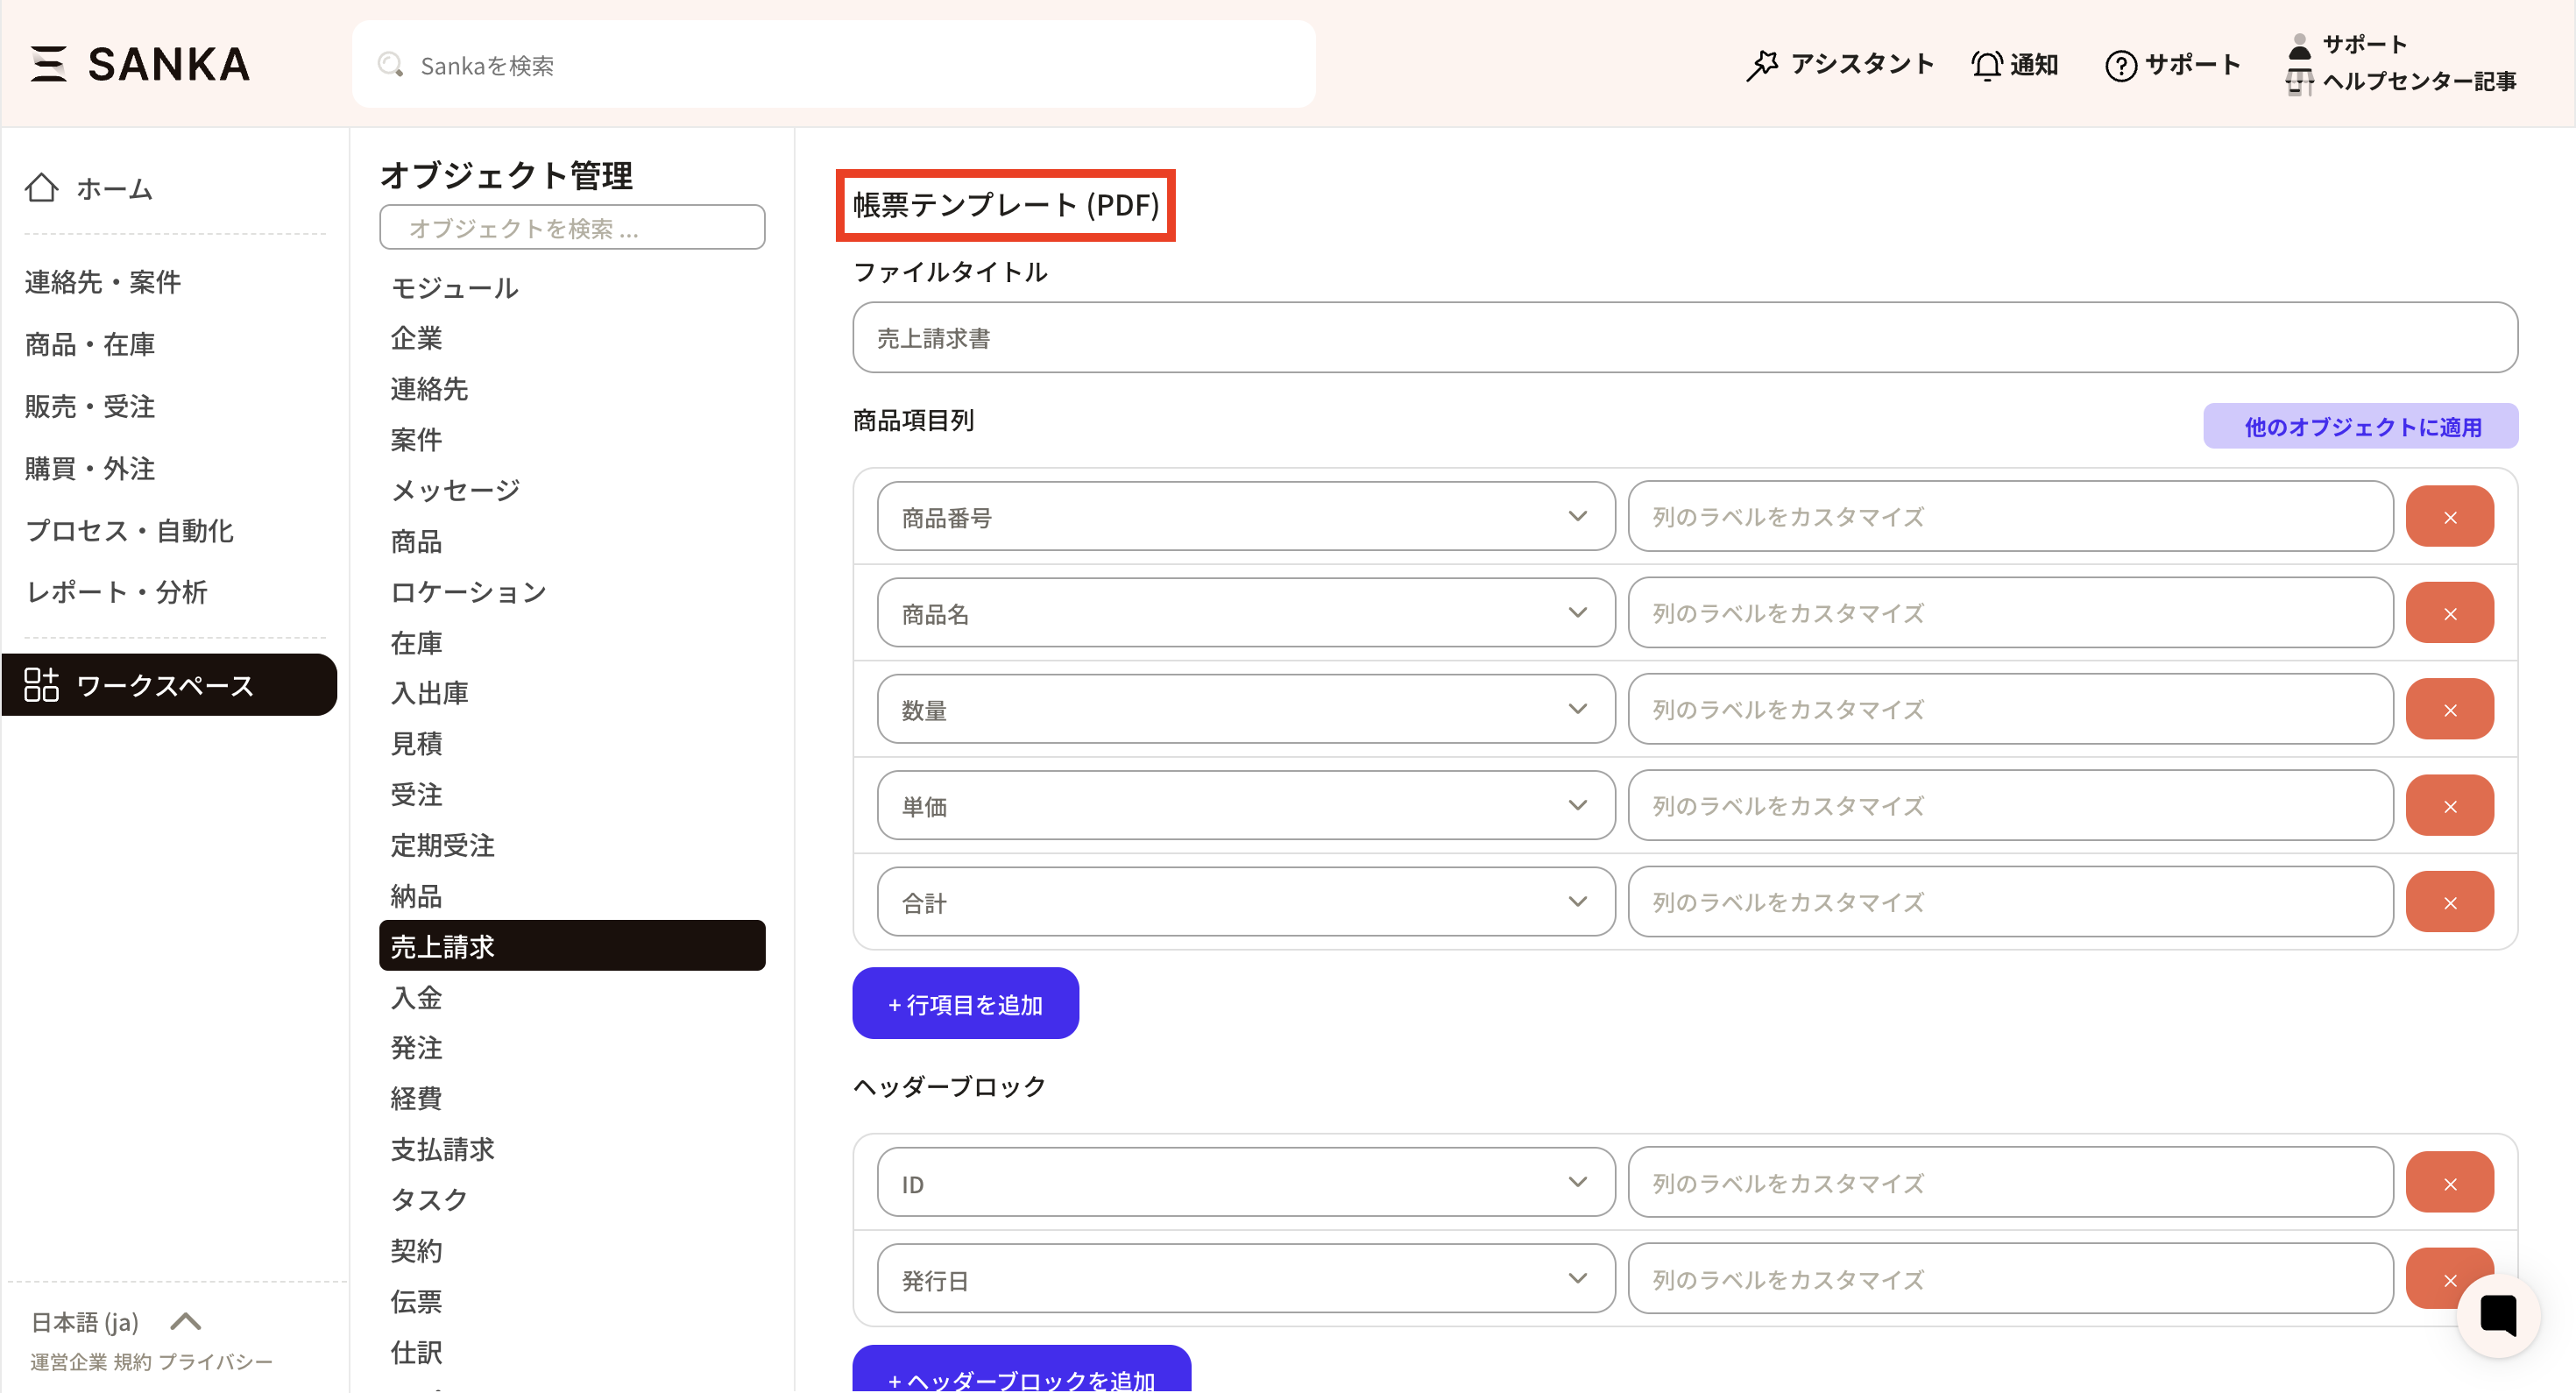
④ Scroll to the bottom of the Property Settings section to find the Document Template (PDF) settings. Configure the required fields.
The items may slightly differ depending on the object, so please check in each object management. to confirm.
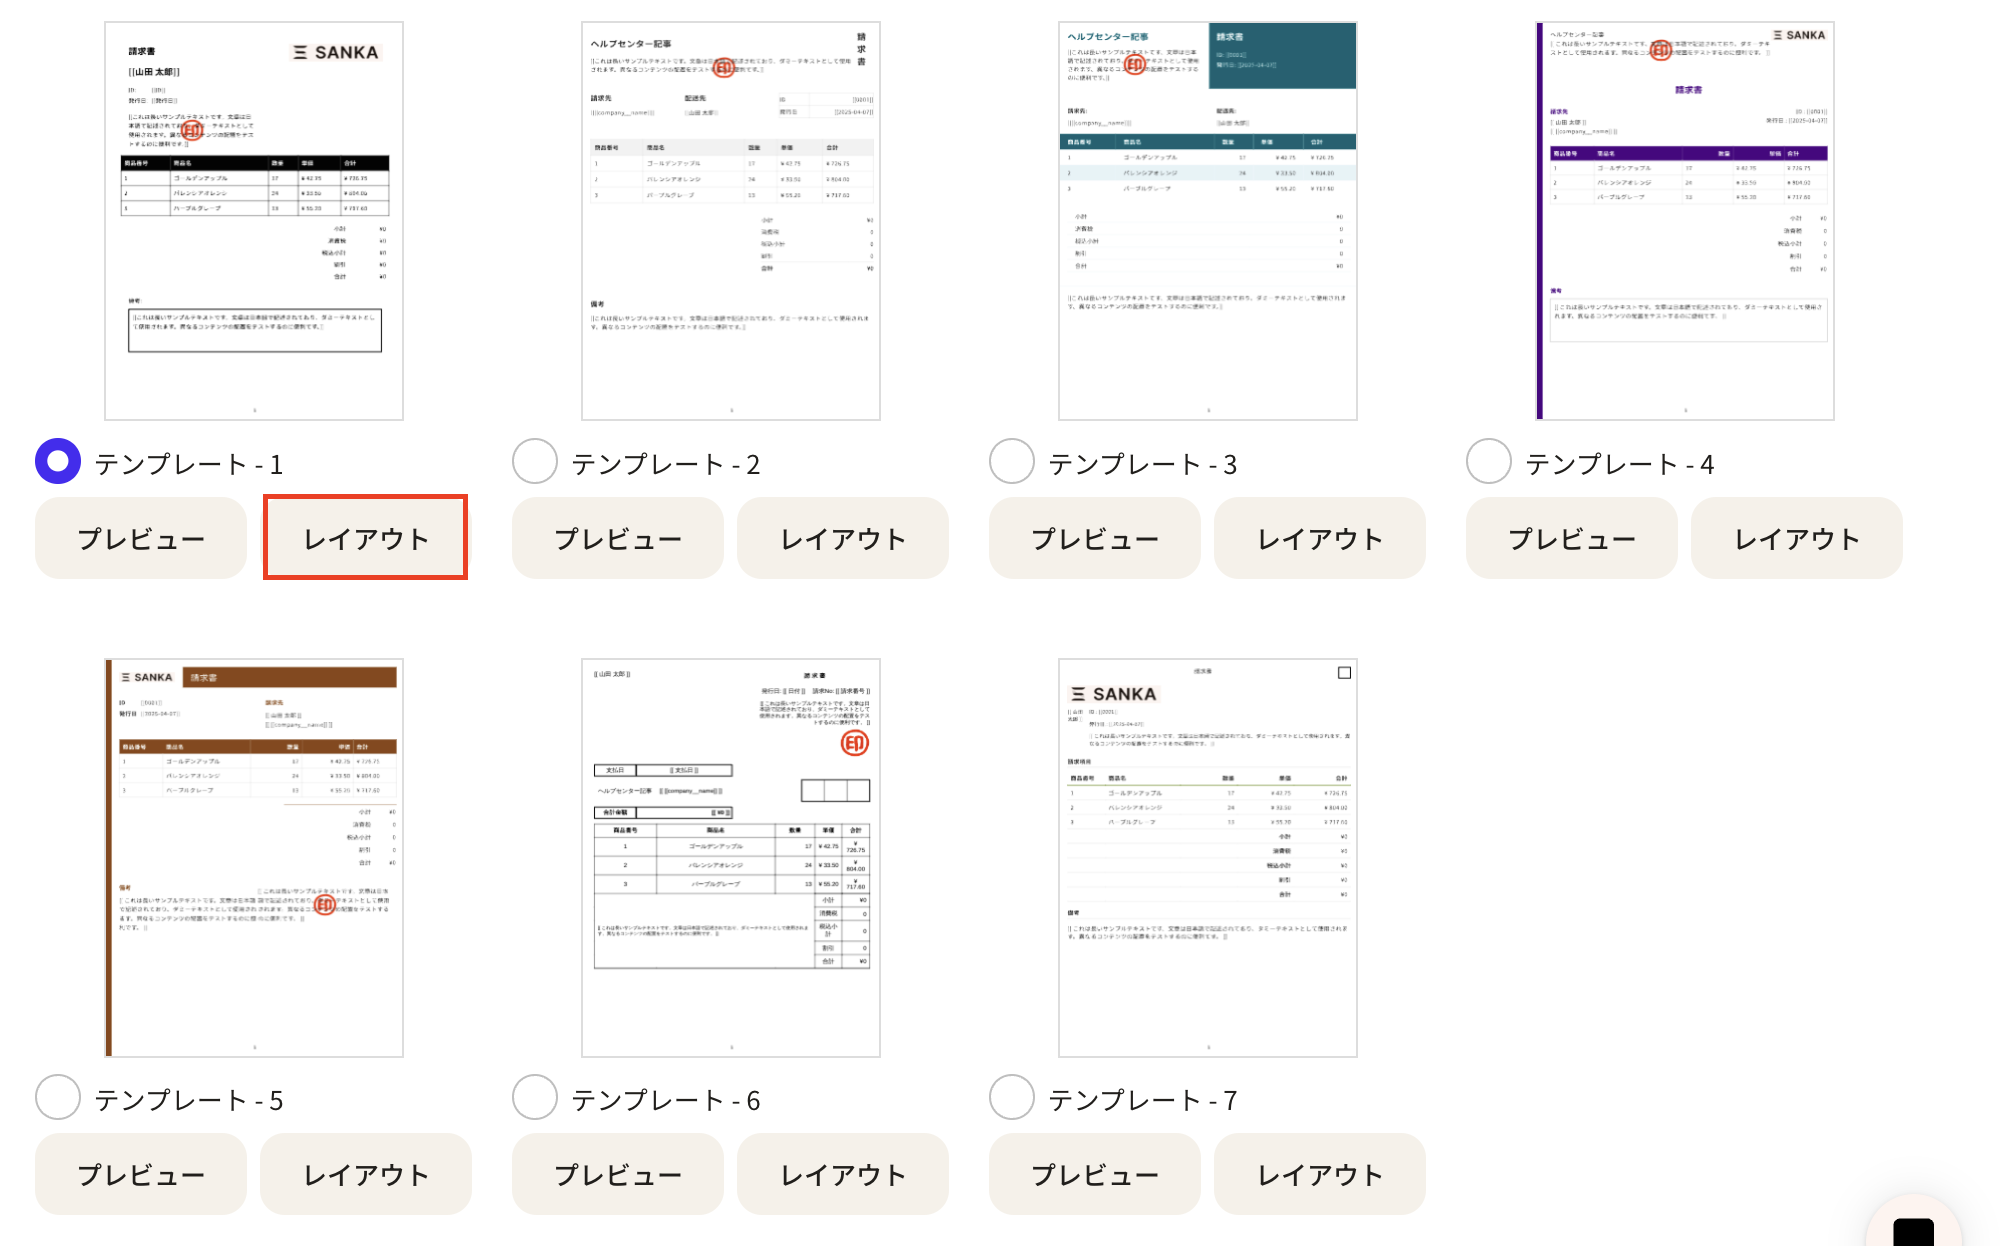
First, decide on the type of template. At the bottom of the form template section, you will find a list of templates. By clicking the “Preview” button, you can view the default design of each template.※ There are objects that do not have templates.
The “Layout” button allows you to check how the settings have been applied.
In general, it is possible to customize the items you wish to display. However, since the design varies by template, please select one that matches your preference. By ticking the template number  ︎, that template will be applied.

Next, we will configure the items to be listed in the template. Go back to the top of the report template.
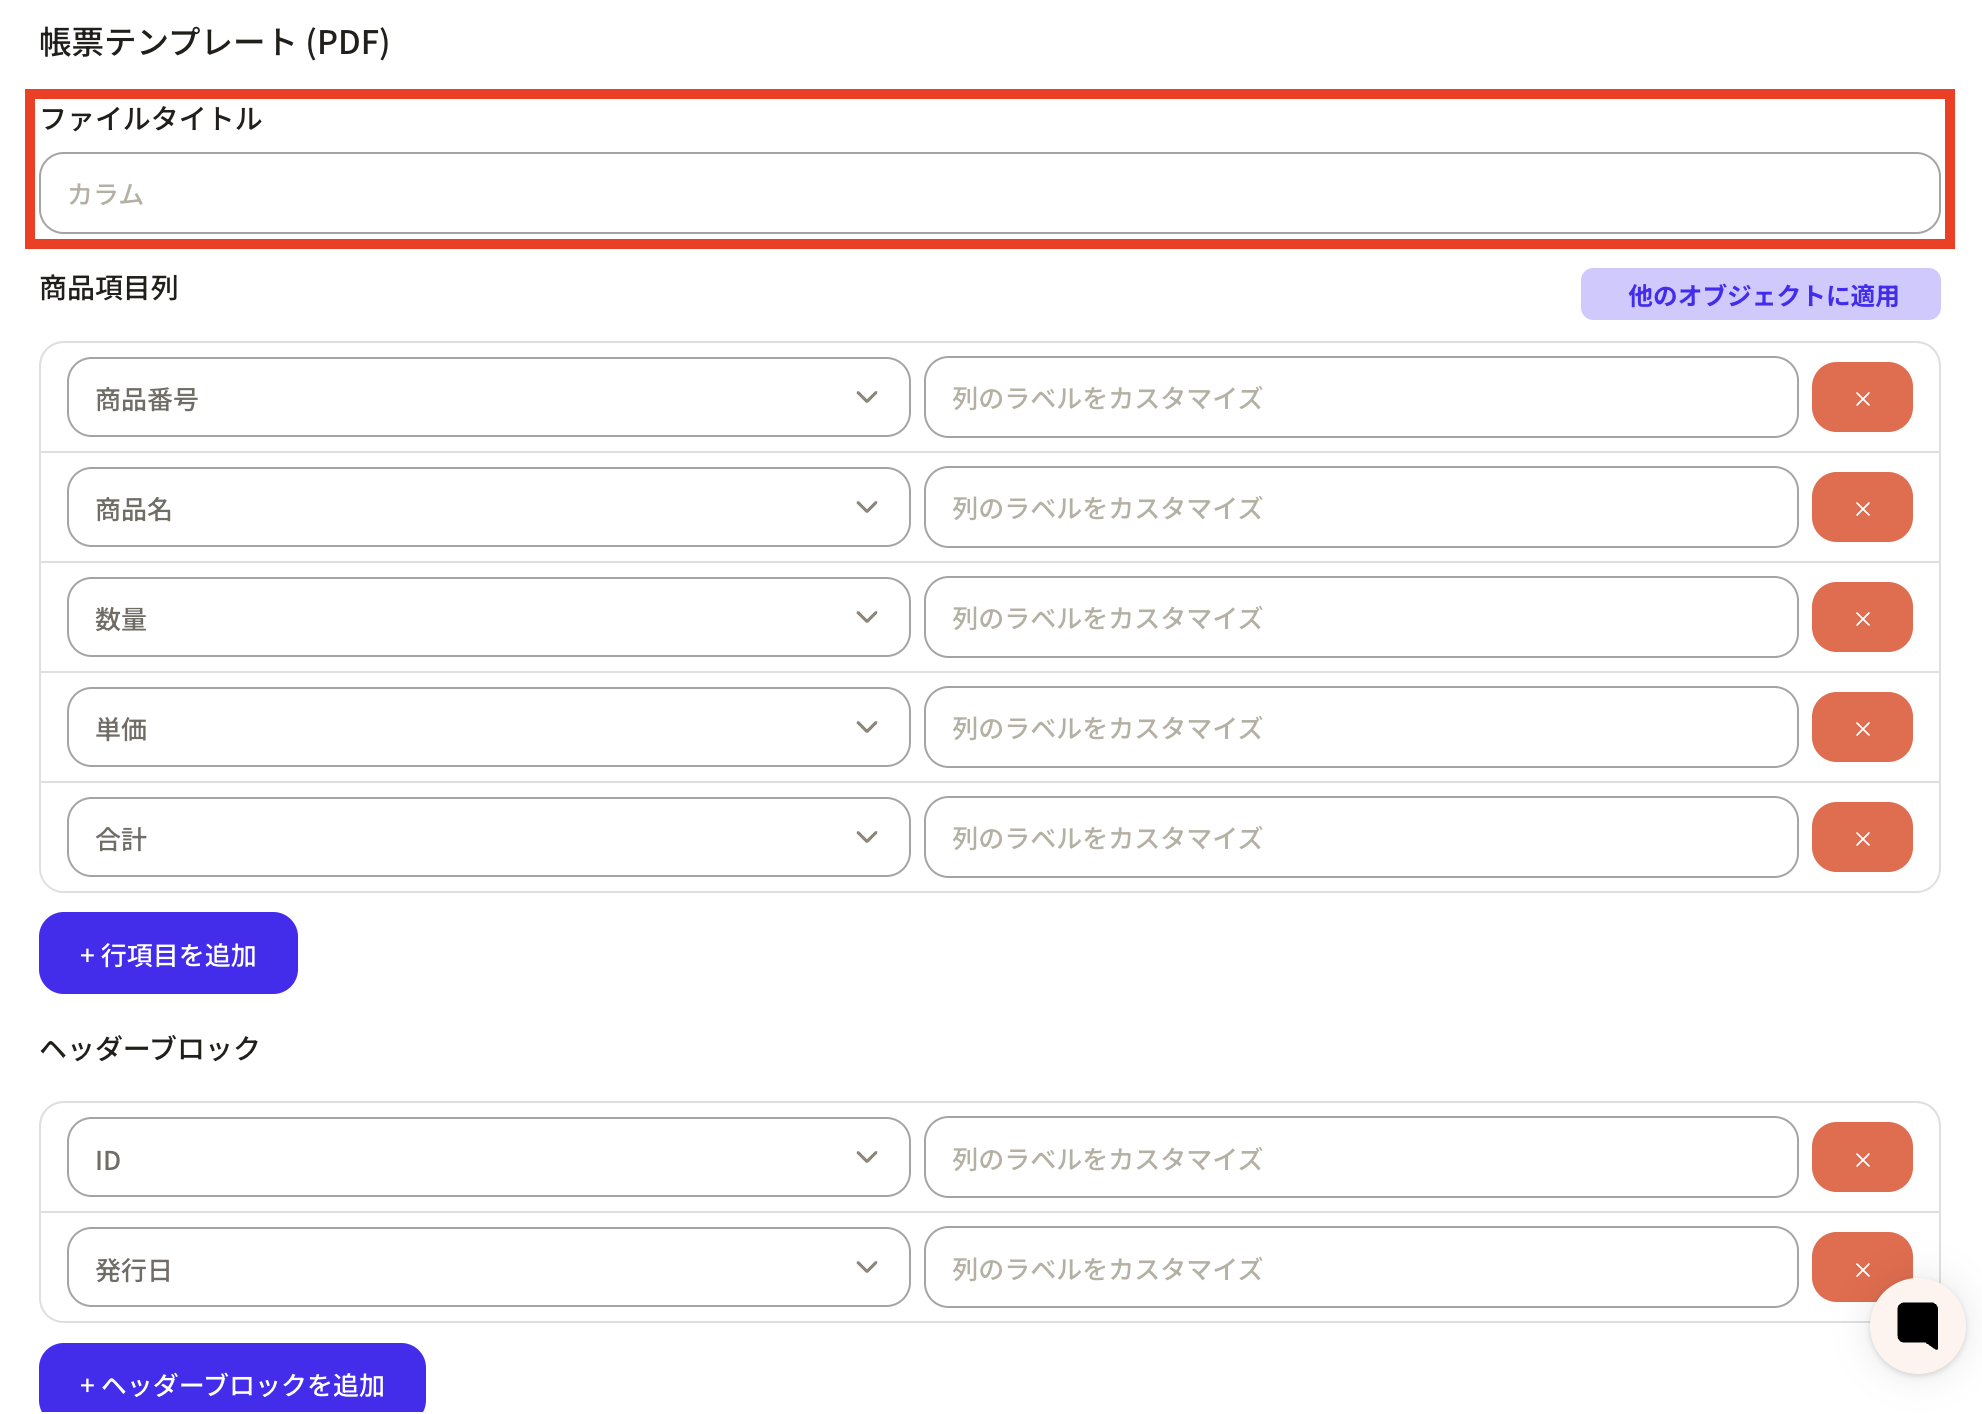
The 'File Title' will be reflected as the title of the report.
'Product Item Column': You can configure the detailed items of the products to be listed in the report. This displays the information from the properties registered in the product object.
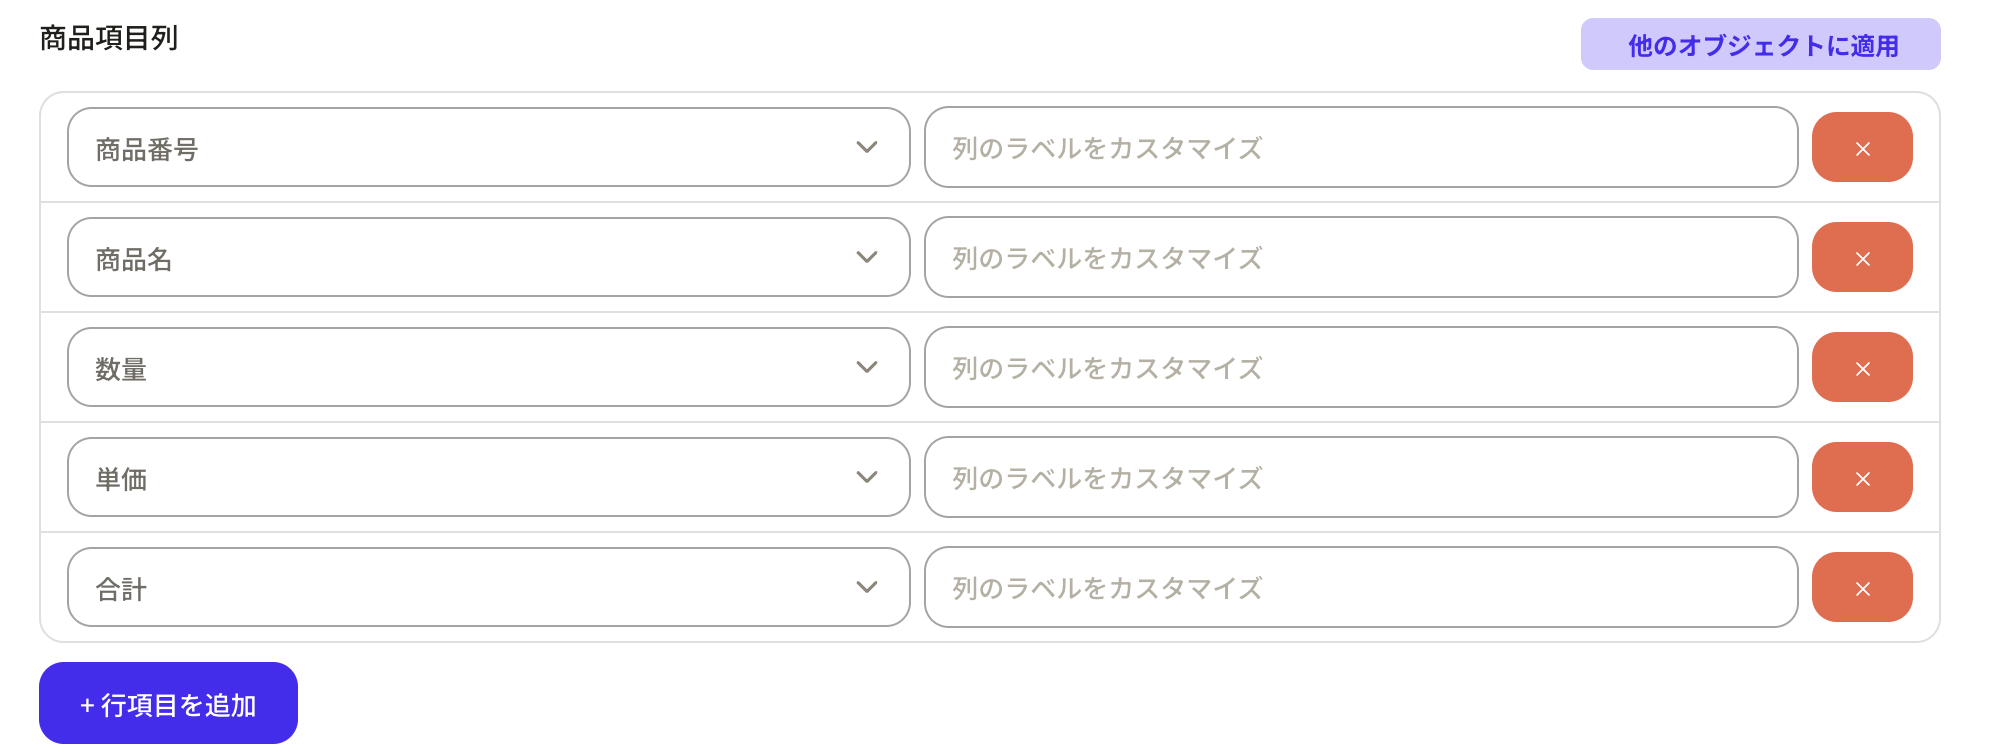
If you wish to add information to the default settings, press the '+ Add Row Item' button, and a new item frame will be displayed.
The left frame allows you to select the property you want to configure. If you wish to change the wording of the display name, you can do so by customizing the label in the right frame.

Pressing the 'Apply to Other Objects' button will apply the settings for the product item column section to other objects as well.
If you wish to change the order, drag and move the relevant column to rearrange it.
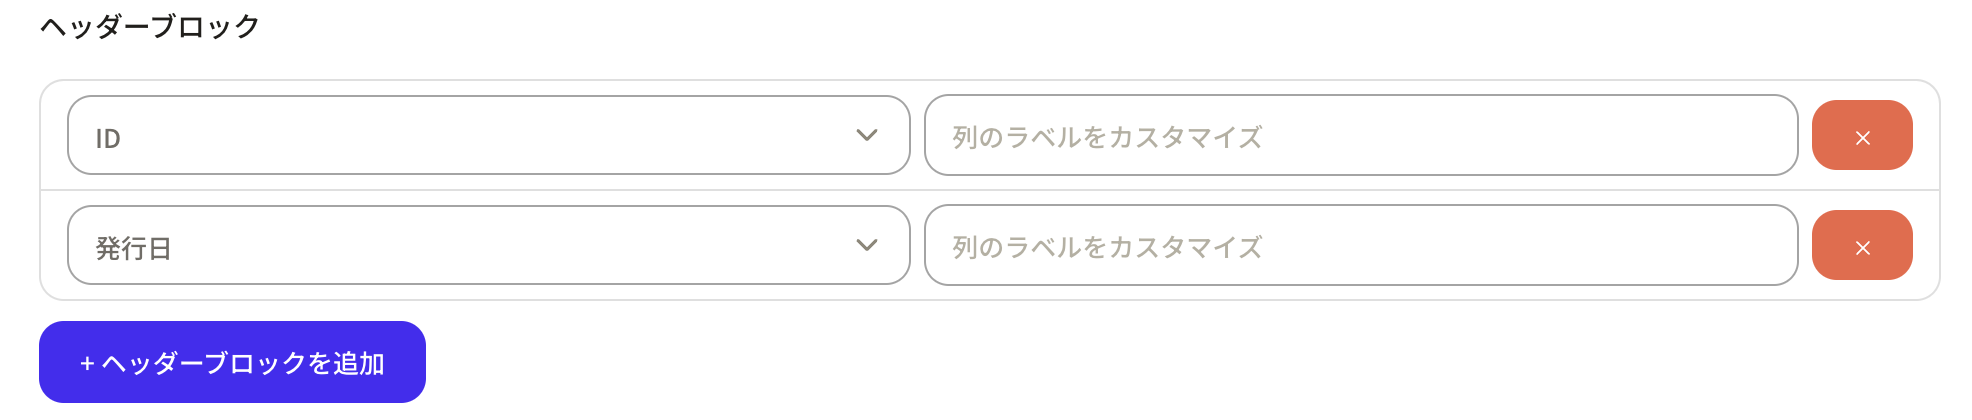
"Header Block": You can configure the content to be included in the header (top) section of the document.
By default, ID and issue date are set as defaults.
By clicking the "+Header Block" add button, new properties can be added.
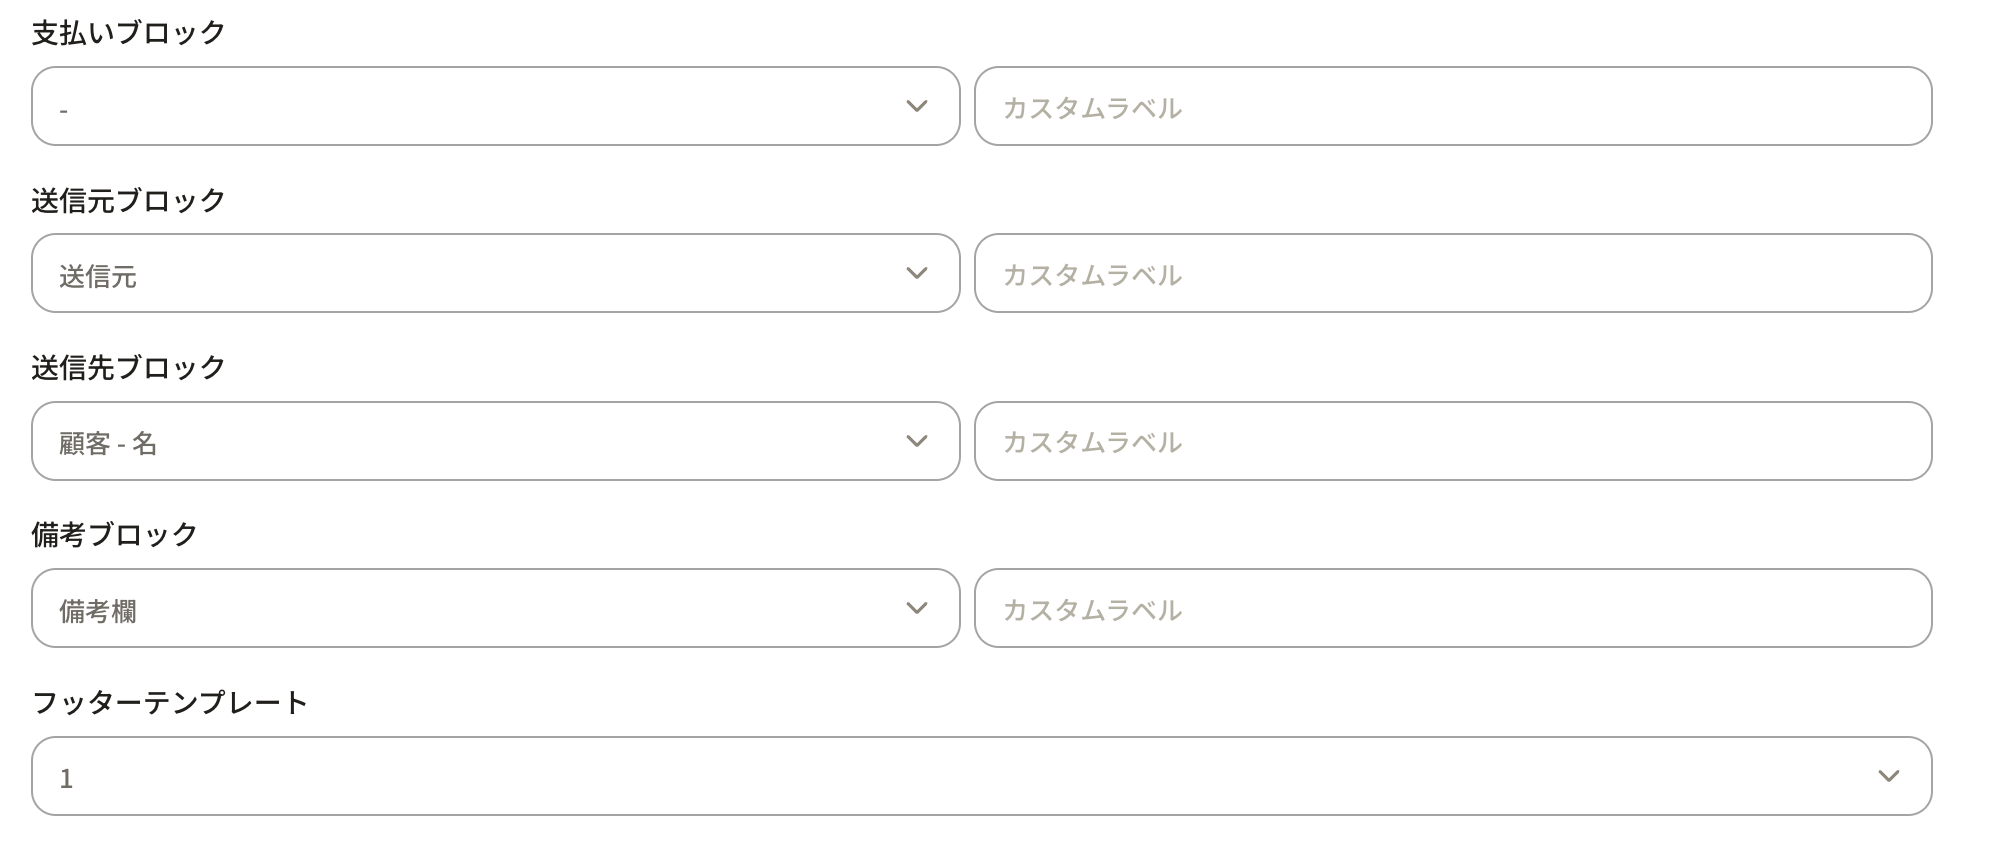
"Payment Block": *Reflected in Templates 2 and 6. Refers to the billing destination. By default, no information is registered.
"Source Block": You can set the source information here. By default, the sender information from the record is set. within the record.
"Recipient Block": You can set the recipient to whom the form will be sent. By default, the customer information from the record is set.
"Remarks Block": By default, the information from the remarks section of the record is set.
"Footer Template": You can set the display format for the page numbers to be included in the footer.
“Background Color”: It can be set using a color code. The default is white, but you can also select it from the color picker that will appear when you make a selection.
“Select Font”: You can set the font from four available options.
“Theme Color”: The background color of the header in the product item section. *Only applies to Template 1.
“Text Color of the Table”: The text color of the header in the product item section. *Only applies to Template 1.
“Font Size of the Table”: *Only applies to Template 1.
“Company Logo”: Please upload the logo file.
“Company Seal”: Please upload the seal file.
Please make sure to press the update button after completing all the settings.

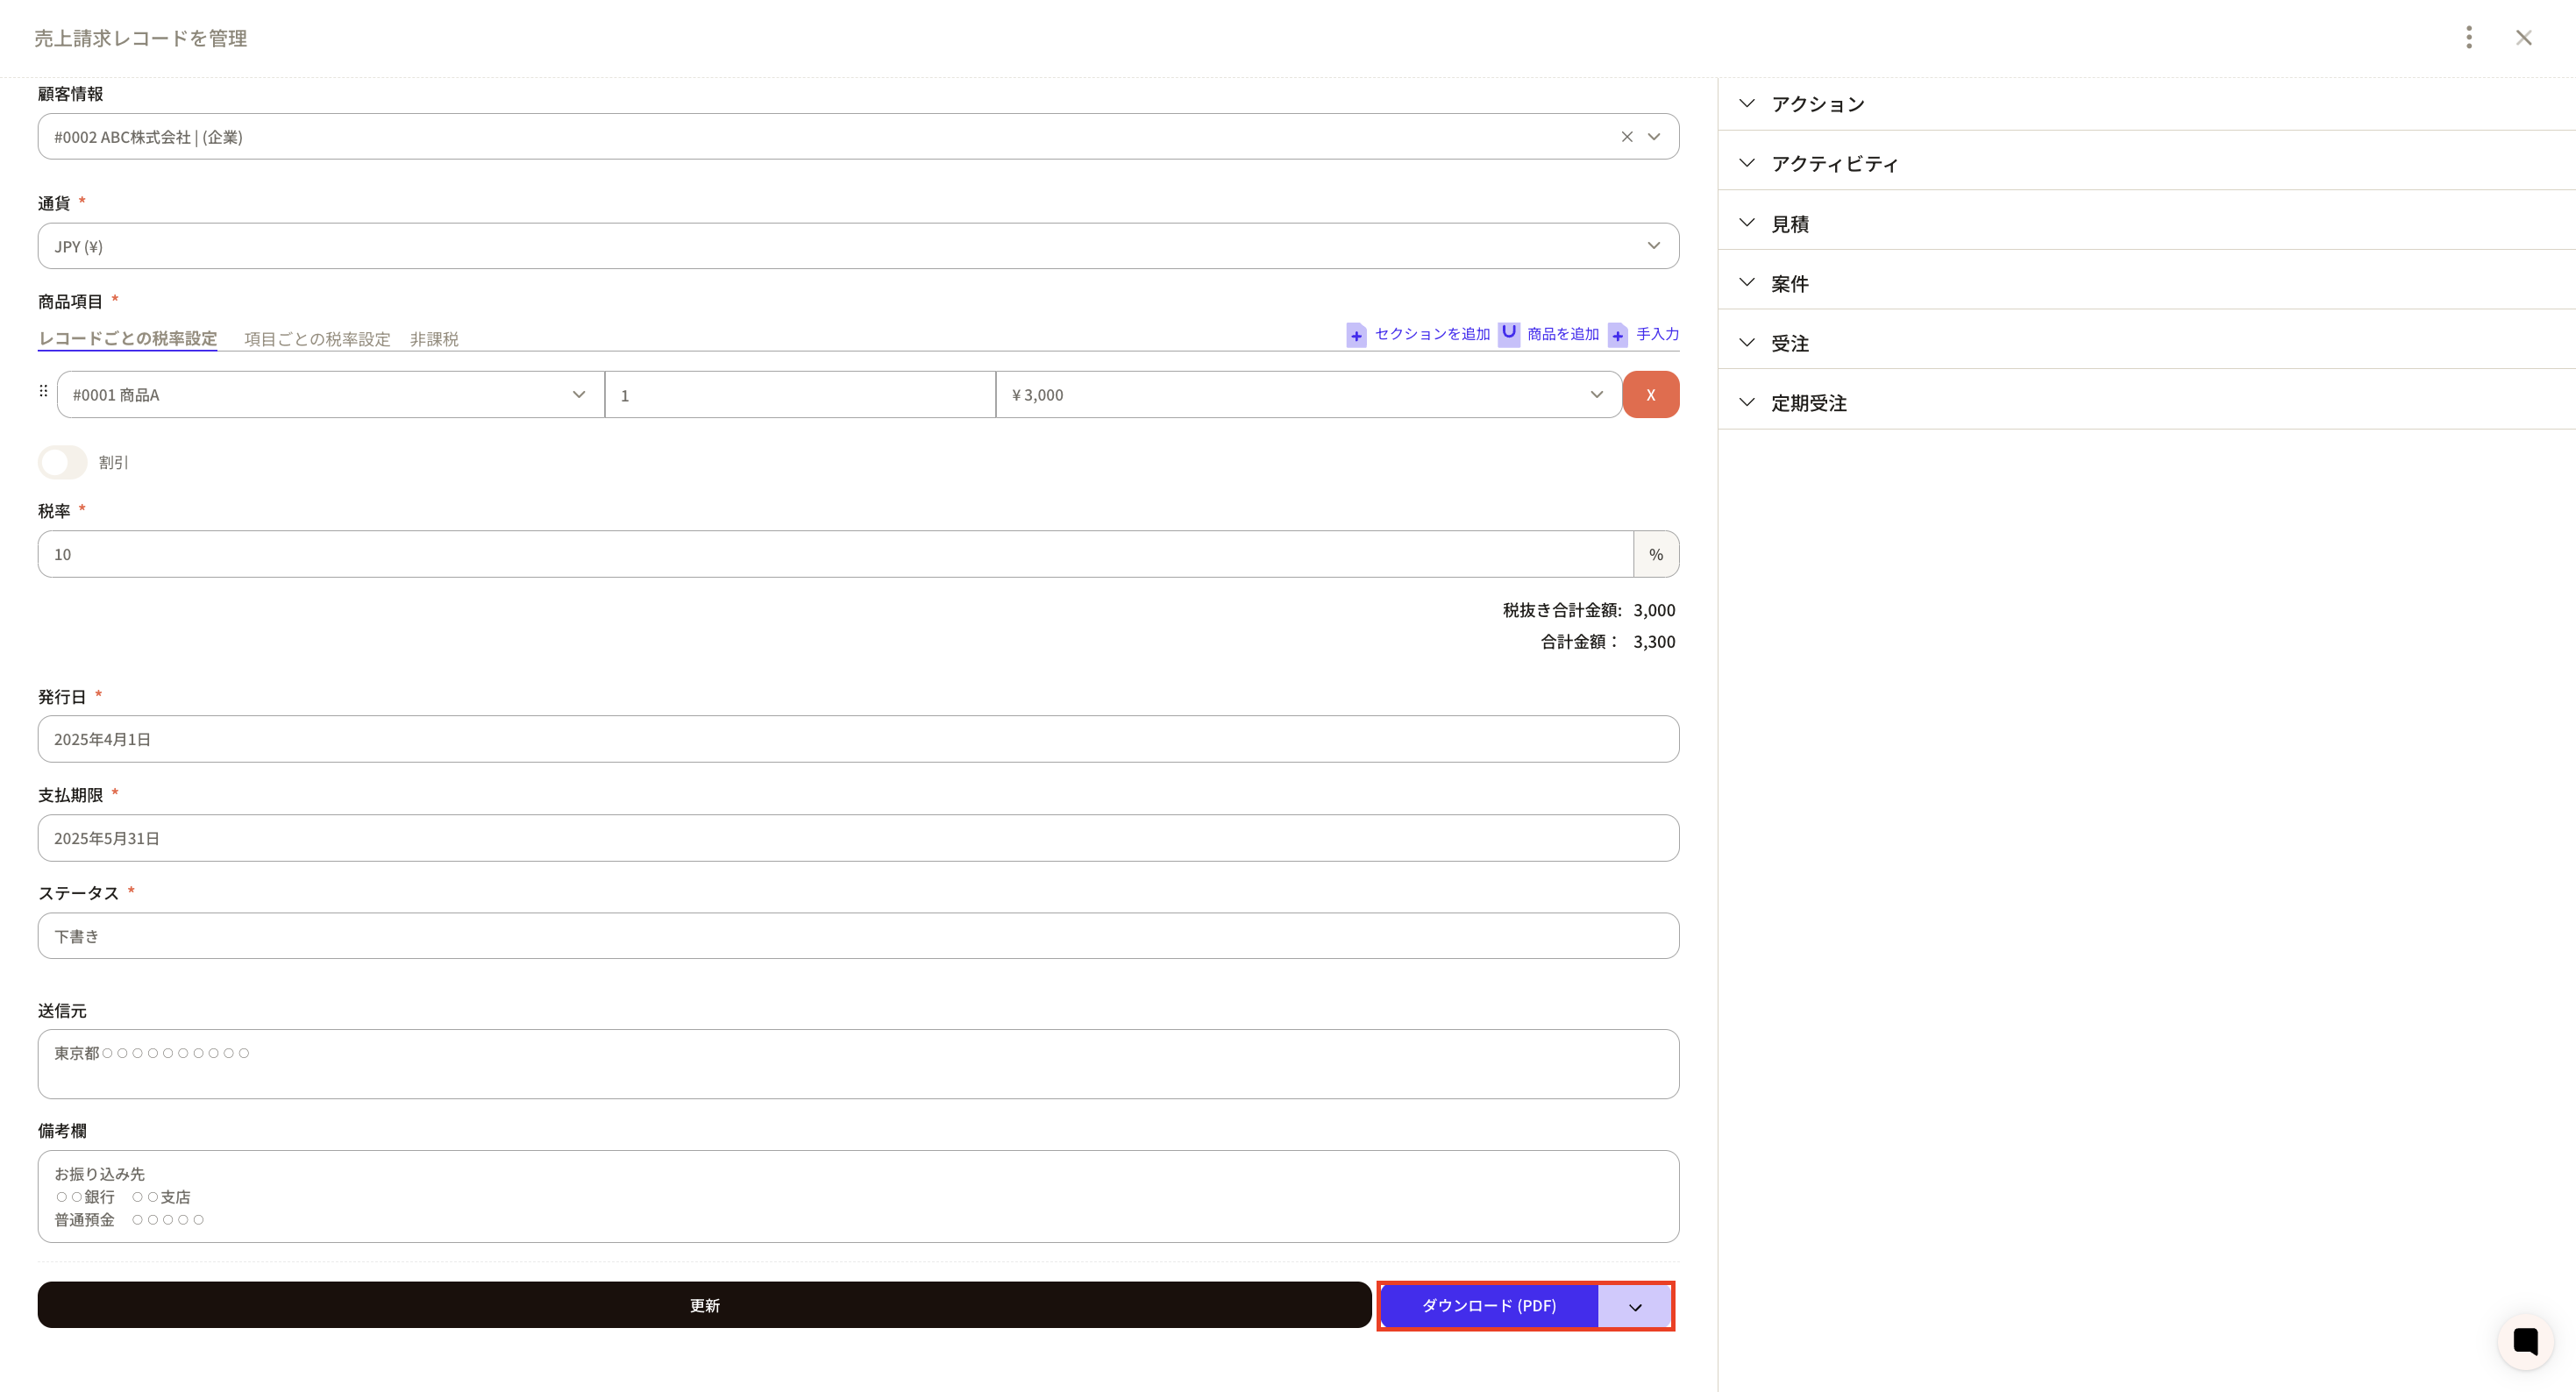
After configuration, you can verify it using the layout below. If you wish to review the details thoroughly, select the record ID of the corresponding object and download the PDF for verification.
Sample after configuration